Posts tagged Chinese Money Plant
5 Easy Steps To Propagating Pilea Peperomiodes AKA The Chinese Money Plant

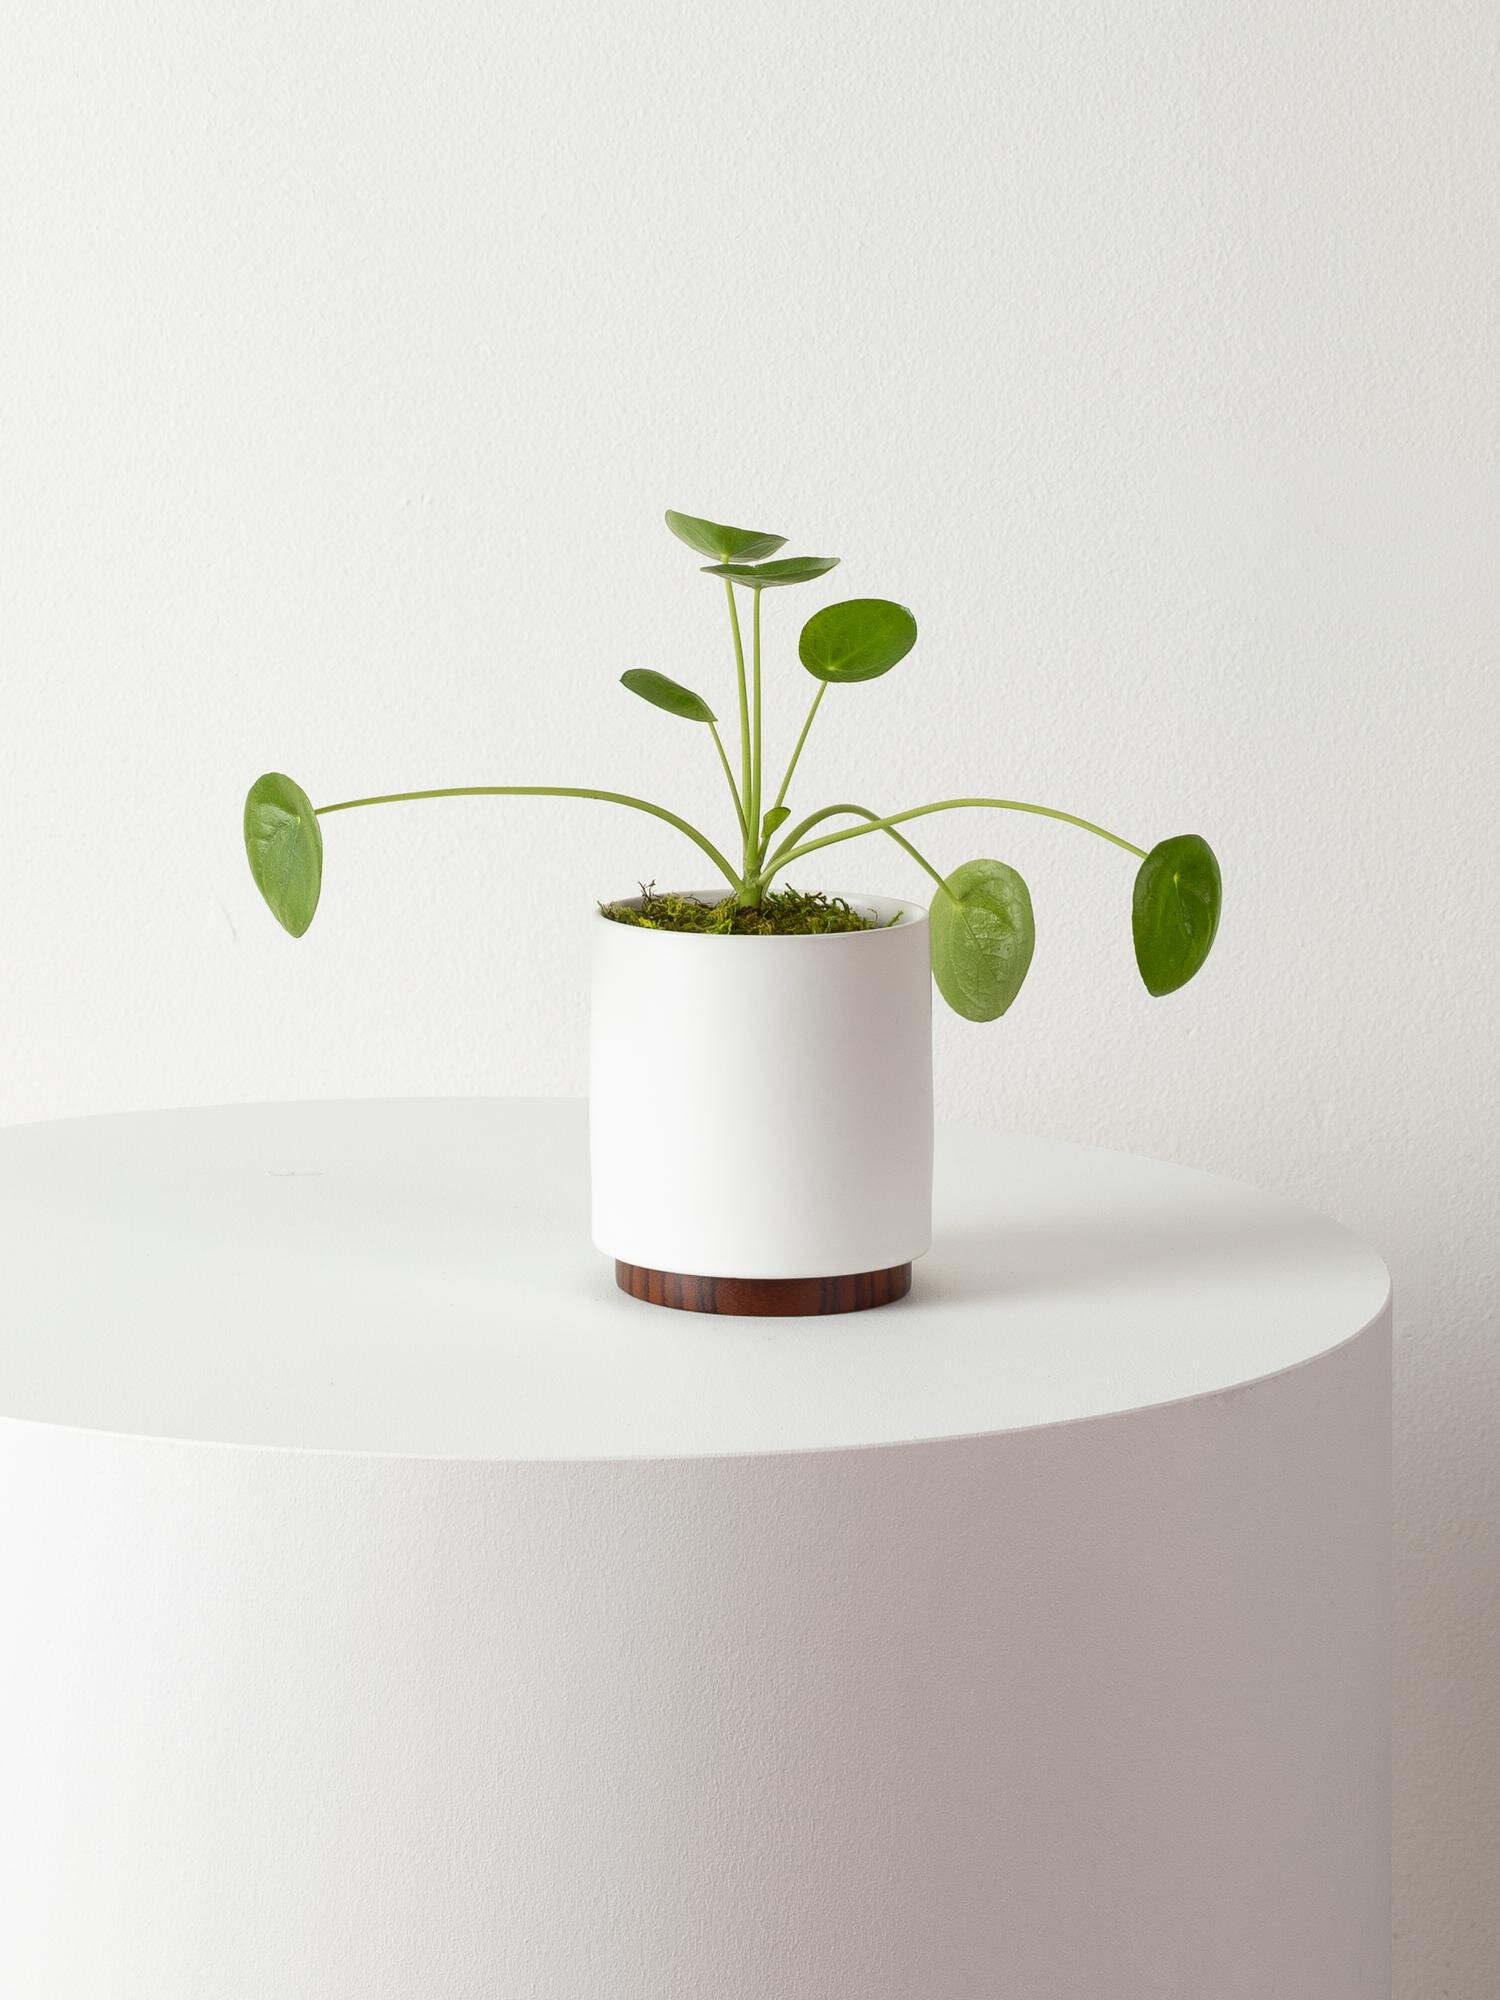
Propagation with cuttings is a simple way to multiply your plant, and the Pilea, also known as the Chinese Money Plant or the Friendship Plant, is the perfect candidate! In fact, it gets the nickname “Friendship Plant” because it was traditionally passed on from one friend to another via cuttings. As such, for a long time, it was a hard plant to find on the shelves of local plant shops and nurseries. Luckily, that’s no longer the case, which makes it the perfect gift to send to a friend (even the New York Times agrees it’s the perfect gift!), or get for yourself and pass along cuttings!

If you’re wondering how to care for your Pilea, check out our complete care guide including light recommendations, watering tips and troubleshooting when things go awry.

How to propagate the Pilea

Propagating the Pilea Peperomiodes is incredibly simple:

The “mother plant” is the central stalk of your plant, while the “pups” are smaller offshoots growing in the surrounding soil.

Cut at the base of a pup, and place in water while it roots.

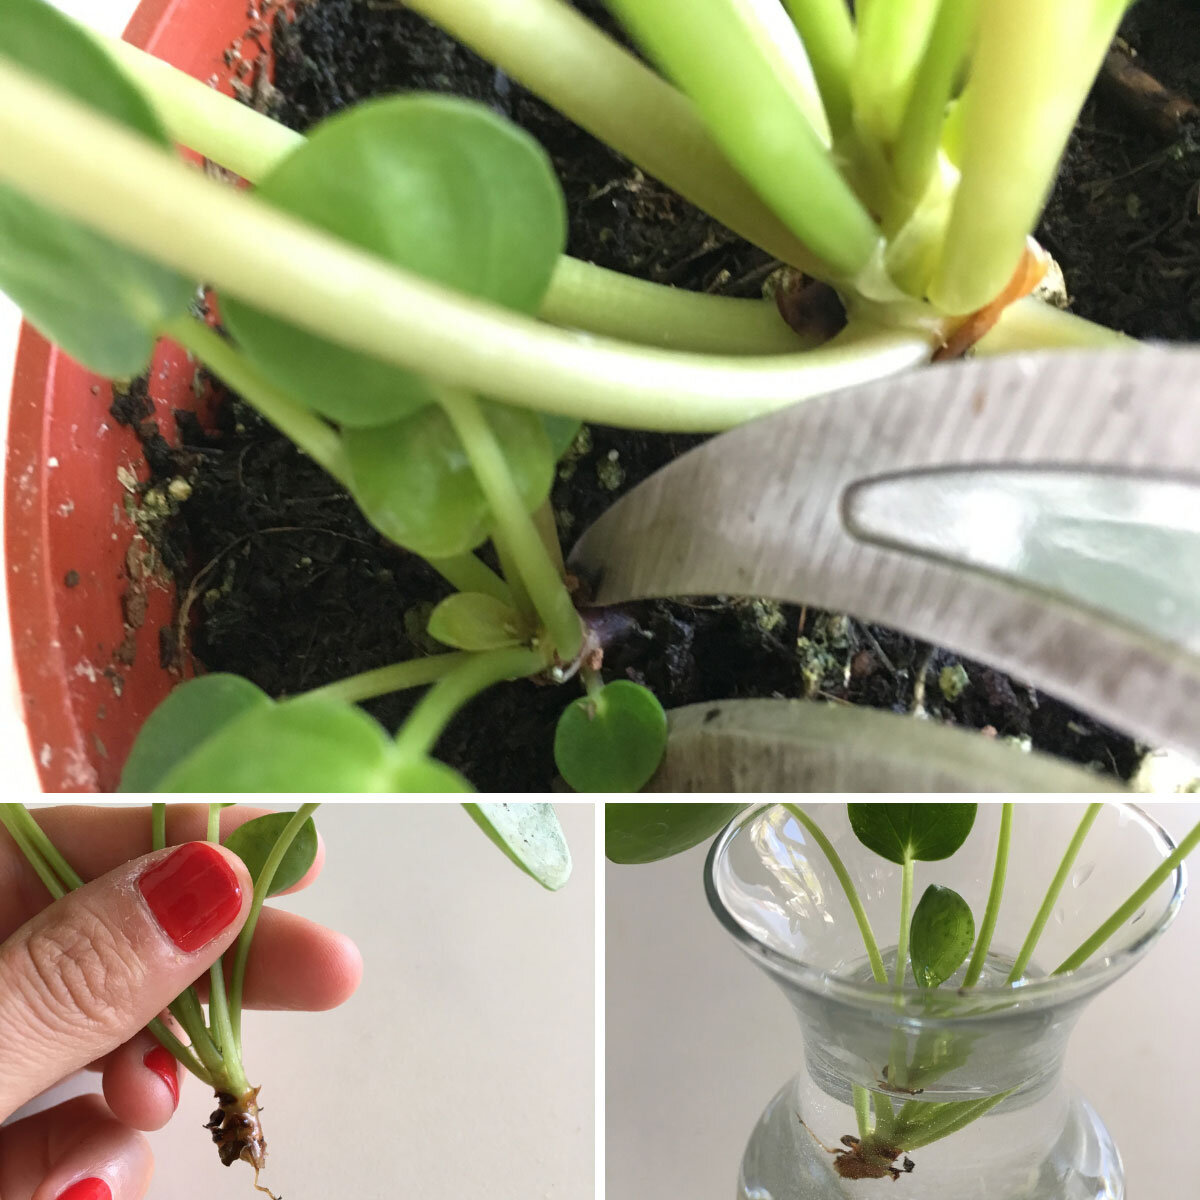
  1. Locate small offsets, or baby Pileas (AKA “pups”), at the base of the plant. You will find these below the main stalk— if your plant doesn’t have any, hold off! They will sprout up soon.

  2. Using a clean blade, cut an offset at the base or closest to the soil as possible.

  3. Place the stem of the offset in a small glass or jar with water. Make sure only the stem or shoot is submerged — do not submerge any leaves, as they will rot (you may need to remove some leaves).

  4. Place in an area with bright, indirect light and wait. You may like to change the water every few days to keep it fresh. After a week or two, you should see roots begin to sprout.

  5. Once the roots have grown to about an inch long, carefully place them in a small pot with fresh soil, gently pressing down on the soil once it’s potted. Keep the soil just moist to the touch for the first few weeks until the plant has taken root.

Good luck and happy propagating! Don’t forget to fertilize your plant once it’s taken root— a gentle fertilizer like Boost Vitaminé natural plant food will help it grow into a healthier and stronger mature plant!


Book a call with a Plant Doctor

1 TO 1 VIDEO CALL WITH AN EXPERT

Yellow leaves? Worried about watering or struggling with incorrect lighting? Book a call and get truly personalized support for all your plant-related needs.

How to Care for and Grow Your Pilea Peperomiodes

Chinese Money Plant

AKA pilea peperomiodes

The peculiar Pilea Peperomiodes, also known as the Chinese Money Plant or the Friendship Plant, has one of the most unique stories of the houseplant world. Originally hailing from the Himalyan mountains, this plant was brought to Europe by a Swedish missionary, and, being incredibly simple to propagate, was multiplied and passed around from friend to friend. As such, for many years it was very difficult to actually purchase, given that horticulturists did not typically grow it. Luckily that’s no longer the case, and these plants are not only relatively easy to find but also incredibly easy to care for. With just a little light, water, and love, you too can grow— and pass on— the lovely Pilea Peperomiodes!

Light requirements for the Pilea

Pileas are not too picky when it comes to light. They prefer bright indirect light, though they can adjust to medium levels of light and also stand a few hours of direct sunlight.

How to water your Pilea

Let your Pilea dry out between waterings, and water thoroughly when topsoil is dry, usually once a week. Avoid overwatering, and note that your watering schedule may be less frequent during winter months.

Are Pileas fast growers?

The Pilea can be a pretty fast grower, though its leaves generally remain quite small. In prime conditions, the Pilea can grow over three feet tall. Fertilize your Pilea 1-2 times per month in the spring and summer with indoor plant food, or foliar feed year round.

Potion Magique

An all-natural elixir to add to your misting routine, providing extra nutrition and pest control for your plants through their foliage.

$28

Common problems with Pileas or Chinese Money Plant

Leaves drooping

It is not uncommon for Pileas’ leaves to droop, and unfortunately there are many different things that cause this. The first thing to check is if the plant is thirsty — if you haven’t watered it in a while, it’s possible that it’s just too dry and has lost its perkiness. Check the soil and if you find this the case (the soil is bone dry), simply give it a good water—ideally in the sink, and even leave it in a bowl with water for a few hours!

Drooping leaves on a Pilea can also be the result of overwatering. Make sure you are only watering when your plant’s soil is dry. If the plant has been severely overwatered, you may have a case of root rot and will need to repot.

Leaves curling

When the Pilea has curling leaves, it most likely is a case of too much sunlight, for example several hours of hot summer sun or strong afternoon sun.

Brown spots

Brown spots, like other issues with the Pilea, can mean many different things. For one, it could mean sunburn—make sure your plant is not getting harsh rays of sunlight for extended periods. Do you fertilize your Pilea? Make sure not to give it more than the recommended dose, as this could lead to fertilizer burn on the plant’s foliage. Finally, and particularly during the winter, make sure your plant isn’t too close to a drafty or freezing window. These plants like moderately warm environments and their leaves will show if exposed to cold temperatures.

White grains on the leaves

Worry not! Pileas develop white grains on their leaves which are simply mineral deposits. You can leave them be, or clean the leaves with a damp cloth.


How to maintain a beautiful and healthy Pilea Peperomiodes

Take care of your Pilea and it will take care of you! Below are simple tips to continue caring for your Pilea or Chinese Money Plant over time.

  • Pruning & Shaping - Remove dry or dead leaves all year round, but save any major pruning for the spring and summer months. If you would like to modify the shape of your Pilea, simply pinch off any undesired leaves at the base of the stem.

  • Cleaning - The thick leaves of the Pilea can accumulate a lot of dust! Rinse them under the sink when watering, or gently wipe away dust with a wet cloth once every few weeks (this also helps the plant soak in more light!).

  • Repotting - Houseplants grow much slower than they would in the wild. Depending on the size of your plant and the density of the roots, this is nice to do every 2-3 years to provide fresh nutrients and encourage new growth.

    • When to repot - Pileas do not need to be repotted often. Repot with fresh soil once every 1-2 years.

    • Pot sizing - if you want your plant to grow taller, find a nursery pot that’s 2” in diameter larger than the current pot. If you want your plant to stay the same height, you can reuse the same pot and simply change the soil.

    • Get your hands dirty - remove the plant from the pot and shake off as much of the old soil as possible so that you have clean roots. Place the plant in the center of the pot, add new soil and pat down firmly. Water the soil thoroughly and place the plant in an area with bright indirect light. Your plant will take 2-4 weeks to settle from the shock and adjust to its new home.


How to propagate a Pilea Peperomiodes

The Pilea is one of the easiest plants to propagate, hence earning itself the name “the friendship plant”, as it is so commonly propagated and passed on from one friend to another. Propagating is very simple, but see our full guide (with images) on how to propagate the Pilea if you need more assistance!

  • Select a stem to propagate - Your Pilea will have one main mother plant and smaller babies that grow at the base of the mother plant. Using sharp, clean scissors or shears, remove one of these babies at the base. This will be the piece you propagate. Don’t have any babies yet? Wait for them to sprout up before propagating!

  • Place in water - Find a clear glass and fill with water. Make sure only the stem is submerged, and no leaves are sitting in the water.

  • Place in a bright area and wait! - Avoid any direct sun. You may need to change the water out every few days to keep it fresh. It usually takes just a few days for the root to start growing.

  • Transfer to soil - After a week or so, transfer to indoor potting soil. A small pot is best — no larger than 6” in diameter.

  • Keep hydrated - During the first few weeks, or until your plant feels firmly rooted in its soil, regularly water and drain your Monstera. The soil should be just barely moist to the touch at all times.


Indoor plants, potted & delivered

Premium plants paired with stylish pots, plus lifetime plant care support. Order online at leonandgeorge.com

5 Easy Steps To Propagating Pothos

How to propagate the Pothos with cuttings: cut just below the node!

When it comes to propagation, Pothos is the way to go. There is no plant quite as simple to propagate as the Pothos, and given the lushness of this particular plant, you can literally make dozens of new Pothos from one in just a few simple steps!

Looking for Pothos plant care? Check out our full care guide, or read up on everything you should know before buying a Pothos.

How to propagate Pothos plants

Pothos propagation is incredibly simple:

Step one: Select a stem with a leaf and locate the node. The node is like a joint: it is where new stems erupt, and often appears just below the stem of a leaf.

Step two: Using a clean blade, cut just below the node. You can also include a few different nodes in one cutting!

Step three: Place the stem and its node in a glass or jar with water. Make sure only the stem and node are submerged — do not submerge any leaves as they will rot.

Step four: Place in an area with bright, indirect light and wait. You may like to change the water every few days to keep it fresh. After a week or two, you should see roots begin to sprout.

Pro tip: your cutting can “live” like this for ages as a beautiful and minimal piece of decor! Feel free to stop here or go on to step 5 if you’d like to grow a full new plant.

Step five: Once the roots are visible, carefully place them in a small pot with fresh indoor potting soil and gently press down. Keep the soil just moist to the touch, ideally by misting it heavily, for the first few weeks until the plant has taken root.

Good luck, happy propagating, and show us your new plant babies by tagging us @leonandgeorge on Instagram!


cascading pothos

A lush and incredibly forgiving easy-care houseplant, the Cascading Pothos is the perfect plant for beginners and seasoned green thumbs alike.