Posts tagged Fern
What You Need To Know Before You Buy A Staghorn Fern

Looking to bring a Staghorn Fern into your life? With sage green, velvet like fronds, these gorgeously unique plants are popular for good reason. Easy to care for but with a few quirks, read up on what makes the Staghorn Fern so special, and how to select a perfect fern for your home.

What is a Staghorn Fern?

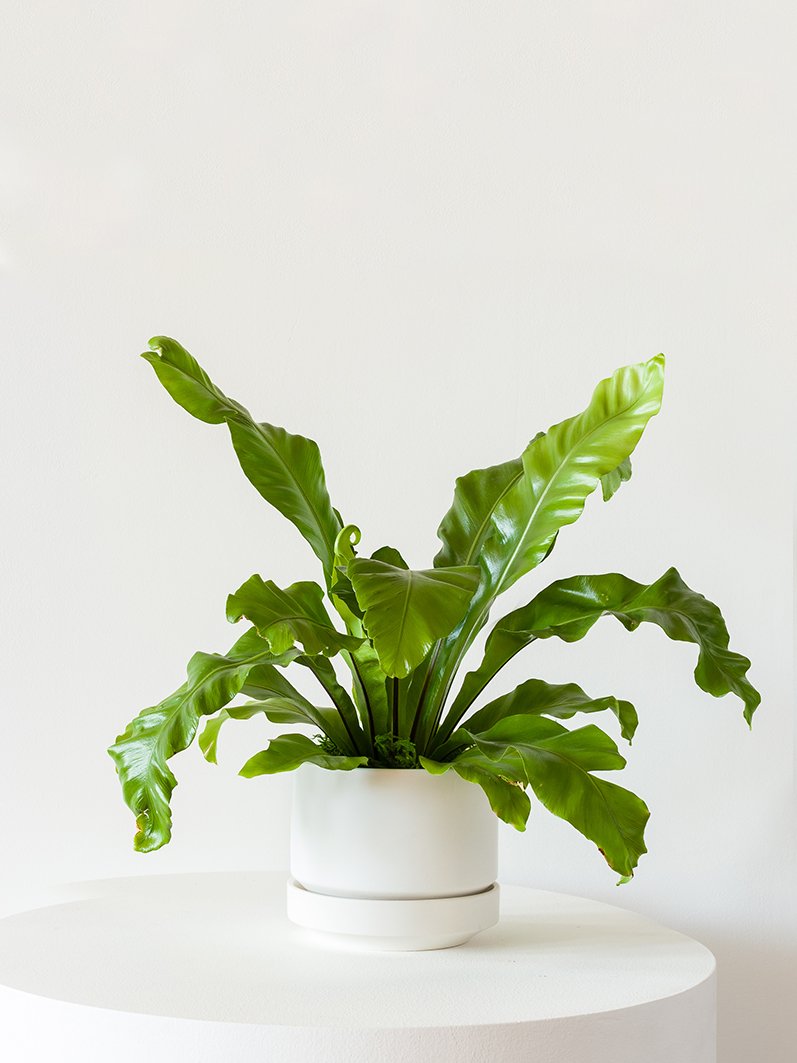
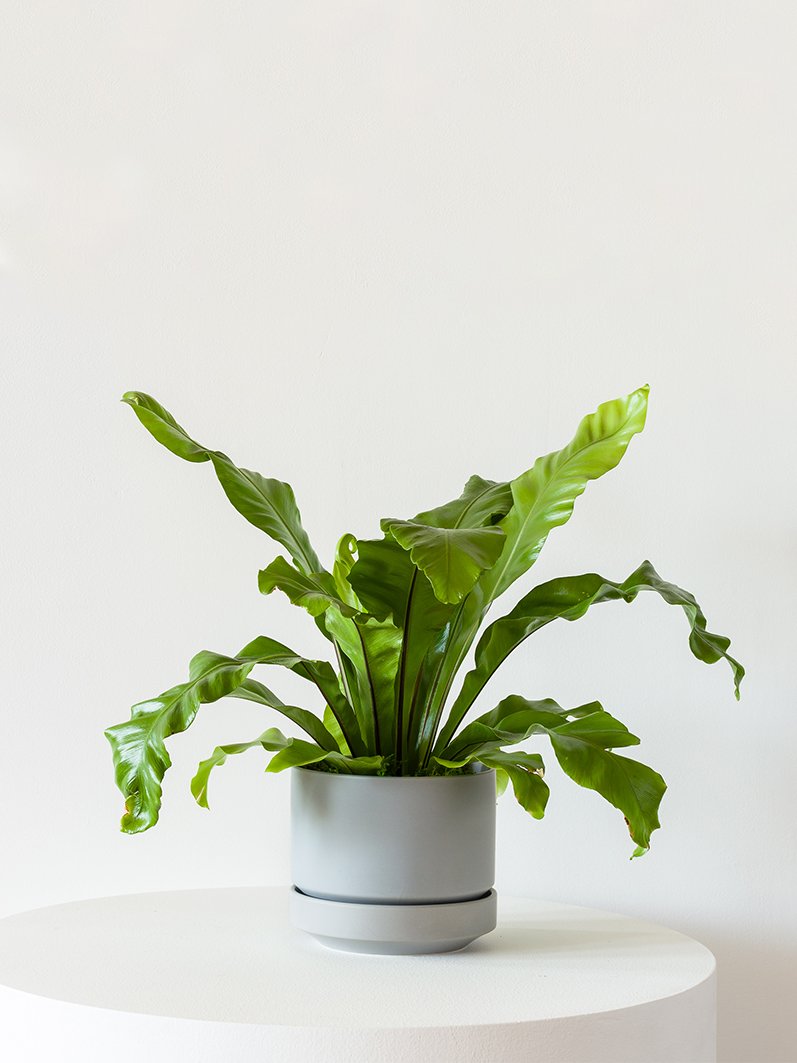
Staghorn Ferns, or Platycerium bifurcatum, refers to a commonly cultivated group of ferns in the genus Platycerium. Staghorn Ferns are epiphytes, which means that in the wild, they grow on other plants and objects for support, such as on tree trunks or branches. Other examples of common epiphytic indoor plants are hoyas and bromeliads. Uniquely, the Staghorn Fern doesn’t even require soil to grow at all -- in fact, it requires stable support to reach its mature stage, and absorbs most of its nutrients from the air rather than its soil.

Staghorn Ferns can thrive indoors or outdoors, and are particularly well-suited to grow outdoors in humid, warmer climates. But that doesn’t mean you can’t enjoy one of these beauties in your home! Their jagged fronds (fern leaves) make for stunning statement pieces in a variety of interior and outdoor spaces, especially when mounted.

Many plant collectors choose to mount their Staghorn Ferns, which creates a beautiful display reminiscent of moose or deer antlers in the home. This is how they got their common name, and are also often referred to as “Elkhorn Ferns.” In ideal conditions, these gorgeous horticultural oddities can grow up to several feet tall and wide and create a massive, unique focal point in any room or patio. These showpiece houseplants are truly a work of art, especially if it is on your wall!

Staghorn Ferns Need More Light than Most Ferns

Many people think of ferns as a low-light houseplant, but remember that Staghorn Ferns uniquely require more sunlight than most ferns. Put your plant near a good light source, such as an east-facing window or near a skylight.

Another excellent placement option for the Staghorn Fern is the bathroom! When placed in a well-lit bathroom in an indirect sunny spot and periodic humidity from the shower, you may find that your Staghorn Fern grows surprisingly quickly.

They love a humid environment

staghorn fern care

Staghorn Ferns grow natively in tropical parts of Australia and other parts of Oceania, thriving in these warm, humid environments.

Unlike many other common houseplants, these plants absorb moisture and nutrients through its fronds. Both its basal fronds and front, more prominent fronds, sometimes referred to as “antler fronds” because of the resemblance to deer and elk antlers, are able to absorb water and nutrients. This makes them an ideal candidate for periodic misting between waterings.

To keep your Staghorn Fern thriving, ensure you’re accounting for misting in your watering schedule and avoid overwatering your plant!

Indoors, Staghorn Ferns Need Fertilizer

Staghorn Ferns are hearty plants whose older, browning leaves serve as mulch-like nutrient preservers as they break down on the plant. In their tropical environments, they are able to absorb nutrients from the moist rainforest air to help them thrive, but this is not possible in the home. For that reason, a natural fertilizer is a prudent choice to keep your Staghorn Fern healthy and happy.

Like with most houseplants, use fertilizer conservatively and only during the plant’s growing season. Staghorn Ferns enjoy monthly or bimonthly doses of diluted liquid fertilizer to prompt growth during the warm summer months. Some people report good results utilizing another ingredient you already may have in your compost pile -- banana peels! These potassium-rich resources can serve as a cheap and natural source of nutrients as they decay over time.

Understand your plant’s natural habitat

A common problem that leads some people to fail in Staghorn Fern care is underestimating the plant’s light requirements. Most ferns grow in the ground level of the forest, and it’s these darker, moist environments that we usually think of when we buy ferns. But the Staghorn Fern prefers significantly more light than other plants in the Polypodiaceae family, so make sure you have an indirectly sunny spot for this unique fern.

While relatively unfussy plants, Staghorn Ferns can also be susceptible to common pests, such as spider mites and scale. To treat this, simply do so as you would any other houseplant, such as with neem oil or another natural pest deterrent. Avoid overwatering your plant to proactively prevent pests from turning your houseplant into their home.

You Should Eventually Mount Your Staghorn Fern

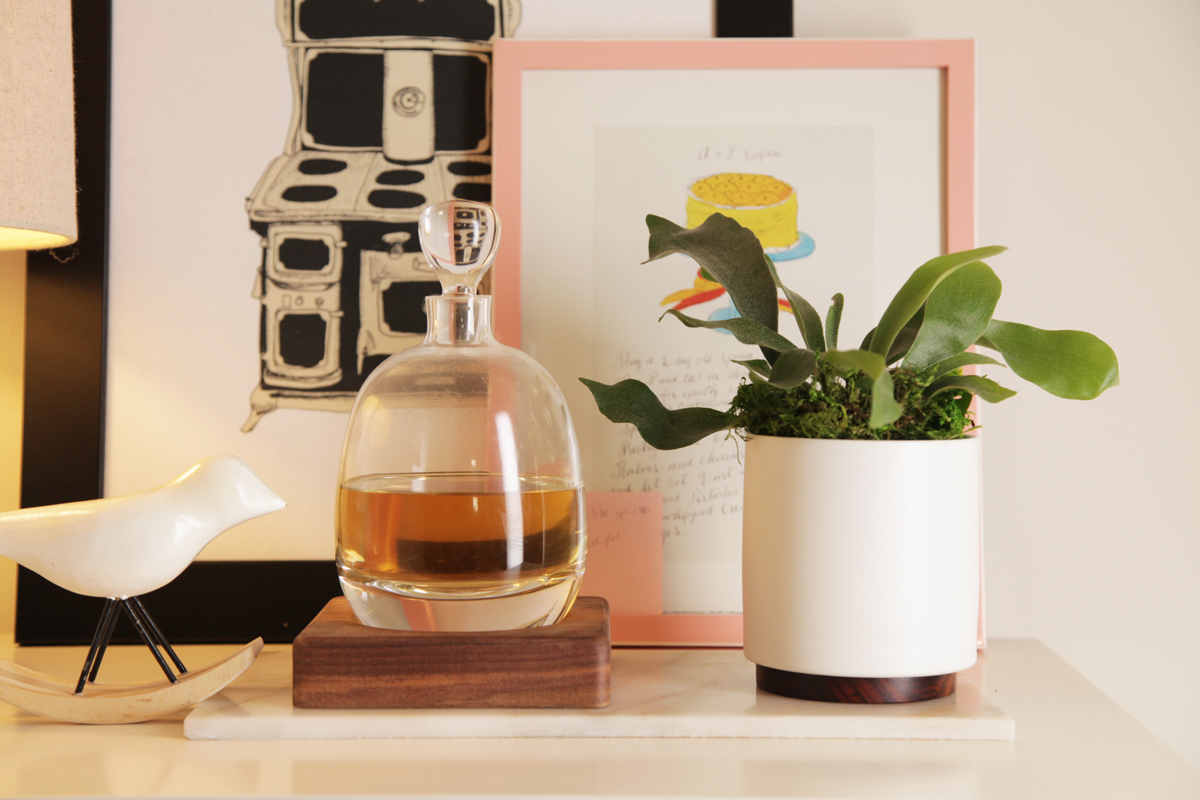
Once your Staghorn Fern is mature, it will require mounting to continue its growth. Young Staghorn Ferns can thrive wonderfully in a ceramic or terracotta pot with a chunky soil mix, but after a year or so, it will do best in an arrangement that takes its fascinating epiphytic habits into account, such as mounted on a wooden board, piece of bark, or even in a kokedama (beautiful Japanese moss balls) arrangement. You can choose how to mount a Staghorn Fern based on your own style and preferences, but it’s easy to do with supplies you may likely already have around the house.

How to mount A staghorn fern

To mount your plant, remove your plant’s root ball from its pot, removing some of the excess soil, and wrap it securely into some sheet moss or other organic substrate. Using twine, fishing line, or a combination of each, affix the plant onto your board or chosen mounting material. Some people choose to use nails and wrap the string around the nail heads, or wrap the plant directly. Either way, once your Staghorn Fern is established and settled onto its board or another source of support, its roots secure the plant in place.

Staghorn Ferns are safe for children and pets

Worried about furry friends or small humans getting into your plants? Staghorn Ferns are nontoxic, making them a great houseplant option for homes with cats, dogs, or young kids.

Staghorn Ferns Propagate Easily

Staghorn Ferns generate offshoot “babies,” which can be propagated into an organic substrate like moss or coco coir and eventually grown into a gorgeous, large Staghorn Fern.

They’re Furry!

Ever wonder what makes the foliage so special on a Staghorn Fern? The velvet-like fronds of this plant actually have a purpose! The tiny, silvery hairs help protect them from insects and pests in the wild (and probably in your home, too!).

Discover the Staghorn Fern

Staghorn Fern: an gorgeous epiphyte for a pot or wall.

Help! Why Are My Bird's Nest Fern's Leaves Wilting?

The beautiful Bird’s Nest Fern is far from your typical fern variety. Named for the way its foliage grows from its nest-like center, Bird’s Nest Ferns are a hardy and lush indoor fern variety with thick, verdant leaves that unfurl luxuriously. But although its care routine is very simple in comparison to most ferns, it does require a specific watering regimen. Diverting from this is the most common cause of curling leaves in Bird’s Nest Ferns. Don’t fret! Just read on to learn how to correct your Bird’s Nest Fern’s curling leaves.

Overwatering

Like most ferns, Bird’s Nest Ferns prefer for their soil to be consistently moist, but not drenched. If you suspect that you’ve provided your fern with too much water, you’ll need to allow its soil to dry out: not entirely, but to reach an even and consistent level of moisture, before watering again.

Incorrect Watering

It is paramount that you never water the Bird’s Nest Fern’s center. Always water around the outermost edges of your Bird’s Nest Fern, which will allow the water to be pulled in by the plant in all the right places. Watering directly in the center of the “nest” can result in a bogged-down, waterlogged fern which may ultimately require repotting to rectify.

Repot When Needed

If your Bird’s Nest Fern has become severely waterlogged, it is at risk of root rot, which can ultimately result in the plant losing all viability. Don’t be afraid to repot in instances like these. Simply plan on getting a little dirty. Move outside or spread newspaper on the floor, then remove the fern from its plastic nursery pot and shake off as much of the old soil as you can, so that you can see the roots. Roots that are severely rotted can be trimmed off with clean, sharp scissors. Then, place the plant in the center of the pot, add new soil (avoid replacing more than 1/3 of the overall soil at one time) and pat the soil down firmly. Water the soil thoroughly until moist, not drenched, and place the plant in an area with bright indirect light. Your plant will take 2-4 weeks to settle from the shock and adjust, but it should mitigate the issue of further root rot developing.


Bird’s Nest Fern

Verdant, resilient and deeply hued, this indoor fern variety boasts lush foliage, which grows in wavy fronds from the plant’s center, resembling a bird’s nest. The Bird’s Nest Fern prefers medium to bright light, consistent moisture and steady humidity.

Help! Why Are My Bird's Nest Fern's Leaves Yellow and Pale?

The Bird’s Nest Fern is the champion of the indoor ferns. Both low-maintenance and vibrant, its unique foliage sets it apart, and it’s far and away the easiest indoor ornamental fern to care for. Named for the way its quill-like leaves grow from a nest-like center, the Bird’s Nest Fern is a lush choice for tabletops and they make gorgeous centerpieces. But although it is low-maintenance, it is somewhat sensitive to light, which can result in pale and/or yellowing leaves. Not to worry! Read on to learn our simple steps on how to correct leaf discoloration and keep your Bird’s Nest Fern healthy and happy.

Pale Leaves: Too Much Light

Bird’s Nest Ferns have a preference for medium, indirect light. Too much bright light is simply too different from the light that they receive in their native, tropical environments, which are both moist and filtered by the canopies of other plants inhabiting the same biome. If your Bird’s Nest Fern is in a spot where it receives direct natural light, it will need to be moved to a space that receives diffuse, medium light. Similarly, if it is in a spot that receives bright light from artificial appliances, it will likely need to be moved to a space with light that is more gentle and less direct.

Yellow Leaves: Overwatering

Yellow leaves are one of Mother Nature’s most common signs of overwatering. This symptom can be seen consistently across many plant families, and the Bird’s Nest Fern is no exception. If its leaves are yellow, sagging, and have the appearance of holding a lot of moisture within them, the fern is likely overwatered. Remember that your Bird’s Nest Fern needs its soil to be kept consistently moist, not drenched. And never water directly within the center of the plant’s nest- always water along the outer edges of the plant’s soil. A watering can with a narrow spout can assist you with this.

If you’re concerned that your fern has been severely overwatered, lift it out of its ceramic pot (still within its plastic nursery pot) and check the ceramic for any signs of standing water. If water has pooled within it, dump it out. Allow the plant’s soil to dry to a consistently moist state before returning the fern to its ceramic pot, then resume your watering schedule: always aiming for consistent moisture, not soaking.

Further Support

If you follow the steps above and the condition of your Bird’s Nest Fern’s does not improve, don’t hesitate to reach out to our Plant Doctor Service. Just log into your Leon and George account and select “Contact Plant Doctor” from the menu. Then, upload photos of your plant as a whole, as well as close-ups of any areas exhibiting a pale or yellow tone, and provide details on the water your fern receives (both how much, and how often) as well as a description of its lighting environment. The Plant Doctor team will get back to you within 1-2 business days with an assessment, and guidance on how to get your fern back on track.


Bird’s Nest Fern

A resilient, low-maintenance and beautifully full indoor fern, the Bird’s Nest Fern’s claim to fame is its luscious, quill-like foliage, which grows in ample fronds from the plant’s center, resembling a bird’s nest. Bird’s Nest Ferns require medium light, consistent moisture and steady humidity. Ideal for tabletops and renowned for their use as eye-catching centerpieces.

Help! Why Does My Bird's Nest Fern Have Brown Tips?

We love the Bird’s Nest Fern for its unique foliage and its disposition as an easy-care indoor ornamental fern. Named for its voluminous shape, with feather-like leaves growing from a nest-like center, the Bird’s Nest Fern is a luxurious and vibrant option for indoor spaces of any style. But although it’s quite low-maintenance as far as indoor ferns go, it can still exhibit stress through browning leaf edges. No need to panic! Read our tips on how to correct browning edges on your Bird’s Nest Fern’s leaves, and how to avoid the issue recurring.

Underwatering

Bird’s Nest Ferns desire consistently moist, but not drenched, soil. Underwatering is a common culprit for browning leaf edges, so be sure to water your fern regularly, by using a watering can with a narrow spout and focusing on the soil’s outer edges. Never water directly within the center of the plant’s nest- this can result in the plant becoming waterlogged, and even experiencing root rot.

Environment Too Dry And/Or Cold

You’re likely aware, but like so many indoor plant varieties, the Bird’s Nest Fern is native to a tropical and moist environment. It can be a challenge to recreate this at home, but we do our best! Ensure that your home maintains a stable, consistent temperature. Temperatures below the 60s can cause your fern to become stressed. The same goes for drafts: it’s vital to keep your Bird’s Nest Fern away from appliances that can create drafts, including AC units, heaters, any other vent, or windows or doors that are frequently opened and closed. Support your fern’s moisture by misting up to three times a week.

More Support

If your Bird’s Nest Fern continues to exhibit browning leaf edges despite following the steps above, our Plant Doctor Service is here to help. Simply log into your Leon and George account and select “Contact Plant Doctor”. Upload photos of your plant as a whole, as well as close-ups of the areas experiencing browning, and provide information regarding the water it is receiving (both how much, and how often) as well as a description of its lighting environment. Our Plant Doctors will get back to you within 1-2 business days with their assessment and guidance to get it back on track.


Bird’s Nest Fern

A luxuriously full and resilient indoor fern variety, the Bird’s Nest Fern boasts lush, quill-like foliage, which grows in frills from the plant’s center, resembling a bird’s nest. The Bird’s Nest Fern prefers medium to bright light, consistent moisture and steady humidity. Ideal for tabletops and as centerpieces.