Posts in Care Guide
How to Care For and Grow Your Dracaena Compacta

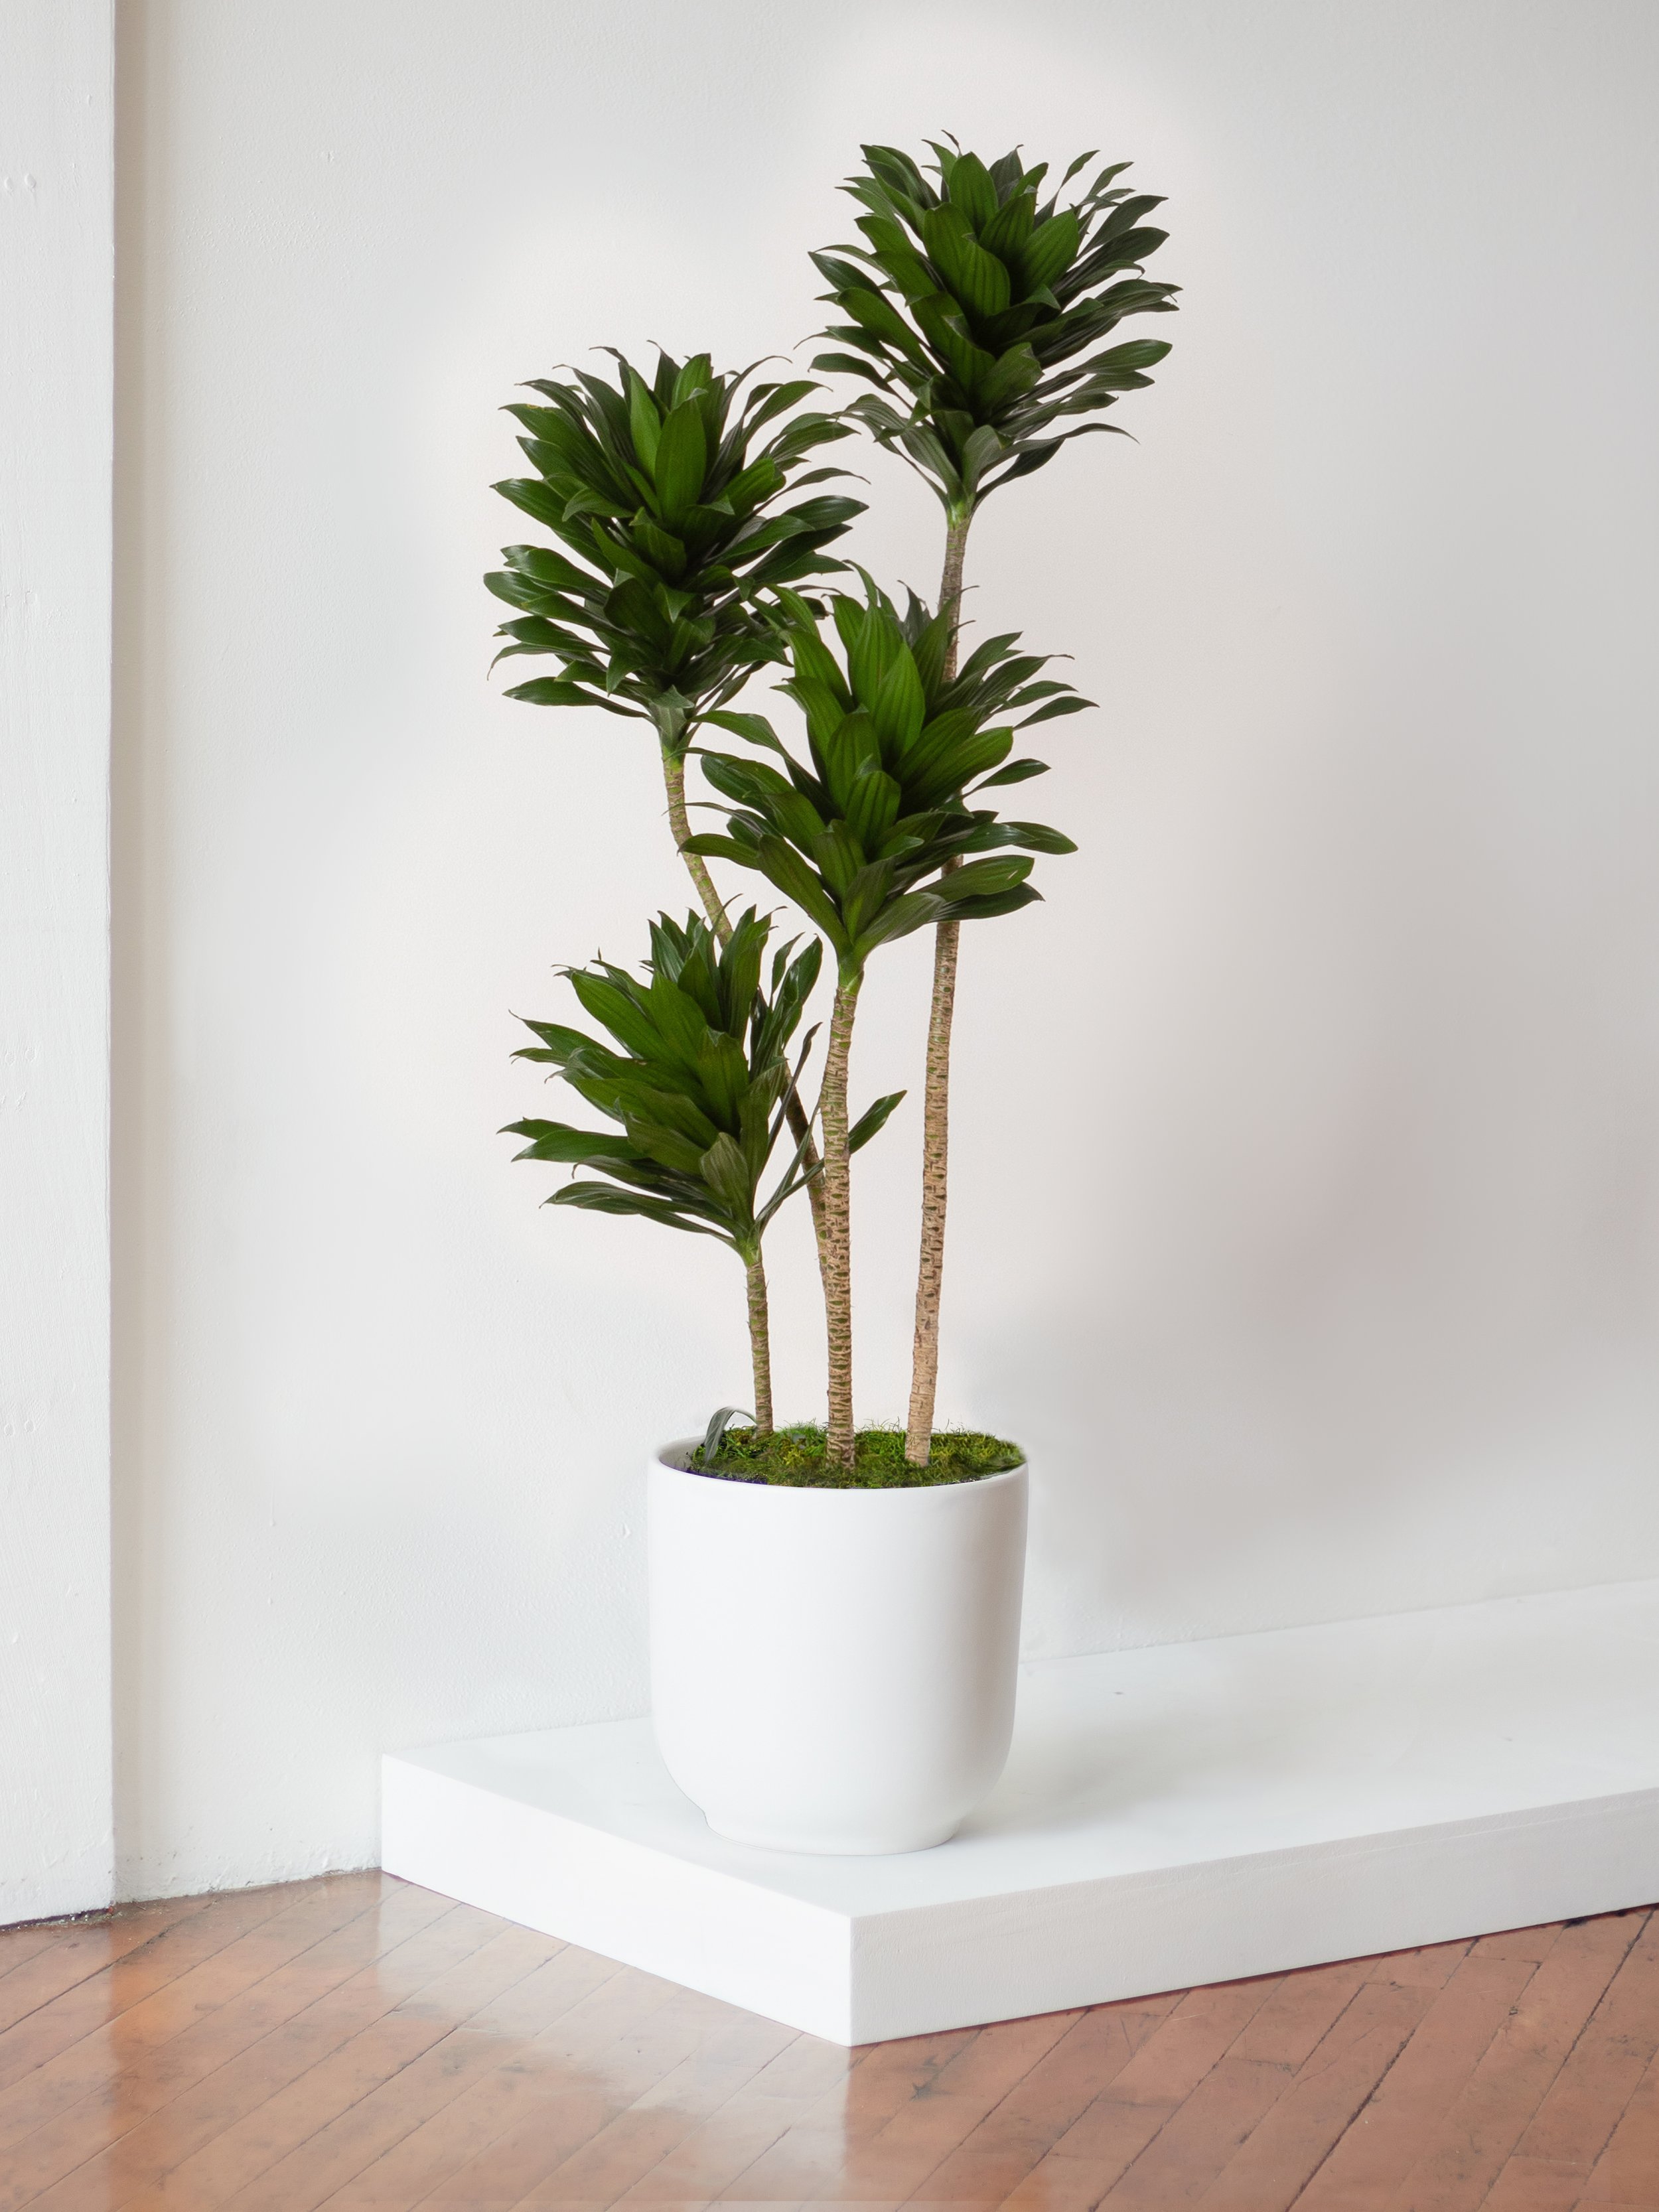
A textural and low-maintenance floor plant, the Dracaena Compacta features slender trunks and a beautifully laddered, lush silhouette. Native to Southeast Africa, the Dracaena Compacta is an ideal easy-care statement plant, with a preference for medium, indirect light.

What type of light do Dracaena Compactas need?

This plant prefers medium to bright indirect light, though it can adjust to lower light environments.

How to Water Your Dracaena Compacta

Water when the top 1-2 inches of soil is dry, taking care not to overwater.

Are Dracaena Compactas fast growers?

Generally a plant with a slower growth rate, Dracaena Compactas typically grow about 4” a year and can grow to a height of 6’ over time

Never overwater your plants with these sleek and simple moisture meters.

MOISTURE METERS

Finally, a moisture meter that actually works.

$29-$39/pack

Common problems with the Dracaena Compacta

Browning Leaf Tips - Low Humidity, Dry Environment

  • Symptom - Leaf tips exhibiting brown tips

  • Cause - Low humidity, dry environment, plant too near AC unit, heat or drafts

  • Remedy - Trim brown tips off, mist plant 3-5 times weekly, adjust watering schedule if necessary.

Read more about brown tips on Dracaena Compactas here.

Evidence of Insect Infestation

  • Symptom - Whitish bumps, indicating scale, or black dots, indicating mites

  • Cause - Insect infestation

  • Remedy - Wash all foliage and trunks of Dracaena Compacta with a mixture of gentle soap and water.

How to maintain a beautiful and healthy Dracaena Compacta

Trimming & reshaping Dracaenas

If your Dracaena Compacta experiences browning at its leaf tips, this can be remedied by trimming leaves with clean, sharp scissors or shears. Follow the natural direction of the leaf as you manicure it.

Cleaning

You can clean your Dracaena Compacta’s foliage and trunks by gently wiping it down with a soft cloth, or a mixture of gentle soap and water.

Repotting Your Dracaena

Dracaena Compactas are moderate to slow growers, and repotted is typically not necessary within the first couple years.

  • When to repot - when your Dracaena Compacta’s roots tightly encircle its pot or many stick out, it may be time to repot.

  • Pot sizing - if you want your plant to grow taller, select a pot that’s 2” in diameter larger than your Dracaena Compacta’s current pot. If you prefer for your plant to stay the same height, its original nursery pot can be re-used, and the soil simply refreshed.

  • Get your hands dirty - spread out newspaper on the floor, remove the plant from the pot and shake off as much of the old soil as possible so that you have clean roots. Place the plant in the center of the pot, add new soil and pat down firmly. Water the soil thoroughly and place the plant in an area with bright indirect light. Your plant will take 2-4 weeks to settle from the shock and adjust to its new home. 

How to Propagate the Dracaena Compacta

Dracaena Compactas can be propagated from top cuttings. Simply cut a portion from the very top of your plant below a leaf line. Ensure that the portion has at least 4-6 inches of growth. Place the cutting in a container of moist soil, and situate it in a shaded location. When roots form (typically after 4-6 weeks), re-pot into a new container with fresh, moist soil.


The Dracaena Compacta

A slim and lovely statement floor plant with narrow trunks and laddered emerald foliage, the Dracaena Compacta is a stunning low-maintenance plant for spaces that receive medium, indirect light.

How to Care For and Grow Your Dracaena Lisa

The Dracaena Lisa

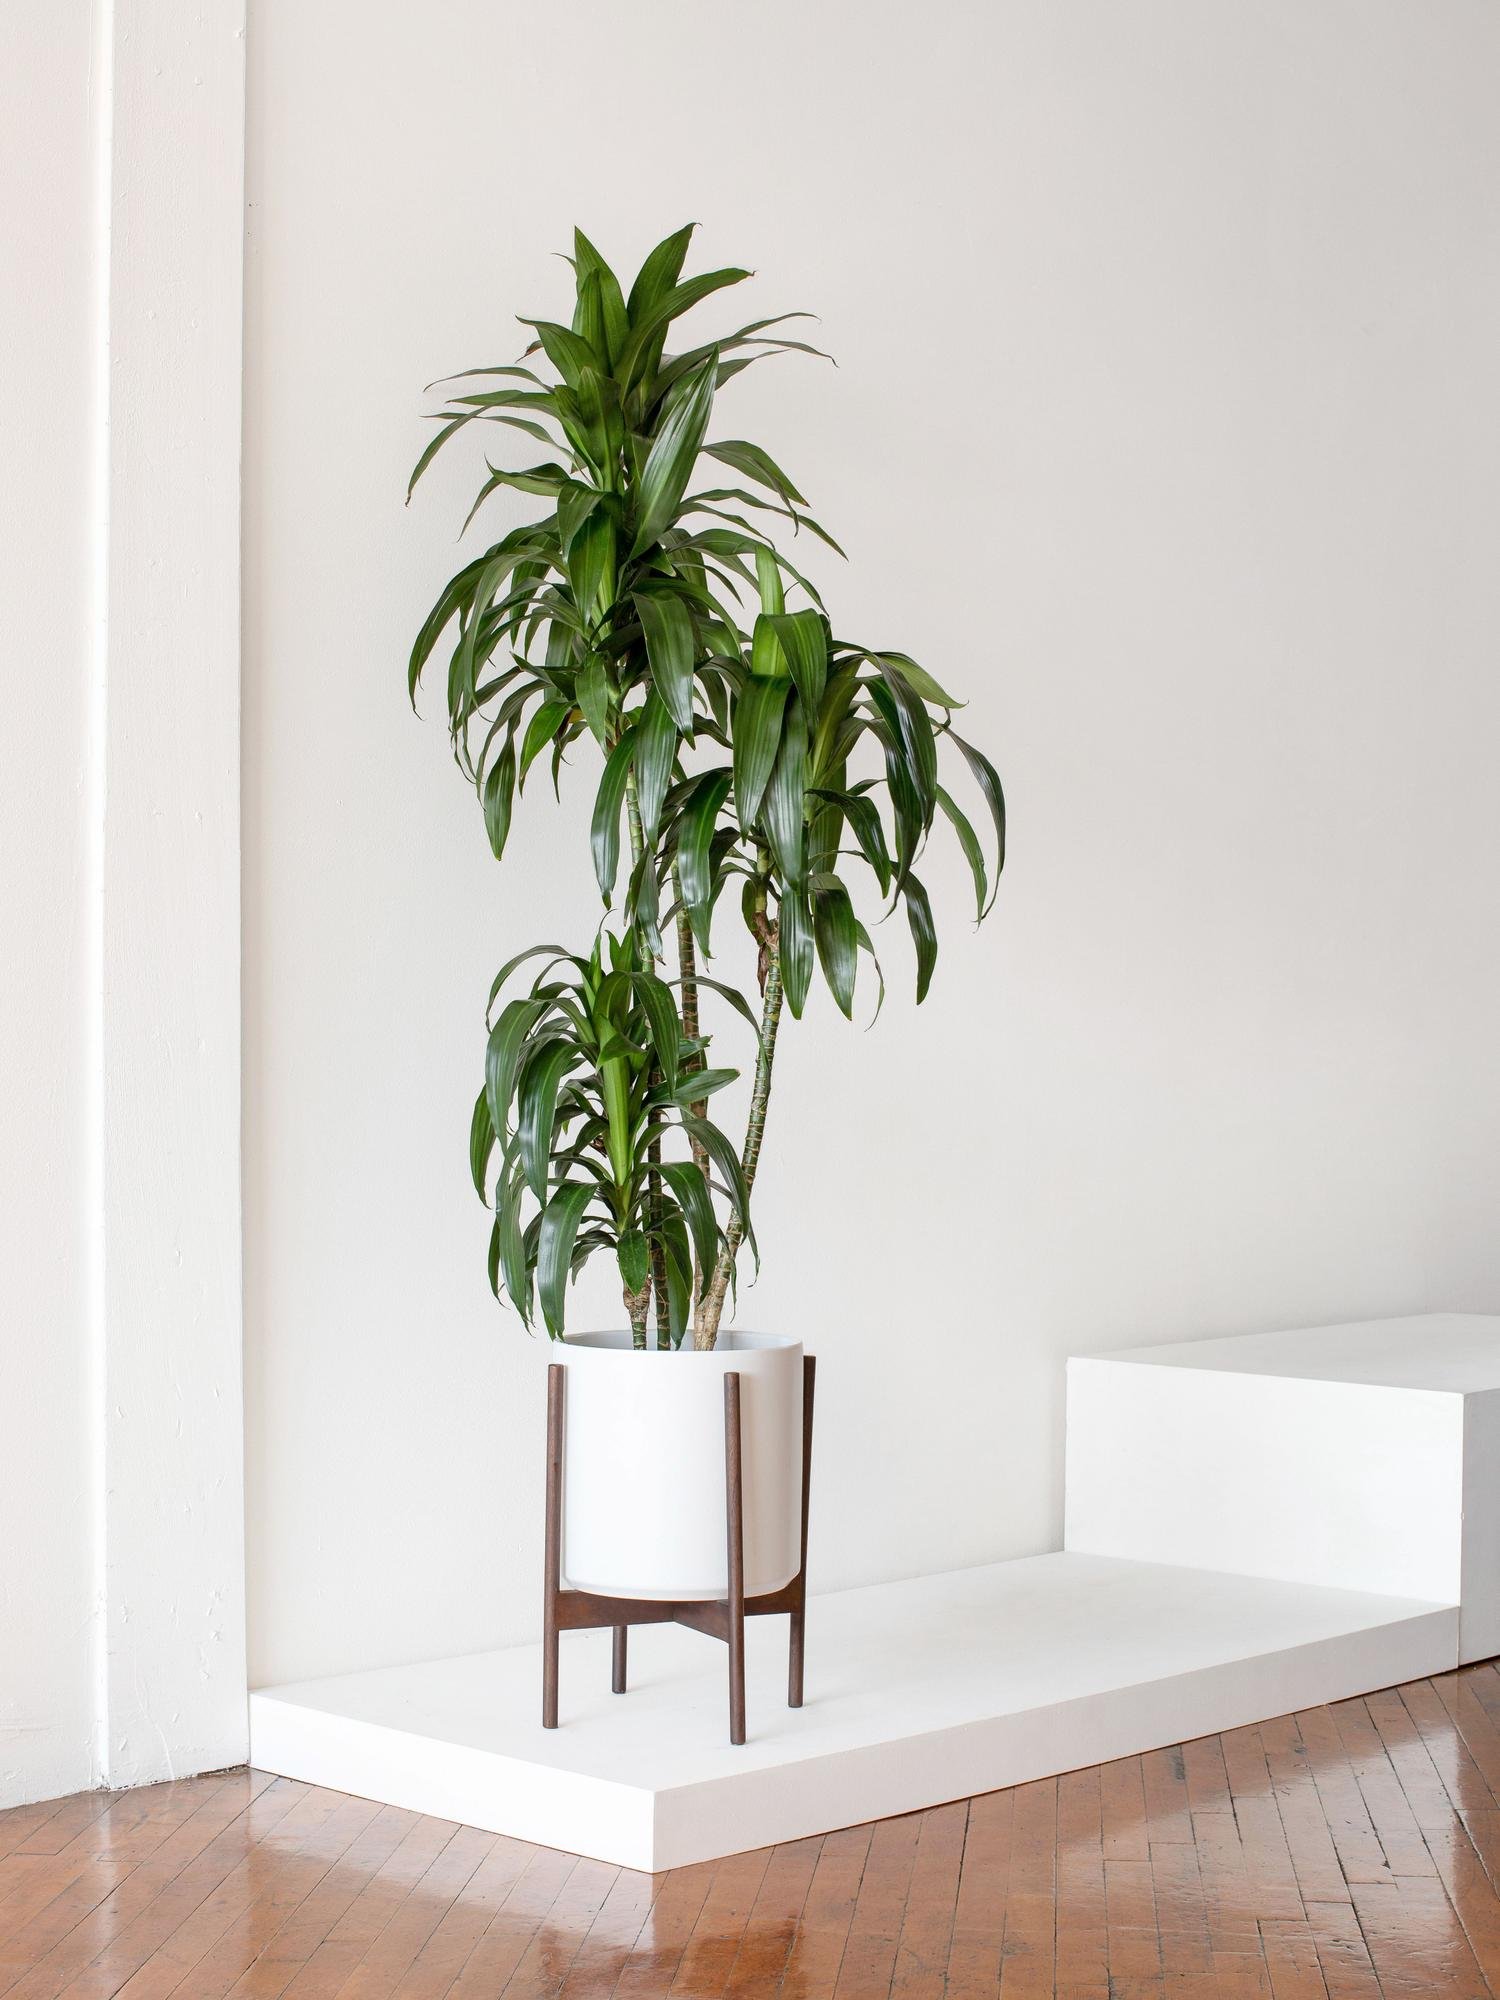
A consummate low-maintenance statement plant, the Dracaena Lisa boasts gorgeous, deep emerald foliage and stunning height. Native to Southeast Africa, the Dracaena Lisa prefers bright to medium indirect light, but can adjust to low light environments. 

What does Dracaena Lisa need?

Light

  • The Dracaena Lisa prefers bright to medium, indirect light

  • The Dracaena Lisa can tolerate low light environments

Water

  • Water the Dracaena Lisa when the top 1-2 inches of soil is dry

  • Take care not to overwater

Growth

  • This statuesque Dracaena Lisa has a moderate to low growth rate.

Never overwater your plants with these sleek and simple moisture meters.

Our moisture meter is the perfect tool for keeping your plants healthy and thriving! Its innovative design features a blue color indicator that signals when the soil has enough water.

MOISTURE METERS

Our moisture meter is the perfect tool for keeping your plants healthy and thriving! Its innovative design features a blue color indicator that signals when the soil has enough water, and a white color indicator that alerts you when it's time to water your plant. With its minimalist aesthetic, this moisture meter seamlessly blends in with your plants, enhancing their beauty and making them easier to care for. Order our moisture meter now to ensure your plants are always at their best!

Common problems with the Dracaena Lisa

Dry Leaf Tips and Edges - Low Humidity or Overwatering

  • Symptom - Leaf tips exhibiting dryness and edges and tips

  • Cause - Low humidity, dry environment with heat/AC

  • Remedy - Mist Dracaena Lisa x2 weekly, adjust watering schedule if necessary.

Dry Patches or Dry Streaks on Leaves - Too Much Direct Light

  • Symptom - Leaves exhibiting dry patches (often round in form) or dry streaking

  • Cause - Too much direct light

  • Remedy - Ensure that your Dracaena Lisa is situated in a spot where it receives indirect light. If it is too near to a window, move it to a spot 3+ feet from the window.

  • Read more about his issue here

Evidence of Insects

  • Symptom - Whitish bumps, indicating scale, or black dots, indicating mites

  • Cause - Insect infestation

  • Remedy - Wash all foliage and trunks of Dracaena Lisa with a mixture of gentle soap and water.

Discover the beauty of the Dracaena Lisa's unique striped foliage! This low-maintenance plant purifies the air and adds a touch of natural elegance to any space. Order now and enjoy nature up close!

How to maintain a beautiful and healthy Dracaena Lisa

  • Maintenance - A little trim is all that most Dracaena Lisa’s need to keep their foliage looking fresh!

    Trimming & reshaping - If your Dracaena Lisa experiences browning at its leaf tips, this can be remedied by trimming leaves with clean, sharp scissors or shears. Follow the natural direction of the leaf as you manicure it.


    Cleaning - You can clean your Dracaena Lisa’s foliage and trunks by gently wiping it down with a soft cloth, or a mixture of gentle soap and water.

  • Repotting - Dracaena Lisas are moderate to slow growers, and repotted is typically not necessary within the first couple years.

    When to repot - when your Dracaena Lisa’s roots tightly encircle its pot or many stick out, it may be time to repot.

    Pot sizing - if you want your plant to grow taller, select a pot that’s 2” in diameter larger than your Dracaena Lisa’s current pot. If you prefer for your plant to stay the same height, its original nursery pot can be re-used, and the soil simply refreshed.

  • Get your hands dirty - spread out newspaper on the floor, remove the plant from the pot and shake off as much of the old soil as possible so that you have clean roots. Place the plant in the center of the pot, add new soil and pat down firmly. Water the soil thoroughly and place the plant in an area with bright indirect light. Your plant will take 2-4 weeks to settle from the shock and adjust to its new home. 
How to Propagate the Dracaena Lisa

Dracaena Lisas can be propagated from top cuttings. Simply cut a portion from the very top of your Dracaena Lisa below a leaf line. Place the cutting in a container of moist soil or a glass of water. When roots form, re-pot into a new container with fresh, moist soil.


Bring the beauty of nature into your living room with the vibrant green leaves of the Dracaena Lisa plant! This low-maintenance plant is the perfect addition to any bright and welcoming space, adding a pop of color and fresh air.

The Dracaena Lisa

Elevate your space with the stunning Dracaena Lisa plant - the perfect low-maintenance addition for nature lovers! Its vibrant green foliage and air-purifying properties make it a stylish and eco-friendly statement piece, ideal for brightening up any home or office. Order now to bring a touch of nature to your decor and enjoy the beauty of this gorgeous plant!

Fishtail Palm Care Guide
Fishtail-Grey-Teak.jpg

The Fishtail Palm

AKA Caryota mitis

With its stunning profusion of airy foliage and tall silhouette, the Fishtail Palm is a gorgeous, low-maintenance floor plant that casts delightful, dappled shadows in light-filled spaces. Native to Southeast Asia, the Fishtail Palm thrives in bright to medium-light environments. 

Light

  • Needs bright indirect or direct light, next to a window is best

  • Will not tolerate low light environments

Water

  • Keep the just slightly moist — water when the top 1-2 inches of soil is dry

  • Note that despite this plant’s preference for moisture, it is relatively drought tolerant

Growth

  • With the right conditions, the Fishtail Palm can be a fast grower

  • Can be fertilized monthly during spring and summer

Never overwater your plants with these sleek and simple moisture meters.

leon-and-george-moisture-meters.jpg

MOISTURE METERS

Finally, a moisture meter that actually works. Tested by our very own Plant Doctors, all orders of Large or Extra Large Léon & George plant sets include a moisture meter

Common problems with the Fishtail Palm

Brown Leaf Tips with Yellow “Halo” - Low Humidity

  • Symptom - Leaf tips exhibiting browning and yellowing

  • Cause - Low humidity, dry environment with heat/AC

  • Remedy - Mist Fishtail Palm x2 weekly

Leaves Yellowing in Quick Succession - Overwatering

  • Symptom - Many leaves becoming yellow over short period of time

  • Cause - Overwatering

  • Remedy - Only water Fishtail Palm when top two inches of topsoil are dry. If overwatered, remove palm (still within its plastic nursery pot) from ceramic planter. If excess water has pooled in planter, dump it out and allow plant to dry before watering again.

Leaves Yellow and Dry: Too Much Direct Sun or Underwatering

  • Symptom - Dry, yellowing leaves

  • Cause - Excess of direct sunlightm underwatering

  • Remedy - Water Fishtail Palm consistently when topsoil is dry. Keep palm a few feet from windows to avoid scorching.

How to maintain a beautiful and healthy Fishtail Palm


  • Maintenance - A little love will go a long way with your Fishtail Palm!

    Trimming & reshaping - You can keep your Fishtail Palm looking fresh by trimming of leaves that exhibit a large degree of yellowing/browning. Cut the leaves’ stems as close to the base of plant as possible with clean, sharp scissors or shears. 


    Cleaning - Clean your Fishtail Palm’s foliage by gently wiping its fronds with a soft cloth. Removing dust from the Palm’s foliage allows it to photosynthesize with ease, which supports its overall health and appearance.


  • Repotting - Houseplants grow much slower than they would in the wild. Depending on the size of your plant and the density of the roots, Fishtail Palms can be repotted every three years to provide fresh nutrients and encourage new growth.


    When to repot - when the roots circle the pot tightly and begin to stick out, it’s time to move them to a new home. 


    Pot sizing - if you want your plant to grow taller, find a nursery pot that’s 2” in diameter larger than the current pot. If you want your plant to stay the same height, you can reuse the same pot and simply change the soil. 


    Get your hands dirty - spread out newspaper on the floor, remove the plant from the pot and shake off as much of the old soil as possible so that you have clean roots. Place the plant in the center of the pot, add new soil and pat down firmly. Water the soil thoroughly and place the plant in an area with bright indirect light. Your plant will take 2-4 weeks to settle from the shock and adjust to its new home. 


How to Propagate the Fishtail Palm


As with most palms, the only way to propagate a Fishtail Palm is by germinating the seeds. However, this can be very time-consuming (germination takes around eight months) and difficult to achieve indoors. Propagating Fishtail Palms is best left to professional growers. 


The Fishtail Palm

A stunning plant with airy foliage that resembles delicate fishtails.

How to Care for and Grow Your Hope Philodendron

How to care for and grow the Hope Philodendron AKA Philodendron Selloum

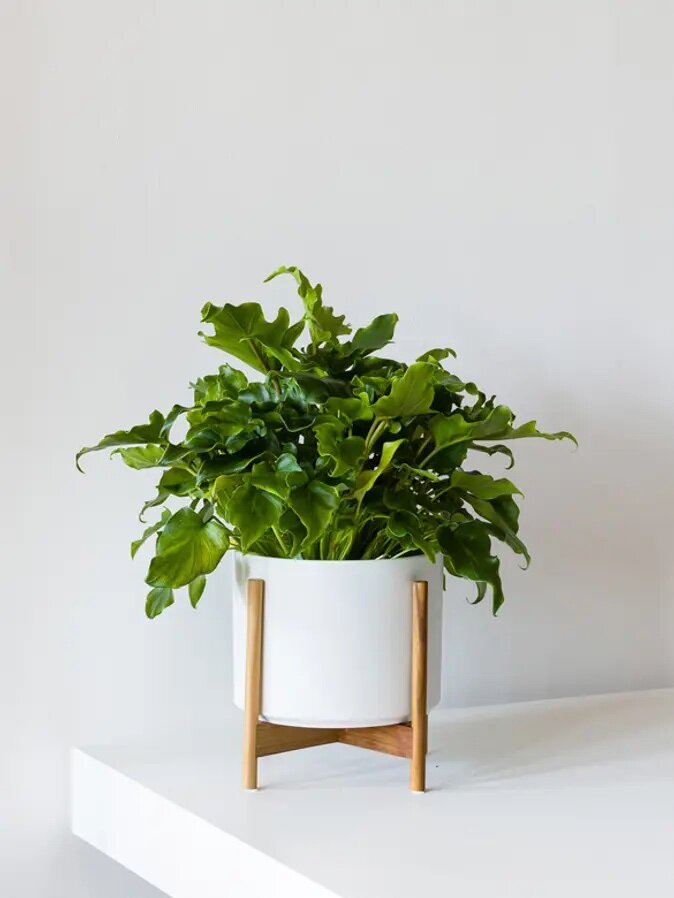
Full, serrated leaves and lots of personality, the Hope Philodendron is a plant that enjoys a shady, tropical-like home, similar to its native regions of South America. Here’s everything you need to know to keep the Hope Philodendron healthy, happy and growing.

Light

  • Prefers bright or medium indirect light

  • It can adjust to lower levels of light, but will grow slower and turn darker green

  • Avoid harsh direct sunlight that may burn your plant’s leaves

Water

  • Water about once a week, when the topsoil is just dry to the touch

  • Mist between waterings to provide humidity

Growth

  • In prime conditions, the Hope Philodendron grows relatively fast and can reach up to two feet in height

  • Fertilize your Hope Philodendron 1-2 times per month in the spring and summer with indoor plant food, or foliar feed year round.

Natural Plant Food

Nourish your plants with this specially-formulated organic liquid plant food. Our Boost Vitaminé is made with potent nutrients from nature to help your plants grow and thrive all year long.

$24

Common problems with the Hope Philodendron

Yellow leaves - overwatering or too much light

  • Symptom - pale yellow leaves, or new leaves unfurling pale or yellow

  • Cause - in most cases, the cause of yellow leaves is overwatering. While the Hope Philodendron likes moisture, it does not want too much moisture or to become waterlogged. If the plant is not overwatered, it’s possible that the plant is exposed to too much light.

  • Remedy - ensure that the soil is not waterlogged — remove from plastic nursery pot and investigate the roots. If they are soaked or emit a stench, it’s possible your plant has root rot and you will need to repot. If it’s just slightly damp, leave the plant in a well-ventilated area with plenty of indirect light and hold off on watering.

Brown tips - underwatering

  • Symptom - edges and tips of plant are brown and dry or crispy

  • Cause - not enough water

  • Remedy - give your plant a thorough shower, allowing all the roots to have a chance to drink and refresh. Wait until water has drained before returning to decorative pot.

Brown spots - overwatering or fungal bacteria

  • Symptom - wet or soggy brown spots on new and or old leaves

  • Cause - overwatering or fungal bacteria

  • Remedy - ensure that the soil is not waterlogged — remove from plastic nursery pot and investigate the roots. If they are soaked or emit a stench, it’s possible your plant has root rot and you will need to repot. If it’s just slightly damp, leave the plant in a well ventilated area with plenty of indirect light and hold off on watering.

How to care for little hope plant

How to maintain a beautiful and healthy Hope Philodendron

Take care of your Hope Philodendron and it will take care of you! Below are simple tips to continue caring for and growing your Hope Philodendron over time.

  • Pruning - the foliage of this plant can get wild! If the plant is taking up too much space, or has unattractive, old, or “leggy” vines, you can safely trim back with a clean blade, this will give your plant more energy to grow new leaves!

  • Trimming - if there is just a small portion of a leaf that was damaged such as the edges, trim off any discoloration or blemishes by following the natural lines and shape of the leaf.

  • Cleaning - regularly remove dust to ensure your plant can soak in as much light as possible. Use a damp cloth and gently wipe the leaf clean.

How to grow and repot the Hope Philodendron

  • Growing - in prime conditions with the right light/water/temperature balance, Hope Philodendron plants are fast growers. After some time, if you don’t see any new growth, consider adjusting one of its elements. During spring and summer, use a diluted fertilizer to give your plant a vitamin boost.

  • Repotting - L&G Hope Philodendron plants come in 6” grow pots and only need to be repotted every few years if you notice the roots outgrowing the pot, or to refresh the soil and give it new nutrients. If you’d like your plant to grow larger, find a new grow pot that is 2” larger than its current pot. If you’re happy with the current size, you can reuse the same pot and simply change the soil.

    • Getting your hands dirty with or without a yard - spread out newspaper on the floor, remove the plant from the pot and shake off as much of the old soil as possible so that you have clean roots. At the bottom of the grow pot, and a layer of soil, then place the plant in the center of the pot and cover with new soil. Pat down firmly and water thoroughly. Place the plant in an area with bright indirect light. Your plant will take 2-4 weeks to settle from the shock and adjust to its new home.

How to propagate the Hope Philodendron

Propagating a Hope Philodendron is best down with cuttings and during spring or summer.

  • Make a clean cut below a node - The node is like a joint in the stem — where new leaves grow from. Using sharp, clean scissors or shears, remove a cutting from the plant and place in fresh water in an area with bright indirect light. Change the water every few days to keep it fresh.

  • Wait for roots to grow and repot- After a few weeks, you will see roots forming. Transfer to a pot with fresh soil and water thoroughly.

  • Stabilize - Keep the soil moist to the touch for one to two weeks as the cutting roots.


Hope Philodendron

This happy and hopeful philodendron will bring joy to any space with its unique wavy leaves and compact shape. They are easy to care for and on NASA’s list of best air-purifying houseplants.

How to Care For and Grow Your Cast Iron Plant

Cast Iron Plant

AKA aspidistra elatior

Beautifully lush and tougher than nails, the Cast Iron Plant is a favorite houseplant for its deep green foliage and easy care vibes. A truly low-maintenance plant, there are just a few things to know before you buy a Cast Iron Plant. Learn the basics of Cast Iron plant care right here: from light requirements, to how to water your Cast Iron Plant, as well as guidance for troubleshooting any problems you may encounter along the way. (Not to worry, Cast Iron Plants are not known to experience many issues!) All the information you need for your Cast Iron Plant is at your fingertips- read on!

How much light does the Cast Iron Plant need?

Cast Iron Plants do best in medium to low light. While the Cast Iron doesn’t mind bright indirect light, these tropical plants should be kept away from harsh, direct sunlight as it may scorch the plant’s leaves.

How to water your Cast Iron Plant

You can water your Cast Iron Plant when its top two inches of soil are dry to the touch. Just stick your finger into the soil every ten days or so, and water when those two inches are dry. The most important aspect of watering your Cast Iron Plant is to avoid overwatering. Note that your watering schedule may be less frequent during winter months and more frequent during the sunnier months of the year. Consider using a moisture meter as a simple, supplemental tool to alert you when your plant’s soil is dry or moist.

Are Cast Iron plants fast growers?

The Cast Iron Plant is a relatively slow grower, and grows in accordance with the amount of light that it receives. Cast Iron Plants will generally grow up to two feet tall and two to three feet wide, and their rate of growth will be slower in low light settings. Fertilize your plant one to two times per month in the spring and summer, and consider foliar feeding year round.

Common problems with Cast Iron Plants

Leaves turning yellow on Cast Iron Plant

Leaves turning yellow or brown

If you see yellow or brown leaves on your Cast Iron Plant, the most likely cause is either waterlogged soil (while these plants like to remain evenly moist, they do not like soggy soil), or that your plant is getting too much light. Avoid direct light, and make sure you are not overwatering your plant.

In the meantime, remove any damaged leaves by simply cutting with clean scissors or a blade at the base of the stem.


Brown tips

If your plant has brown tips, it’s possible your plant is underwatered. While the Cast Iron Plant is a very resilient plant, like any other greenery it will show distress if neglected for long periods of time. If you do not suspect underwatering, consider the possibility of mineral accumulation. Some areas have tap water that is too high in minerals for watering indoor plants. If this is possibly the case, try leaving a full watering can out overnight before watering your plants.

Spider mites on plants

Speckled discolored leaves

Cast Iron Plants can sometimes be susceptible to spider mites. Check the underside of the leaves to see any webbing. The spider mites themselves can be hard to see but if you shake a leaf over a sheet of paper and see small specks fall, your plant has spider mites. Don’t worry! The plant can still be saved. Follow our simple instructions for how to treat spider mites here.


How to maintain a beautiful and healthy Cast Iron Plant

Take care of your Cast Iron Plant and it will take care of you! Below are simple tips to continue caring for your plant over time.

How to repot Cast Iron Plant

How to prune Cast Iron Plants

Remove dry or dead leaves all year round, but save any major pruning for the spring and summer months. When pruning your Cast Iron Plant, use sharp, clean shears and cut any excessive growth or unwanted foliage at the base of the stem.

Cleaning your plant

Take each leaf between two soft tissue cloths and wipe off the top to reveal a healthy shine. Do this at least once a month to keep away pests and help the plant soak in more light!

How and when to repot the Cast Iron Plant

Houseplants grow much slower than they would in the wild. Because of their slow-growing nature, Cast Iron Plants only need repotting once every three to four years.

  • When to repot - Cast Iron Plants have strong roots and will show you when it’s time! When the plant begins to “bust” out of its pot, it’s time for a new home.

  • Pot sizing - if you want your plant to grow wider, find a nursery pot that’s 2” in diameter larger than the current pot. If you want your plant to stay the same height, you can reuse the same pot and simply change the soil.

  • Get your hands dirty - spread out newspaper on the floor, remove the plant from the pot and shake off as much of the old soil as possible so that you have clean roots. Place the plant in the center of the pot, add new soil and pat down firmly. Water the soil thoroughly and place the plant in an area with bright indirect light. Your plant will take 2-4 weeks to settle from the shock and adjust to its new home.


How to propagate a Cast Iron Plant

Cast Irons are easy to propagate through division. Follow these instructions to propagate your plant:

  • Remove from pot - Remove a mature Cast Iron Plant from its pot (or do this when you are repotting).

  • Separate the roots - With your hands, gently separate a root cluster (rhizome) for propagation. You will need at least two or three stems growing off the root cluster you choose to propagate.

  • Place in soil - Place in a small pot with a few inches of fresh potting soil and cover with more soil to about half an inch below the rim of the pot, firmly pressing down once you’ve reached the top.

  • Keep moist - Water frequently to keep the soil just moist to the touch. After a few weeks, your plant will take root and should feel snuggly “rooted” to its pot.

Illustrations by our talented plant stylist, Kailie Barnes.


10-cast-iron-white-nouvelle.jpg

Cast Iron Plant

A resilient beauty with shiny dark green leaves and a low-maintenance disposition, the Cast Iron Plant is easy to care for and ideal for low light spaces.

How to Care For and Grow Your Meyer Lemon Tree

Meyer Lemon Tree

AKA Citrus meyeri

There’s so much to love about Meyer Lemon trees, from their incredibly fragrant foliage to their full silhouettes. Meyer Lemon Trees, Citrus meyeri, have been popular for over a hundred years, and it’s easy to see why. They are resilient, elegant and easy to care for. But like all of us, they have preferences and needs to meet in order to grow strong. Rise to the occasion, and read on to learn how to care for and grow your new Citrus meyeri. 

How much light do Lemon Trees need?

Lemon Trees need ample direct sunlight to thrive and produce fruit, at least 6-8 hours a day.

How to water your Lemon Tree

Check moisture of topsoil weekly and give plant four cups of water when top two inches of soil are dry to the touch. Avoid overwatering. 

How fast do Lemon Trees grow?

It can take several months to years for Meyer Lemon trees to fruit. Remember that light = fruit, and fertilize every two weeks during spring, summer and fall. 

Never overwater your plants with these sleek and simple moisture meters.

leon-and-george-moisture-meters.jpg

MOISTURE METERS

Finally, a moisture meter that actually works. Tested by our very own Plant Doctors, all orders of Large or Extra Large Léon & George plant sets include a moisture meter

$24-$29/pack

Common problems with Meyer Lemon Trees

Yellow, Drooping Leaves: Overwatering

Symptom: Yellow leaves that appear droopy or saggy.

Cause: Overwatering.

Remedy: Grasp your fruit tree as low as possible on the base of its trunk, while wearing gardening gloves. Be careful to support the plant as you lift it, still within its plastic nursery pot, out of its ceramic planter.

Dump out any standing water that may have collected in the ceramic pot. Then leave the fruit tree, still in its plastic pot, in a sunny spot to dry. Don’t water again until its top two inches of soil are dry to the touch, at which time you can return it to its ceramic pot. 

Yellow Leaves: Inadequate Light

Symptom: A large amount of yellow leaves in the tree’s canopy.

Cause: Too much shade, not enough direct light.

Remedy: Ensure that your tree is in a space that receives ample direct sunlight for at least 8 hours/day.

Pale, Yellowing Older Leaves: Needs Fertilizer

Symptom: New leaves on canopy are green and healthy, old leaves are pale and yellowing.

Cause: The tree needs more nitrogen, which is available through fertilizer.

Remedy: Give your tree a balanced fertilizer every two weeks from spring through fall.

Shop the Meyer Lemon Tree at leonandgeorge.com

How to care for and grow meyer lemon tree

Can I keep a Meyer Lemon Tree indoors?

Considering keeping this plant indoors? Meyer Lemon Trees need full sun throughout the day to thrive. While it may survive indoors, most areas don’t receive the 6-8 hours of direct sunlight it desires. This usually translates to little or no fruit and stunted growth. We reccommend keeping your plant outdoors in a balcony, patio, or other open air space where it can get plenty of sunlight!

How to maintain a beautiful and healthy Meyer Lemon Tree

Care for your plant and it will thrive for years to come. See these simple tips to keep your tree flourishing. 

  • Pruning: Meyer Lemon Trees can be pruned between late winter and early spring. Pruning is not required, but you can prune to maintain you tree’s preferred shape by cutting branches below new leaf nodes/buds, with clean, sharp shears. 

  • Fertilizing: fertilize your tree twice monthly during spring, summer and fall with a balanced slow-release fertilizer.

Shop the Meyer Lemon Tree at leonandgeorge.com

How to propagate a Meyer Lemon Tree

Meyer Lemon tree cuttings make wonderful gifts, and these trees can be propagated both via cuttings and seeds. If you’re planning on propagating with cuttings, plan on doing it during the warmest months of the year, when your tree is growing at its most rapid rate.

Propagating with Cuttings:

  • Prepare a rooting container: a small nursery pot with drainage, and fill it with citrus fruit tree potting soil. 

  • Select a sturdy tip from one of your tree’s branches, about eight inches long. 

  • Positioning your clean, sharp shears below a leaf node or bud, cut a branch of around eight inches long. 

  • Remove all but a handful of leaves from the branch.The leaves that stay on the branch should be positioned toward the branch tip. 

  • Coat the cut end of the branch in 0.2-percent IBA rooting talc.

  • Firmly plant the branch in rooting container and place it outdoors in a spot that receives partial shade.

  • Patience! These things take time, so check your cutting for roots after three months in the rooting container. Allow it to stay in the container until solidly rooted and sturdy, then transplant to a larger pot during fall. 

Propagating with Seeds:

  • Select a juicy, healthy lemon. 

  • Remove the seeds from the lemon’s flesh and wash and dry them thoroughly. Be sure that all pulp is removed. 

  • Do not leave the lemon seeds to “dry out,” plant them while they’re new and lively.

  • Fill a small pot with pasteurized soil mix, or a half and half blend of peat moss and perlite.

  • Plant the lemon seeds ½ an inch deep in the soil mixture.

  • Moisten the soil lightly and cover with plastic wrap.

  • Keep the seeds in an area that averages around 70 degrees. The kitchen, such as on the top of the refrigerator, is a good spot. 

  • Once seedlings emerge, move the pot to a location that receives at least four hours of sunlight a day, and remove the plastic wrap. 

  • When the seedlings have leaves, transfer them to pots with a 4 to 6 inch diameter.

  • Fertilize them every 4-6 weeks and keep the soil moist.

  • Place them outside in an area that receives at least four hours of direct sunlight a day and is between 60 to 70 degrees in temperature.

  • Watch them grow!


Lemon Tree

With vibrant green foliage and a classically fresh citrus aroma, the Meyer Lemon Tree is a beloved, low-maintenance outdoor fruit tree variety.

How to Care For and Grow Your Sago Palm

SAGO PALM

AKA Cycas revoluta

How to care for and grow the Sago Palm

Sago Palms, Cycas revoluta, are gorgeous, vibrant statement plants.With feathery light, high-gloss fronds and a richly textured trunk, they add a lush and lively aesthetic to outdoor spaces. Sage Palms are low-maintenance, with a preference for bright light and partial shade, and they are slow growers, so they rarely need repotted. Read on to learn more about how to care for your Sago Palm and watch it flourish! 

Light

Prefers ample sunlight and partial shade.

Water

Check moisture of topsoil every 7-10 days, and provide three cups of water when top two inches of soil are dry to the touch. Avoid overwatering. 

Growth

Sago Palms are slow growers, but have been known to live for hundreds of years.

Never overwater your plants with these sleek and simple moisture meters.

leon-and-george-moisture-meters.jpg

MOISTURE METERS

Finally, a moisture meter that actually works. Tested by our very own Plant Doctors, all orders of Large or Extra Large Léon & George plant sets include a moisture meter

$24-$29/pack

Common problems with Sago Palms

Scale and Mealybugs

Symptom: Foliage that appears unhealthy, the presence of small brown, gray, black or white insects that may look like a scaly covering. 

Cause: Scales or mealybugs.

Remedy: While wearing gardening gloves, clean the plant thoroughly with an insecticidal soap like L’Original. If necessary, a scrub brush can be used to remove pests thoroughly. Treat the entire plant with a spray insecticide or apply insecticidal granules to the plant’s soil.

Limp, Saggy Foliage

Symptom: Foliage that appears exhausted, sags and is not robust. 

Cause: Too much water. 

Remedy: While wearing thick gardening gloves, grasp Sago Palm by the strongest point of its trunk. Be cautious and support the plant as you lift it, still inside its plastic nursery pot, out of the ceramic pot. 

If standing water has collected in the ceramic planter, dump it out. Still in its plastic pot, place the Sago Palm in a spot that receives ample direct sunlight and allow it to dry out thoroughly. Do not give the palm more water until its topsoil is completely dry to the touch. At that point, you can return it to its ceramic pot. 

Brown or Yellow, Frizzy Foliage

Symptom: The Sago Palm’s foliage is discolored, frizzy and appears to be unhealthy. 

Cause: A deficiency of the manganese micronutrient.

Remedy: Manganese sulfate can be applied to the soil of your palm. Do not confuse manganese sulfate for magnesium sulfate. Purchase the Manganese sulfate from a garden or home improvement store. One to two ounces of manganese sulfate will be sufficient for your palm. You will not need to utilize other fertilizers or plant foods.

Shop the Sago Palm at leonandgeorge.com

How to care for and grow philodendron brasil

How to maintain a beautiful and healthy Sago Palm

Sago Palms are wonderfully simple. They don’t need much-- a light touch is their favorite approach.

  • Pruning: Always use sturdy gardening gloves, and only remove lower foliage. Do so by cutting the fronds as close to the trunk as possible with clean, sharp shears. 

  • Fertilizing: Sago Palms do not need standard fertilizer but may benefit from manganese if they are exhibiting symptoms of a deficiency.

  • Do not overwater, and do not water directly onto the trunk. Water in a circular pattern toward the edges of the plant. 

Shop the Sago Palm at leonandgeorge.com

How to propagate a Sago Palm

Sago Palms grow clones from their parent plant over time. These new plants are known as offsets or “pups.” Sagos can be propagated by removing the offsets. With mature plants, the offsets can often be removed with a gentle tug.

Propagating with Offsets:

  • While wearing sturdy gardening gloves, tug, “snap” or cut the offset free at the point where it meets the parent plant. An offset of 4 to 5 inches in length is best.

  • Remove the leaves and roots from the offset, and, while wearing gloves, rinse it thoroughly in water.

  • Place the offset in a shady spot outdoors for a week. The area that has been cut will develop a callus, and you want that. It protects the plant from illness.

  • Fill a pot with a well-draining soil, at least two inches in diameter larger than the diameter of the offset.

  • Plant the offset with its bottom half beneath the soil and its top off entirely outside of the soil. 

  • Water the soil thoroughly (not the offset itself!) and keep it in shade outdoors.

  • Within 6 to 12 months, the offset will display both leaves and roots.

  • Re-pot the new Sago in a pot at least two inches larger in diameter than the palm itself. Use cycad soil. 

  • Keep the young Sago Palm in a spot outside that receives bright light as it grows and adapts.


Sago Palm

A unique and easy to care for plant well-suited for the outdoors.

Calathea Care Guide: Everything You Need To Know
Calathea-Care-Guide.jpg

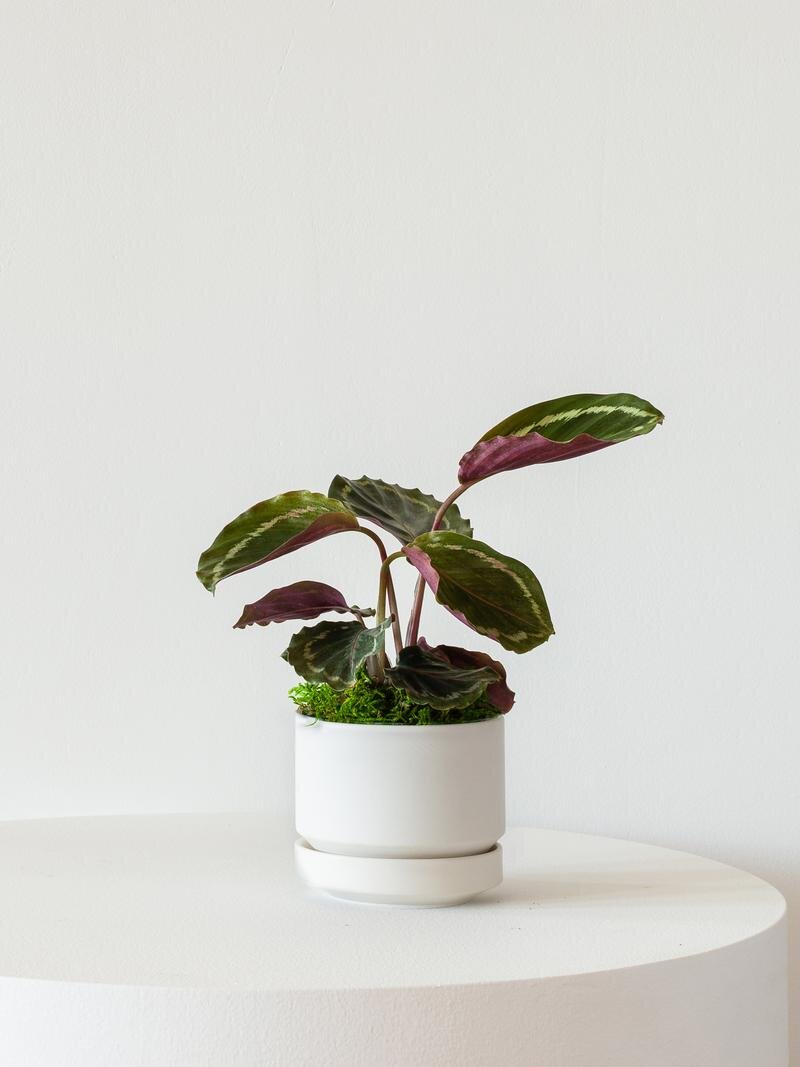
The Calathea

Part of the prayer plant family, the stunning Calathea is arguably one of Mother Nature’s most beautiful creations. With seemingly painted on leaves with brushstrokes of deep green and fuschia tones, prayer plants as they’re often called are known not just for their variegated beauty but also for their movement: their leaves rise and fall throughout the day in response to the light they receive. But though this plant is an increasingly popular choice, it remains a relatively high-maintenance houseplant and requires a bit of extra TLC to keep those leaves perky and shining. Read on to find a comprehensive guide to Calathea care over time.

What type of light do Calatheas need?

In their natural habitat, Calatheas grow in shady tropical areas. A such, they prefer medium to bright indirect light and will scorch in direct sunlight.

How to water your Calathea

Keep the soil evenly moist, never allowing it to completely dry out but also taking care not let the plant become oversaturated or waterlogged. Read our Ultimate Guide to watering the Calathea for tips and tricks.

How fast do Calatheas grow?

In prime conditions, this plant grows relatively fast and can reach up to two feet in height. Fertilize your plant 1-2 times per month in the spring and summer with indoor plant food, or foliar feed year round.

Common problems with Calathea Plants

How to maintain a beautiful and healthy Calathea

Take care of your Calathea and it will take care of you! Below are simple tips to continue caring for and growing your plant over time.

How to prune a calathea medallion

Pruning Your Calathea

To keep your plant healthy and strong, you may trim older or unhappy looking leaves. If there is just a small portion of a leaf that was damaged (due to underwatering, overwatering, etc), you can trim the leaf following the natural shape of the leaf.

Cleaning Your Plant

Take each leaf between two soft tissue cloths and wipe off the top to reveal a healthy shine (also helps the plant soak in more light!).

How to repot the Calathea

It is a good idea to repot your calathea once every year or every other year to give it fresh soil and nutrients.

  • When to repot - Once a year or every other year.

  • Pot sizing - if you want your plant to grow wider, find a nursery pot that’s 2” in diameter larger than the current pot. If you want your plant to stay the same size, you can reuse the same pot and simply change the soil.

  • Get your hands dirty - spread out newspaper on the floor, remove the plant from the pot and shake off as much of the old soil as possible so that you have clean roots. Place the plant in the center of the pot, add new soil and pat down firmly. Water the soil thoroughly and place the plant in an area with bright indirect light. Your plant will take 2-4 weeks to settle from the shock and adjust to its new home.

How to propagate a Calathea

The best way to propagate your plant is through division.

  • Divide the roots - When repotting, determine which areas you will divide to create new plants. Carefully untangle the roots with your hands.

  • Place in fresh soil - Place the new divisions in fresh soil and water thoroughly. Be sure to keep the soil moist but not soggy-- it may take 2-4 weeks for your plant to settle from the shock and adjust to its new home

Illustrations by our talented plant stylist, Kailie Barnes.


calatheamedallionscandi.jpeg

Calathea Medallion

A stunning prayer plant with a deep color palette of leaves painted by nature.

Pink Rubber Tree Care Guide: Everything You Need To Know

Pink Rubber Tree

AKA ficus elastica ruby

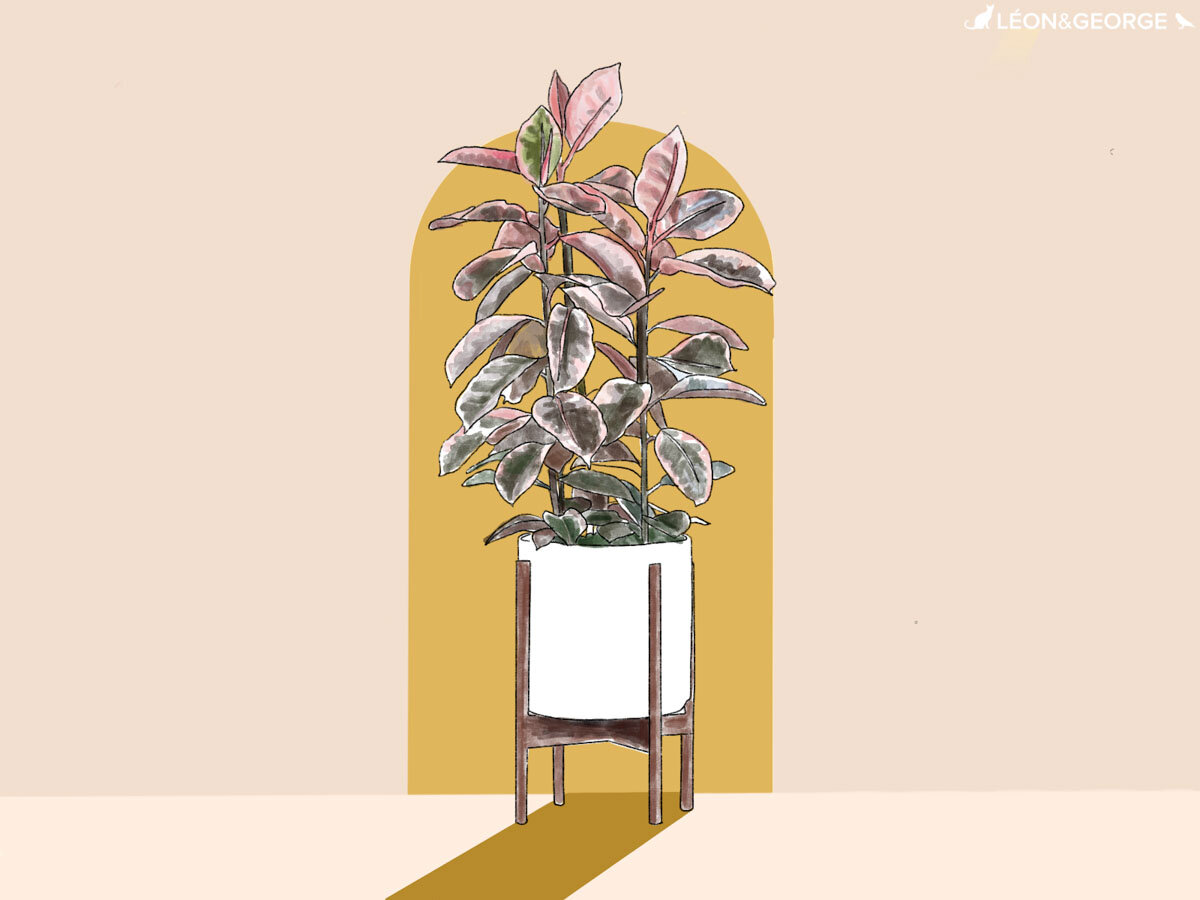
A gorgeous variegated version of the burgundy Rubber Tree, the strawberry-colored leaves of the Pink Rubber Tree make this plant a unique addition to any indoor space. But like so many variegated plants, the Pink Rubber Tree can be slightly more sensitive and requires the right balance of light and humidity to thrive. Read on for simple care instructions for the Pink Rubber Tree, including light requirements, watering frequency, and how to troubleshoot common problems you may encounter along the way.

What type of light does the Pink Rubber Tree need?

Pink Rubber Trees prefer plenty of bright indirect light, though they can also adjust to medium indirect light as well. Keep out of harsh direct sunlight as this may scorch their leaves.

How to water your Pink Rubber Tree

The Pink Rubber Tree likes to dry out between waterings — water whenever the top two inches of soil are dry, or about once a week to 10 days. Avoid overwatering, and note that your watering schedule may be less frequent during winter months.

Is the Pink Rubber Tree a fast grower?

During the spring and summer is when the Pink Rubber Tree usually grows the most. It can grow up to eight feet tall indoors. Fertilize your your Pink Rubber Tree 1-2 times per month in the spring and summer with indoor plant food, or foliar feed year round.

Common problems with Pink Rubber Trees

Yellow or pale leaves

Yellow leaves on a Pink Rubber Tree can be common. Keep in mind if it’s just one yellow leaf here and there (and it may drop off the plant), it most likely is just an older leaf that’s on its way out. However, if there are many yellow leaves, particularly at the bottom of the plant, this could be a sign of overwatering. Make sure the top soil of your plant is dry before watering, and also look at the roots to make sure it’s not waterlogged.

If the leaves are pale or not that “pink”, this could be a sign of the plant not getting enough light or warmth. Pink Rubber Trees, like most ficus, do not like changes in temperature or cold drafts. They also do best with loads of bright indirect light.

Brown edges

Brown edges on a Pink Rubber Tree leaf usually indicate underwatering, though like many plant issues, there could be other reasons! First, rule out that your plant is not underwatered. One way of quickly assessing the water situation if you are unsure is to lift your plant up. If it feels lighter than you’d expect, it may be very thirsty! Check the soil with your finger — if it’s bone dry, that’s another sign your plant needs a bit more water. If your plant definitely does not seem underwatered, it could also be overwatered, again check the soil, as well as the roots, for accumulated moisture.

Dropping leaves

Pink Rubber Trees like other ficus can be sensitive to change, and it is not uncommon for this plant to drop leaves after being moved. Your plant may also drop leaves if it is subject to temperature changes or drafts. Make sure your plant is moved away from air vents, heaters, or windows with cold air drafts.

How to maintain a beautiful and healthy Pink Rubber Tree

Take care of your Pink Rubber Tree and it will take care of you! Below are simple tips to continue caring for your Pink Rubber Tree over time.

Pruning Pink Rubber Trees

Remove occasional dry or dead leaves all year round, but save any major pruning for the spring and summer months. When pruning your Pink Rubber Tree, wear gloves and protect your floor with newspaper — the sap that leaks out can be sticky and damage floors. Use sharp, clean shears and cut just above the node at a 90 degree angle.

Cleaning Your Plant

Take each leaf between two soft tissue cloths and wipe off the top to reveal a healthy shine. Do this at least once a month to keep away pests and help the plant soak in more light!

How to repot Pink Rubber Trees

Houseplants grow much slower than they would in the wild. Depending on the size of your plant and the density of the roots, this is nice to do every 2-3 years to provide fresh nutrients and encourage new growth.

  • When to repot - if the roots start to become visible outside the soil, it is time to consider repotting.

  • Pot sizing - if you want your plant to grow taller, find a nursery pot that’s 2” in diameter larger than the current pot. If you want your plant to stay the same height, you can reuse the same pot and simply change the soil.

  • Get your hands dirty - spread out newspaper on the floor, remove the plant from the pot and shake off as much of the old soil as possible so that you have clean roots. Place the plant in the center of the pot, add new soil and pat down firmly. Water the soil thoroughly and place the plant in an area with bright indirect light. Your plant will take 2-4 weeks to settle from the shock and adjust to its new home.

How to propagate a Pink Rubber Tree

There are many ways to do propagate Pink Rubber Trees, but water propagation is generally the easiest way to go about it. Follow these instructions to propagate your Pink Rubber Tree:

  • Select a small branch to propagate - Using sharp, clean scissors or shears, cut a two to three inch branch just above a node (a leaf joint) of your Rubber Tree.

  • Place in water - Find a clear glass and fill with water. Make sure only the stem of the branch is submerged, and no leaves are sitting in the water.

  • Place in a bright area and wait! - Avoid any direct sun. If desired, change the water out every few days to keep it fresh. It could take up to several weeks for your cutting to form roots.

  • Transfer to soil - After some time, you will start to see tiny white roots emerging from the cutting. Give it a few more days until the roots have grown, and then transfer to indoor potting soil. A small pot is best — no larger than 6” in diameter.

  • Keep moist - During the first few weeks, or until your plant feels firmly rooted in its soil, regularly water and drain your plant. The soil should be just barely moist to the touch at all times. Once it is rooted, you can begin to water less frequently, whenever the topsoil is dry to the touch.

Illustrations by our talented plant stylist, Kailie Barnes.


Indoor plants, potted & delivered

Premium plants paired with stylish pots, plus lifetime plant care support. Order online at leonandgeorge.com

Kentia Palm Care Guide: Everything You Need To Know

The Kentia Palm

AKA howea forsteriana

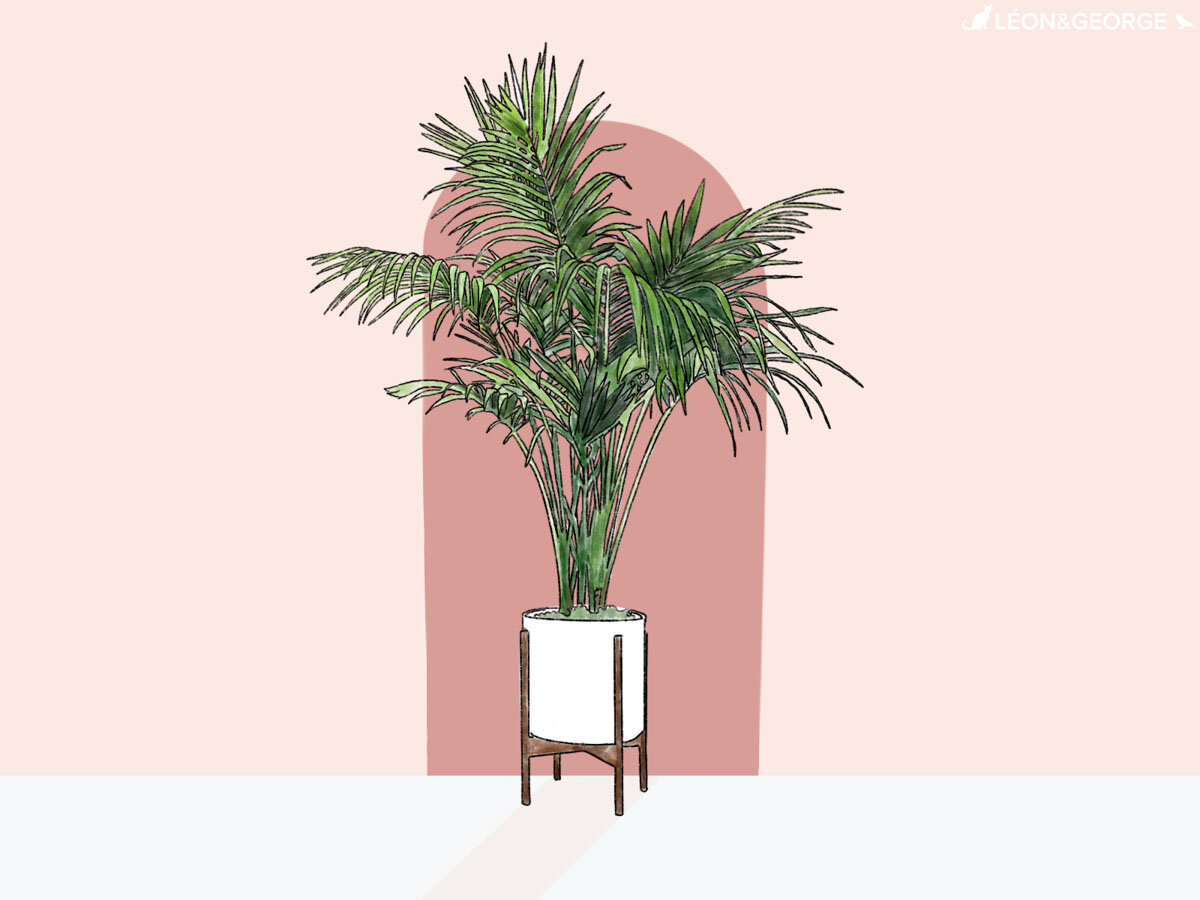
Tall, full, and majestic, the Kentia Palm is known for its lush fans of foliage and tropical island vibes. An excellent air purifier, this popular houseplant is a slow grower which blossoms new fronds from the center of its narrow trunk. Though the Kentia Palm is a relatively easy plant to care for, it does require a certain set of conditions to thrive. Read on to find simple care tips and solutions for how to successfully care for and grow a Kentia Palm.

How much light do Kentia Palms need?

This plant prefers medium to bright indirect light, but can adjust to medium-low light. Keep in mind that it will scorch in direct sunlight.

How to water your Kentia Palm

Keep the just slightly moist — water when the top 1-2 inches of soil is dry. When watering, take care not let the plant become oversaturated or waterlogged, and regularly mist to boost humidity levels.

How fast does the Kentia Palm grow?

The Kentia Palm is a slow grower and will take many years to reach the majestic heights it’s known for. Fertilize your Kentia Palm 1-2 times per month in the spring and summer with indoor plant food, and consider foliar feeding year round.

Common problems with the Kentia Palm

Yellow leaves - overwatered

  • Symptom - yellowing leaves

  • Cause - too much water, potential root rot

  • Remedy - Allow the soil to air out (aeration could help for minor cases) or change the soil entirely to reduce the risk of root rot. You may cut the yellow leaves off at the base.

Brown tips- underwatered

  • Symptom - leaves turning yellow or brown at the tips

  • Cause - most likely underwatering, but could also be a result of too much fertilizer

  • Remedy - Be sure to keep a consistent watering schedule to ensure the plant’s soil does not dry out too much between waterings. You may also mist the plant weekly to boost moisture levels, and make sure it is not placed near any air vents, heaters, or air conditioners.

Heavily drooping leaves - overwatering or underwatering

  • Symptom - fronds drooping more so than usual

  • Cause - overwatering or underwatering

  • Remedy - Depending on your watering schedule, this could be either! If you suspect it’s underwatering, take your plant out of its decorative pot and place outside or in a bathtub or shower to give it a deeper watering, allowing all the roots to drink evenly. For overwatering, follow the instructions above.

How to maintain a beautiful and healthy Kentia Palm

Take care of your Kentia Palm and it will take care of you! Below are simple tips to continue caring for and growing your Kentia Palm over time.

Pruning your Kentia Palm

Kentia Palms don’t love to be tampered with too much. If you have yellowing or old fronds, you may cut them at the base with clean, sharp pruning shears. Otherwise, avoid pruning.

Cleaning your plant

Take each frond between two soft tissue cloths and wipe off the top to reveal a healthy shine (also helps the plant soak in more light!). Regularly misting will also help to keep your plant clean and dust-free.

How to repot a Kentia Palm

Avoid repotting the Kentia Palm unless absolutely necessary (risk of root rot, for example). Kentia Palms have delicate roots and do not like to be repotted.

  • When to repot - Only when your plant is at risk of root rot

  • Pot sizing - if you want your plant to grow wider, find a nursery pot that’s 2” in diameter larger than the current pot. If you want your plant to stay the same size, you can reuse the same pot and simply change the soil.

  • Get your hands dirty - spread out newspaper on the floor, remove the plant from the pot and shake off as much of the old soil as possible so that you have clean roots. Be gentle with the delicate root ball! Place the plant in the center of the pot, add new soil and pat down firmly. Water the soil thoroughly and place the plant in an area with bright indirect light. Your plant will take 2-4 weeks to settle from the shock and adjust to its new home.
How to propagate the Kentia Palm

The only way to propagate a Kentia Palm is by germinating the seeds. However, this is incredibly difficult to achieve indoors, and unfortunately, propagating is best left to growers.

Illustrations by our talented plant stylist, Kailie Barnes


kentiapalm.jpg

Indoor plants, potted & delivered

Premium plants paired with stylish ceramics, plus lifetime plant care support. Order online at leonandgeorge.com

Philodendron Brasil Care Guide: Everything You Need To Know

PHILODENDRON BRASIL

AKA variegated heartleaf philodendron

The Philodendron Brasil offers a colorful twist on a classic houseplant and is surprisingly easy to care for. With heart-shaped leaves in different shades of green and yellow, this trailing plant earned its name thanks to the close resemblance to the Brazilian flag. Read on to learn everything you need to know about taking care of your Philodendron Brasil from the amount of water it needs, its light requirements, and how to overcome the common issues you might encounter along the way.

What type of light does the Philodendron Brasil need?

While it can survive in low light conditions your Brasil will show its variegation best in medium to bright indirect light. Be careful not to give them too much sun though, placing them in direct sunlight can cause leaf burn.

How to water your Philodendron Brasil

Water about once a week and allow the topsoil to dry out between waterings. Avoid overwatering, and note that your watering schedule may be less frequent during winter months.

Is the Philodendron Brasil a fast grower?

This plant is indeed considered a fast grower. You can either keep you Brasil in a hanging pot and let its leaves trail down or you can train it to grow upwards by using supports. Fertilize your Philodendron Brasil 1-2 times per month in the spring and summer with indoor plant food, or foliar feed year round.

Common problems with Philodendron Brasils

How to maintain a beautiful and healthy Philodendron Brasil

Philodendrons are known for being easy to care for, read on for tips on how to keep yours looking full and colorful over time.

Pruning Philodendrons

Remove dry or dead leaves all year round, but save any major pruning for the spring and summer months. When pruning your philodendron, use sharp, clean shears and cut any excessive growth at the base of the stem.

Cleaning Your Plant

Take each leaf between two soft tissue cloths and wipe off the top to reveal a healthy shine (also helps the plant soak in more light!).

How to repot your Philodendron

Houseplants grow much slower than they would in the wild. Depending on the size of your plant and the density of the roots, this is nice to do every 2-3 years to provide fresh nutrients and encourage new growth.

  • When to repot - Philodendrons are known for their rapid growth. You’ll know when it’s time to repot yours when its roots are growing our of the pot.
  • Pot sizing - if you want your plant to grow outwards more, find a nursery pot that’s 2” in diameter larger than the current pot. If you want your plant to stay the same height, you can reuse the same pot and simply change the soil.

  • Get your hands dirty - spread out newspaper on the floor, remove the plant from the pot and shake off as much of the old soil as possible so that you have clean roots. Place the plant in the center of the pot, add new soil and pat down firmly. Water the soil thoroughly and place the plant in an area with bright indirect light. Your plant will take 2-4 weeks to settle from the shock and adjust to its new home.

How to propagate a Philodendron Brasil

If you’re interested in making more of your Philodendron Brasil either for yourself or a friend rest assured that propagating this plant is very easy. Though there are many ways to do this, water propagation is generally the easiest way to go about it. Follow these instructions to propagate your Philodendron Brasil:

  • Select a stem to propagate - Using sharp, clean scissors or shears, cut an inch or two below a node(these are the areas where leaves attach to the vines).

  • Place in water - Find a clear glass and fill it with water. Submerge only the stem of the vine, any leaves that are sitting in the water will rot!

  • Place in a bright area and wait! - Avoid any direct sun. You may need to change the water out every few days to keep it fresh. It usually takes just a few days for the root to start growing.

  • Transfer to soil - After a week or so, transfer to indoor potting soil. A small pot is best — no larger than 6” in diameter.

  • Keep hydrated - During the first few weeks, or until your plant feels firmly rooted in its soil, regularly water and drain your Philodendron. The soil should be just barely moist to the touch at all times.


brasil.jpg

Philodendron Brasil

An incredibly resilient tropical plant, this colorful variation of the heart-leaf philodendron is the perfect choice for beginners.

How to Care For and Grow Your Red Congo Philodendron

Red Congo

AKA philodendron congo rojo

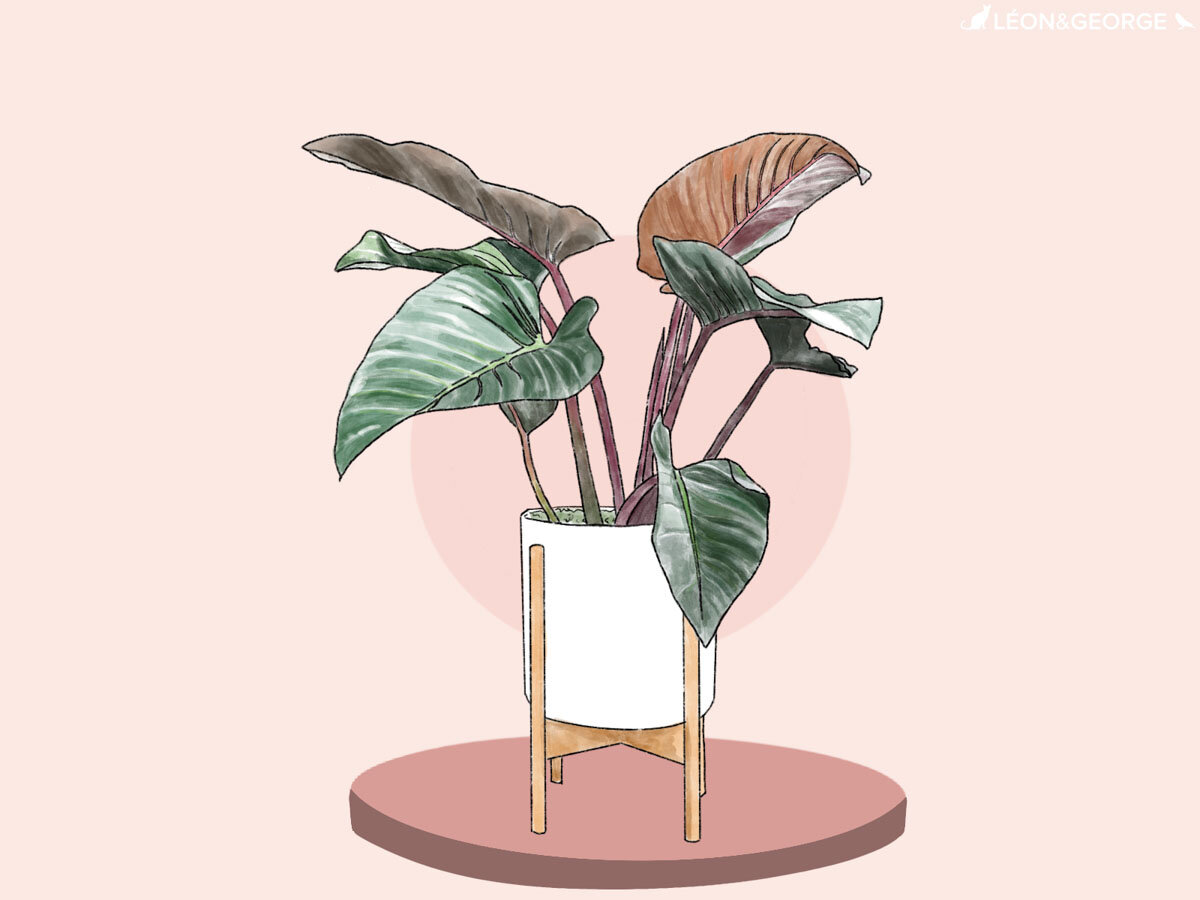
With stunning green and crimson leaves sprouting from a single central stem, the Red Congo is at once as elegant as it is lush. Learn the basics of Red Congo plant care including light requirements, watering frequency, and how to troubleshoot common problems you may encounter along the way.

What type of light do Red Congos need?

As members of the philodendron family, Red Congos prefer bright indirect light, though they can adjust to medium levels of light as well.

Keep them out of harsh direct sunlight, as too much of it can burn their leaves.

How to water your Red Congo

Let your Red Congo dry out between waterings. Water thoroughly when topsoil is dry, usually once a week.

Avoid overwatering, and note that your watering schedule may be less frequent during winter months.

Are Red Congos fast growers?

Red Congos, unlike other philodendrons, are not climbers but instead “self-heading” plants, meaning they grow new foliage in layers from a single stalk.

They are relatively slow growers and can reach up to four feet tall indoors.

Fertilize your Red Congo 1-2 times per month in the spring and summer with indoor plant food, or foliar feed year round.

Common problems with Red Congos

Leaves turning yellow or brown

Yellow or brown leaves on the Red Congo philodendron is most likely a sign of imbalance between water and light, and usually it is an issue of too much water and not enough light. Make sure your plant is getting the right ratio of each. Keep in mind that if your plant does not get lots of bright indirect light, you will water it less than if it does.

Remember that overwatering can lead to more severe ailments and that may eventually require you change the soil.  

Leaves or stems wilting

When philodendrons like the Red Congo wilt, it is again most likely a sign of imbalance between water and light (i.e. too much water, not enough light). However, it could also be a sign of dehydration — if you check the soil and it is bone dry (or you know the plant hasn’t been watered in a long, long time), try giving it a thorough shower: water it in a dish or bathtub so that it may sit in water and “drink” for a couple hours or up to a day.

Dropping leaves

The Red Congo can sometimes mysteriously begin to drop its leaves. In most cases, this is usually a sign of an environment that is too cold for this warm-loving philodendron! Make sure the Red Congo lives in a room that does not drop much below room temperature (~68 degrees Fahrenheit) , or that the plant is not too close to any air conditioning units or vents.

Leaves and stems becoming leggy

When plants lose their fullness or bushiness and grow long, spindly stems (they become “leggy"), this is a clear sign that the plant needs more light. While philodendrons can adjust to medium levels of light, if they are placed in a very low light area they may become leggy as they literally reach for more light. If you aren’t sure about the light you have in your home, check our lighting guide for more details.

How to maintain a beautiful and healthy Red Congo

Take care of your Red Congo and it will take care of you! Below are simple tips to continue caring for your Red Congo over time.

Pruning Philodendrons

Remove dry or dead leaves all year round but save any major pruning for the spring and summer months. Red Congos generally shed old leaves every month or two, so when you see a single leaf looking sad, simply remove it and move on! When pruning your Red Congo, use sharp, clean shears and cut any excessive growth at the base of the stem.

Reshaping Your Plant

If your Red Congo gets a few minor brown spots on the leaves (from overwatering, for example), you can easily reshape the leaf using scissors to cut away the unattractive areas, following the natural shape of the leaf.

Cleaning

Take each leaf between two soft tissue cloths and wipe off the top to reveal a healthy shine (also helps the plant soak in more light!).

How to Repot the Red Congo

Houseplants grow much slower than they would in the wild. Depending on the size of your plant and the density of the roots, this is nice to do every two to three years to provide fresh nutrients and encourage new growth.

  • When to repot - As they are slow growers, Red Congos do not need frequent repotting. Repot once every two to three years to give your plant fresh nutrients.

  • Pot sizing - if you want your plant to grow taller, find a nursery pot that’s 2” in diameter larger than the current pot. If you want your plant to stay the same height, you can reuse the same pot and simply change the soil.

  • Get your hands dirty - spread out newspaper on the floor, remove the plant from the pot and shake off as much of the old soil as possible so that you have clean roots. Place the plant in the center of the pot, add new soil and pat down firmly. Water the soil thoroughly and place the plant in an area with bright indirect light. Your plant will take two to four weeks to settle from the shock and adjust to its new home.

How to propagate a Red Congo

Propagating the Red Congo requires some patience, but like most propagations, is fairly simple and straightforward! Follow these instructions to propagate your Red Congo:

  • Select a stem to propagate - Using sharp, clean scissors or shears, cut a stem from the very base of the central stalk.

  • Place in water - Find a clear glass and fill with water. Make sure only the stem is submerged, and no leaves are sitting in the water. You may also choose to first dip the cutting in rooting hormone, as this will increase the chances and speed of the cutting forming its own roots.

  • Place in a bright area and wait! - Avoid direct sun, and be patient! New roots may take a few weeks to begin forming.

  • Transfer to soil - After the roots are at least two inches long, transfer to indoor potting soil. A small pot is best — no larger than 6” in diameter.

  • Keep hydrated - During the first few weeks, or until your plant feels firmly rooted in its soil, regularly water and drain your Red Congo. The soil should be just barely moist to the touch at all times.

Illustrations by our talented plant stylist, Kailie Barnes.


Ex-Red-Congo-Coral-Light.jpg

RED CONGO

With wide, oval-shaped leaves and deep scarlet stems, the Red Congo is one of the more unique and elegant members of the philodendron family.