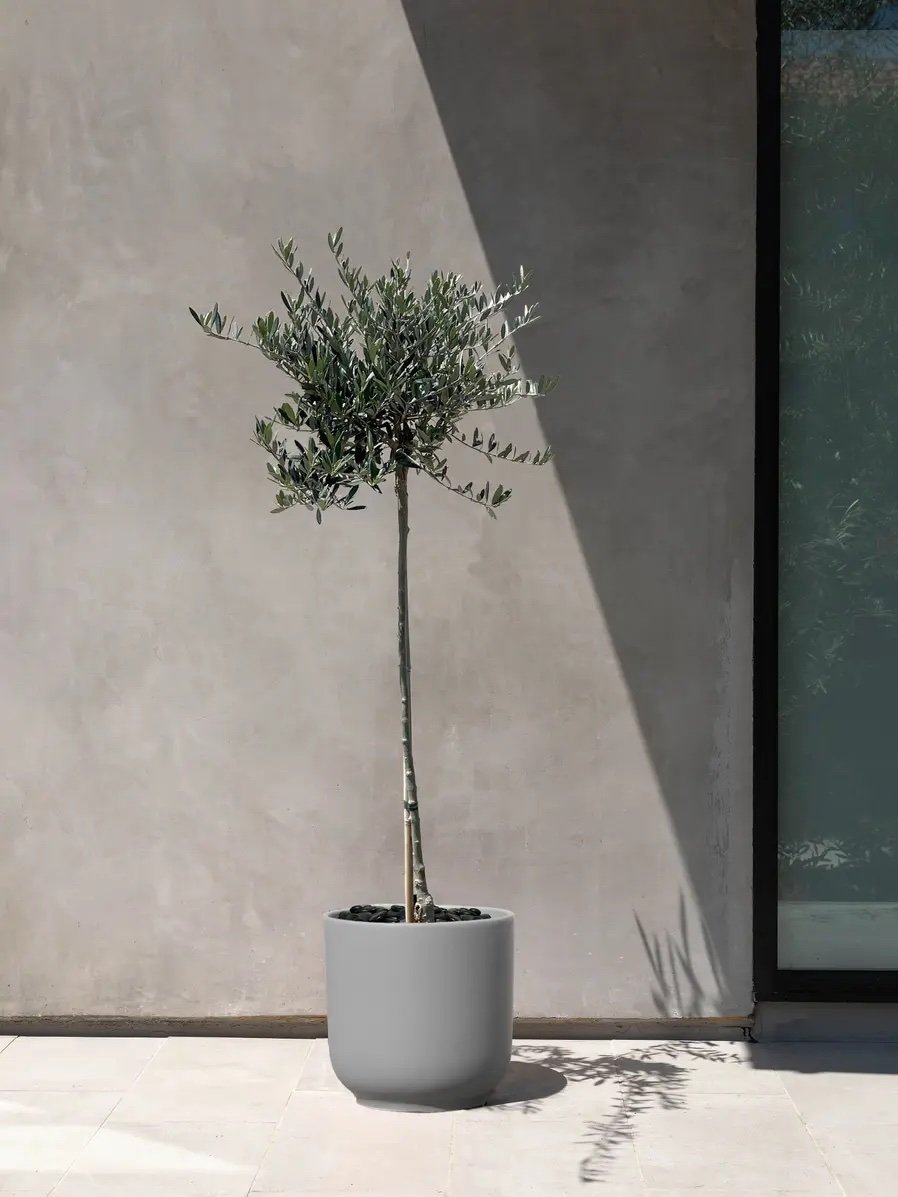
Posts in Plant Care
How to Care For and Grow Your Sago Palm

SAGO PALM

AKA Cycas revoluta

How to care for and grow the Sago Palm

Sago Palms, Cycas revoluta, are gorgeous, vibrant statement plants.With feathery light, high-gloss fronds and a richly textured trunk, they add a lush and lively aesthetic to outdoor spaces. Sage Palms are low-maintenance, with a preference for bright light and partial shade, and they are slow growers, so they rarely need repotted. Read on to learn more about how to care for your Sago Palm and watch it flourish! 

Light

Prefers ample sunlight and partial shade.

Water

Check moisture of topsoil every 7-10 days, and provide three cups of water when top two inches of soil are dry to the touch. Avoid overwatering. 

Growth

Sago Palms are slow growers, but have been known to live for hundreds of years.

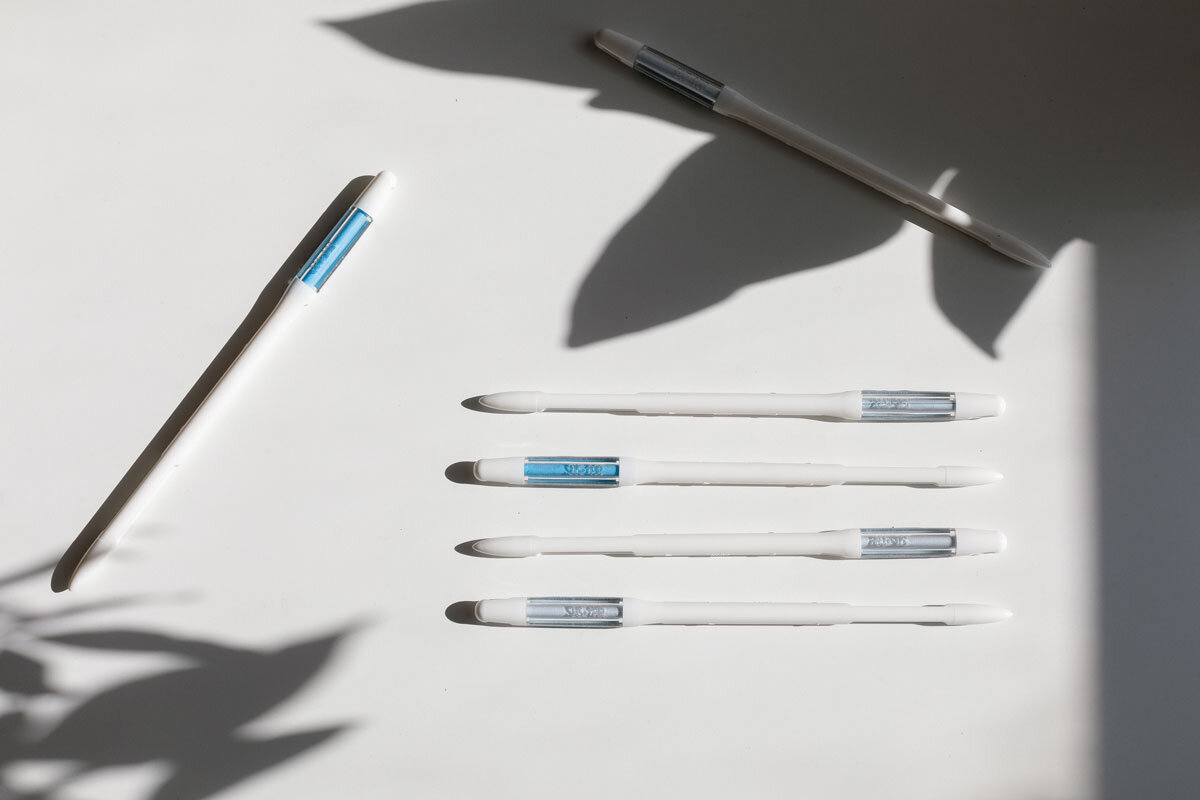
Never overwater your plants with these sleek and simple moisture meters.

leon-and-george-moisture-meters.jpg

MOISTURE METERS

Finally, a moisture meter that actually works. Tested by our very own Plant Doctors, all orders of Large or Extra Large Léon & George plant sets include a moisture meter

$24-$29/pack

Common problems with Sago Palms

Scale and Mealybugs

Symptom: Foliage that appears unhealthy, the presence of small brown, gray, black or white insects that may look like a scaly covering. 

Cause: Scales or mealybugs.

Remedy: While wearing gardening gloves, clean the plant thoroughly with an insecticidal soap like L’Original. If necessary, a scrub brush can be used to remove pests thoroughly. Treat the entire plant with a spray insecticide or apply insecticidal granules to the plant’s soil.

Limp, Saggy Foliage

Symptom: Foliage that appears exhausted, sags and is not robust. 

Cause: Too much water. 

Remedy: While wearing thick gardening gloves, grasp Sago Palm by the strongest point of its trunk. Be cautious and support the plant as you lift it, still inside its plastic nursery pot, out of the ceramic pot. 

If standing water has collected in the ceramic planter, dump it out. Still in its plastic pot, place the Sago Palm in a spot that receives ample direct sunlight and allow it to dry out thoroughly. Do not give the palm more water until its topsoil is completely dry to the touch. At that point, you can return it to its ceramic pot. 

Brown or Yellow, Frizzy Foliage

Symptom: The Sago Palm’s foliage is discolored, frizzy and appears to be unhealthy. 

Cause: A deficiency of the manganese micronutrient.

Remedy: Manganese sulfate can be applied to the soil of your palm. Do not confuse manganese sulfate for magnesium sulfate. Purchase the Manganese sulfate from a garden or home improvement store. One to two ounces of manganese sulfate will be sufficient for your palm. You will not need to utilize other fertilizers or plant foods.

Shop the Sago Palm at leonandgeorge.com

How to care for and grow philodendron brasil

How to maintain a beautiful and healthy Sago Palm

Sago Palms are wonderfully simple. They don’t need much-- a light touch is their favorite approach.

  • Pruning: Always use sturdy gardening gloves, and only remove lower foliage. Do so by cutting the fronds as close to the trunk as possible with clean, sharp shears. 

  • Fertilizing: Sago Palms do not need standard fertilizer but may benefit from manganese if they are exhibiting symptoms of a deficiency.

  • Do not overwater, and do not water directly onto the trunk. Water in a circular pattern toward the edges of the plant. 

Shop the Sago Palm at leonandgeorge.com

How to propagate a Sago Palm

Sago Palms grow clones from their parent plant over time. These new plants are known as offsets or “pups.” Sagos can be propagated by removing the offsets. With mature plants, the offsets can often be removed with a gentle tug.

Propagating with Offsets:

  • While wearing sturdy gardening gloves, tug, “snap” or cut the offset free at the point where it meets the parent plant. An offset of 4 to 5 inches in length is best.

  • Remove the leaves and roots from the offset, and, while wearing gloves, rinse it thoroughly in water.

  • Place the offset in a shady spot outdoors for a week. The area that has been cut will develop a callus, and you want that. It protects the plant from illness.

  • Fill a pot with a well-draining soil, at least two inches in diameter larger than the diameter of the offset.

  • Plant the offset with its bottom half beneath the soil and its top off entirely outside of the soil. 

  • Water the soil thoroughly (not the offset itself!) and keep it in shade outdoors.

  • Within 6 to 12 months, the offset will display both leaves and roots.

  • Re-pot the new Sago in a pot at least two inches larger in diameter than the palm itself. Use cycad soil. 

  • Keep the young Sago Palm in a spot outside that receives bright light as it grows and adapts.


Sago Palm

A unique and easy to care for plant well-suited for the outdoors.

Introducing L'Alchimie Botanique
LAB_COLLECTION.JPG

At our brand’s inception, we chose to become a purveyor of premium plant sets because of our belief that gorgeous, healthy plants are the key to a transcendent indoor space: an aesthetic focal point, a source of clean air and natural detoxification, and a mood-boosting, tranquility-enhancing addition to carefully curated interiors.

Now we expand beyond the plant set, to offer a lifestyle collection of goods designed to provide a myriad of rich sensory experiences.

Introducing L’Alchimie Botanique, a line of apothecary elixirs that champion the inherent luxury of simple, natural products. We disrupt the status quo of fertilizers, insecticides and household cleaners, which often rely heavily on chemical ingredients, and offer aromas that won’t wear on your senses, as so often happens with synthetic scents. After all, nobody gets sick of the smell of an olive grove in late afternoon, a profusion of fresh lavender, or wall of undulating blossoms.

We hope you enjoy discovering this new collection as much as we enjoyed creating it, and that it not only completes but also enhances your plant's healthy diet of light, water and love.

L’Original

A natural leaf shine, insecticide and fungicide for all living plants.

Shop now →

Boost Vitaminé

A specially-formulated liquid fertilizer made with nature's most potent nutrients.

Shop now →

Potion Magique

A nutrient-filled foliar feed mist, with a fresh, mood-enhancing aroma.

Shop now →

Why Are My Philodendron's Leaves Curling?
Philodendron Brasil Foliage

Why are my Philodendron’s Leaves Curling?

Philodendrons are such gorgeous accent plants. With their playful heart-shaped and often variegated foliage and tendril-like vines, they have a lush and nostalgic aesthetic that blends well with any space. They’re an easy-care plant variety, which is great! But when they’re in less than optimal health, they can exhibit frustrating curling to their leaves. Read on to learn why, and what you can do about it!

Underwatering

Underwatering is definitely the number one cause of curling and dryness to Philodendron foliage. Be sure to water your plant whenever its topsoil is dry. You can gauge this by lifting off some of your plant’s decorative moss and sticking your finger about two inches down in its soil. If the top two inches of soil are dry, it’s time to water. You will likely find that the soil dries out about every seven to ten days, but this will vary from season to season, so it’s important to check the soil manually.

Lack of Moisture from Atmospheric Dryness

Philodendrons appreciate being misted, especially during the driest months of the year. If you notice curling foliage on your plant, mist it up to three times weekly. You can utilize a watering can that has a mister attachment, like this one here, or buy a mister locally from a nursery or home supply store. Additionally, air conditioners and heaters can both cause spaces to become dry, so be mindful of your plant’s placement in regard to appliances like these. It may need to be moved.

Cold Environment

Philodendrons are also sensitive to cold. There’s not much you can do about the temperature changes brought on by the seasons, but be sure to keep your plant in a space that has a consistent temperature. Move it away from anything that might cause drafts, which can get the plant cold. That means keeping your plant away from frequently opened and closed doors, air conditioners and fans.


Philodendron Brasil - Scandinavian_black.jpg

Philodendron Brasil

A lush and resilient tropical plant, the Philodendron Brasil features heart-shaped leaves, and is a low-maintenance plant variety with a flexible disposition and tolerance for low light and sporadic watering.

The 10 Commandments of Potted Fruit Tree Care

Curious about owning a potted fruit tree?

Caring for fruiting trees like Meyer lemon trees or olive trees is a rewarding and exhilarating experience. But the care that these plant varieties require is a little different from your standard flowering plants or ornamentals. It's essential to maintain houseplants that thrive, especially when they can bear fruit.

Potted Fruit Trees, including evergreen varieties, have the potential to reward you, not only with burgeoning, fragrant blossoms but also with actual ripe fruit. Whether this is your end goal, or just a pleasant byproduct of these aesthetically enchanting plants, perhaps reminiscent of olives waiting to be turned into oil, you’ll want to care for them according to some basic tenets. Read on, and be inspired!

1. Give them all the light

Fruit trees need bright sunlight to thrive. Ample, direct sunlight is their main source of energy, and everything from their photosynthesis to the lushness of their foliage to blossoming and pushing forth fruit depends on it. These plants do best in full sun but will tolerate some shade. Place your plant in an area that receives as much direct light as possible—most fruit-bearing plants need a minimum of 4-6 hours a day of direct sunlight. Regular pruning can also help in ensuring the plant gets adequate light and maintains healthy growth.

2. Water regularly and healthily

All plants need water to survive, but fruiting plants often require more water than standard indoor houseplant varieties. However, it's essential that the soil is well-drained to prevent root rot. Higher temperatures, especially if the plant is placed outside, direct sunlight, and features of the weather, like wind, all affect the rate at which your plant uses the water you give them. Some fruiting plants may also be drought-tolerant, meaning they can withstand periods without water better than others, but it's still crucial to monitor their moisture needs closely. Both of our potted fruit trees, Olive and Meyer Lemon, should be watered when their top two inches of soil are dry to the touch. More on that later, but to start off, plan on checking those moisture levels regularly. 

3. But Beware of Overwatering

We know, we know. Determining how much water to give your plants, and how often, can feel like baffling arithmetic. Give them water, but not too much, lest you awaken some monster in the roots of your plants. But we can simplify it for you: if the topsoil of your potted fruit tree is wet, it does not need more water yet. We know that it can be tempting to douse it anyway out of boredom and the wild love and longing to connect that all of us plant folks feel with our green friends. But re-channel that energy into...

Never overwater your plants again with these sleek and simple moisture meters.

leon-and-george-moisture-meters.jpg

Moisture Meter

Finally, a moisture meter that actually works. Tested by our very own Plant Doctors, all orders of Large or Extra Large Léon & George plant sets include a moisture meter.

$24-$29/pack

4. Probe That Soil!

At Léon & George, we are avid fans of sticking our fingers in dirt. And it’s not just because we’ve never fully matured out of our sandbox days-- it’s because probing your plant’s soil truly is the best way to measure its moisture and determine if it needs water. When planting in pots, choosing the right soils is essential, especially if you're aiming for a Mediterranean feel, which often requires specific soil types.

If you’re squeamish, wear a gardening glove (we’ve never been ones to turn down an opportunity to accessorize). But do stick your finger down into the top two inches of your plant’s soil-- at least once weekly is best— and gauge its moisture. This hands-on method also allows you to detect any pests early on, ensuring that your plants remain healthy and vibrant.

If the top two inches of soil are dry, rejoice! It’s time to water, and you can use another fun accessory, like a sweet watering can. 

5. Don’t Overthink It

Ah, our favorite tenet of all. So easy to say and so challenging sometimes to truly practice. The fruit trees on offer at Léon & George are low-maintenance by nature. They need only a few things to thrive, like light, water, love, and occasional plant food. 

It can be hard not to get a little meddlesome with your plants. Are they happy? How do you know, since they can’t talk? They look happy, but are they for sure? These concerns are totally normal, and we experience them, too. Still, for the good of your tree, keep it simple and avoid

  • Plant Food Spikes. Fruiting trees want food in liquid form. So say chin chin and offer them their fertilizer in a draught (aka, water soluble) rather than a spike. 

  • Musical Chairs. We love re-arranging decor, but this practice is best exercised with things that are, well, not alive. Your plant will not appreciate being shuffled about regularly. So find a spot that satisfies its lighting needs, and stick with it. Your plant wants nothing more than to “bloom where it’s planted.”

  • Repotting just for fun. Especially during the warmer months, it is not advised to re-pot your plant. Summer is the time of fastest growth for fruit trees, and they want to direct their energy toward that growth, rather than toward adjusting to a new container. So don’t throw a hitch in your plant’s giddy-up unnecessarily by attempting to repot during the summer. Instead, sit back and watch as it manifests gorgeous growth for you!

6. Watch Out For Bugs

It’s unlikely that your plant will experience any issues with insects. After all, olive trees are naturally pest resistant. Thank you, Mother Nature! Still, there are easy ways to eradicate insects should you experience an unexpected visitation. 

There are plenty of pest-control products for fruiting outdoor plants available, and you can use them with confidence, because they will not have an adverse affect on your plant. If you prefer to explore an all-natural solution, neem oil is a great alternative, and you can learn all about it and other natural pest remedies here. Just make sure not to apply neem oil to your tree on particularly sunny days, which can cause leaf scorching, not unlike the sunburn we’d get if we oiled up on a super-hot day.

7. Be Patient

Can’t wait until your potted evergreen tree, perhaps an Olea europaea, proffers a tumble of olives for your martini? We get that! But gardening is a meditative pastime. It takes time, lots of light, fertilizing during the growing season, and consistency for fruit trees to bear fruit, and it can sometimes take up to a few years. In the meantime, be patient with your tree, enjoy its grace, its gorgeous silhouette, and the strength of its branches. Every phase of a plant’s growth is beautiful, and if you learn to enjoy them all, you will never be disappointed. Your Meyer lemon bars will come in time. Until then, enjoy every moment of your plant’s evolution. After all, it’s because of your love and care that it is growing at all.

8. Treat Overwatering Briskly

We’re not pinning this on you-- freak rainstorms have been known to occur, as have overzealous garden hoses. So not to worry, if you’ve overwatered, there is a simple solution: it just requires a little elbow grease.

Your plant is in a plastic nursery pot, which is situated within its ceramic pot on top of a level consisting of a foam block. Using containers that have drainage is adequate for plant growth, and this system helps ensure just that. Don your gardening gloves and grasp your plant as low as possible on the base of its trunk. Be careful to support the plant as you lift it, still within its plastic pot, out of the ceramic planter.

See standing water in the ceramic pot? Say good riddance and dump it out! Then leave your plant, still clad only in its plastic pot, in a sunny spot to dry. Don’t water again until its top two inches of soil are dry to the touch, at which time you can return it to its ceramic pot.

9. Tune In To the Rhythm 

Unsurprisingly, your fruiting plants will respond to seasonal changes. These plants are often fast growers that produce fruit when given the right conditions. And when the weather beckons you to the beach, tempts you with a summer treat, or calls for celebratory fireworks, it’s also signaling to your plants to grow, baby, grow!

During spring and summer, your fruit trees will want to be fed plant fertilizer about every two weeks. It's essential to fertilize your plants consistently during these periods. Your tree won’t want to be repotted, and it will desire more water. So if you’re reaching for your Evian facial spray, your plant might crave its equivalent. Probe its and allow soil to dry out to be sure before watering.

The same logic goes for colder months. If visions of sugarplums are dancing in your head, your plant is likewise ready to dream and rest. And if (and only if!) temperatures are freezing or below freezing, your plant will want to go inside, just like you.

10. A Word on Winter and Frost

Citrus trees, with their ornamental stems and vibrant blooms, are particularly vulnerable to frost and should not be left outside in freezing or near-freezing conditions. As autumn turns colder and if your location experiences freezing temperatures during the winter, you as a gardener will need to bring your tree inside, either into a garage or inside your home. The tree will go dormant during the winter. During this time, its stems might seem less lively and it may not be in its blooming best. But don’t worry! It’s perfectly natural, and the plant will awaken and revive as the season moves into spring.

We understand that even though our fruiting tree collection is right outside your door, it’s still a new frontier. Don’t be shy- we’re here to help! Our Plant Doctor service offers unlimited guidance for your Léon & George plants. So if you have questions that haven’t been answered here, just reach out. Log into your Léon & George account, upload photos of your plant as a whole and close ups of any areas of concern, and tell them a bit about what you’re seeing. Good things happen when we work together, and we answer inquiries punctually and thoroughly. 


Outdoor collection - blog.jpg

FRUITING TREES AND BUSHES BY LÉON & GEORGE

Luxurious greenery for vibrant, brightly lit spaces. Order online at leonandgeorge.com

Why Are The Tips Of My Snake Plant Turning Brown?
Snake plant brown tips

Why are my the tips of my Snake Plant turning brown?

Snake plants are notoriously resilient plants, however, like all plants they may experience a little discomfort depending on their environment . There are a number of reasons why your Snake plant might be browning. But not to worry, it's very likely that there are no serious issues at play. Take a look below for causes of browning tips, and find a solution that will help your Snake plant achieve greatness!

Inconsistent Watering

If you find that the tips or stalks of your Snake plant are browning, there's a chance that you could be overwatering or underwatering your plant. A simple inspection will let you know which is happening. 

If the Snake plant’s soil is soggy and waterlogged, that means that your Snake is getting too much to drink! Remedy this by waiting for the soil to completely dry out, which can take between ten days and two weeks, then you may water your plant again.

If the Snake plant’s soil is dry, then it could be that your plant is in need of some water. To test the moisture of your plant, you can use a moisture meter, which will help you maintain a healthy and regular watering schedule, which will aid in keeping your Snake’s tips from browning.

Too Much Sunlight

Snake plants may be hardy, but there is a limit to how much sunlight and heat they can handle. Just like you, excessive heat or sun can make your plant uncomfortable or stressed. If your snake plant sits by a window, or simply in a spot that gets a lot of sun, this could be the reason your plant’s tips are browning. If this is the case, you can move your plants to another spot in your house where your plant will get slightly less direct sun. You can monitor it over time to make sure it’s happy and thriving! 

Pests

The possibility of bugs can be an issue for many plants, but don’t panic! There are multiple ways you can treat a pest issue with your Snake plant.

Inspect your Snake plant’s leaves and soil and look for any signs of bugs in either area. They can be small, so be sure to look closely. One common type of pest you may discover is called a mealybug, which will look like little, white cotton spots on the stalks of your Snake. They are considered to be sap suckers, and can slowly dehydrate your plant and steal its nutrients, which can cause browning overtime. Before treating the plant, we suggest removing it from your other surrounding houseplants while it heals, just to ensure the infestation doesn’t spread to other plants in your home.

There are multiple chemical pesticides and insecticides for treating pests, but if you would like a more natural route, you can use Neem oil. Spray it directly on the infestation sites and they will be gone within days, and you can repeat the routine if needed.

When In Doubt, Reach Out

Browning on your Snake plant is most likely not a serious health issue. However, if you are concerned that your Snake plant is showing other signs of distress, our Plant Doctor Service is here to provide guidance. Simply sign in to your Léon & George account, select “Contact Plant Doctor” and get in touch.


snakeplantvertical.jpg

Snake Plant

A popular, air-purifying succulent with a structural shape and an incredibly hardy disposition.

Repotting Plants: Our Most Common Questions, Answered

Repotting indoor plants, like this Bird of Paradise, is a simple process.

Repotting plants may seem like a scary endeavor if you’ve never gotten your hands dirty, but anyone who’s tried it will agree that it’s not only simple but also quite fun and enjoyable as well! Learn how to repot, when to repot and more with this simple guide.

When SHOULD I REPOT MY PLANT?

When it comes to indoor plants, you should repot once every one to two years. However, sometimes your plant may also send you signals that it’s time to repot. Here are some signs you may look for:

  • Matted roots on the soil surface, as can be common with Fiddle Leaf Figs

  • The roots are coming out at the bottom, through the drainage holes for example, not uncommon with Birds of Paradise

  • The roots are seemingly “busting” at the seams, as sometimes seen on the Snake Plant or Zanzibar Gem (and if the plant is in a plastic nursery pot, it may well break it!)

  • The roots are quite literally “pushing” the plant out of the pot

  • The plant dries out very quickly, for example in a matter of days

WHAT ARE SOME OF THE BENEFITS OF REPOTTING MY PLANT?

There are many benefits to repotting your plants, and that’s why we recommend doing so every 1-2 years, even if you don’t plan on sizing up to a larger planter. Some of the benefits of repotting include:

  • More room for plants’ roots to grow

  • Fresh nutrients in the soil

  • Better airflow in fresh soil

  • An opportunity to remove dead or dying roots

What time of year should I Repot MY plant?

The best time of year to repot your plant is in the spring or summer, as this is when plants are actively growing. That said, is not the end of the world if for whatever reason you need to repot in the middle of winter!

HOW DO I REPOT MY PLANT?

Before repotting your plant, make sure you have the necessary basic materials to repot, like fresh, indoor potting soil. a new bigger pot if desired and sharp, clean shears.

Our Deluxe Repotting Kit is a great place to start if you have a large or XL Léon & George plant that needs sizing up.

Once you have all your materials, when your plant is dry or before it's next watering, follow these simple instructions:

  1. Remove the plant from its pot. For smaller plants, you can do this by simply turning over the pot and letting the plant slide out. For larger plants, you may need to gently coax it out of the pot (pro tip: spread newspaper over the floor for easy clean up!). If your plant is difficult to remove from the pot (the roots are twisting out the drainage holes), you may need to simply cut these roots off to get it out.

  2. Shake the soil off the roots, removing about half of the old soil. You may need to gently detangle some of the roots to do this. Don’t panic if some of them rip or break. You may also prune some roots, especially if you are planning on potting it in the same pot as before.

  3. Pour a couple inches of fresh potting soil into the pot and pat down so it’s firm.

  4. Place the plant in the pot and fill with more soil until it’s secure in place and standing straight. Pat down again until firm.

  5. Fill with soil to the top of the pot, but make sure to leave about an inch so that water does not overflow when you water your plant.

  6. Water thoroughly and let the plant completely drain.

Voilà! You’re done. Remember that your plant may be a little unstable the first few weeks in its new pot, so take care when moving it back to its home.

WHAT IS THE Best Potting Soil for Indoor Plants?

You don’t need any special type of potting soil for most indoor plants. Any organic potting soil labeled for indoor plants will do. Certain plants, such as succulents and cacti, may need a fast-draining potting soil, but generally speaking the majority of popular houseplants will do just fine with regular indoor potting soil.

Do you have to repot your plant?

Our Plant Doctors receive many enquiries about when to repot plants, or if it’s an absolute must for the plant to thrive. The truth is that most indoor plants only need repotting once every one or two years (though some slow growers can survive many years in the same pot!), and even then, it isn’t necessarily required to repot them in a bigger container.

The primary reason why we repot plants is to give them fresh, nutrient-rich soil, which can easily be done by removing the plant from its pot and shaking the old dirt off the roots. At that point, if you’d like your plant to stay the same size, you may simply repot it directly in the old pot, of course with fresh new soil. If you’d like your plant to grow bigger, you can repot it in something about two inches larger than what it was in before.

Of course depending on the plant, it could potentially survive years without repotting. But if you want your plant to thrive, think about giving it some fresh soil and even room to grow every few years!

Need help gathering the materials you’ll need for repotting plants? Our Deluxe Repotting Kit is a complete set of items to make repotting a breeze!


blogsnake.jpg

Indoor plants, potted & delivered.

Premium plants paired with stylish ceramics. Order online at leonandgeorge.com

Don't Panic! How Plants Adjust To Summertime
how plants adjust to summertime

Summer is here, and you can probably feel the weather begin to warm up. Perhaps the air is feeling a bit dry, or you’ve caved in and turned on the air conditioning (we have, too!).

Our houseplants experience changes during seasonal shifts just like we do, but caring for them during the sunniest season doesn’t have to be stressful. Read on, and be soothed! Like you, your plant doesn’t have to get a sunburn (or any other ailment for that matter). An ounce of prevention is worth a pound of cure! Here are a few things to look out for when caring for your plants in the summer.

Drooping Leaves

Alarmed because your perennially perky plant is exhibiting sulky, drooping foliage? Don’t worry, you didn’t offend them! They’re probably just thirsty. During the warmer months of the year, your plant’s moisture evaporates more quickly from its soil, so you may need to water it more frequently than you would in fall and winter. Check your plant’s moisture levels by sticking your finger in its topsoil (the 1-2 inches of soil below its layer of decorative moss) or by using a moisture meter, and be sure to water it whenever that soil layer is dry. Be in the habit of probing your plant regularly, because its moisture intake will ramp up as the temperature rises. 

Seasonal Plant Pests

As far as we know, no houseplant owner enjoys finding bugs on their green companions. They can be unnerving, gross, and yes, they can bug you out. But it’s a fact of life that when it’s summertime, and your plants are lookin’ good insects may be tempted to move into that palatial new home!

Don’t panic— there are solutions!

The first, which we employ daily at our headquarters, is our organic Black Soap spray. This all-natural soap is a potent insecticide, even as it shines your plant’s leaves and boosts its health by allowing it to photosynthesize with ease. 

The second option, and you can opt to use both simultaneously, is neem oil. Neem oil is an all-natural pest repellent and eradicator extracted from--you guessed it--the neem tree! By diluting neem oil in water and spraying it on your plant’s foliage and soil, you’ll eradicate pests without harming your plants. Other insecticides can work wonders as well, and many treat pests at the source: deep in the soil. Don’t be afraid to ask an associate at your local nursery or home supply store to guide you toward an effective indoor houseplant insecticide if you feel you need an instant fix.

Pests like spider mites love warmer temperatures and can be more commonly seen in summer.

Pests like spider mites love warmer temperatures and can be more commonly seen in summer.

Air Conditioning Distress

Don’t get us wrong, we love the AC (we live in SoCal!) And we understand that air conditioning is a necessary evil for many of us. But it can create issues for houseplants, so it’s important to give them extra care during the AC season. Air conditioning can sap much of the natural humidity out of your home environment’s air, causing your plants to become dry and experience yellowing or browning foliage. This should be combatted on two fronts: first, by diligently checking the moisture of your plant’s soil, as it will compensate by drinking more even as the dry air causes the soil’s moisture to evaporate. Secondly, this dryness should be countered by misting your plant regularly. 

Misting is a fun, safe way to commune with your plant and give it the humidity it’s missing. So mist away, and enjoy this plant care ritual! 

A Note On Drafts

It’s important to mention that in addition to lowering your space’s humidity overall, direct drafts can irritate your plant. Being faced with a constant barrage of cold, dry air is ideal for no one- and your plants are no exception. So during the summer, make sure that all houseplants are moved away from the path of direct drafts. If you’re concerned that this might alter the amount of light they receive, consult our light guide for guidance on the best spot for your plant based on its lighting requirements.

For a full list of summer plant care tips, head this way. And remember—the key to successful plant ownership is patience because after all, plants are living things that adapt and change to their environments, just like us!


largeplantcollection.jpg

Easy Care Plants, Delivered

Beautifully potted plants, plus lifetime plant care support. Order online at leonandgeorge.com

Snake Plants and Their Soggy Spots

Snake Plants & Soggy Spots

The Snake Plant or sansevieria is a member of the succulent family, making it super adaptable to almost any environment and incredibly low maintenance. Despite its easy-going attitude, there are still a few easy traps to fall prey to.

  • Soggy fronds and brown tips are a result of overwatering or an inconsistent watering schedule. With shallow root systems, they're susceptible to root rot which will cause fronds to tip over and show soggy spots.

    • To treat, first identify if root rot has occurred. If yes, trim infected roots and change the soil. If no, start decreasing the amount of water you give the plant and get on a regular schedule.

    • Brown tips can be trimmed, but leave a thin sliver of dried edge to avoid further damage to the plant.

  • Scars are common but can be easily avoided. Even though Snake Plants are hearty and can survive a wide range of conditions, they don't have the toughest skin. Any bumps or scratches will cause the skin to break and eventually scar.

    • While you can't remove the scars, eventually, they'll appear smaller as the plant grows and therefore less noticeable. Keep your plant in a low traffic area to avoid the risk of more damage.

  • Fronds that fold in on themselves is less common, but a crucial problem to remedy as quickly as possible. An infestation of a pest called Thrips is likely the cause. They're nearly impossible to see, but can be harmful to the plant if left untreated. 

    • Remove any fronds that are curled in or are suspect to infection. Wipe down remaining leaves with Neem Oil, check every few weeks and re-apply to avoid re-infestation.

large-snake.jpg

SNAKE PLANT

A large succulent and thus extremely adaptable and low maintenance – the perfect starter plant. It is also a terrific air purifier, making it a healthy and attractive addition to any indoor space.

The 10 Commandments of Snake Plant Care
Snake Plant care

If you’re reading this, you’re probably already an aficionado of the Snake Plant— and for good reason! They’re striking and sculptural, and they are renowned for their low-maintenance disposition. 

A member of the Sansevieria genus, Sansevieria trifasciata is the variety that we champion here at Léon & George. Also known as Mother-In-Law’s Tongue and Snake Tongue, the Sansevieria trifasciata is emblematic of every trait that makes this species special (That variegation! That height!).

Snake Plants are a shoo-in for any discerning plant parent seeking to enhance the aesthetic of their living space, and they’re truly as simple as 1-2-3. But like every plant, even the hardy Snake Plant has unique characteristics and needs. So read on, because we’re sharing the ten essential commandments of Snake Plant care!

1. Gentle Light is Best

Don’t worry: Snake Plants really are as tolerant of varied light conditions as you’ve heard. That being said, they don’t love the intensity of bright direct light. So if possible, it’s best to place your Snake Plant somewhere it’ll receive a good amount of indirect light. You want to keep your Snake Plant’s leaves verdant and emerald, not scorched.

2. Drop That Can: A Caution Against Overwatering

We know, you’re excited! You want to commune with your plant by stroking it, singing to it, (perhaps playing “Plantasia” to it…) and of course, by watering it. But wait! It’s important to be sure that your Snake Plant is ready to be watered. They typically only need to be watered every ten days to two weeks, and can go even longer without watering. 

Remember, the best way to know for certain that your Snake Plant is ready for watering, is to...

moisturemeter.jpg

Moisture Meters

Sleek design and simple to use, a plant tool that will tell you exactly when to water your plants.

3. Get Dirty!

It’s tempting to want to schedule the things that are important to you (ahem, Google Calendar and constant Zooms.) But going based on a calendar- or a clock- is not the best way to keep track of when to water any of your plants.

This is where getting dirty comes into the equation. Snake Plants want to be watered only when their topsoil (the top 1-2 inches of soil, beneath the decorative moss) are dry. So check your moisture levels by lifting up a bit of the Snake Plant’s decorative moss, sticking your finger into the top 1-2 inches, and determining whether it is dry or still moist. If it’s moist, hold off on watering until it dries.

4. Keep An Eye Out for Squatters- Yes, We Mean Bugs

At L&G, we take extra-special care to prepare our plants for a pristine and insect-free life. And of course, we do guarantee that our plants are lovingly cleaned and prophylactically treated for bugs before we ship them out. When bugs occur, they occur in the plant’s new environment— and it’s most common when they move in with other plants, in spaces that have higher levels of humidity. 

Snake Plants are adored by a bug called the thrip, a tiny black insect that can do damage over time. If you’re concerned your environment may have bugs, lift your Snake Plant and give it a shake over a piece of white paper. If you see that tiny black bugs have fallen off the plant, you may be unwittingly housing thrips. 

But don’t panic! You can simply remove severely damaged leaves with clean, sharp shears or scissors, spray the Snake Plant thoroughly with water, and wipe it down with a clean cloth. A follow-up regimen of neem oil or diluted, organic soap can be helpful as well. 

5. Shine On, You Crazy Sansevieria 

If you notice that your Snake Plant is lacking luster, you can return it to a healthy shine with a little TLC. Just use two soft cloths and wipe off the blades one by one, from base to tip. This also helps your Snake Plant’s photosynthesis-- less dust on the blades makes it easier for the plant to drink up light. 

6. Don’t Crack Up! 

If you notice that your Snake Plant is showing cracks on its blades, don’t worry— this doesn’t signal an issue in your care regime. Cracking in blades is a naturally occurring trait of Snake Plants. Think of them as being like the veins in Carrara marble— they denote the natural beauty of the plant. 

Léon & George Snake Plant

Léon & George Snake Plant

7. SOS- I’ve Overwatered! 

So, your Snake Plant has been overwatered. Maybe you had an overzealous plant-sitter, or maybe you didn’t want your Sansevieria to experience FOMO as you drank your weekend prosecco by her side. Don’t worry— we’ve got you.

Your Snake Plant may exhibit symptoms of overwatering by showing mushy or soggy leaves. (Trust us, you’ll know them when you see them.) If you suspect overwatering, remove your Snake Plant from its ceramic pot and its plastic nursery pot. Take a look at the soil and roots. 

If it’s a swamp down there, leave your Snake Plant out of the ceramic pot (but inside the plastic nursery pot) until at least half of its potting soil is dry. After a few days, you should be able to return the plant and plastic pot to the ceramic pot. 

Be sure to check periodically that no excess water is gathering in the bottom of the ceramic pot.

8. Patience, Patience

Snake Plants are somewhat slow growers, especially if they are in environments with low light. This can be great if you think your plant is perfectly sized at the time of its purchase! If you want your Snake Plant to grow, it will reward you in time. Just make sure you keep your Snake Plant in a spot where it receives ample indirect sunlight. You can also fertilize it in the spring and summer months for an extra energy boost.

9. Don’t Be Afraid to Repot

Snake Plants don’t need to be repotted often, but when they do, they’ll let you know! You’ll likely see that your Snake Plant’s roots are beginning to outgrow its pot. 

If you just want to freshen your Snake Plant’s soil, you can repot it in the same ceramic pot. This can be a good idea as over time, soil loses its nutrients- they’re used up by the plants to keep them growing healthy and strong. Just remove the Snake Plant from its pot and shake off as much of the old soil from its base and roots as possible. Then place the plant in the center of the pot, add new nutrient-rich soil and pat down firmly. Water the soil and place the Snake Plant in an area with bright, indirect light.

The same instructions go for re-potting in a new pot— just pot your Snake Plant into a ceramic pot with a diameter at least two inches larger than its original pot. For more information on how to repot your Snake Plant or any other plant, click here.

10. Pair Your Snake Plant With a Peer

Plants like to be grouped among other plants, and if you arrange them close to each other, there are benefits to be had- like a microbiome that regulates humidity, the simplification of your watering routine.

That being said, it’s important to be sure that the plants you’re pairing in a group have the same basic requirements for care, especially light. It’s best not to situate your Snake Plant next to another plant that needs frequent watering, because accidental overwatering of a Snake Plant can cause serious damage to the plant’s health. 

Consider situating your Snake Plant next to another easy-care plant like the Zanzibar Gem. Like Snake Plants, they prefer to be watered sparingly and can are tolerant of varied light levels.

Embrace your Snake Plant and maximize its benefits! 

Snake Plants are exceptional air purifiers. According to NASA, they are incredibly effective at filtering out environmental toxins like formaldehyde and xylene. They also convert carbon dioxide into oxygen at night, so they’re a great choice for a bedroom plant.

The Snake Plant is a newbie plant owner’s dream and an experienced green thumb’s vacation plant- they thrive with remarkably little care. So embrace your Snake, and remember the old adage: Less is More when it comes to caring for your Sansevieria. 


isaac-leon-and-george-09-2019-0546 (1).jpg

Indoor plants, potted & delivered

Premium plants paired with stylish ceramics, plus lifetime plant care support. Order online at leonandgeorge.com

The 10 Commandments of Monstera Deliciosa Care
Monstera deliciosa care

Oh, the Monstera Deliciosa! She’s been enjoying a place in the spotlight lately, but Monsteras have long been a desirable and iconic plant for stylish interiors. This sculptural plant enjoyed wild popularity from the 1950s to the 1970s, and like most things retro, she is making her mark once more!

Monsteras radiate positivity, playfulness, and an aura of vibrant growth. What many plant enthusiasts don’t realize is that they are also a flexible, easy-going plant that can adapt to almost any environment- so shop with confidence and follow these simple commandments. Your Monstera will be a joyful presence for years to come!

1. A Place Near the Sun 

The Monstera Deliciosa is tropical (native to Central America) so like many indoor tropical plants, they appreciate light and warmth, but don’t need a lot of direct light. Monsteras tend to do best in rooms where they receive bright, indirect light, but they can also adjust to medium levels. Again, they’re low-maintenance! Just be sure not to place your Monstera too close to direct bright sun. As with many tropical plants, this can cause a Monstera’s leaves to scorch.

2. Misty Mornings…In Moderation!

When warmer weather hits, many of us instinctively reach for our Evian atomizers. Your Monstera does not need to be misted, but they enjoy a touch of humidity from time to time. If you would like to bond with your plant through misting, limit misting to once weekly. Misting in the morning will ensure that the plant has time to enjoy the moisture before the temperature drops for the evening. 

3.  Don’t overwater! 

We know, we know— we say this all the time, but don’t overwater your Monstera. Monsteras like to dry out between waterings, so plan on watering your Monstera only when its topsoil is dry. Which brings us to...

4.  Get Used to Getting Dirty!

It’s tempting to want to schedule the things that are important to you (ahem, Google Calendar and constant Zooms.) But going based on a calendar- or a clock- is not the best way to keep track of when to water any of your plants. 

This is where getting dirty comes into the equation. The Monstera Deliciosa wants to be watered only when its topsoil (the top 1-2 inches of soil, beneath the decorative moss) is dry. So check your Monstera by lifting up a bit of its moss, sticking your finger into the top 1-2 inches, and determining whether it is dry or still moist. If it’s moist, hold off on watering until it dries.

leon-and-george-moisture-meters.jpg

MOISTURE METERS

Finally, a moisture meter that actually works. Tested by our very own Plant Doctors, all orders of Large or Extra Large Léon & George plant sets include a moisture meter

$24-$29/pack

5. Ga-Ga for Growth? Monsteras Like to Be Fed!

When the conditions are right, Monsteras can grow fast. And this may or may not be what you’re going for, but if you would like your Monstera to rise to meteoric heights, you can fertilize it 1-2 times a month in the warmer months of spring and summer. You can also feed it using gentle foliar feed (plant food that is misted directly on a plant’s leaves) year round. 

6. Curling Leaves? Consider a Refreshing Shower.

Monsteras will occasionally experience curling leaves if they are not receiving enough water. You can remedy this by giving your Monstera a shower. Just  take it out of its decorative pot (but keep it in the plastic nursery pot, or you’re in for something of a landslide) and place it outside or in a bathtub. Water it copiously, but let the water drain entirely before returning the Monstera to its ceramic pot. 

7. A Little Haircut

It’s normal to feel trepidation about pruning (cutting leaves or stems off of your plant). However, it’s actually great to get in the practice of pruning your plants because pruning offers so many benefits to the plant’s overall health. 

You can safely remove dead or dry leaves from your Monstera year round, by cutting them off at the base of their stem using sharp, clean scissors or shears.

Major pruning jobs (or “haircuts”) should be saved for the warmer spring and summer months, when your Monstera has the most energy to generate new growth. 

Need a little more guidance on pruning your plant? See our step by step guide here.

Léon & George Monstera Deliciosa. Photo by Apt2B.

Léon & George Monstera Deliciosa. Photo by Apt2B.

8. No Holes? No Problem! 

If you notice that your Monstera does not have holes in some of its leaves, don’t worry! This feature can take time. You’ll likely find that when your young Monstera grows up a bit and pushes out new leaves, they’re wonderfully holey. If you love the swiss cheese look and want to encourage more holes, move it to a spot that receives brighter (but still indirect!) light. 

9. Don’t Be Afraid to Repot

Again, the Monstera Deliciosa is a prolific grower. Like a B-52 with a burgeoning beehive, they long to reach toward the light! So don’t be afraid to repot. 

Monsteras are known for exhibiting aerial roots, and some may grow outside of the pot at any point in a Monstera’s life cycle. But when it’s time to repot, you’ll likely see that your Monstera’s stems have grown significantly larger, and their roots have as well. They may appear to flow outside of the pot at this point. 

Follow the directions here under “Repotting” to safely and securely repot your Monstera.

10. Consider Supporting Your Monstera with Stakes

Like your favorite friend after happy hour, your Monstera can get a little floppy. It’s part of her charm! But it can also be controlled. If you’d like your Monstera to grow with a more pronounced vertical climb, you can stake the plant.

Bamboo poles make beautiful stakes, and nurseries and home improvement stores have great options for stakes that blend into the palette of the plant and won’t disrupt the aesthetic of your gorgeous Monstera’s foliage. 

Read our full guide on how to stake the Monstera here.

Celebrate! The Monstera Deliciosa is all about positivity and joy.

In Feng Shui, Monsteras are renowned for bringing good luck (and even money!) to their owner. For guidance on all things Monstera, keep an eye on our blog, which features many posts on this beloved plant variety and is always being updated! 


isaac-leon-and-george-09-2019-0546 (1).jpg

Indoor plants, potted & delivered

Premium plants paired with stylish ceramics, plus lifetime plant care support. Order online at leonandgeorge.com

How to Care For and Grow Your Lady Palm
How to care for Lady Palm

Unique and dramatic, the Lady Palm is a head-turning statement plant that brings a touch of tropical vibes to any space she graces. Suitable for many conditions and requiring little upkeep or maintenance, this slow growing beauty is a great choice for all types of plant parents. Read on to learn how to care for the Lady Palm and keep her glowing over time.

How much light does the Lady Palm need?

The Lady Palm prefers bright indirect light, but also does well in medium levels of light. She can easily adapt to low or artificial light but will grow very slowly in these conditions.

How to water your lady Palm

Regular watering is virtually the only maintenance required for Lady Palms. Water your Lady Palm once a week or just enough to keep the soil evenly moist but not soggy. While the Lady Palm prefers a humid environment, she will withstand drought relatively well.

How fast does a Lady Palm grow?

The Lady Palm is a slow grower, and takes many years to reach taller heights. All new growth will fan out from a clump of woody stems at the base. Fertilize your Lady Palm once or twice a month in the spring and summer, always using half the recommended dose for indoor plants.

Common problems with the Lady Palm

Brown tips

Brown tips in the Lady Palm are often the result of conditions being too dry. This could be the humidity levels in the plant’s environment, or it could be an issue with watering. Check the soil — if it feels very dry, try watering more frequently to ensure it stays evenly moist. Mist your plant regularly or use a humidifier to increase humidity in the plant’s environment.

Yellow leaves

It is not uncommon to see yellow leaves on the Lady Palm, especially when it receives very little light. Keep in mind that yellow leaves are not always a sign of overall plant health, and it may just be their time to go. Yellow leaves may also indicate a lack in nutrients (fertilizer). As a slow grower, the Lady Palm needs little fertilizer, but it is still recommended to fertilizer 1-2 times per month in the spring and summer.

How to care for Lady Palm rhapis excelsa

How to maintain a beautiful and healthy Lady Palm

The Lady Palm requires little maintenance to keep it glowing over time. Read up on simple care tips to maintain its freshness, beauty, and overall growth.

  • Pruning - As mentioned above, yellow leaves will commonly appear towards the bottom of this plant, especially if it receives little natural light. Remove these leaves regularly: doing so will give your plant more energy for new growth!

  • Cleaning - The leaves of your Lady Palm will collect dust build up over time. To ensure it soaks in as much light as possible, regularly clean the leaves with a damp cloth and even better, a mild soap, which acts as a natural pest repellant.

How to grow and repot the Lady Palm

  • Growing - Lady Palms are slow growers— and this is part of what makes them so special! During spring and summer, fertilize once a month, and use half the dose recommended by regular indoor plant foods.

  • Repotting - The Lady Palm will need repotting every three to four years, but you do not necessarily need to increase the pot size. The main benefit of repotting is to give your plant fresh nutrients in the soil. Here’s how to repot your Lady Palm:

    • Remove the plant from its plastic nursery pot and shake off as much soil as you can from the clump of roots. “Tease” the root ball by gently pressing it to loosen compacted soil in the root system. Fill the plastic nursery pot about halfway with fresh indoor potting soil (you may use the same one as before, or size up if you’d like your plant to grow larger) and place the root ball inside. Surround with more soil, filling to the top and pressing down on the soil with your hands. Gently water the soil thoroughly. You’re done! Be sure to keep the soil just moist to the touch for the first several weeks to avoid any shock the plant may experience from repotting.


isaac-leon-and-george-9-3-19-3x2- (1).jpg

Indoor plants, potted & Delivered

Premium plants paired with stylish ceramics, plus lifetime plant care support. Order online at leonandgeorge.com

Where Are The Splits On My Monstera?
Monstera no holes

Monsteras With No Splits: What Gives?

This stylish and iconic plant from the art deco era has made a comeback in a big way and is more popular than ever. Though extremely beautiful, it can be picky and quickly expresses any neglect it might encounter.

One of the most common questions we get with this plant is around the splits in its leaves: what causes them, and why do they sometimes not appear? Rest assured that there’s absolutely nothing wrong with a Monstera with no splits, and know that most likely your plant does not have splits either because it is too young or because it does not get enough light. But let’s dig a little deeper to learn more.

Why Do Monsteras Have Splits?

The splits in the leaves of the Monstera Deliciosa are a naturally occurring feature called fenestration. There are many different theories around what causes fenestration but the most likely one is that the plant creates these holes in the leaves to allow more light to pass through to the lower leaves on the plant.

Why Won’t My Plant Produce Holey Leaves?

Have you ever seen a small or young Monstera? Most likely most of its leaves did not have holes on them. You may have even not recognized this plant as a Monstera! Monsteras grow leaves with more holes as they mature, so it’s perfectly normal for a young plant to not have any.

What about those enormous leaves with many holes? To accomplish this feat, your plant will need plenty of bright indirect light. Often when a Monstera is showing little to no holes, it’s because it’s not getting enough light. Other signs that your plant might need a little more light is if it looks leggy and has lost its “bushy” look, or if it’s wilting or showing signs of malnourishment.

Ready to take a deeper dive into caring for and growing your Monstera Deliciosa? Check out our complete care guide with repotting, pruning, and more, or have a quick read through the 10 commandments of Monstera care!


Monstera Deliciosa

A fabulous statement plant with sculptural, swiss-cheese foliage and a low-maintenance disposition! The Monstera Deliciosa is an ideal easy-care plant for a joyful, textural space.