5 Lush and Lavish Plant-Inspired Zoom Backgrounds
Photo Credit: Margaret Austin

Photo Credit: Margaret Austin

Remote office need a little sprucing? Or perhaps there’s simply an absolute mess behind you, which you completely forgot tidy up before your 8am meeting. Of course a living plant will drastically improve your Zoom game, but in the meantime, here’s a gift from us to you: a few backdrops to instantly put some lush greenery in your corner! Tested by our team and Plant Stylist approved, you can’t go wrong with a beautiful, plant-filled background.

How to use: simply right click, save, and upload to Zoom! Keep in mind that once you’ve set it as your background, the logo will read backwards for you (but not your audience).

Working In Paradise


Morning Light


Urban Oasis


At Home With Léon & George


Parisian Cafe


fiddle-bush-white-stand-nude-leather-chair.jpg

Indoor plants, potted & delivered

Premium plants paired with stylish ceramics, plus lifetime plant care support. Order online at leonandgeorge.com

Why Are My Bird of Paradise's Leaves Splitting?

The Bird of Paradise is a natural star: the ideal plant for bright, sunny spaces, they grow big and beautiful with little care and require little water. You’ve probably seen Birds of Paradise thriving outdoors all over town, but they are also a showstopper indoor plant variety, effortlessly achieving great height and pushing out bountiful leaves. This plant variety has a naturally wild aesthetic, which includes frayed, feathery-split leaves.

Naturally Split Leaves

If you notice that your Bird of Paradise is exhibiting lots of splits and frays in its leaves, you can relax: this is completely normal. The split foliage does not mean you’re doing anything wrong! It’s a trait of the plant that evolved in nature. In the wild, the splits ensure that wind can pass through the plant’s foliage without breaking the plant or disturbing its roots.

Prefer Fewer Splits?

The Bird of Paradise is always likely to exhibit splits and frays to its feathers, so this trait will occur to varying degrees regardless of where your plant is situated. However, an indoor Bird of Paradise may exhibit less splitting if it is kept in an environment away from moving air (drafts from doors or windows, air conditioning units, heaters or fans.) The best thing that you can do for your plant is to give it consistent care according to its own specific needs. For Birds of Paradise, this means watering it only when its topsoil (the top two inches of soil below its decorative moss) are entirely dry, ensuring that it receives bountiful, bright indirect light, and misting it regularly. You can mist your Bird of Paradise with plain water, or give it an additional boost by misting it with a combination of water and a gentle Foliar Feed, like Potion Magique. When using Potion Magique, be sure to dilute the product, using approximately three drops for every eight ounces of water and shaking lightly to mix.


Bird of Paradise

A wild and bountiful indoor plant variety, the Bird of Paradise is the perfect low-maintenance plant for spaces that bask in plenty of bright, indirect light.

Choosing the Best Soil for Your Fiddle Leaf Fig
Choosing the best soil for your fiddle leaf fig

Fiddle Leaf Figs are known for their beauty, grace, and of course, finicky nature. While they can be pretty low maintenance plants (we promise!), setting them up in ideal conditions is key to success in their care. As such, choosing the correct soil is important when potting or repotting your Fiddle Leaf Fig. Fast draining, well aerated soils are ideal, as this plant prefers relatively dry soil to keep its roots moist but not wet.

Keep in mind that soil for indoor plants provides a handful of basic functions for your plant:

  • Serves as a place for the roots to anchor and support the plant

  • Provides nutrients for growth and photosynthesis

  • Allows the roots to access oxygen

  • Delivers water to the entire plant, via the root system!

So which soil is best for your Fiddle Leaf Fig? Read on to find out!

Which Soil is Best for Your Fiddle Leaf Fig?

Most houseplant soil blends use perlite to aid with drainage and peat moss to retain moisture. Any good quality houseplant soil mix will work for your Fiddle Leaf Fig, such as MiracleGro indoor potting mix , which is specifically designed to provide aeration, fast drainage, and nutrition for your plants, and is also resistant to fungus and gnats.

NATURAL PLANT FOOD

Nourish your plants with this specially-formulated organic liquid plant food. Our Boost Vitaminé is made with potent nutrients from nature to help your plants grow and thrive all year long.

$24

Giving your Fiddle proper drainage

Even if you purchase the very best soil on the market, it won’t matter if your plant does not have proper drainage. Fiddle Leaf Figs can be incredible unforgiving with overwatering, so set your plant up in a container with good drainage to make sure it gets the most out of its fresh soil!

How to fertilize your Fiddle Leaf Fig

The soil we give our plants is not an endless source of nutrients, and in fact only really nourishes our plants for ~6 or so months. After that, it’s a good idea to fertilize every 2-4 weeks during the spring, summer, and early fall. Any indoor plant food will provide fresh nutrients, and we recommend our all natural plant food for leafy beauties like this one.

This post was adapted from the Fiddle Leaf Fig Plant Resource by expert Claire Akin. Head to their website to learn more about caring for the Fiddle Leaf Fig.


fiddleleaffigbush.jpg

Indoor plants, potted & delivered.

Premium plants paired with stylish ceramic pots, plus lifetime plant care support. Order online at leonandgeorge.com

Fishtail Palm Care Guide
Fishtail-Grey-Teak.jpg

The Fishtail Palm

AKA Caryota mitis

With its stunning profusion of airy foliage and tall silhouette, the Fishtail Palm is a gorgeous, low-maintenance floor plant that casts delightful, dappled shadows in light-filled spaces. Native to Southeast Asia, the Fishtail Palm thrives in bright to medium-light environments. 

Light

  • Needs bright indirect or direct light, next to a window is best

  • Will not tolerate low light environments

Water

  • Keep the just slightly moist — water when the top 1-2 inches of soil is dry

  • Note that despite this plant’s preference for moisture, it is relatively drought tolerant

Growth

  • With the right conditions, the Fishtail Palm can be a fast grower

  • Can be fertilized monthly during spring and summer

Never overwater your plants with these sleek and simple moisture meters.

leon-and-george-moisture-meters.jpg

MOISTURE METERS

Finally, a moisture meter that actually works. Tested by our very own Plant Doctors, all orders of Large or Extra Large Léon & George plant sets include a moisture meter

Common problems with the Fishtail Palm

Brown Leaf Tips with Yellow “Halo” - Low Humidity

  • Symptom - Leaf tips exhibiting browning and yellowing

  • Cause - Low humidity, dry environment with heat/AC

  • Remedy - Mist Fishtail Palm x2 weekly

Leaves Yellowing in Quick Succession - Overwatering

  • Symptom - Many leaves becoming yellow over short period of time

  • Cause - Overwatering

  • Remedy - Only water Fishtail Palm when top two inches of topsoil are dry. If overwatered, remove palm (still within its plastic nursery pot) from ceramic planter. If excess water has pooled in planter, dump it out and allow plant to dry before watering again.

Leaves Yellow and Dry: Too Much Direct Sun or Underwatering

  • Symptom - Dry, yellowing leaves

  • Cause - Excess of direct sunlightm underwatering

  • Remedy - Water Fishtail Palm consistently when topsoil is dry. Keep palm a few feet from windows to avoid scorching.

How to maintain a beautiful and healthy Fishtail Palm


  • Maintenance - A little love will go a long way with your Fishtail Palm!

    Trimming & reshaping - You can keep your Fishtail Palm looking fresh by trimming of leaves that exhibit a large degree of yellowing/browning. Cut the leaves’ stems as close to the base of plant as possible with clean, sharp scissors or shears. 


    Cleaning - Clean your Fishtail Palm’s foliage by gently wiping its fronds with a soft cloth. Removing dust from the Palm’s foliage allows it to photosynthesize with ease, which supports its overall health and appearance.


  • Repotting - Houseplants grow much slower than they would in the wild. Depending on the size of your plant and the density of the roots, Fishtail Palms can be repotted every three years to provide fresh nutrients and encourage new growth.


    When to repot - when the roots circle the pot tightly and begin to stick out, it’s time to move them to a new home. 


    Pot sizing - if you want your plant to grow taller, find a nursery pot that’s 2” in diameter larger than the current pot. If you want your plant to stay the same height, you can reuse the same pot and simply change the soil. 


    Get your hands dirty - spread out newspaper on the floor, remove the plant from the pot and shake off as much of the old soil as possible so that you have clean roots. Place the plant in the center of the pot, add new soil and pat down firmly. Water the soil thoroughly and place the plant in an area with bright indirect light. Your plant will take 2-4 weeks to settle from the shock and adjust to its new home. 


How to Propagate the Fishtail Palm


As with most palms, the only way to propagate a Fishtail Palm is by germinating the seeds. However, this can be very time-consuming (germination takes around eight months) and difficult to achieve indoors. Propagating Fishtail Palms is best left to professional growers. 


The Fishtail Palm

A stunning plant with airy foliage that resembles delicate fishtails.

Why Are My Zanzibar Gem's Leaves Browning at the Tips?

Why are my Zanzibar Gem’s Leaves Browning at the Tips?

Zanzibar Gems are a lush and beautiful indoor plant variety with foliage to die for. With their generous profusion of wand-like stalks adorned with bountiful, emerald colored foliage, ZZ Gems as they’re often called lend a dazzling pop of color to any interior. So when you notice that your plant is exhibiting browning leaf tips, it’s natural to be frustrated! But you don’t need to fret— browning leaf tips are easily treated, and can almost always easily traced back to one of these hiccups in plant care. Read on, and be relieved!

Environment Too Dry

The most common cause of browning leaf tips on a Zanzibar Gem is a lack of humidity in the plant’s environment. The use of air conditioners or heaters, drafts from doors and windows, and seasonal changes can all cause a change in humidity- but it can be easily assuaged by misting your plant! Mist you plant up the three times weekly, either with plain water or with water mixed with a foliar feed, like Potion Magique.

Overwatering

The browning caused by overwatering has a specific appearance and texture. If the foliage appears soft and mushy, is falling off or is very easily removed, it’s possible that your plant may be overwatered. Zanzibar Gems need to be watered only sparingly- when the top two inches of their soil are entirely dry. If you are concerned that your plant may have been overwatered, remove the plant, still within its plastic nursery pot, from its ceramic planter. Check its soil to see if it is waterlogged or has a musty scent. If the soil is thoroughly wet, allow it to dry out entirely before you replace the plant in its ceramic pot, and begging your watering schedule again, watering only when the topsoil is entirely dry. Remove any significantly brown or unhealthy leaves.

Underwatering

If a large portion of your Zanzibar Gem’s leaves are dry, brown and crispy, it’s possible that your plant has gone too long without water. Insert your finger in the top two inches of its soil— if they are entirely dry, give it 1-2 cups of water. Do not overwater the plant to compensate for its dryness; just commit to a new regular schedule of checking its moisture and watering it when needed. You can trim off the severely dried leaves or allow them to naturally fall. New growth will appear as your plant bounces back from its drought.

Reach Out!

In the unlikely event that your Zanzibar Gem’s condition is not improved by making adjustments to its care routine, don’t hesitate to reach out to our Plant Doctor service via your Léon & George account. Our experts are always here to help!


LeonGeorge_Summer2021_28.jpeg

Zanzibar Gem

Lush and vibrant, with wand-like stems and emerald foliage, the Zanzibar Gem is a stunning, low-maintenance indoor plant that thrives in medium to low, indirect light.

How to Care for and Grow Your Hope Philodendron

How to care for and grow the Hope Philodendron AKA Philodendron Selloum

Full, serrated leaves and lots of personality, the Hope Philodendron is a plant that enjoys a shady, tropical-like home, similar to its native regions of South America. Here’s everything you need to know to keep the Hope Philodendron healthy, happy and growing.

Light

  • Prefers bright or medium indirect light

  • It can adjust to lower levels of light, but will grow slower and turn darker green

  • Avoid harsh direct sunlight that may burn your plant’s leaves

Water

  • Water about once a week, when the topsoil is just dry to the touch

  • Mist between waterings to provide humidity

Growth

  • In prime conditions, the Hope Philodendron grows relatively fast and can reach up to two feet in height

  • Fertilize your Hope Philodendron 1-2 times per month in the spring and summer with indoor plant food, or foliar feed year round.

Natural Plant Food

Nourish your plants with this specially-formulated organic liquid plant food. Our Boost Vitaminé is made with potent nutrients from nature to help your plants grow and thrive all year long.

$24

Common problems with the Hope Philodendron

Yellow leaves - overwatering or too much light

  • Symptom - pale yellow leaves, or new leaves unfurling pale or yellow

  • Cause - in most cases, the cause of yellow leaves is overwatering. While the Hope Philodendron likes moisture, it does not want too much moisture or to become waterlogged. If the plant is not overwatered, it’s possible that the plant is exposed to too much light.

  • Remedy - ensure that the soil is not waterlogged — remove from plastic nursery pot and investigate the roots. If they are soaked or emit a stench, it’s possible your plant has root rot and you will need to repot. If it’s just slightly damp, leave the plant in a well-ventilated area with plenty of indirect light and hold off on watering.

Brown tips - underwatering

  • Symptom - edges and tips of plant are brown and dry or crispy

  • Cause - not enough water

  • Remedy - give your plant a thorough shower, allowing all the roots to have a chance to drink and refresh. Wait until water has drained before returning to decorative pot.

Brown spots - overwatering or fungal bacteria

  • Symptom - wet or soggy brown spots on new and or old leaves

  • Cause - overwatering or fungal bacteria

  • Remedy - ensure that the soil is not waterlogged — remove from plastic nursery pot and investigate the roots. If they are soaked or emit a stench, it’s possible your plant has root rot and you will need to repot. If it’s just slightly damp, leave the plant in a well ventilated area with plenty of indirect light and hold off on watering.

How to care for little hope plant

How to maintain a beautiful and healthy Hope Philodendron

Take care of your Hope Philodendron and it will take care of you! Below are simple tips to continue caring for and growing your Hope Philodendron over time.

  • Pruning - the foliage of this plant can get wild! If the plant is taking up too much space, or has unattractive, old, or “leggy” vines, you can safely trim back with a clean blade, this will give your plant more energy to grow new leaves!

  • Trimming - if there is just a small portion of a leaf that was damaged such as the edges, trim off any discoloration or blemishes by following the natural lines and shape of the leaf.

  • Cleaning - regularly remove dust to ensure your plant can soak in as much light as possible. Use a damp cloth and gently wipe the leaf clean.

How to grow and repot the Hope Philodendron

  • Growing - in prime conditions with the right light/water/temperature balance, Hope Philodendron plants are fast growers. After some time, if you don’t see any new growth, consider adjusting one of its elements. During spring and summer, use a diluted fertilizer to give your plant a vitamin boost.

  • Repotting - L&G Hope Philodendron plants come in 6” grow pots and only need to be repotted every few years if you notice the roots outgrowing the pot, or to refresh the soil and give it new nutrients. If you’d like your plant to grow larger, find a new grow pot that is 2” larger than its current pot. If you’re happy with the current size, you can reuse the same pot and simply change the soil.

    • Getting your hands dirty with or without a yard - spread out newspaper on the floor, remove the plant from the pot and shake off as much of the old soil as possible so that you have clean roots. At the bottom of the grow pot, and a layer of soil, then place the plant in the center of the pot and cover with new soil. Pat down firmly and water thoroughly. Place the plant in an area with bright indirect light. Your plant will take 2-4 weeks to settle from the shock and adjust to its new home.

How to propagate the Hope Philodendron

Propagating a Hope Philodendron is best down with cuttings and during spring or summer.

  • Make a clean cut below a node - The node is like a joint in the stem — where new leaves grow from. Using sharp, clean scissors or shears, remove a cutting from the plant and place in fresh water in an area with bright indirect light. Change the water every few days to keep it fresh.

  • Wait for roots to grow and repot- After a few weeks, you will see roots forming. Transfer to a pot with fresh soil and water thoroughly.

  • Stabilize - Keep the soil moist to the touch for one to two weeks as the cutting roots.


Hope Philodendron

This happy and hopeful philodendron will bring joy to any space with its unique wavy leaves and compact shape. They are easy to care for and on NASA’s list of best air-purifying houseplants.

How To Keep Cats Out Of Plants
How to keep cats out of plants

How to keep your cats out of your plants

Any cat owner knows the trials and tribulations that come with wanting a home that’s both feline and flora friendly. Cats are infamously curious, and unfortunately, houseplants are of high interest to our feline friends. One of our co-founders is a cat (Léon, of Léon & George!), so we know firsthand how difficult it can be.

Luckily, there are a handful of natural solutions for keeping cats off plants. Of course, you may consider only non-toxic plants that are safe for cats to nibble on just in case, but keep in mind that most common houseplants considered “toxic” are only mildly so and will rarely cause any real harm to your pet.

Citrus

Cats don't love the smell of citrus. Make your plant smell "bad" to your pets (and good to you!) by misting it with lemon juice diluted in water. Similarly, try leaving a few lemon or orange peels on top of the soil.

Vinegar

The smell of vinegar is also a great deterrent for cats. Vinegar is too acidic to spray directly on the plant, but try cleaning the ceramic pot with a vinegar solution every few weeks to keep curious pets at bay.

Decorative rocks

Deter digging with decorative rocks or stones atop the soil of your plants. These come in all sizes, shapes and colors, and finding something that's also aesthetically pleasing should be easy!

Wondering how to keep cats out of your garden? Check out these tips here.


Calathea Rattlesnake

A beautifully patterned prayer plant with green and purple hues. 100% non-toxic and safe for cats.

Dear Plant Stylist: "Which plants are best for a modern farmhouse?"
Photo Credit: @riverwoodbuildingcompany

Photo Credit: @riverwoodbuildingcompany

In our Dear Plant Stylist series, we share styling and lighting inquiries received by our in-house stylists with our audience. So read on-- you just might find that your plant styling questions are answered below! 

Dear Plant Stylist, 

We just moved into our forever home— a modern farmhouse-style, two-story home that we waited years for. We chose this style because it suits our minimalist aesthetic, and the interior is spacious and gets tons of light. What plants will pair best with this style? I want easy-care varieties that will blend well with modern appliances and accents. 

Best,

T.B. 

Hi T., 

Congratulations on your new home! There is so much to recommend the modern farmhouse aesthetic, so you’ve made a great choice. We love modern farmhouses because they’re classic and clean, often incredibly energy-efficient, and they offer the perfect canvas for decorating in your own personal style.

You mentioned your preference for a minimalist look, which jives well with our ceramics collection. Every option-- the classic Mid-Century, more angular Scandinavian, and curved Nouvelle-- is ultimately minimalist in style and will blend seamlessly with the modern farmhouse aesthetic. So, go wild on pots! Shades of gray, black and white will be particularly good options for your home. 

Undoubtedly the Fiddle Leaf Fig Tree is the ultimate statement plant for a modern farmhouse style. Photo Credit: @spmliving

Undoubtedly the Fiddle Leaf Fig Tree is the ultimate statement plant for a modern farmhouse style. Photo Credit: @spmliving

The fact that you receive a lot of light in your home bodes well for your options in regard to plants. We recommend starting with a statement Fiddle Leaf Fig Tree— or two! These statuesque beauties thrive in bright, indirect light, and they’re especially breathtaking as pairs, flanking thresholds. They are also a wonderful choice for a solo statement plant to brighten a corner. 

If your space receives steady, direct bright light, you can incorporate a large Bird of Paradise. They bring fantastic size and texture, with an easy-care disposition that has endeared them to our customers nationwide! 

Large statement plants are definitely the way to go with most modern farmhouses, as they so often boast large features like windows and fireplaces and soaring ceilings where possible.

A Bird of Paradise brings a welcome splash of color and life to this beautiful white-washed sunroom. Photo Credit: www.homebunch.com

A Bird of Paradise brings a welcome splash of color and life to this beautiful white-washed sunroom. Photo Credit: www.homebunch.com

For subtle, large floor plants, Rubber Trees are a fantastic option. They have deeply tonal foliage and are the perfect height for placement near seating and end tables. Their streamlined style means that they blend well with varied decor, and they’re a perfect counterpoint for the charcoal, black and gray accents that are common in modern farmhouse interiors. Pairing the Rubber Trees with a dark or black wood stand makes their richly colored foliage pop, and they require watering only when fully dry. 

For plants to place on surfaces, the Tineke Rubber Plant is a shoo-in. Its gentle, pastel foliage is a gorgeous accent for the white walls of modern farmhouses. Leafy varieties like Little Hopes and Bird’s Nest Ferns are immediately homey and nostalgic, and make perfect centerpieces for dining areas and as accents to nightstands. 

Leafy plants like the Cascading Pothos (pictured) or Little Hope make wonderful accents for modern farmhouse decor. Photo Credit: www.homebunch.com

Leafy plants like the Cascading Pothos (pictured) or Little Hope make wonderful accents for modern farmhouse decor. Photo Credit: www.homebunch.com

If your modern farmhouse is home to curious pets (or children!) be sure to check out  this collection, which features all of our non-toxic houseplant varieties, including lots of stunning options for shelves, tables and other raised surfaces. 

When it comes down to it, you really can’t go wrong when selecting plants for your modern farmhouse. That’s the magic of this streamlined style of home- it will easily accommodate your vision! But it can be fabulously accented by healthy, living greenery. Choose plants that will thrive in the bountiful light your home receives, and they will flourish for years to come!


largeplantcollection.jpg

Easy Care Plants, Delivered

Beautifully potted plants, plus lifetime plant care support. Order online at leonandgeorge.com

Why Are My Zanzibar Gem's Leaves Yellowing?

Why are my Zanzibar Gem’s Leaves Yellowing?

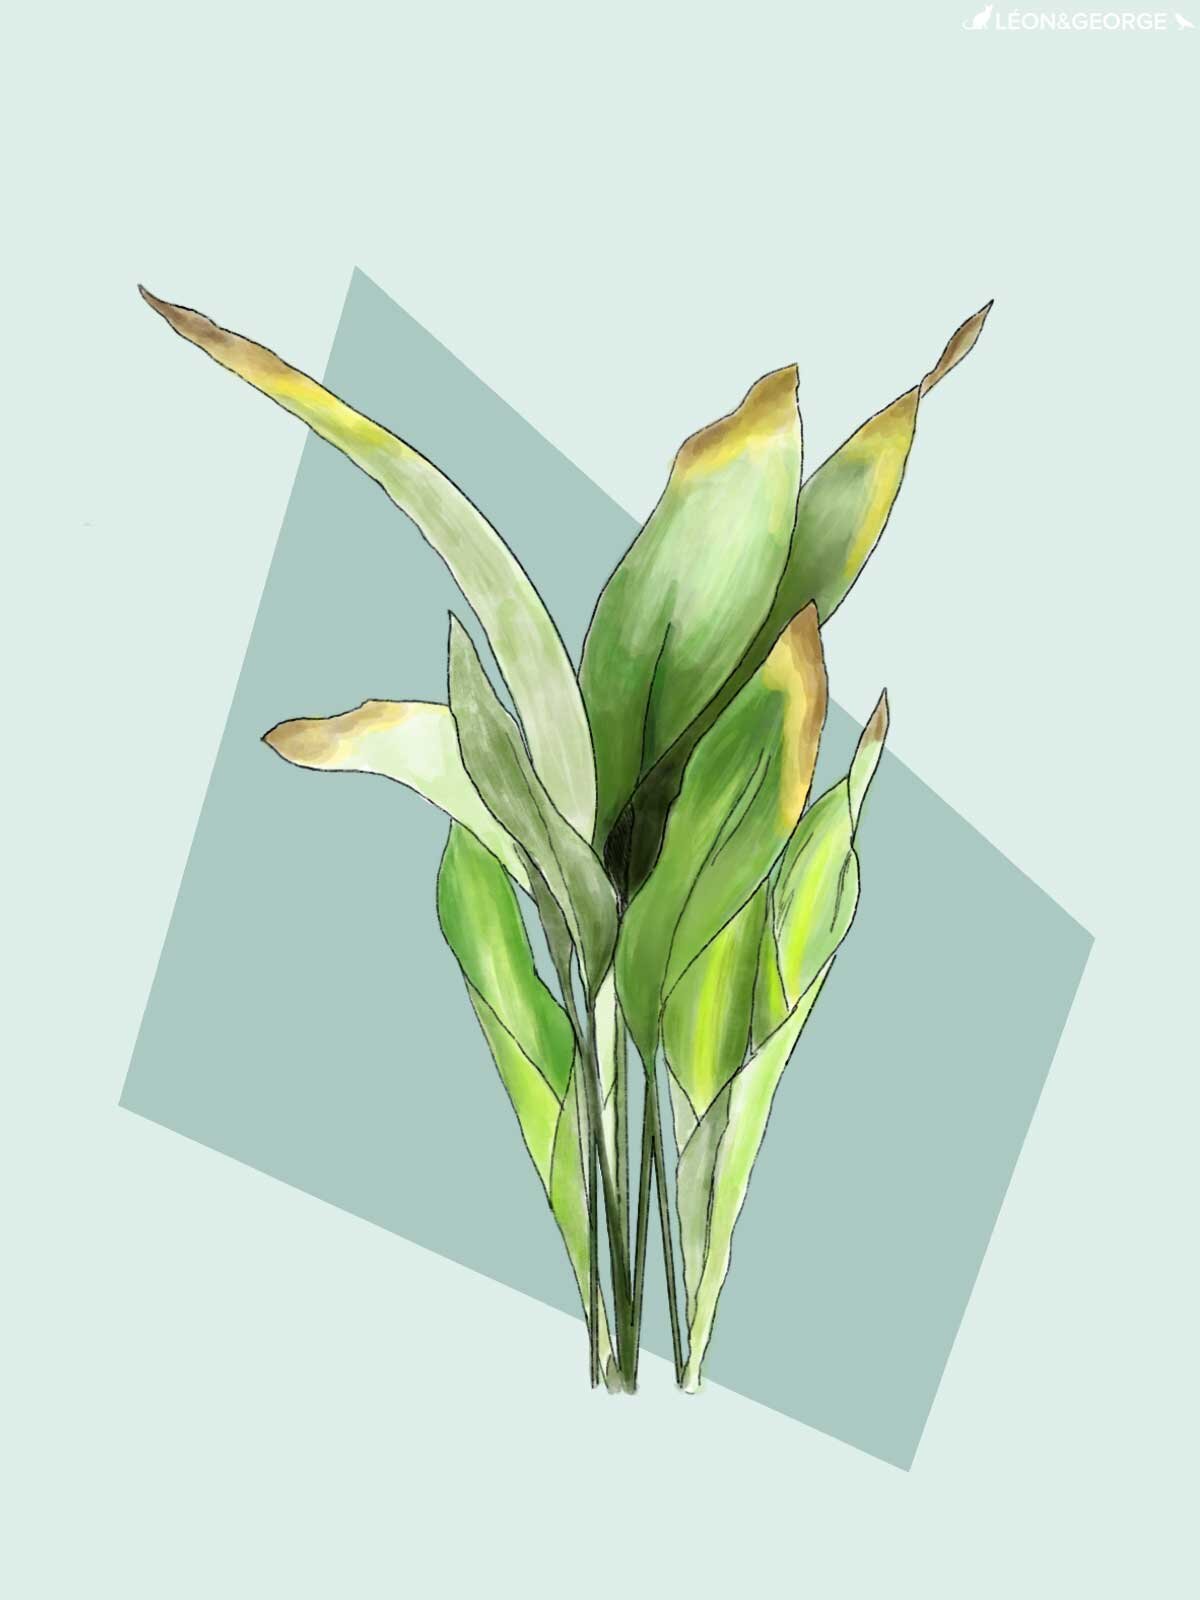
Zanzibar Gems have no shortage of fabulous, textural foliage, and these deep, emerald-toned leaves are its most beloved characteristic. With that in mind, it makes perfect sense to feel concern if you notice discoloration or yellowing. Luckily, yellowing foliage on your Zanzibar Gem is an easy fix! Read on to learn the common causes and solutions for yellowing leaves on your Zanzibar Gem.

Normal Leaf Shedding

It’s normal for Zanzibar Gems to shed older leaves from time time, so if you notice that your Zanzibar Gem has a small number of yellow leaves, you can simply pluck them off, or trim them as close to the branch as possible with clean, sharp scissors or shears.

Overwatering

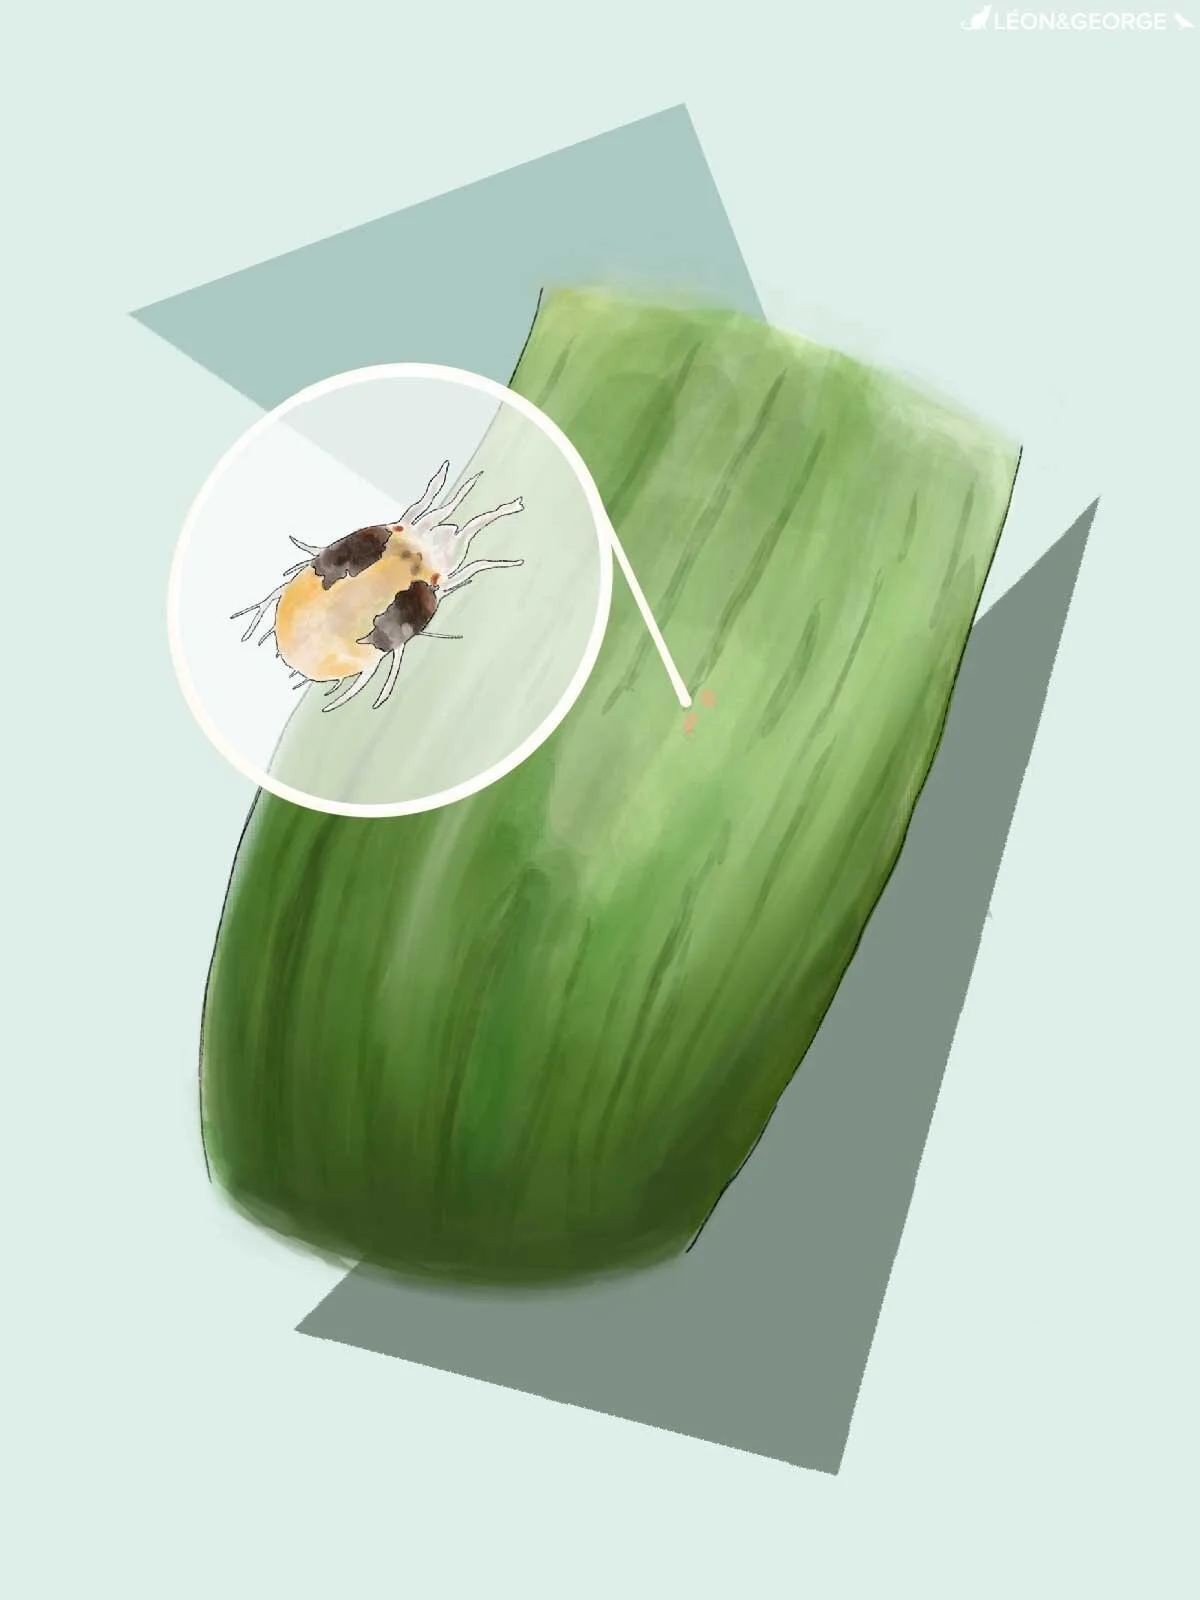
If you notice more than a small amount of yellowing leaves, inspect your Zanzibar Gem for signs of overwatering such as soft, mushy stalks and waterlogged, very wet soil. 

If you see these signs, remove your plant (still within its plastic nursery pot) from its ceramic planter. Check the ceramic planter for excess water and, if any has pooled inside of it, pour that water out. Keep your Zanzibar Gem out of the ceramic planter until its soil dries entirely. 

You will also want to remove any dead, yellow leaves and mushy stalks or roots at this time.

It may take a few weeks to a month for your Zanzibar Gem’s soil to dry entirely, but don’t worry, your plant does not need more water during this time. 

Once it has fully dried, you can return it to its ceramic planter and re-initiate your watering regimen, of watering only when the top two inches of its soil, below the decorative moss, are entirely dry. 

Consider a Moisture Meter

Moisture meters are a handy, easy-to-use tool that allows you to determine your plant’s moisture level with no fuss. 

You simply push the meter deeply into your plant’s soil (be mindful not to hit your plant’s roots with the meter on the way down) and read its sensor window. When your plant’s soil is moist, the window will appear blue. When the soil is dry and your plant is ready for water, the window will appear white.

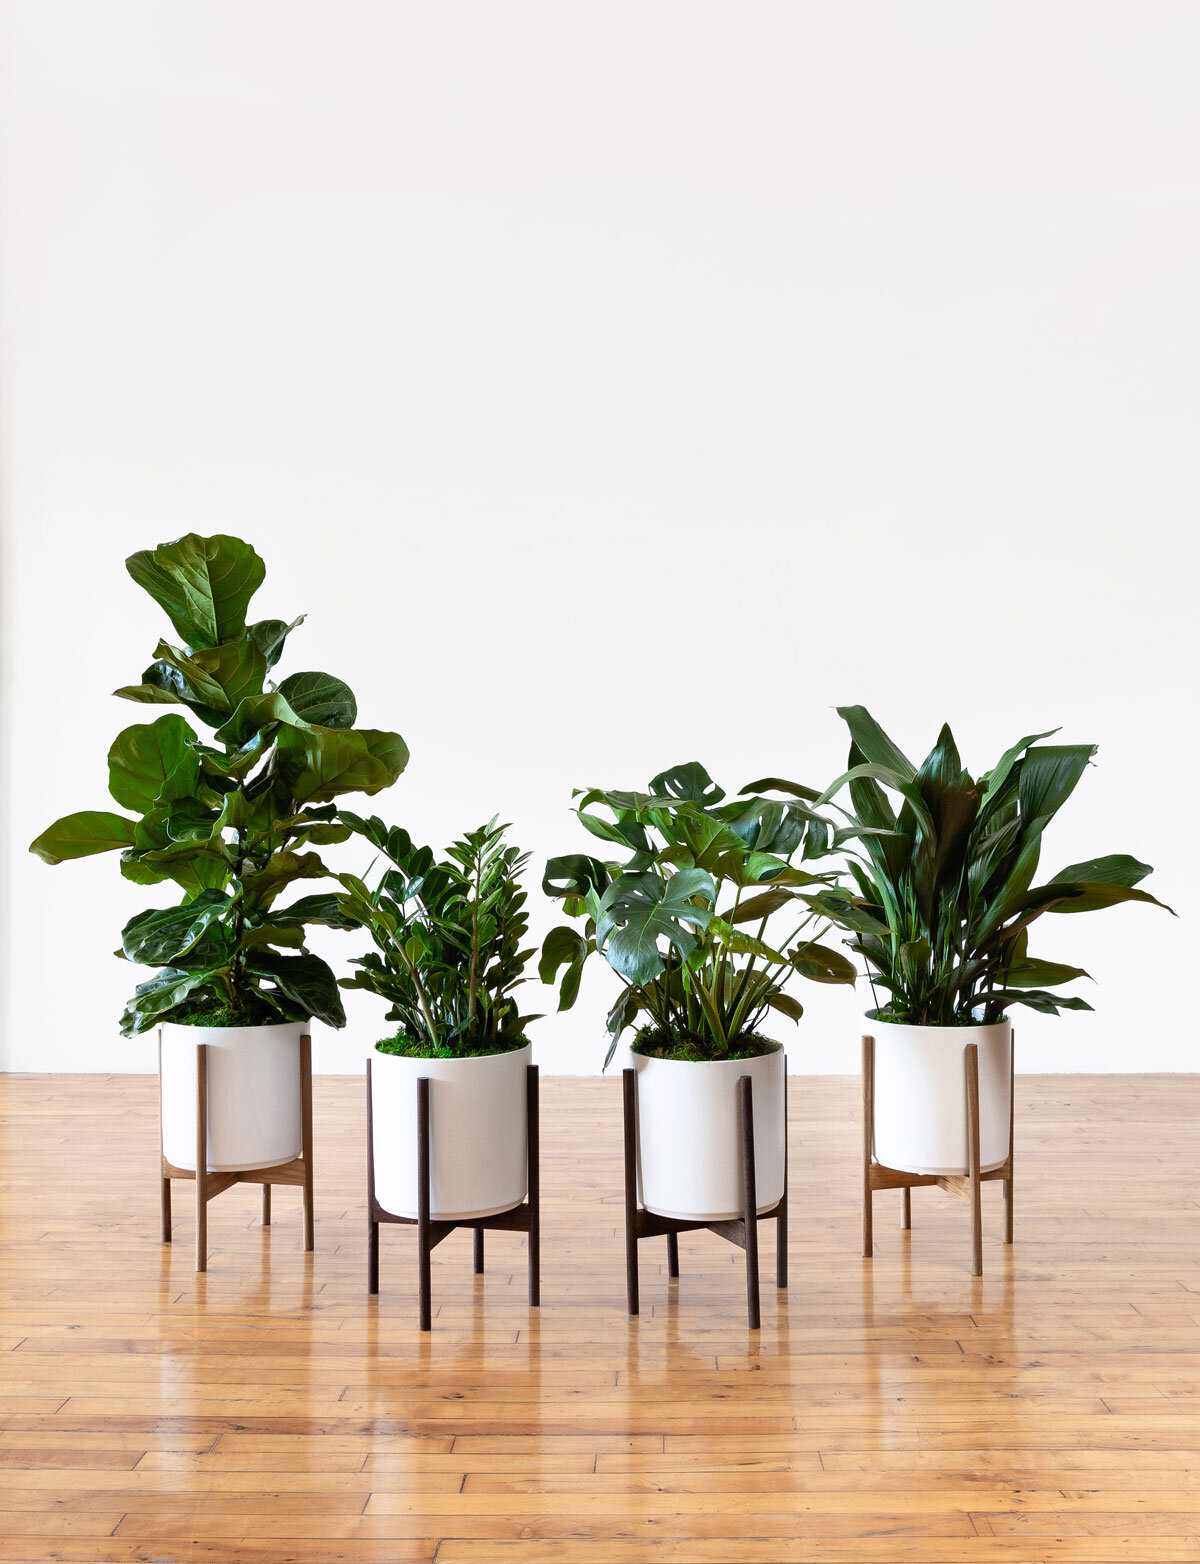
Moisture meters are affordable and available in the same sizes as your Zanzibar Gem: Small, Medium, and Large. 

If In Doubt, Reach Out!

Yellow leaves are typically not a sign of a serious health problem, and can simply be removed. However, if you are concerned that your Zanzibar Gem is showing other signs of distress, or if it is delivered with a high degree of discoloration, our Plant Doctor Service can provide guidance. Simply sign in to your Léon & George account, select “Contact Plant Doctor” and provide photos.


20181103_L&G-389.jpg

Zanzibar Gem

Vibrantly tonal, with an abundance of lush, emerald-tone foliage, the Zanzibar Gem is a low-maintenance, low-water dream plant for spaces that received medium to low, indirect light.

Why Are My Monstera Deliciosa's Leaves Yellowing?

The foliage of the Monstera Deliciosa is its crowning glory! Playful, sculptural and vibrant, its leaves grow in abundance, creating beautiful silhouettes and adorning your space with dimensionality and deep, emerald hues. So we know how upsetting it is when your Monstera’s leaves take a hit and begin to show troubling yellow tones. It’s the most common ailment for Monsteras, and it’s an easy fix! Read on to get your plant’s luscious split leaves back on track.

Underwatering

Far and away, the most common cause of yellowing Monstera foliage is overwatering. It can be so tempting to water your Monstera frequently (i.e. multiple times a week) because we all love to commune with our plant friends, but this is not what your plant usually wants. Monsteras should be watered only when their topsoil is fully dry to the touch. You can probe its topsoil weekly, by lifting a portion of its decorative moss and pushing your finger two inches down into its soil. If those two inches are dry, you can give the Monstera a good drink- but if they are still dry, hold off.

If you find that your plant’s soil is very soggy and wet, and has been for a week or more, you can lift it out of its ceramic pot while keeping it inside its interior plastic nursery pot. Check its overall moisture. If it is very wet, keep it outside of the ceramic pot until the moisture has dried entirely before watering again and returning it to its ceramic pot.

Environmental Dryness

The yellowing caused by environmental dryness looks different than the yellowing caused by overwatering. It causes browning at the edges of the leaves, which gradually merges into a central, yellowing leaf. The brown edges are a very good indicator of dryness. If you notice these signs, incorporate misting the Monstera a few times a week into your plant care routine, either with plain water, or with water boosted with Potion Magique.

Insects

Spider mites can cause yellowing, unhealthy foliage, though this is one of the less common ailments that Monsteras face. Spider mites can be eradicated by hosing off your plant or placing it under your shower head while it’s running, to remove any mites clinging to its foliage, and then applying an insecticide.

Extra Support

If your Monstera Deliciosa continues to experience yellowing foliage after receiving appropriate care, it may very well be that the yellowing is just a result of the natural, occasional yellowing and leaf shedding that all living plants experience. But our Plant Doctor service can also help to diagnose the issue and get your plant back on track. Reach out to the Plant Doctor via your Léon & George account, and you can expect a helpful response within two to three business days.


Monstera Deliciosa

A fabulous statement plant with sculptural, swiss-cheese foliage and a low-maintenance disposition! The Monstera Deliciosa is an ideal easy-care plant for a joyful, textural space.

How to Care For and Grow Your Cast Iron Plant

Cast Iron Plant

AKA aspidistra elatior

Beautifully lush and tougher than nails, the Cast Iron Plant is a favorite houseplant for its deep green foliage and easy care vibes. A truly low-maintenance plant, there are just a few things to know before you buy a Cast Iron Plant. Learn the basics of Cast Iron plant care right here: from light requirements, to how to water your Cast Iron Plant, as well as guidance for troubleshooting any problems you may encounter along the way. (Not to worry, Cast Iron Plants are not known to experience many issues!) All the information you need for your Cast Iron Plant is at your fingertips- read on!

How much light does the Cast Iron Plant need?

Cast Iron Plants do best in medium to low light. While the Cast Iron doesn’t mind bright indirect light, these tropical plants should be kept away from harsh, direct sunlight as it may scorch the plant’s leaves.

How to water your Cast Iron Plant

You can water your Cast Iron Plant when its top two inches of soil are dry to the touch. Just stick your finger into the soil every ten days or so, and water when those two inches are dry. The most important aspect of watering your Cast Iron Plant is to avoid overwatering. Note that your watering schedule may be less frequent during winter months and more frequent during the sunnier months of the year. Consider using a moisture meter as a simple, supplemental tool to alert you when your plant’s soil is dry or moist.

Are Cast Iron plants fast growers?

The Cast Iron Plant is a relatively slow grower, and grows in accordance with the amount of light that it receives. Cast Iron Plants will generally grow up to two feet tall and two to three feet wide, and their rate of growth will be slower in low light settings. Fertilize your plant one to two times per month in the spring and summer, and consider foliar feeding year round.

Common problems with Cast Iron Plants

Leaves turning yellow on Cast Iron Plant

Leaves turning yellow or brown

If you see yellow or brown leaves on your Cast Iron Plant, the most likely cause is either waterlogged soil (while these plants like to remain evenly moist, they do not like soggy soil), or that your plant is getting too much light. Avoid direct light, and make sure you are not overwatering your plant.

In the meantime, remove any damaged leaves by simply cutting with clean scissors or a blade at the base of the stem.


Brown tips

If your plant has brown tips, it’s possible your plant is underwatered. While the Cast Iron Plant is a very resilient plant, like any other greenery it will show distress if neglected for long periods of time. If you do not suspect underwatering, consider the possibility of mineral accumulation. Some areas have tap water that is too high in minerals for watering indoor plants. If this is possibly the case, try leaving a full watering can out overnight before watering your plants.

Spider mites on plants

Speckled discolored leaves

Cast Iron Plants can sometimes be susceptible to spider mites. Check the underside of the leaves to see any webbing. The spider mites themselves can be hard to see but if you shake a leaf over a sheet of paper and see small specks fall, your plant has spider mites. Don’t worry! The plant can still be saved. Follow our simple instructions for how to treat spider mites here.


How to maintain a beautiful and healthy Cast Iron Plant

Take care of your Cast Iron Plant and it will take care of you! Below are simple tips to continue caring for your plant over time.

How to repot Cast Iron Plant

How to prune Cast Iron Plants

Remove dry or dead leaves all year round, but save any major pruning for the spring and summer months. When pruning your Cast Iron Plant, use sharp, clean shears and cut any excessive growth or unwanted foliage at the base of the stem.

Cleaning your plant

Take each leaf between two soft tissue cloths and wipe off the top to reveal a healthy shine. Do this at least once a month to keep away pests and help the plant soak in more light!

How and when to repot the Cast Iron Plant

Houseplants grow much slower than they would in the wild. Because of their slow-growing nature, Cast Iron Plants only need repotting once every three to four years.

  • When to repot - Cast Iron Plants have strong roots and will show you when it’s time! When the plant begins to “bust” out of its pot, it’s time for a new home.

  • Pot sizing - if you want your plant to grow wider, find a nursery pot that’s 2” in diameter larger than the current pot. If you want your plant to stay the same height, you can reuse the same pot and simply change the soil.

  • Get your hands dirty - spread out newspaper on the floor, remove the plant from the pot and shake off as much of the old soil as possible so that you have clean roots. Place the plant in the center of the pot, add new soil and pat down firmly. Water the soil thoroughly and place the plant in an area with bright indirect light. Your plant will take 2-4 weeks to settle from the shock and adjust to its new home.


How to propagate a Cast Iron Plant

Cast Irons are easy to propagate through division. Follow these instructions to propagate your plant:

  • Remove from pot - Remove a mature Cast Iron Plant from its pot (or do this when you are repotting).

  • Separate the roots - With your hands, gently separate a root cluster (rhizome) for propagation. You will need at least two or three stems growing off the root cluster you choose to propagate.

  • Place in soil - Place in a small pot with a few inches of fresh potting soil and cover with more soil to about half an inch below the rim of the pot, firmly pressing down once you’ve reached the top.

  • Keep moist - Water frequently to keep the soil just moist to the touch. After a few weeks, your plant will take root and should feel snuggly “rooted” to its pot.

Illustrations by our talented plant stylist, Kailie Barnes.


10-cast-iron-white-nouvelle.jpg

Cast Iron Plant

A resilient beauty with shiny dark green leaves and a low-maintenance disposition, the Cast Iron Plant is easy to care for and ideal for low light spaces.

Bottom Watering 101

How (And Why) To Bottom Water Your Plants

We're going to let you in on a little secret that all green thumbs swear by: bottom watering. Bottom watering is just what it sounds like: letting a plant drink from the bottom up, and plants absolutely love it.

Why Bottom Water?

When and why should you bottom water? This technique is great as a regular watering routine, but it can be particularly helpful when plants are extra thirsty after you've been out of town or simply have forgotten to water them.

Not all plants are easily bottom watered: larger plants that are difficult to maneuver can be tough. If you like bottom watering but don’t want the hassle of moving the plant around, trying placing your plant directly on the floor of a ceramic planter (if there is a drainage hole, place a plastic drip tray in the planter first). This requires a bit of a special touch with watering as you’ll want to be careful not to overdo it— there’s nothing most plants hate more than having “wet feet” or sitting in water for sustained periods of time.

Our Mid-Century ceramic planters are 100% waterproof and allow you to place the plant directly on the floor of the planter without worry of harming your floors.

How to Bottom Water

Step 1: Remove your plant from its decorative container and fill a drip tray or any other container with a couple inches of water.

Step 2: In its plastic nursery pot, place your plant in the water and let it soak anywhere from 30 minutes to several hours. You can also water over the top during this time. Remove it from the water and allow it to fully drain in the sink, bathtub, or outside.

Step 3: Remove it from the water and allow it to fully drain in the sink, bathtub, or outside before returning it to its decorative container.

Bottoms up!


Zanzibar Gem

A resilient low-light plant with waxy, emerald green wands.