Posts in Care Guide
How to Care For and Grow Your Dieffenbachia

THE DIEFFENBACHIA

AKA Dieffenbachia, Dumb Cane, Tropic Snow

If you're looking for a lush, green plant that will add a touch of the tropics to your home, the Dieffenbachia is an excellent choice. This plant is known for its large, variegated leaves that come in a range of colors, from deep green to creamy white. But, as with any plant, the Dieffenbachia needs specific care to thrive in your home. Read on to learn about how to care for and grow a healthy Dieffenbachia.

What type of light does the Dieffenbachia need?

Dieffenbachia prefers bright, indirect light, but can also tolerate low light conditions. However, if you place your Dieffenbachia in direct sunlight, it can scorch the leaves, so it's best to keep it away from windows that receive direct sunlight.

How to water your Dieffenbachia

Water your Dieffenbachia thoroughly once every 7-10 days. This plant loves moisture, but also needs to dry out a bit between waterings. Think about giving it one big drink after extended thirst. A good rule of thumb is to water your Dieffenbachia when the top two inches of soil feel dry to the touch, or use these handy moisture meter indicators. Misting the leaves occasionally will help keep your plant humid and keep dry browning edges to a minimum.

black-soap-spray.jpg

BLACK SOAP SPRAY

All natural and made with just four ingredients, L'Original acts as a natural leaf shine, insecticide, and fungicide for all living plants.

$24

How fast does the Dieffenbachia grow?

In prime conditions, the Dieffenbachia is a fast grower and can grow up to 2 feet per year. Fertilize your Dieffenbachia 1-2 times per month in the spring and summer with indoor plant food, or foliar feed year round.

Common problems with Dieffenbachia

Yellow Leaves

See just one yellow leaf? Don’t worry. It may just be time for that leaf to go! There is only cause for concern if you see multiple yellow leaves or a consistent pattern of yellowing.

One of the most common issues with the Dieffenbachia is the appearance of yellow leaves. This is usually due to overwatering and/or poor drainage. If you begin to notice yellow leaves on your plant, check in on your watering routine: are you checking the soil each time you water? The top two inches or so should be dry to the touch. If you believe you’ve overwatered beyond repair, check in on the plants roots to ensure there is no root rot. Root rot can be serious for most indoor plants if not treated quickly.

Although less common, yellow leaves can also be a sign of nutrient deficiency or even a pest infestation. Inspect your plant thoroughly to ensure there are no unwanted visitors (and if there are, isolate your plant and treat it as soon as possible — Super Neem Oil is a great all-natural remedy for common plants!). As for nutrient deficiencies, make sure you are fertilizing your plant at least once a month in the spring and summer. Alternatively, think back to the last time you repotted your plant. If it’s been over two years, it may be time to repot.

Legginess

Dieffenbachias can also get leggy over time if not cared for properly. With most plants, legginess is a sign of the plant not getting enough light— it will literally reach towards the light to soak up more of it!

While less common, legginess can also be a sign of the general malnourishment of the plant— whether that’s due to lack of fertilizing, a pest infestation, or even a root bound plant that needs more space to grow.

How to maintain a beautiful and healthy Dieffenbachia

Take care of your Dieffenbachia and it will take care of you! Below are simple tips to continue caring for your Dieffenbachia or Dumb Cane over time.

  • Pruning - Remove dry or dead leaves all year round, but save any major pruning for the spring and summer months. When pruning your Dieffenbachia, wear gloves as your plant has a sap that can irritate skin. Use sharp, clean shears and cut just above where the stem is growing from the cane. Dieffenbachias can be fast growers and so it is recommended to prune often or when things start to look crowded.

  • Cleaning - Take each leaf between two soft tissue cloths and wipe off the top to reveal a healthy shine (also helps the plant soak in more light!). Check out L’Original black olive soap as an excellent all-natural houseplant cleaner.

  • Repotting - Houseplants grow much slower than they would in the wild. Depending on the size of your plant and the density of the roots, this is nice to do every 2-3 years to provide fresh nutrients and encourage new growth.

    • When to repot - if the roots start to become visible outside the soil, it is time to consider repotting your Dieffenbachia

    • Pot sizing - if you want your plant to grow taller, find a nursery pot that’s 2” in diameter larger than the current pot. If you want your plant to stay the same height, you can reuse the same pot and simply change the soil.

    • Get your hands dirty - spread out newspaper on the floor, remove the plant from the pot and shake off as much of the old soil as possible so that you have clean roots. Place the plant in the center of the pot, add new soil and pat down firmly. Water the soil thoroughly and place the plant in an area with bright indirect light. Your plant will take 2-4 weeks to settle from the shock and adjust to its new home.

How to propagate a Dieffenbachia

Dieffenbachias are easy plants to propagate. While there are multiple ways to propagate this plant, the most straightforward is to simply take a cutting from your plant and root it in water:

  • Select a stem to propagate - Using sharp, clean scissors or shears, cut a stem at the base of the cane, the stalky “trunk” of your plant.

  • Place in water - Find a clear glass and fill with water. Make sure only the stem of the branch is submerged, and no leaves are sitting in the water.

  • Place in a bright area and wait! - Avoid any direct sun. You may need to change the water out every few days to keep it fresh. It could take up to several weeks for your cutting to form roots.

  • Transfer to soil - After some time, you will start to see tiny white roots emerging from the cutting. Give it a few more days until the roots have grown, and then transfer to indoor potting soil. A small pot is best — no larger than 6” in diameter.

  • Keep hydrated - During the first few weeks, or until your plant feels firmly rooted in its soil, regularly water and drain your plant. The soil should be just barely moist to the touch at all times.


Dieffenbachia

A vibrant and colorful plant with intricately patterned leaves that are silky smooth to the touch, the Dieffenbachia or Dumb Cane is a sought-after statement plant for its easy-going nature and effortless ability to brighten any room. Native to the verdant rainforests of Central and South America, the Dieffenbachia is an excellent air-purifier that does best in medium to bright indirect light.

How to Care For and Grow Your Olive Tree

Olive Tree

AKA Olea europaea

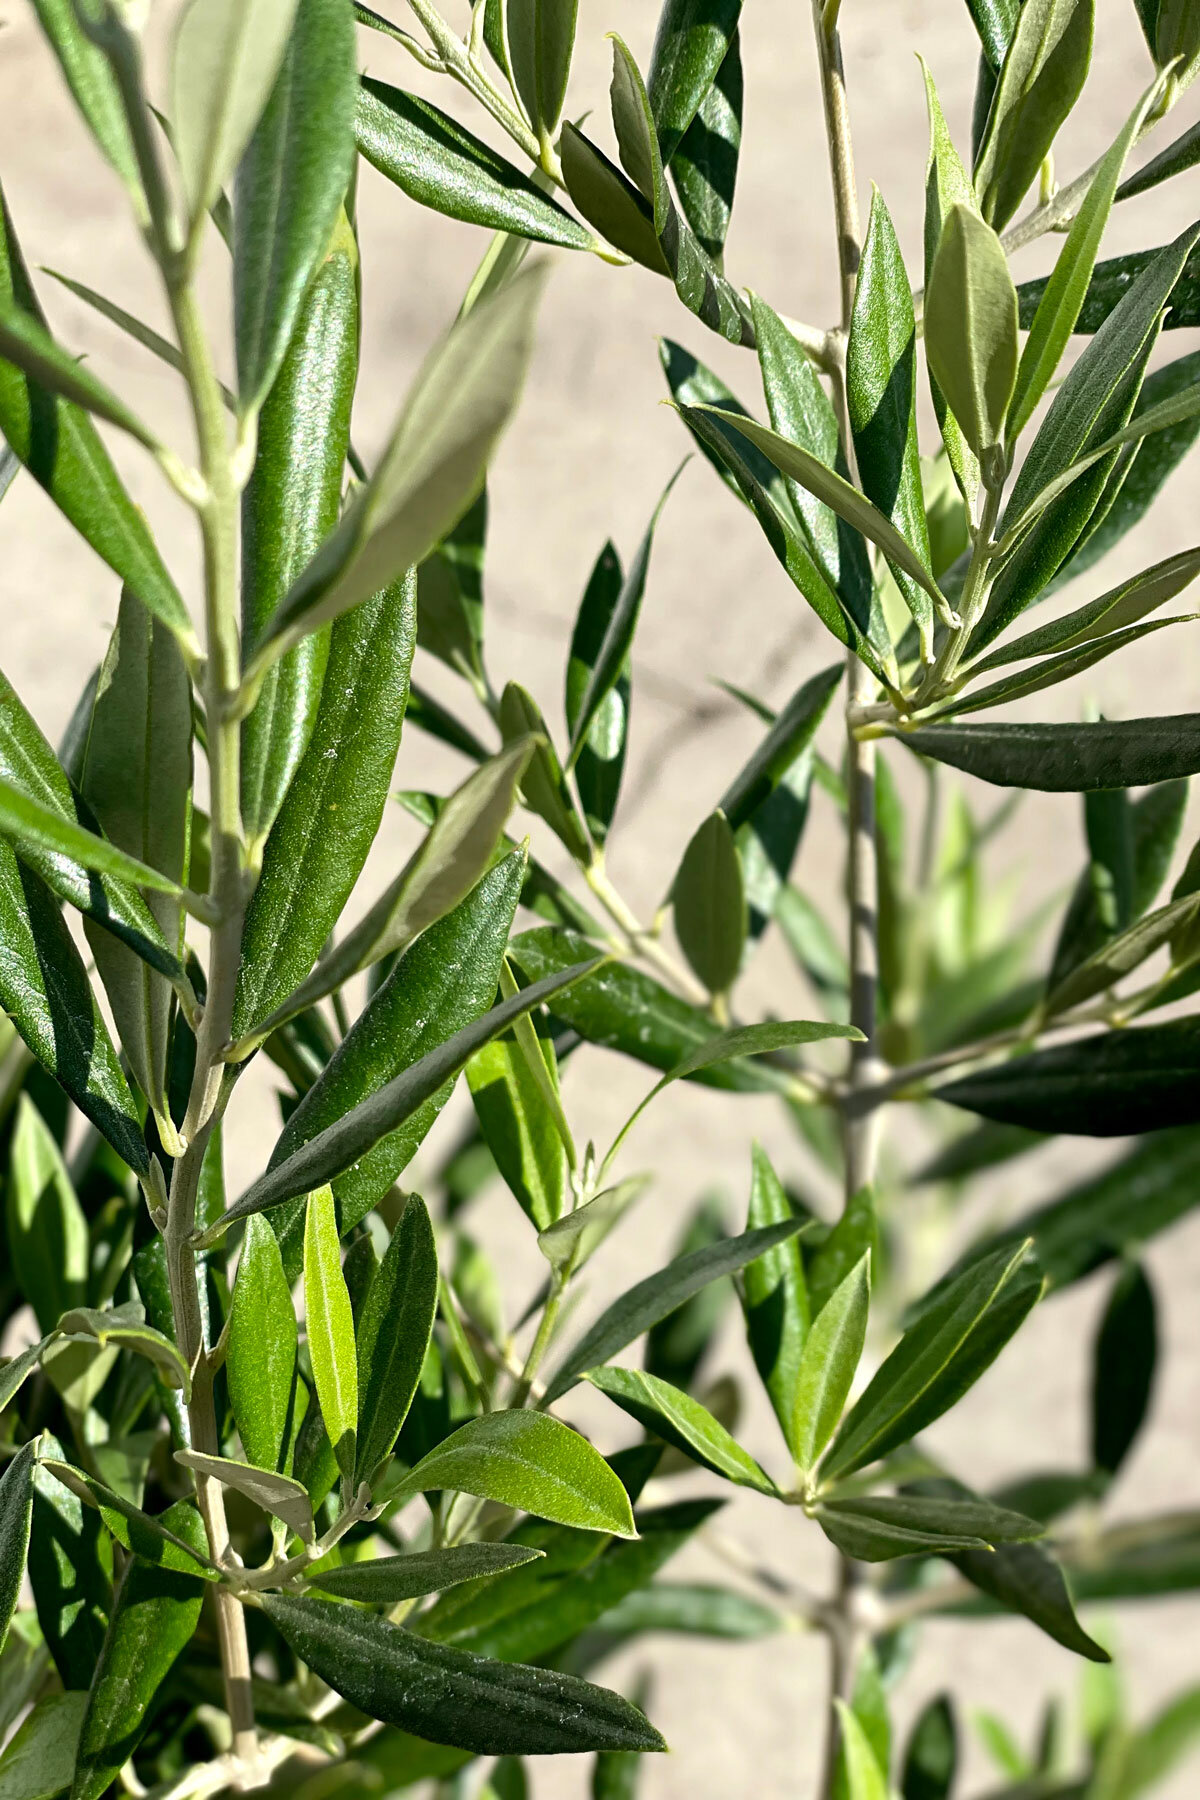
With their elegant, silver-green foliage and graceful silhouettes, the Olive Tree or Olea europaea is a time-tested, infinitely elegant legacy tree and indoor plant for outdoor and indoor spaces that receive plenty of bright light. This plant variety is naturally both pest and drought resistant and easy to care for. But like all living things in the gardening realm, they have their own requirements and preferences for care. So read on and explore tips on optimal planters and dive into the horticulture of the Olea europaea. 

How Much light do Olive Trees need?

The Olive Tree needs ample direct sunlight to thrive and produce fruit — ideally at least six hours a day or more of direct sunlight. Generally speaking, it is best if Olive Trees are placed outdoors. Refrain from placing in low light or medium light areas.

Water

Check moisture of topsoil weekly and give plant four cups of water when top two inches of soil are dry to the touch. Avoid overwatering and too much damp soil to prevent root-rot. Occasionally mist your Olive Tree to increase the humid climate. Prevent the soil from drying out.

Growth

It can take several months to years for Olive Trees to begin blooming fruit. Remember that light and full sun = fruit, and fertilize every two weeks during spring, summer and fall. Ensure your Olive Tree is receiving the right humidity,

MOISTURE METERS

Finally, a moisture meter that actually works.

Common problems with Olive Trees

Weeds

Symptom: Other plants growing in your Olive Tree’s pot and soil. 

Cause: Particularly young Olive Trees can experience competition from opportunistic weeds.

Remedy: Pluck the weeds out as soon as you see them and make sure to get the roots out. Gentle herbicides can be used but are usually not required.

Yellow Leaves: Not Enough Light

Symptom: A large amount of yellow leaves in the tree’s canopy.

Cause: Too much shade, not enough direct light.

Remedy: Ensure that your tree is in a space that receives ample direct sunlight for at least 8 hours/day.

Yellow Leaves: Needs Fertilizer

Symptom: Majority of canopy exhibiting yellow leaves.

Cause: The tree needs more nitrogen, which is available through fertilizer.

Remedy: Give your tree a balanced fertilizer every two weeks from spring through fall. 

Shop the Olive Tree at leonandgeorge.com

How to care for and grow olive tree

Can I keep an Olive Tree indoors?

One of the most common question our Plant Stylists receive is whether or not Olive Trees can survive indoors, and while we don’t necessarily recommend it, this plant can be kept indoors if that area receives enough light and humidity—at least four hours a day of direct sun minimum. However, it is unlikely to bloom or produce fruit indoors.

If you’re interested in this look for your home, try the Black Olive Tree, a similar variety of plant that does better indoors. Read more about the differences between the Olive Tree and the Black Olive Tree aka Shady Lady.

How to maintain a beautiful and healthy Olive Tree

Care for your plant and it will thrive for years to come. See these simple tips to keep your tree flourishing. 

  • Pruning: your tree will not need to be pruned for the first 2+ years of its life with you. When it is time, prune off any yellow or dying leaves from your tree with clean, sharp shears. Limited pruning to the fall and winter months. 

  • Fertilizing: fertilize your tree twice monthly during the warmer months including spring, summer and fall with a balanced slow-release fertilizer. During these months, your Olive Tree may need to be watered more frequently.

  • Pests: To keep your olive trees thriving, regular inspections are crucial to catch signs of pests such as mealybugs, aphids, or spider mites early. Consider introducing neem oil as organic pest control methods

Shop the Olive Tree at leonandgeorge.com

How to propagate an Olive Tree

Beautiful plants are wonderful gifts to share and easy to grow, some Olive Tree varieties can be propagated from cuttings. Only propagate during summer with this one, when your tree experiences its highest rate of growth.

  • Prepare a rooting container or grower pot: a small nursery pot with drainage, and fill it with fruit tree potting soil and watch your planted roots grow

  • Select an eight-inch long, hardwood tip from one of your tree’s branches.

  • Trim the branch with clean, sharp shears. Be sure to sever it directly below a leaf “node or bud.”

  • Remove all but six or seven leaves from the branch.

  • Coat the cut end of the branch in 0.2-percent IBA rooting talc.

  • Plant the branch in the rooting container and place it outdoors in a spot that receives partial shade.

  • Mist the branch and its foliage regularly. 

  • Check for roots after three months. Allow it to grow within the rooting container until sturdy, then transplant to a new pot, preferably during autumn.

Incorporating Olive trees into your collection of house plants can be a rewarding experience for any gardener. Their resilient and tolerant nature makes them an excellent choice for outdoor and indoor spaces, thriving in high light exposure. The lush foliage not only enhances your living environment but also contributes to improved air quality as they purify the indoor air. As you embark on this green journey, consider exploring our nursery for Olive Trees. Happy gardening!


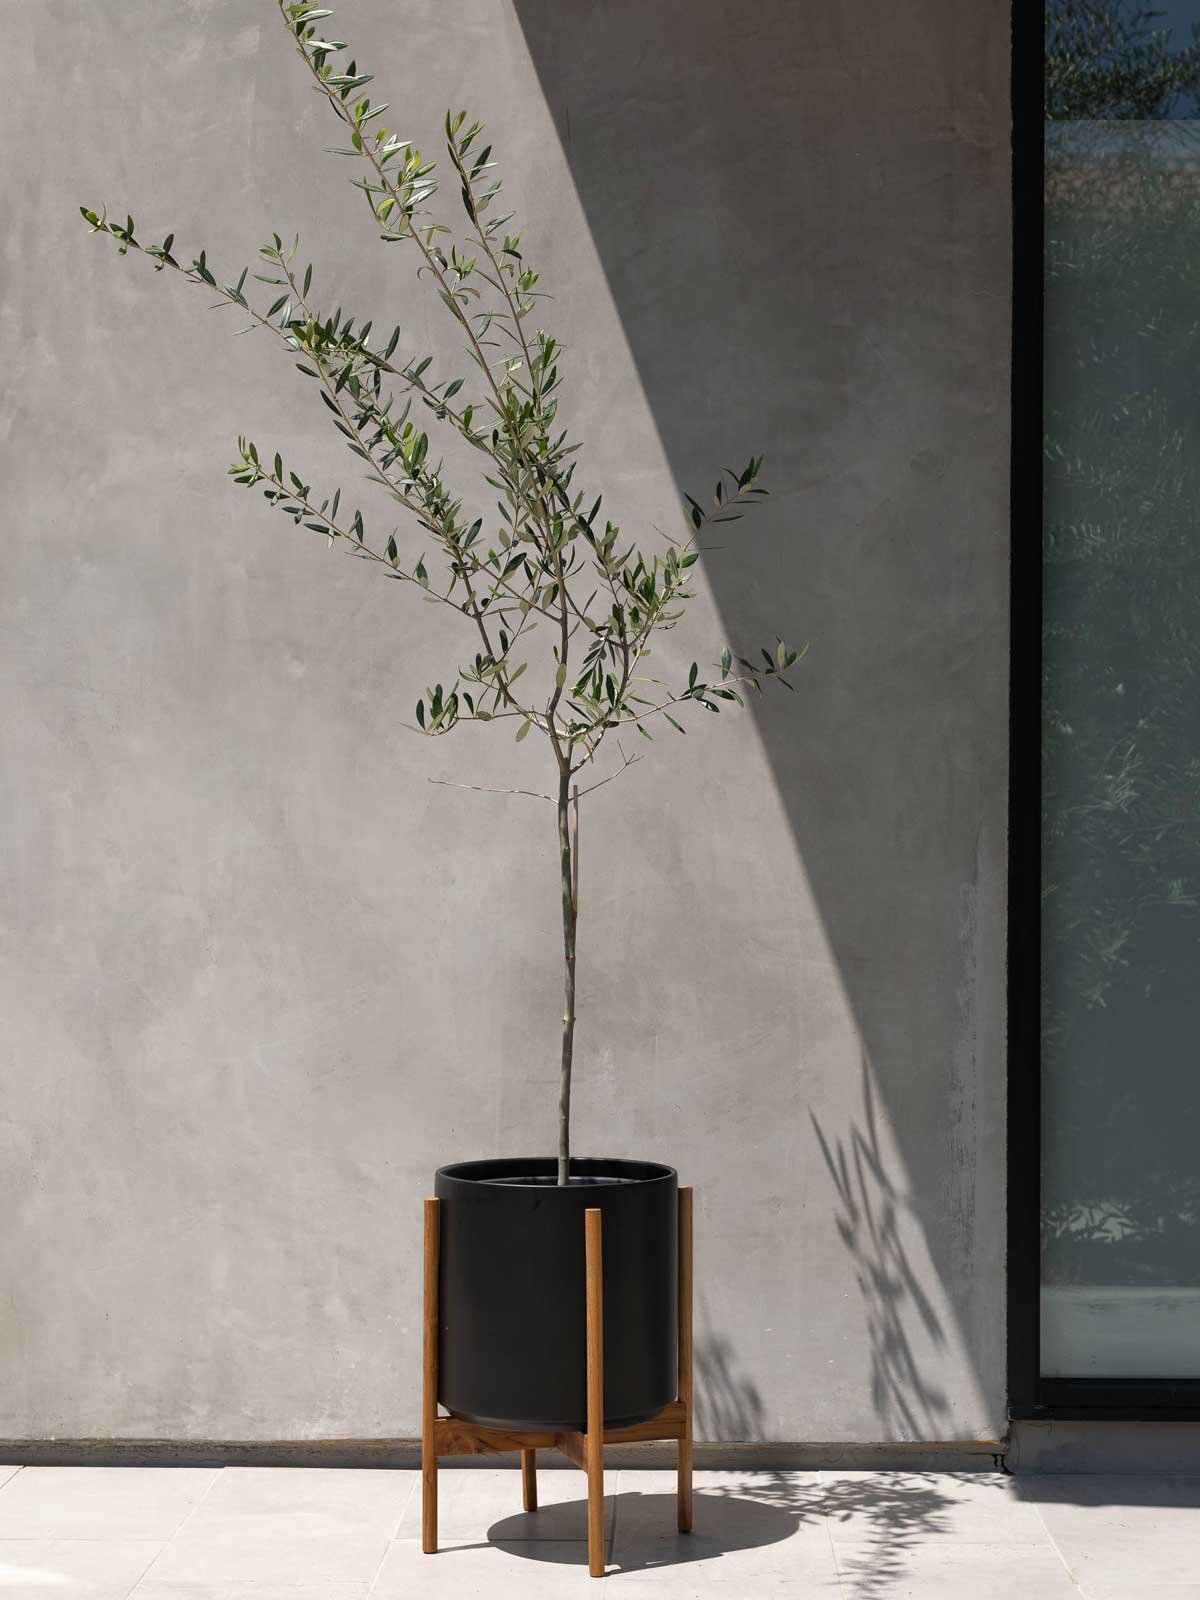
olivetreeblackstand.jpg

Olive Tree

A classic and elegant addition to any brightly lit space, plus naturally pest and drought resistant.

How to Care for and Grow Your Pothos
pothos-care-guide.jpg

The Cascading Pothos, also known as simply Pothos or Devil’s Ivy, is one of the easiest plants out there to care for, and a great plant for beginners. Learn the basics of Pothos plant care including light requirements, watering frequency, and how to troubleshoot common problems you may encounter along the way.

How much light does a Pothos need?

Pothos prefer bright indirect light, though they can easily survive in low-light environments. Keep your plant out of harsh direct sunlight as their leaves will quickly burn.

How to water your Pothos

Let your plant dry out between waterings. Water thoroughly when topsoil is dry, usually once a week.

  • Avoid overwatering, and note that your watering schedule may be less frequent during winter months or if the plant is getting little light.

How fast does a Pothos grow?

In prime conditions, the Pothos is an incredibly fast grower and its tendrils can grow over 10 feet long! Fertilize your plant 1-2 times per month in the spring and summer with indoor plant food, or foliar feed year round.

Pothos leaves turning yellow

Are your Pothos’ leaves yellow? Pothos have many leaves and if it’s just one or two and the rest of the plant looks healthy, most likely those leaves are just on their way out. You should be able to easily pluck them off. This is totally normal and nothing to worry about!

If you notice many yellow leaves on your Pothos, it could be a sign of overwatering. Check the soil and make sure it dries out before watering again.

Monstera no holes on leaves

Pothos leaves wilting or drooping

If your Pothos looks droopy or the leaves are wilting, most likely your plant is under-watered. This is easy to check by simply touching the soil, or checking the weight of the plant (lift it up— does it feel very light? If so, it needs a good drink!). Sometimes Pothos become so dry that when you water it, the water just drains right through. If this seems to be the case, let your plant sit in water for a few hours (no more than one day) to drink as much as it needs from the bottom up.

 
Keep your (plant’s) medicine cabinet fully stocked. Our complete set of natural vitamins and pest solutions is the ultimate curative remedy for plants undergoing stress due to common ailments such as fungus or infestation.

RESTORATIVE PLANT CARE ESSENTIALS

Keep your (plant’s) medicine cabinet fully stocked. Our complete set of natural vitamins and pest solutions is the ultimate curative remedy for plants undergoing stress due to common ailments such as fungus or infestation.

Shop the Cascading Pothos at leonandgeorge.com

How to maintain a beautiful and healthy Pothos

Take care of your Pothos and it will take care of you! Below are simple tips to continue caring for your Pothos over time.

  • Pruning your pothos - Remove yellow leaves all year round, and prune often if you’d like a fuller, bushier look. Simply cut the tendrils just below the node.

  • Cleaning your pothos - With so much foliage, the Pothos can be annoying to clean! Mist regularly to keep dust off, and once ever few months use a damp cloth to clean each leaf and reveal a healthy shine (also helps the plant soak in more light!).

  • Repotting your pothos - Houseplants grow much slower than they would in the wild. Depending on the size of your plant and the density of the roots, this is nice to do every 2-3 years to provide fresh nutrients and encourage new growth.

    • When to repot - Pothos are incredibly hardy plants and can live in the same pot for years. If you want your Pothos to grow very large, repot every 2-3 years.

    • Pot sizing - if you want your plant to grow bushier, find a nursery pot that’s 2” in diameter larger than the current pot. If you want your plant to stay the same height, you can reuse the same pot and simply change the soil.

    • Get your hands dirty - spread out newspaper on the floor, remove the plant from the pot and shake off as much of the old soil as possible so that you have clean roots. Place the plant in the center of the pot, add new soil and pat down firmly. Water the soil thoroughly and place the plant in an area with bright indirect light. Your plant will take 2-4 weeks to settle from the shock and adjust to its new home.

  • Staking your pothos - Some Pothos owners like to stake their plant to encourage vertical growth. You can do this by simply inserting a moss totem and attaching the stems of the plant to it with prongs.


Shop the Cascading Pothos at leonandgeorge.com

How to propagate a Pothos

Whether you want to recycle your Pothos cuttings after pruning or you simply want to create a new plant, know that the Pothos, thanks to its aerial roots, is one of the easiest plants to propagate. Though there are many ways to do this, water propagation is generally the easiest way to go about it. Follow these instructions to propagate your Pothos:

How to propagate a pothos
  • Select a stem to propagate - Using a clean blade, cut an inch or two below an aerial root. You don’t have to propagate with an aerial root, but this is a guaranteed way of propagation success!

  • Place in water - Find a clear glass and fill with water. Make sure only the stem is submerged, and no leaves are sitting in the water.

  • Place in a bright area and wait! - Avoid any direct sun. It usually takes just a week or so for the root to start growing.

  • Transfer to soil - After a couple weeks, transfer to indoor potting soil. A small pot is best — no larger than 6” in diameter.

  • Keep hydrated - During the first few weeks, or until your plant feels firmly rooted in its soil, regularly water and drain your new Pothos. The soil should be just barely moist to the touch at all times until the plant is thoroughly rooted in the soil, at which point you can water every time the soil dries out.

Illustrations by our talented plant stylist, Kailie Barnes.


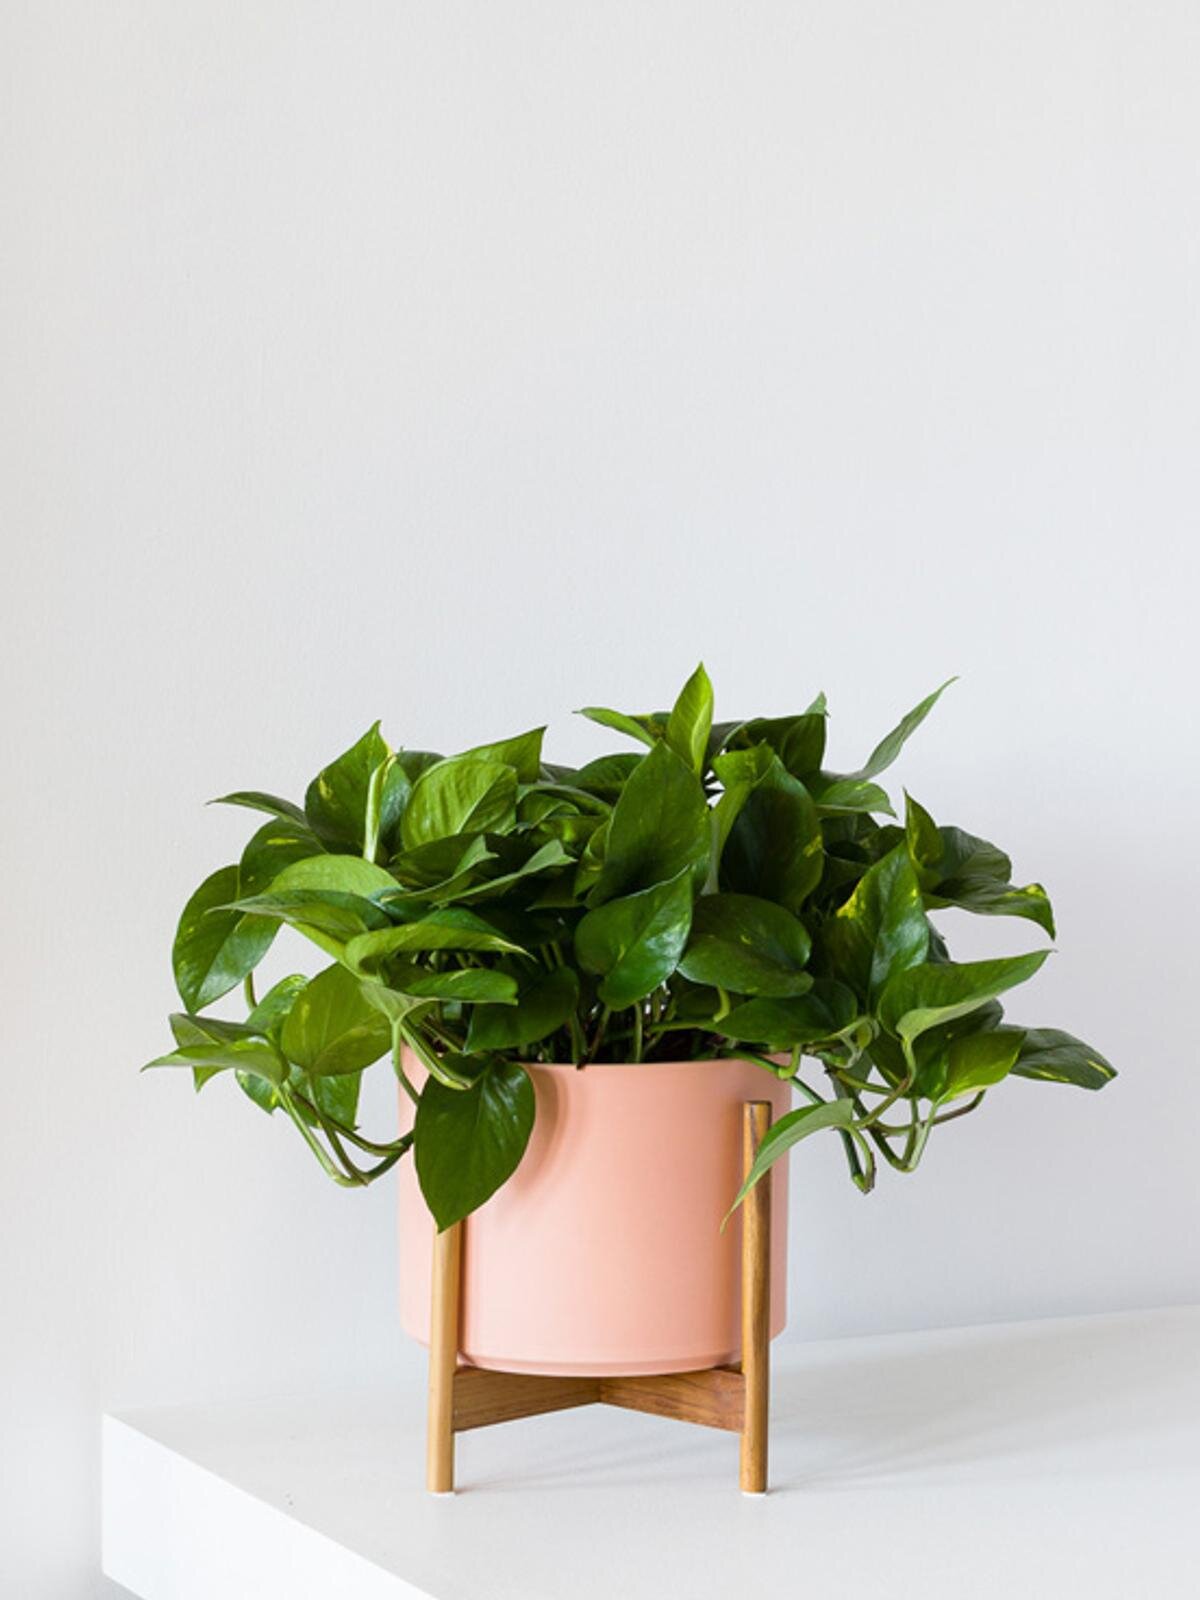
pothoscoral.jpeg

Cascading Pothos

A popular, attractive, and truly easy-care plant, the Cascading Pothos has smooth and leathery heart-shaped leaves and is adaptable to virtually any environment.

How to Care For and Grow Your Braided Money Tree

Braided Money Tree

AKA pachira aquatica

A symbol of good luck and prosperity, the Braided Money Tree is a gorgeous indoor tree that can grow up to eight feet tall. Learn the basics of caring for this plant including light requirements, watering frequency, and how to troubleshoot common problems you may encounter along the way.

What kind of light does the Money Tree need?

This plant prefers bright indirect light, though they can adjust to medium levels of light. Keep them out of direct sunlight, as too much of it can scorch their leaves!

How to water your money tree

Let your plant dry out between waterings. Water thoroughly when topsoil is dry, usually once a week. Avoid overwatering, and note that your watering schedule may be less frequent during winter months.

Growth

In prime conditions, this plant is a fast grower and can reach up to eight feet tall indoors (and 60 feet tall in the wild!). Fertilize your Money Tree 1-2 times per month in the spring and summer with indoor plant food, or foliar feed year round.

Common problems with Braided Money Trees


How to maintain a beautiful and healthy Braided Money Tree

Take care of your Money Tree and it will take care of you! Below are simple tips to continue caring for your Money Tree over time.

Pruning Money Trees

Remove dry or dead leaves all year round, but save any major pruning for the spring and summer months. When pruning your plant, take a step back and look at the entire shape of the canopy, and determine which branches to remove to give it to restore an even, balanced shape. Use sharp, clean shears and cut any excessive growth at the base of the stem.

Cleaning Your Plant

The leaves of this plant are delicate. Mist regularly to keep dust off the plant, but if it gets to be extra dusty, carefully clean each leaf with a damp cloth.

How to Repot a money tree

Houseplants grow much slower than they would in the wild. Depending on the size of your plant and the density of the roots, this is nice to do every couple years to provide fresh nutrients and encourage new growth.

  • When to repot - Braided Money Trees are resilient plants that don’t need a lot of upkeep. Repot once every two to three years to provide fresh nutrients.

  • Pot sizing - if you want your plant to grow taller, find a nursery pot that’s 2” in diameter larger than the current pot. If you want your plant to stay the same height, you can reuse the same pot and simply change the soil.

  • Get your hands dirty - spread out newspaper on the floor, remove the plant from the pot and shake off as much of the old soil as possible so that you have clean roots. Place the plant in the center of the pot, add new soil and pat down firmly. Water the soil thoroughly and place the plant in an area with bright indirect light. Your plant will take 2-4 weeks to settle from the shock and adjust to its new home.

How to propagate a Braided Money Tree

There are many debates around how to successfully propagate a Money Tree. That said, it is a simple process if you take your cutting from the correct place. Follow these instructions to propagate your Money Tree:

  • Select a stem to propagate - Using sharp, clean scissors or shears, cut a stem with at least two nodes. The node as a joint in the plant’s stem— this is where new growth typically stems off from.

  • Place in potting soil - Place the cutting in fresh soil and water and drain thoroughly. Make sure the pot is an appropriate size — no more than six inches in diameter.

  • Keep hydrated - Place the potted cutting in a bright area and, during the first few weeks or until your plant feels firmly rooted in its soil, regularly water and drain your new Money Tree. The soil should be just barely moist to the touch at all times.

Illustrations by our talented plant stylist, Kailie Barnes


1 TO 1 VIDEO CALL WITH AN EXPERT

Yellow leaves? Worried about watering or struggling with incorrect lighting? Book a call and get truly personalized support for all your plant-related needs.

How to Care For and Grow Your False Aralia

False Aralia

AKA Dizygotheca elegantissima

A beautifully unique houseplant with wispy, textured foliage, the False Aralia (also known as Threadleaf Aralia and Spider Aralia) is a wonderful plant for any level of green thumb. Read up on what it takes to care for a False Aralia, from watering and light needs to problems and more.

What type of light does my False Aralia need?

The False Aralia does best bright indirect light. Be sure to keep it out of harsh direct sunlight as this will cause its leaves to brown.

How to water your False Aralia

Let your False Aralia dry out between waterings. Water thoroughly when topsoil is dry, usually once a week. Avoid overwatering, and note that your watering schedule may change during winter months. False Aralias also love an occasional bottom watering. Consider using a tool like a moisture meter to take the mystery out of your watering schedule.

How fast does the False Aralia grow?

False Aralias are relatively slow growers, but can reach a height of about 6ft when grown in a container.

Common problems with False Aralias

Leaves drooping

The most common cause of leaves drooping on a False Aralia is underwatering. Check the soil: f you suspect your plant is dry, give it a healthy watering and wait 24 hours to see if it perks back up.

Leaf shedding

False Aralias can be sensitive to change. When this plant begins to loose leaves, it is usually due to a change in its environment, whether that’s light, humidity levels or both. Be patient, sometimes it will take a few weeks for plants to adjust to their new home.

Another thing to keep in mind with leaf drop on False Aralias is that this plant typically loses its lower leaves over time. If you’d like to maintain its bushiness, prune it back once a year.

How to maintain a beautiful and healthy False Aralia

Take care of your Aralia and it will take care of you! Below are simple tips to continue caring for your False Aralia over time.

Pruning Your False Aralia

The False Aralia is a slow grower that requires very little pruning and maintenance over time. You will only need to prune your plant if you’d like to control its height or to encourage bushiness. If you’d like your plant to maintain it’s bush-like form, prune it back in the spring for fuller growth. Otherwise, it will slowly lose its lower leaves and take on a more tree-like appearance.

Cleaning Your False Aralia

With so many thin leaves, the False Aralia can be difficult to clean! We recommend regularly misting to keep dust off, and occasionally cleaning the leaves with a moist towel and L’Original black olive oil soap for plants.

How To Repot A False Aralia

Houseplants grow much slower than they would in the wild. Depending on the size of your plant and the density of the roots, this is nice to do every 1-2 years to provide fresh nutrients and encourage new growth.

  • When to repot - Aralias are particularly slow growing plants, but repotting them once a year in the spring will help them grow faster.

  • Pot sizing - if you want your plant to grow taller, find a nursery pot that’s 2” in diameter larger than the current pot. If you want your plant to stay the same height, you can reuse the same pot and simply change the soil. You may need to cut back some of the roots to do this.

  • Get your hands dirty - spread out newspaper on the floor, remove the plant from the pot and shake off as much of the old soil as possible so that you have clean roots. Place the plant in the center of the pot, add new soil and pat down firmly. Water the soil thoroughly and place the plant in an area with bright indirect light. Your plant will take 2-4 weeks to settle from the shock and adjust to its new home.

Need help repotting? Check out our Deluxe Repotting Kit which includes everything you need to repot your plant, including step by step instructions and a video tutorial with our Plant Doctors.


False Aralia

A unique plant with textured, serrated foliage that requires little maintenance over time.

How to Care For and Grow Your Rubber Tree
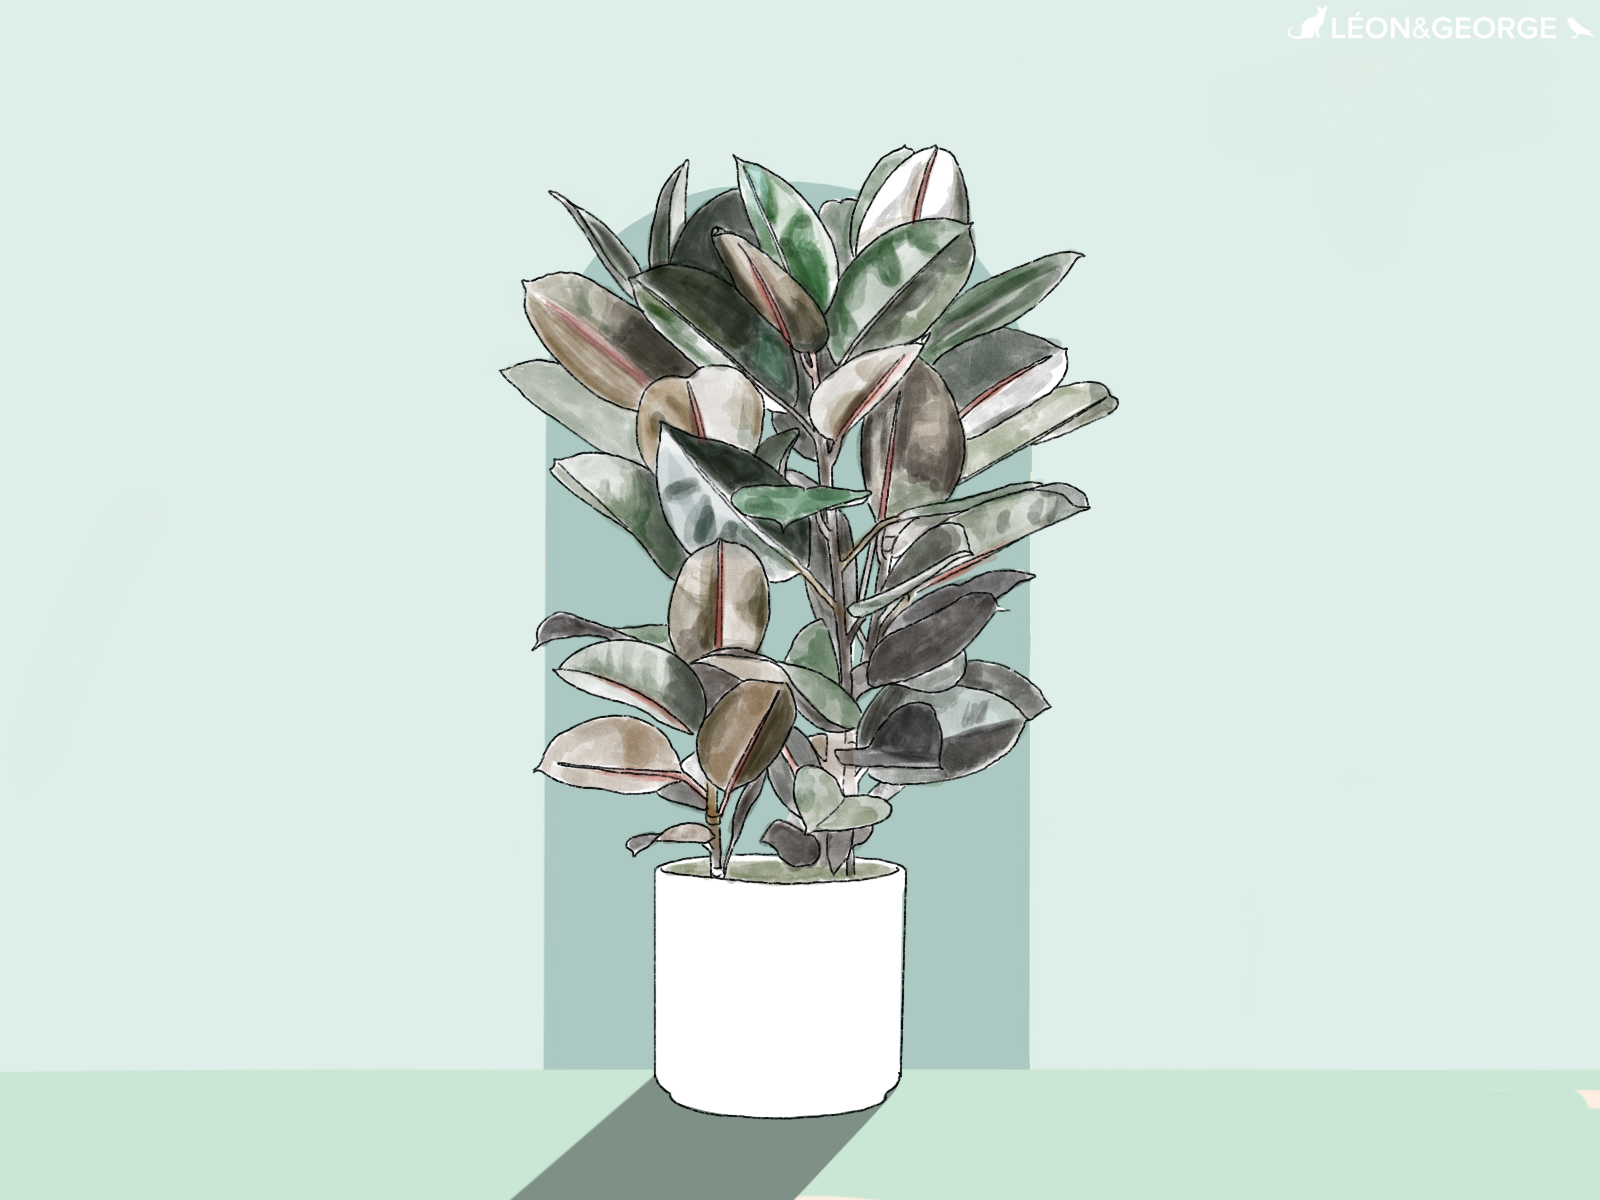
RubberTree (1).png

The Rubber Tree

AKA ficus elastica
AKA ficus decora
AKA ficus robusta

The Rubber Tree, also known as a Rubber Plant or Ficus Elastica, is one of the hardiest members of the ficus family, often times notorious for being fickle, finicky, and for some just plain difficult. That tends to not be the case with the rubber tree, whose dark burgundy leaves shine with just a little TLC. Read on for simple tips to care for the Rubber Tree!

What type of light does the Rubber Tree need?

Rubber Trees perfer bright indirect light, though they can also adjust to medium levels of light. Place your Rubber Tree no further than three to four feet away from a bright window for best results.

How to water your Rubber Tree

Consistency is key! Water your Rubber Tree when the topsoil feels dry, usually once a week to every ten days. Avoid overwatering, and keep in mind that your watering schedule may be less frequent during winter months.

black-soap-spray.jpg

BLACK SOAP SPRAY

All natural and made with just four ingredients, L'Original acts as a natural leaf shine, insecticide, and fungicide for all living plants.

$24

How fast does the Rubber Tree grow?

In prime conditions, the Rubber Tree is a fast grower and can grow up to 10 feet tall indoors. Fertilize your Rubber Tree 1-2 times per month in the spring and summer with indoor plant food, or foliar feed year round.

Shop leaf shine, insecticide and fungicide at leonandgeorge.com

Common problems with Rubber Trees

Yellow leaves on a rubber tree

Yellow or brown leaves - overwatering

  • Symptom - leaves turning yellow or brown, usually at the bottom of the tree

  • Cause - too much water, not enough light

  • Remedy - allow soil to dry out completely, sometimes this can take 2-3 weeks. Check the soil’s moisture through the drainage holes at the bottom. Overwatering can lead to more severe ailments and that may eventually require you change the soil.  

Read more about discolored leaves here.

Droopy leaves on a Rubber Tree

Leaf drop - unstable temperatures

  • Symptom - leaves dropping

  • Cause - cold air drafts, overly dry climates, or not enough light

  • Remedy - make sure your plant is placed away from air vents or cold air drafts. While rubber trees can adapt to indoor climates, they prefer warmth and high humidity. If the possible cause is not enough light, move the rubber tree to medium to brightly lit area.

Read more about Rubber Tree leaf drop.

Leaf droop - over or underwatering

  • Symptom - leaves sagging or drooping

  • Cause - most likely underwatering, but could also be overwatering

  • Remedy - always check the soil before watering a Rubber Tree. It should be dry to the touch before watering again. If you suspect it’s been overwatered, allow soil to dry out completely before watering again.

How to maintain a beautiful and healthy Rubber Tree

Rubber tree plant care

Take care of your Rubber Tree and it will take care of you! Below are simple tips to continue caring for your Rubber Tree over time.

  • Pruning - Remove dry or dead leaves all year round, but save any major pruning for the spring and summer months. When pruning your rubber tree, wear gloves and protect your floor with newspaper — the sap that leaks out can be sticky and damage floors. Use sharp, clean shears and cut just above the node at a 90 degree angle.

  • Cleaning - Take each leaf between two soft tissue cloths and wipe off the top to reveal a healthy shine (also helps the plant soak in more light!).

  • Repotting - Houseplants grow much slower than they would in the wild. Depending on the size of your plant and the density of the roots, this is nice to do every 2-3 years to provide fresh nutrients and encourage new growth.

    • When to repot - if the roots start to become visible outside the soil, it is time to consider repotting your rubber tree

    • Pot sizing - if you want your plant to grow taller, find a nursery pot that’s 2” in diameter larger than the current pot. If you want your plant to stay the same height, you can reuse the same pot and simply change the soil.

    • Get your hands dirty - spread out newspaper on the floor, remove the plant from the pot and shake off as much of the old soil as possible so that you have clean roots. Place the plant in the center of the pot, add new soil and pat down firmly. Water the soil thoroughly and place the plant in an area with bright indirect light. Your plant will take 2-4 weeks to settle from the shock and adjust to its new home.


How to propagate a Rubber Tree

Whether you want to recycle your Rubber Tree cuttings or you simply want to create a new plant, propagating the Rubber Tree is simple. Though there are many ways to do this, water propagation is generally the easiest way to go about it. Follow these instructions to propagate your Rubber Tree:

  • Select a small branch to propagate - Using sharp, clean scissors or shears, cut a two to three inch branch just above a node (a leaf joint).

  • Place in water - Find a clear glass and fill with water. Make sure only the stem of the branch is submerged, and no leaves are sitting in the water.

  • Place in a bright area and wait! - Avoid any direct sun. You may need to change the water out every few days to keep it fresh. It could take up to several weeks for your cutting to form roots.

  • Transfer to soil - After some time, you will start to see tiny white roots emerging from the cutting. Give it a few more days until the roots have grown, and then transfer to indoor potting soil. A small pot is best — no larger than 6” in diameter.

  • Keep hydrated - During the first few weeks, or until your plant feels firmly rooted in its soil, regularly water and drain your plant. The soil should be just barely moist to the touch at all times.


201804-LÉON&GEORGE_Jessica-isaac-8 (1).jpg

RUBBER TREE

This plant grows quickly in ideal conditions and is easy to care for. The crimson casings of new leaves adds a pop of color and is the perfect statement piece for budding plant parents.

Dragon Tree Care Guide: Everything You Need To Know

Dragon Tree

AKA dracaena marginata

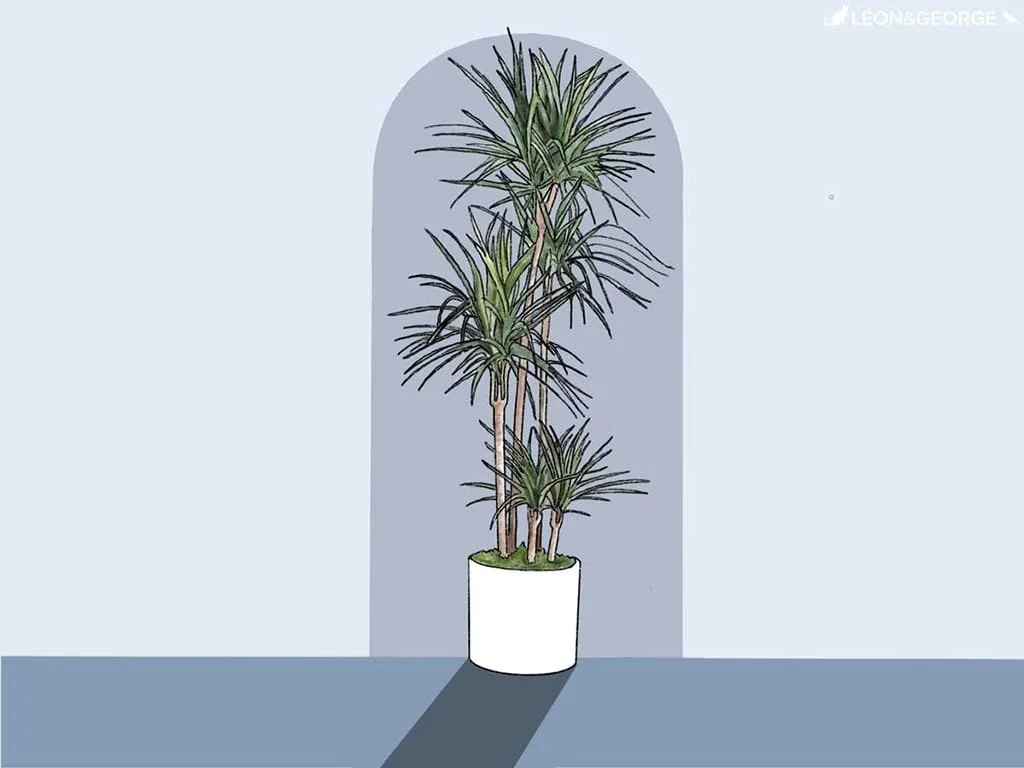
A timeless indoor plant with a striking appearance, the Dragon Tree, or Dracaena marginata, is known for its slender striped leaves that burst out of strong trunks. One of the easiest plants to care for and a fabulous indoor air-purifier, the Dragon Tree requires little maintenance to bring beauty and elegance to any space it graces. You can’t go wrong by buying a Dragon Tree: they’re truly as easy-going as they are gorgeous! Learn how to care for and grow your very own Dragon Tree.

What type of light does my Dragon tree need?

Dragon Trees prefer bright indirect light, though they can adjust to medium to low levels of light as well. Keep them out of harsh direct sunlight, as too much of it can scorch their leaves.

How to water your Dragon Tree

Let your Dragon Tree dry out between waterings. Water thoroughly when topsoil is dry, usually once a week. Avoid overwatering, and note that your watering schedule may be less frequent during winter months. Consider using a moisture meter to take the mystery out of your watering schedule and monitor soil humidity.

How fast does the Dragon Tree grow?

The Dragon Tree is a slow grower houseplant, though it is constantly unfolding new leaves and shedding old ones. Indoors, it can reach up to eight feet tall! Fertilize your Dragon Tree 1-2 times per month in the spring and summer with indoor plant food, or foliar feed year round.

Common problems with Dragon Trees

Leaves falling off

If you see your Dragon Tree leaves falling off, worry not! The Dragon Tree naturally sheds its leaves, so it is not uncommon for you to find them at the base of the soil or on the floor. To avoid them falling to the ground, you may periodically prune your Dragon Tree by simply removing any dead leaves once every week or two. Also consider fertilizing your plant in the spring and summer to make sure there are enough nutrients to go around the many many leaves!

If your Dragon Tree is losing many leaves (think the plant is starting to look scarce and/or showing other signs of distress), you may actually have a problem. Check first to make sure you are not overwatering — the soil should dry out in between waterings. Overwatering can lead to more severe ailments and that may eventually require you change the soil.  

Read more about leaf drop in Dragon Trees here.

Leaves drooping

If you see leaves or foliage dropping on your Dragon Tree, it’s very possible you are either overwatering or underwatering. If you suspect it’s underwatering, give your Dragon Tree a thorough shower and let it completely drain out — it should perk up within 24 hours. If you suspect overwatering, check the soil, particularly at the bottom of the plant. Is there moisture? Let the plant dry out before watering again, and if you expect a case of root rot, you may need to repot the plant with fresh soil.

Read more about droopy Dragon Trees here.

Leaves turning brown

Are the new leaves of your Dragon Tree turning brown? This could be due to temperature fluctuations. The Dragon Tree does not like drastic temperature changes that could be caused by air vents (AC or heating) or drafts.

Read more about Dragon Trees and their brown tips here.


How to maintain and grow a beautiful and healthy Dragon Tree

Take care of your Dragon Tree (AKA dracaena marginata) and it will take care of you! Below are simple tips to continue caring for your Dragon Tree over time.

Pruning Your Dragon Tree

Remove dry or dead leaves all year round, but save any major pruning for the spring and summer months. If you would like to remove an entire stalk or branch of your Dragon Tree, simply cut them off at a 45 degree angle with sharp pruning shears.

Brown tips? No problem. This can be common but not serious with Dragon Trees. Simply cut the tips off, following the natural shape of the leaf.

Cleaning Your Dragon Tree

With so many thin leaves, the Dragon Tree can be difficult to clean! We recommend regularly misting to keep dust off, and occasionally cleaning the leaves with a moist towel.

How To Repot A Dragon Tree

Houseplants grow much slower than they would in the wild. Depending on the size of your plant and the density of the roots, this is nice to do every 2-3 years to provide fresh nutrients and encourage new growth.

  • When to repot - If the roots of your Dragon Tree are outgrowing its pot, it will let you know by bulging out at the sides.

  • Pot sizing - if you want your plant to grow taller, find a nursery pot that’s 2” in diameter larger than the current pot. If you want your plant to stay the same height, you can reuse the same pot and simply change the soil. You may need to cut back some of the roots to do this.

  • Get your hands dirty - spread out newspaper on the floor, remove the plant from the pot and shake off as much of the old soil as possible so that you have clean roots. Place the plant in the center of the pot, add new soil and pat down firmly. Water the soil thoroughly and place the plant in an area with bright indirect light. Your plant will take 2-4 weeks to settle from the shock and adjust to its new home.


Shop beautiful Dragon Trees at leonandgeorge.com

How to propagate a Dragon Tree

The Dragon Tree (AKA dracaena marginata) is a simple plant to propagate. Though there are many ways to do this, water propagation is generally the easiest way to go about it. Follow these instructions to propagate your Dragon Tree:

  • Select a branch or stalk to propagate - Using sharp, clean scissors or shears, cut a branch off your Dragon tree at a 45 degree angle.

  • Place in water - Find a clear glass and fill with water. Make sure only the stem is submerged, and no leaves are sitting in the water.

  • Place in a bright area and wait! - Avoid any direct sun. You may need to change the water out every few days to keep it fresh. It usually takes just a few days for the root to start growing.

  • Transfer to soil - After a few weeks, transfer to indoor potting soil. Depending on the size of the branch and its roots, make sure to choose an appropriate size pot — you do not want an overly large pot for a small cutting or roots.

  • Keep hydrated - During the first few weeks, or until your plant feels firmly rooted in its soil, regularly water and drain your Dragon Tree. The soil should be just barely moist to the touch at all times.

Illustrations by our talented plant stylist, Kailie Barnes.


dragon-tree-leonandgeorge.jpg

Dragon Tree

Recognizable for its long slender striped leaves that spring forth from a robust trunk, the Dragon Tree is a favorite among easy-to-grow house plants. Its adaptability to different styles makes it a must-have for any gardener. While it thrives in bright light, it remains one of the easiest plants to grow and care for. Each Dragon Tree comes with the option of various pots, including a self-draining ceramic pot that ensures optimal moisture levels. Additionally, the perfect potting mix provided with it wards off pests and harmful insects, ensuring your plant remains vibrant and healthy. Whether you're an avid gardener or just beginning your journey with house plants, the Dragon Tree is an excellent choice to add to your collection.

Schefflera Tree Care Guide: Everything You Need To Know

With stunning texture and a covetable canopy, the Schefflera Tree, also known as Schefflera arbicola or Umbrella Tree, is a fresh and vibrant statement plant. And it gets even better: the Schefflera Tree is a potent air purifier and a low-maintenance plant species overall. Caring for a new Schefflera Tree can be a breeze, as long as you know the simplest 1-2-3’s. So read on, and learn all you need to know about caring for and growing a stunning Schefflera Tree. You’re guaranteed to love this easygoing beauty.

LIGHT

  • Prefers medium to bright indirect light, but is adjustable to lower light

  • Leaves may scorch in harsh direct sunlight

WATER

  • Water thoroughly when topsoil is dry, usually once every ten days or so. Avoid overwatering.

  • Watering schedule may be less frequent during winter months

GROWTH

  • In prime conditions, the Schefflera Tree is a fast grower and can grow up to 8-10 feet tall indoors

  • Fertilize your plant regularly during the spring and summer months.

Schefflera Tree

Schefflera Tree

A gorgeous statement tree with an air-purifying punch, the Schefflera is renowned for its abundant canopy of oval leaves that grow in circular, umbrella-shaped configurations. Hardy and resilient, the Schefflera thrives in medium to bright indirect light.
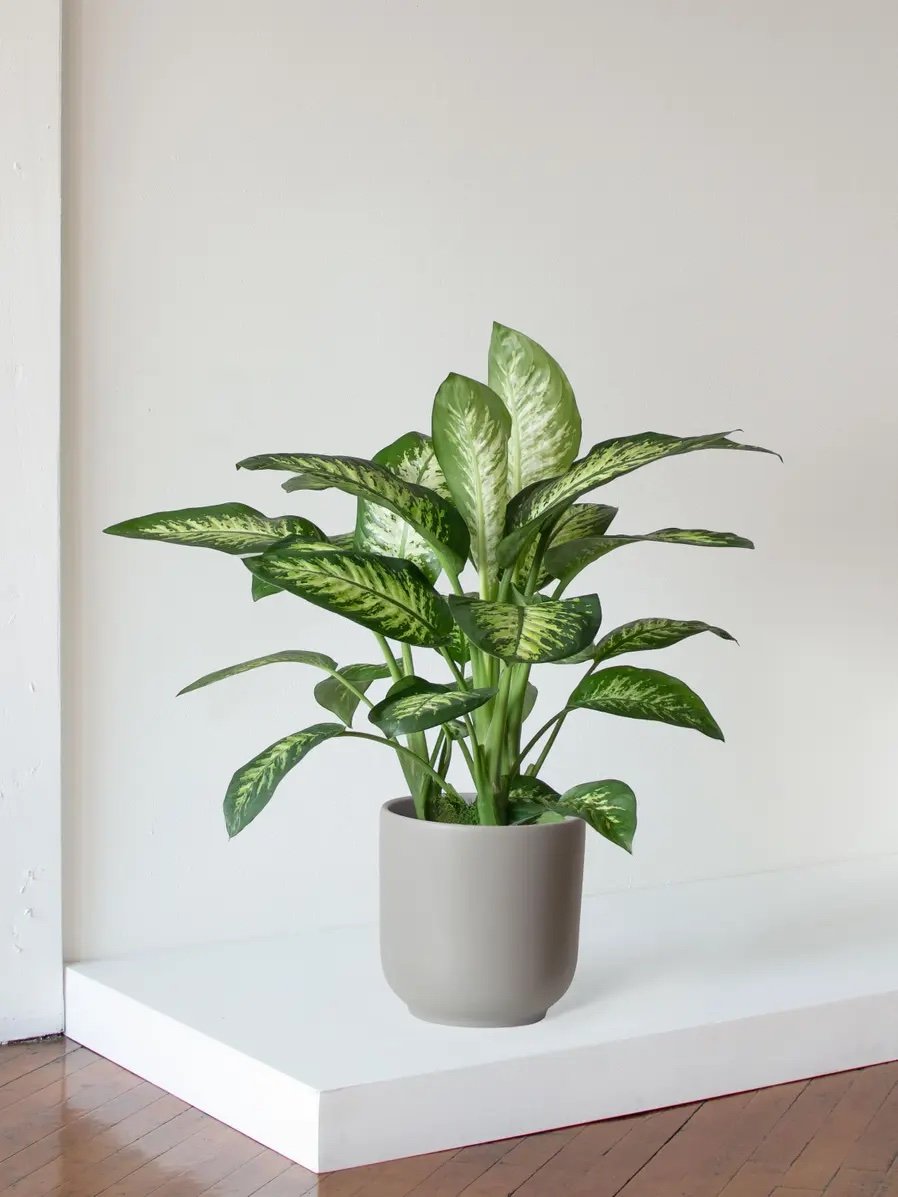
Common problems with the Schefflera Tree

Drooping, yellowing leaves - overwatering

  • Symptom - leaves appearing to droop or appear yellow, especially on lower portion of plant

  • Cause -overwatering and/or not enough sunlight

  • Remedy - allow Schefflera Tree’s soil to dry out completely. Check the soil’s moisture through the drainage holes at the bottom of plastic nursery pot: overwatering can lead to more severe ailments like root root, which may eventually require you change the soil. If soil has a bad odor, repotting with fresh soil will be necessary as root rot has likely set in.

Discolored or browning leaves - underwatering or insufficient humidity

  • Symptom - leaves discolored or brown, often with crispy edges

  • Cause - underwatering or insufficient humidity

  • Remedy - Water Schefflera Tree whenever its top two inches of soil are dry to the touch and mist tree once a week or more with plant water. You can also take your Schefflera Tree out of its ceramic pot, and, keeping it in its plastic nursery pot, allow the tree to sit in a shallow dish of water for a few hours so that the roots can drink from the bottom. Let the tree drain entirely before returning it to its decorative pot.

Leaf drop - overwatering, underwatering or cold drafts

  • Symptom - leaves dropping, either at the bottom of the plant or from all areas of the plant

  • Cause - often overwatering, but underwatering and cold drafts can also cause leaf drop in Schefflera trees.

  • Remedy - Follow instructions above for either overwatered or underwatered Schefflera Trees, and ensure that tree is situated in a spot away from A.C’s, vents, heaters or doors and windows that frequently open or close.

How to maintain a beautiful and healthy Schefflera Tree

Your new Schefflera Tree wants to thrive, and this low-maintenance wonder plant makes it easy for you. Follow the simple tips below, and what your Schefflera Tree flourish for years to come!

  • Pruning - Remove dry or dead leaves all year round, but save any major pruning for the late winter or early spring, when the emergence of new growth on Scheffleras is strongest. Use sharp, clean shears and cut just above nodes at a 90 degree angle.

  • Staking - Mature Schefflera Trees can grow quite large and may benefit from the extra support of a plant stake or two. You can stake your tree by inserting a wooden dowel or support stick gently into the soil near the trunk, then using plant tape or twine to secure the Schefflera’s trunk(s) to the stake at intervals of 4-5 inches.

  • Cleaning - Take a damp cloth or sponge and gentle clean each leaf (this also helps the plant soak in more light!).

  • Repotting - Houseplants grow at a much slower rate than they would in the wild. Depending on the size of your plant and the density of the roots, this is nice to do every 2-3 years to provide fresh nutrients and encourage new growth.

    • When to repot - if the roots start to become visible outside the soil (i.e. circling around the grow pot), it is time to consider repotting your Schefflera Tree.

    • Pot sizing - if you want your plant to grow taller, source a nursery pot that’s 2” in diameter larger than the current pot. If you want your plant to stay the same height, you can reuse the same pot and simply change the soil.

    • Get your hands dirty - spread out newspaper on the floor, remove the plant from the pot and shake off as much of the old soil as possible so that you have clean roots. Place the plant in the center of the pot, add new soil and pat down firmly. Water the soil thoroughly and place the plant in an area with bright indirect light. Your plant will take 2-4 weeks to settle from the shock and adjust to its new home.

Schefflera Tree

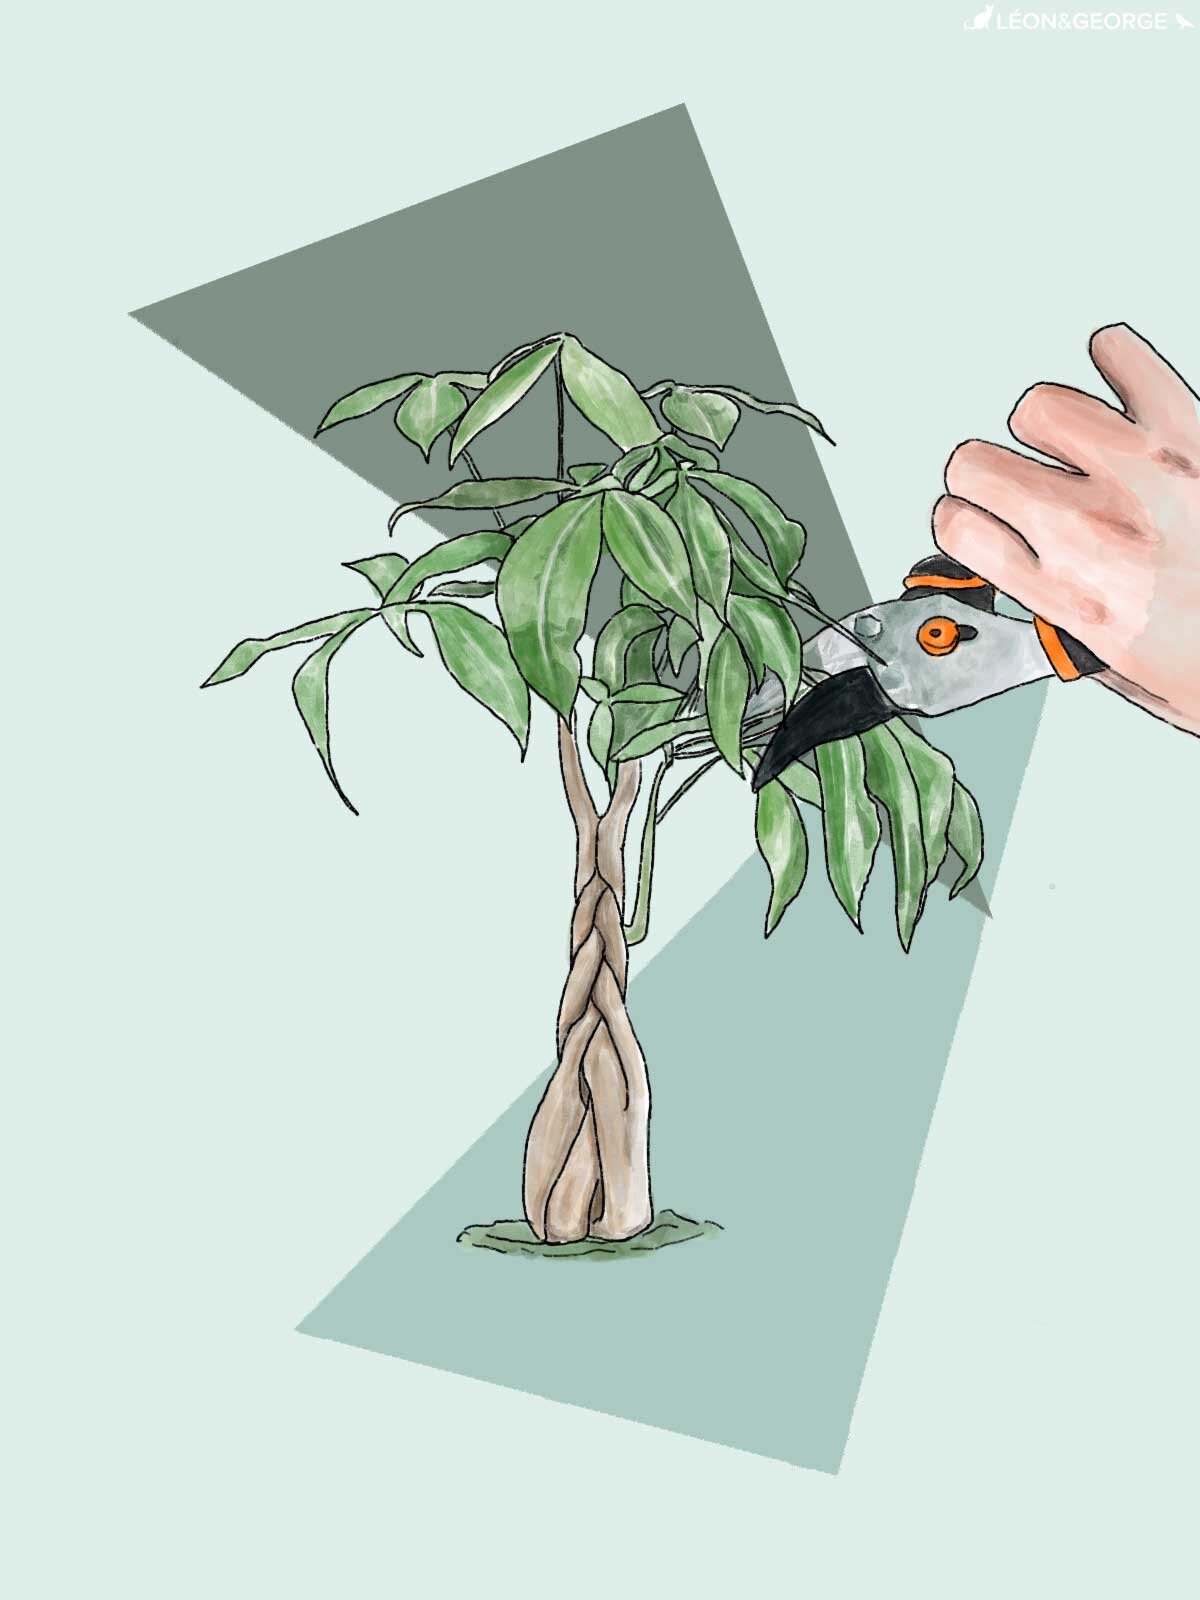
Featuring a graceful umbrella of emerald foliage, the Schefflera Tree is a gorgeous low-maintenance statement plant and a potent air purifier. Easy to care for and even easier to love, the Schefflera Tree is adaptable to low light and needs water only sparingly.

Ficus Audrey Care Guide: Everything You Need To Know

The perfect statement plant can be hard to select, especially when you have a wealth of options to choose from. But look no further than the Ficus Audrey: elegant and statuesque, with a lush flutter of vibrant, spade-shaped foliage, the Ficus Audrey is an ideal indoor tree for graceful spaces and plant owners with moderate plant care experience. Like its sister variety, the Fiddle Leaf Fig, the Ficus Audrey is not considered to be entirely low-maintenance- but it is well worth the effort to care for and maintain this gorgeous tree. Read on to learn all you need to know about caring for and growing a stunning Ficus Audrey.

LIGHT

WATER

  • Water thoroughly when topsoil is dry, usually once every ten days or so. Avoid overwatering.

  • Watering schedule may be less frequent during winter months

GROWTH

  • In prime conditions, the Ficus Audrey is a fast grower and can grow up to 10 feet tall indoors

  • Fertilize your plant regularly during the spring and summer months.

Ficus Audrey Care Guide

FICUS AUDREY

A stunning statement plant for graceful spaces that receive ample natural light, the Ficus Audrey features a bountiful canopy of spade-shaped foliage, slender trunk and statuesque silhouette.

Common problems with Ficus Audrey

Yellow or brown leaves - overwatering

  • Symptom - leaves appearing yellow or brown, usually starting at the center of the leaf

  • Cause -overwatering and/or not enough sunlight

  • Remedy - allow tree’s soil to dry out completely, sometimes this can take 2-3 weeks. Check the soil’s moisture through the drainage holes at the bottom of plastic nursery pot. Overwatering can lead to more severe ailments like root root, which may eventually require you change the soil.  

Yellow or brown leaves - underwatering

  • Symptom - leaves turning yellow or brown, usually beginning at the edge of the leaf

  • Cause - underwatering

  • Remedy - give your Ficus Audrey a full shower! Remove from decorative pot (while keeping tree in plastic nursery pot) and put in a bathtub, shower or outdoor area, then give it a thorough watering. You can even let it sit in water for a few hours so that the roots can drink from the bottom. Let it drain out completely before returning tree to its decorative pot.

Leaf drop - overwatering or underwatering

  • Symptom - leaves dropping, either at the bottom of the plant or from all areas of the plant

  • Cause - usually overwatered Ficus Audrey trees will drop their bottom leaves, while underwatered trees will drop leaves from anywhere on the plant.

  • Remedy - follow instructions above for either overwatered or underwatered Ficus Audreys.

Leaf droop - underwatered or too warm

  • Symptom - leaves sagging or drooping

  • Cause - Ficus Audrey trees sometimes exhibit drooping foliage if it’s warm and they are thirsty

  • Remedy - adjust your watering schedule. During warm summer months, your plant may need more frequent waterings.

How to maintain a beautiful and healthy Ficus Audrey

Take good care of your Ficus Audrey, and it will flourish for years in your home! Below are simple tips to continue caring for your plant over time.

  • Pruning - Remove dry or dead leaves all year round, but save any major pruning for the spring and summer months. It is not uncommon for Ficus Audreys to direct their growth toward their light source, and if this is the case, you may want to prune it back. When pruning your Ficus Audrey, wear gloves and protect your floor with newspaper — Ficuses contain sticky sap that can leak and damage floors. Use sharp, clean shears and cut just above the node at a 90 degree angle.

  • Staking - Sometimes Ficus Audrey trees can grow so large that they need some extra support. If you’ve pruned and still find your plant leaning, you may stake it by inserting a wooden dowel or support stick gently into the soil near the trunk.

  • Cleaning - Take a damp cloth or sponge and gentle clean each leaf (this also helps the plant soak in more light!).

  • Repotting - Houseplants grow at a much slower rate than they would in the wild. Depending on the size of your plant and the density of the roots, this is nice to do every 2-3 years to provide fresh nutrients and encourage new growth.

    • When to repot - if the roots start to become visible outside the soil (i.e. circling around the grow pot), it is time to consider repotting your Ficus Audrey.

    • Pot sizing - if you want your plant to grow taller, source a nursery pot that’s 2” in diameter larger than the current pot. If you want your plant to stay the same height, you can reuse the same pot and simply change the soil.

    • Get your hands dirty - spread out newspaper on the floor, remove the plant from the pot and shake off as much of the old soil as possible so that you have clean roots. Place the plant in the center of the pot, add new soil and pat down firmly. Water the soil thoroughly and place the plant in an area with bright indirect light. Your plant will take 2-4 weeks to settle from the shock and adjust to its new home.


Explore The Gorgeous Ficus Audrey Tree with Mid-Century Ceramic Pot and Wood Stand From Leon and George

Ficus Audrey

A graceful and sculptural statement tree with delicate, spade-shaped leaves and a slender trunk, the Ficus Audrey is a lush and stately option for sun-filled spaces.

How to Care For and Grow Your Ponytail Palm

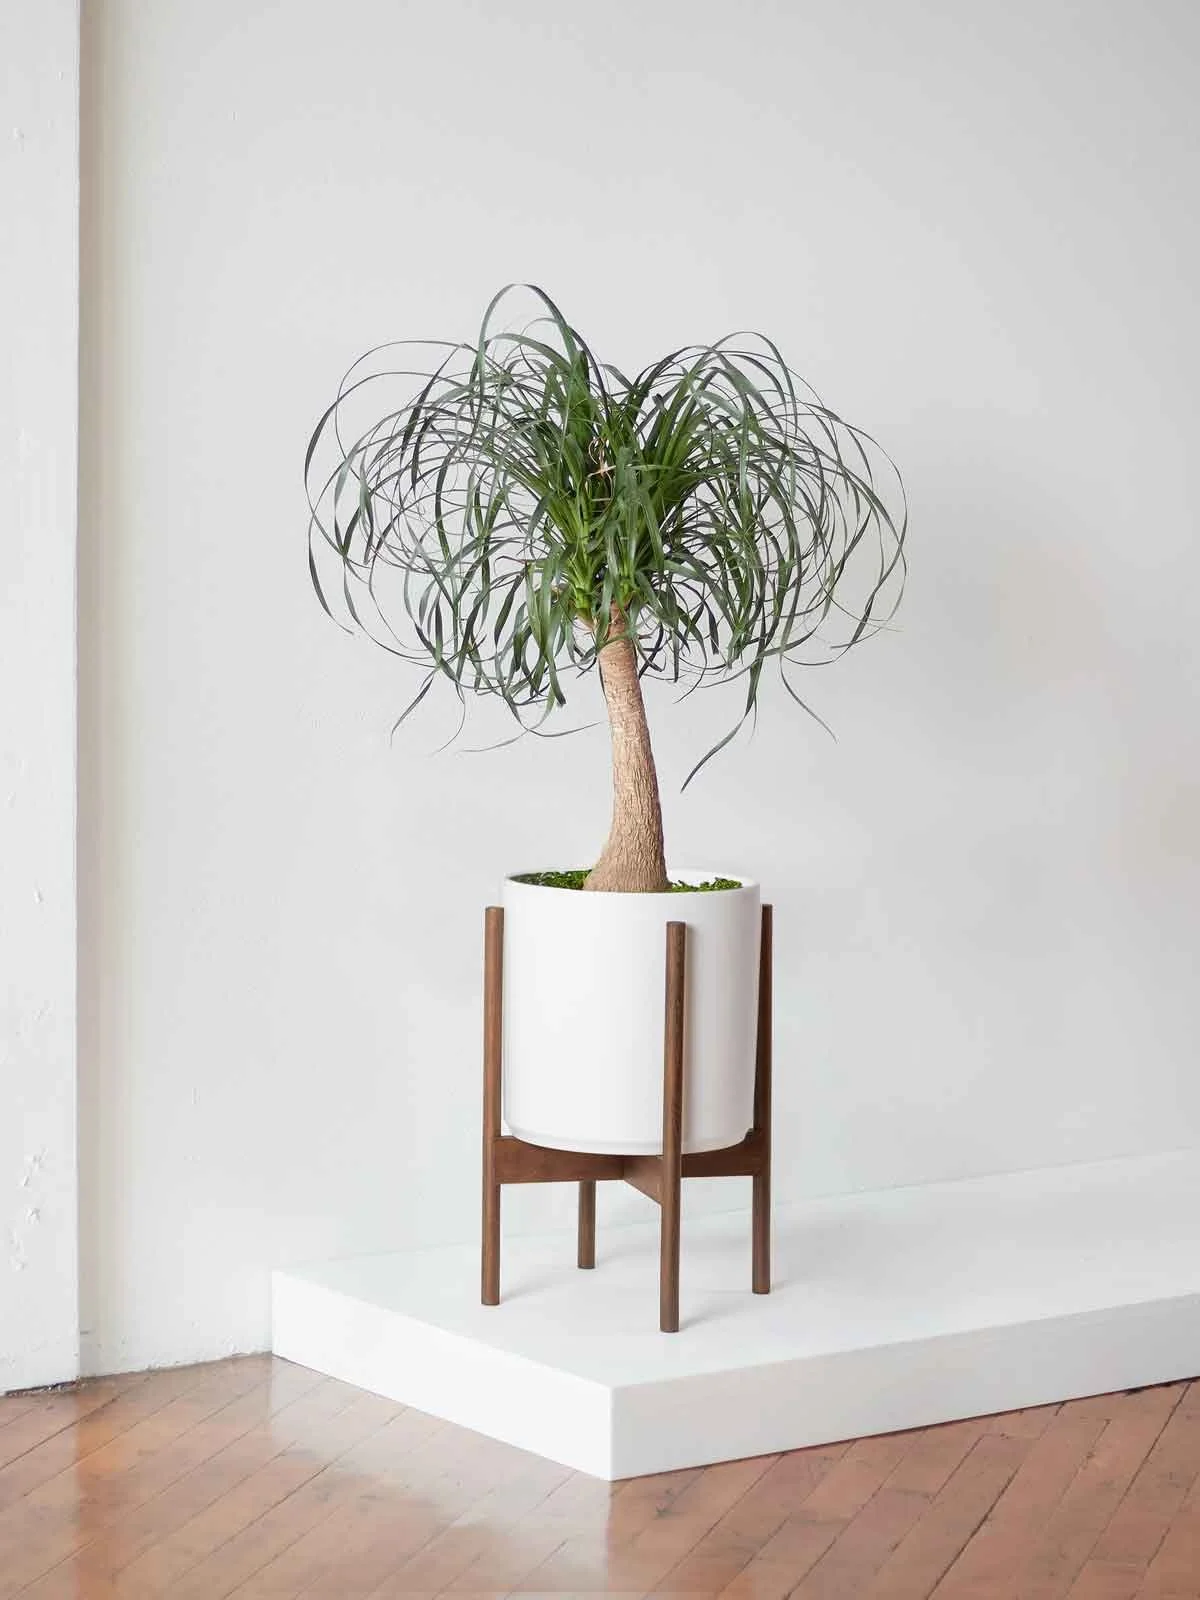
The Ponytail Palm is an immediate standout. With a charming, bottle-shaped trunk and a burst of vibrant, blade-like foliage, the Ponytail Palm imbues instant texture and character into any space. The best news of all? Ponytail Palms, alias Beaucarnea recurvata, have a truly low-maintenance disposition. A member of the Agave family, they have simple needs that make this voluminous beauty an ideal plant for beginners and those on-the-go. Read on for simple tips on how to care for and grow your Ponytail Palm.

How much light does the Ponytail Palm need?

Ponytail Palms prefer bright light and plenty of it. Direct sun is best, but they can also thrive in bright, indirect light. With careful conditioning, they can also adapt to medium levels of light.

How often to water your Ponytail Palm

Ponytail Palms store water in their bulbous trunk, and need to be watered only sparingly. These drought-tolerant plants typically need water only every every two weeks and should be watered only when their top 2-3 inches of soil are dry to the touch.

Ponytail Palm Growth Rate

In prime conditions, Ponytail Palms can grow up to twelve inches a year, though indoors this is uncommon. Inside homes and offices, growth is slow and steady, and you can expect more like 2-4 inches a year. As an extra boost, your Ponytail Palm can be fertilized during its prime growing seasons, spring and summer.

Common problems with the Ponytail Palm

Yellow leaf tips - too much water

  • Symptom - yellow, droopy leaf tips

  • Cause - too much water

  • Remedy - Remove your Ponytail Palm from its ceramic pot and dump out any standing water. Place the palm, still within its plastic nursery pot, in a spot that receives ample, bright light and allow its soil to dry entirely before dressing back up. Gauge soil every two weeks for moisture, and provide water only when top 2-3 inches of soil are fully dry moving forward.

Browning leaves - underwatering

  • Symptom - Crispy, browning foliage

  • Cause - Underwatering or lack of humidity

  • Remedy - Prune browning foliage off with clean, sharp scissors or shears by cutting along the leaf’s natural curve in the direct of its growth. Do not remove more than 20% of your plant’s foliage at a time. Remove the Ponytail Palm from its ceramic pot to survey its soil. If the soil is dry but not parched, provide 2-3 cups of water. If the soil is entirely parched, fill a sink or bathtub with 3-4 inches of water, then place your Ponytail Palm in the water, while still housed in its plastic pot. Allow the Ponytail Palm to soak up water through its roots for about 45 minutes before returning to its ceramic pot, then proceed with standard watering routine, gauging the soil every 2 weeks and watering when the top 2-3 inches are dry to the touch.

How to maintain a beautiful and healthy Ponytail Palm

Take good care of your Ponytail Pam and it will thrive beautifully for years to come! Below are simple tips to continue caring for and growing your Ponytail Palm over time. Trust us, it’s easy!

Pruning

As your plant ages, yellowing or browning foliage is normal and part of the plant’s regular upkeep.To remove, snip blades at the base of the leaf, where they meet the Ponytail Palm’s trunk, with sharp, clean pruning shears. To manicure individual blades, cut discolored areas off with scissors while following the natural curve.

Boosting Humidity

Liberally mist your Ponytail Palm once a week to boost its humidity levels and keep its canopy free of dust. A gentle foliar feed can also be used as part of your regular upkeep.

Repotting the Ponytail Palm

Ponytail Palms grow fairly slow and it is uncommon for them to become rootbound, but if your plant is beginning to look unstable or like it is outgrowing its pot, you can consider repotting into a bigger container with fresh soil.

Indoor houseplants grow much more slowly than they do in the wild. Depending on the size of your Ponytail Palm and the density of the roots, repotting every 2-3 years can provide the benefit of fresh nutrients and encourage new growth.

  • When to repot - if or when the plant looks unstable as if it has outgrown its container, it may be time to repot

  • Pot sizing - if you want your plant to grow taller, find a nursery pot that is two inches larger in diameter than its current container.

  • Grab your gardening gloves - spread newspaper or a tarp on the floor and remove your Ponytail Palm from its pot. Shake off old soil, but leave at least 1/3 of its original soil to prevent shock. Place the plant in the center of the new pot, add new soil and pat down firmly. Water the soil if dry and place the plant in an area with bright light. Your plant will take 2-4 weeks to settle and adjust to its new container.

How to propagate a Ponytail Palm

Ponytail Palms can be propagated with their “pups"“, or healthy, growing offshoots. They are also referred to as “clones”, and look like mini-palms growing off of or around the trunk of the plant.

  • Carefully remove pups - You can carefully dig around and remove healthy Ponytail Palm pups for propagation. Use a gentle touch as you excavate the pup and loosen its roots before removing from soil.

  • Transplant pups into new soil - Transplant the pups into pots containing a cactus/succulent soil mix. Bury the pup in the soil, leaving its plant structure (its foliage and stems) above the soil line. Add more soil if needed and pat down firmly.

  • Provide water, but not too much - Provide only enough water to moisten the soil and remove any air pockets. As you move forward, water the pups only when their soil is dry to the touch. No Ponytail Palm, not even the smallest, like being overwatered!


Ponytail Palm

A stunning and spirited agave variety with a charming, bottle-shaped trunk and mane of lush blade-like foliage.

How to Care For and Grow Your Bird's Nest Fern

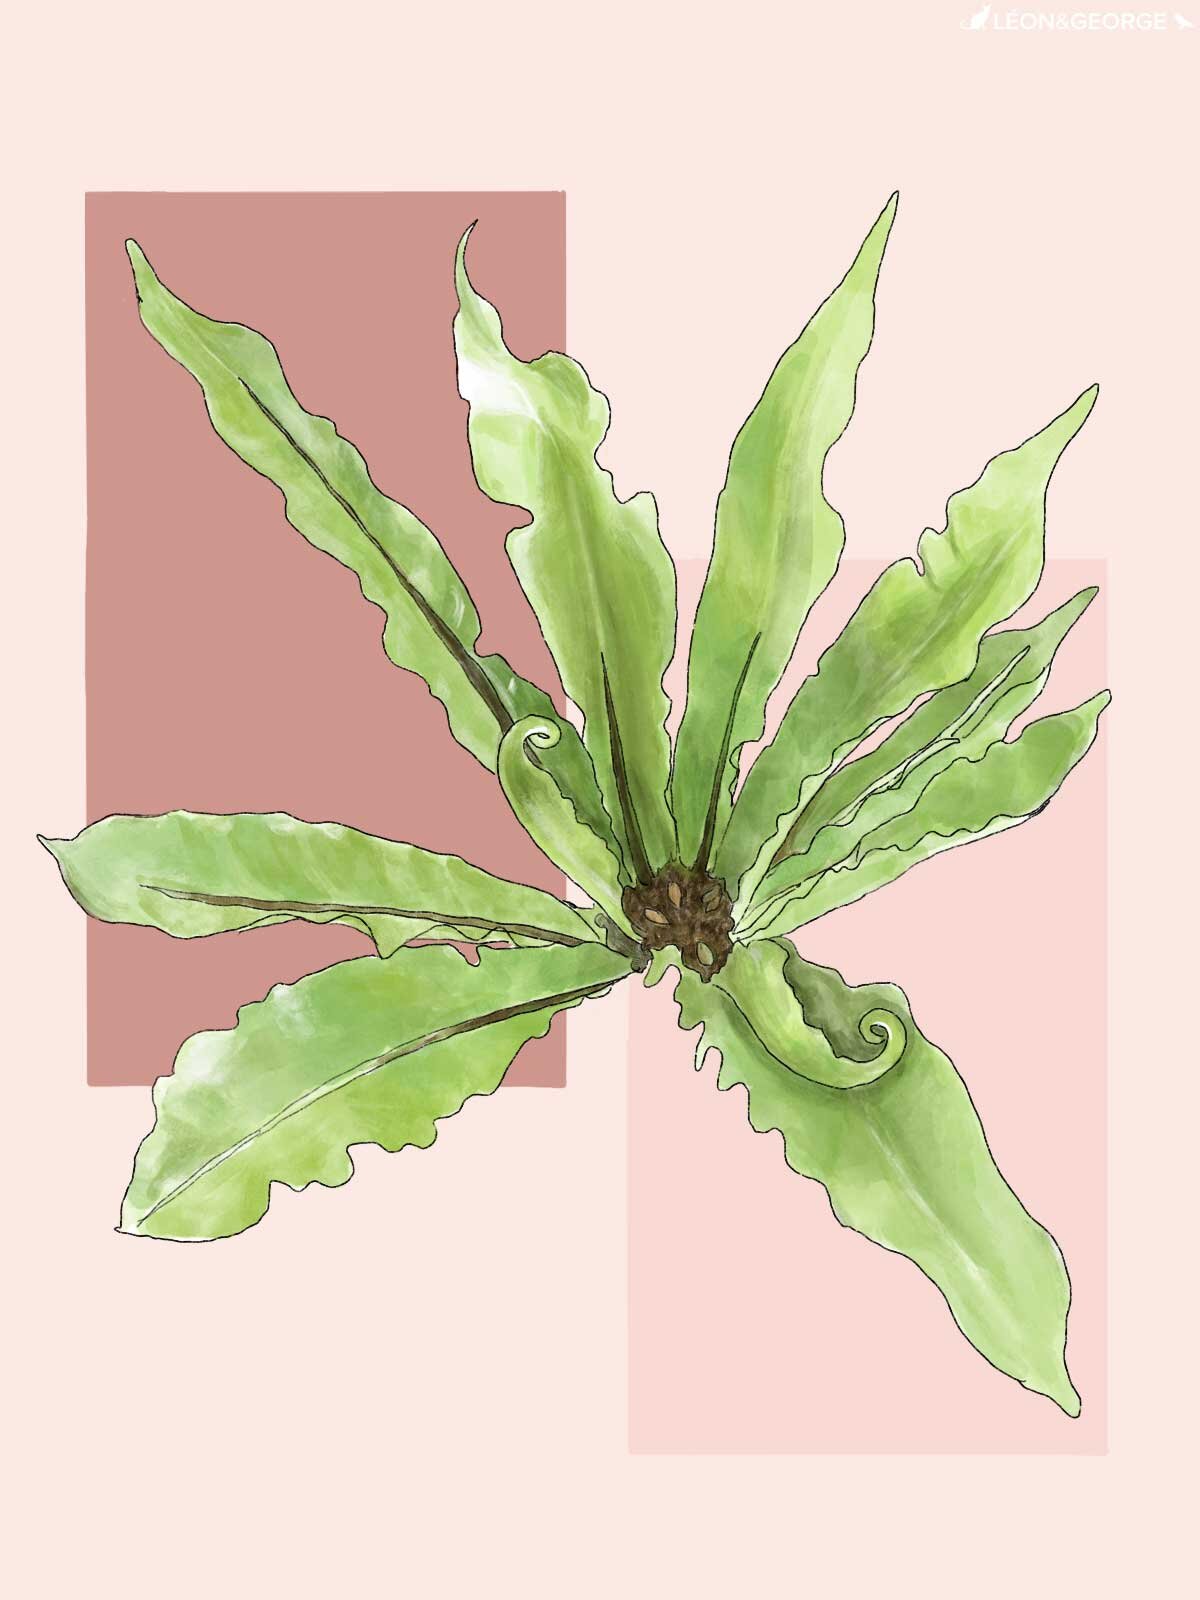
The gorgeous Bird’s Nest Fern, whose name comes from the nest-like center of the plant, is not your typical fern. Hardier than most of its kind, the Bird’s Nest Fern boasts thick, waxy leaves that slowly unfurl to create a beautiful and unique accent on a table, shelf, or bedroom dresser. But though it trumps most other ferns in terms of maintenance, it is still unforgiving to things like too much sun or an inconsistent watering schedule. Read on to find simple tips on how to care for and grow your Bird’s Nest Fern.

How much light does the Bird’s Nest Fern need?

This plant prefers medium to bright indirect light, and will scorch in direct sunlight. Ferns can also adjust to medium-low light over time.

How often to water your fern

Keep the soil evenly moist, never allowing it to completely dry out. Water around the edge of the pot and never in the center of its “nest”, a watering can with a long spout will help you be precise!

Bird’s Nest Fern Growth Rate

In prime conditions, the Bird’s Nest Fern will unfurl new leaves regularly from the center of its “nest”. Fertilize once a month during spring and summer, and consider foliar feeding year round.

Common problems with Bird’s Nest Fern

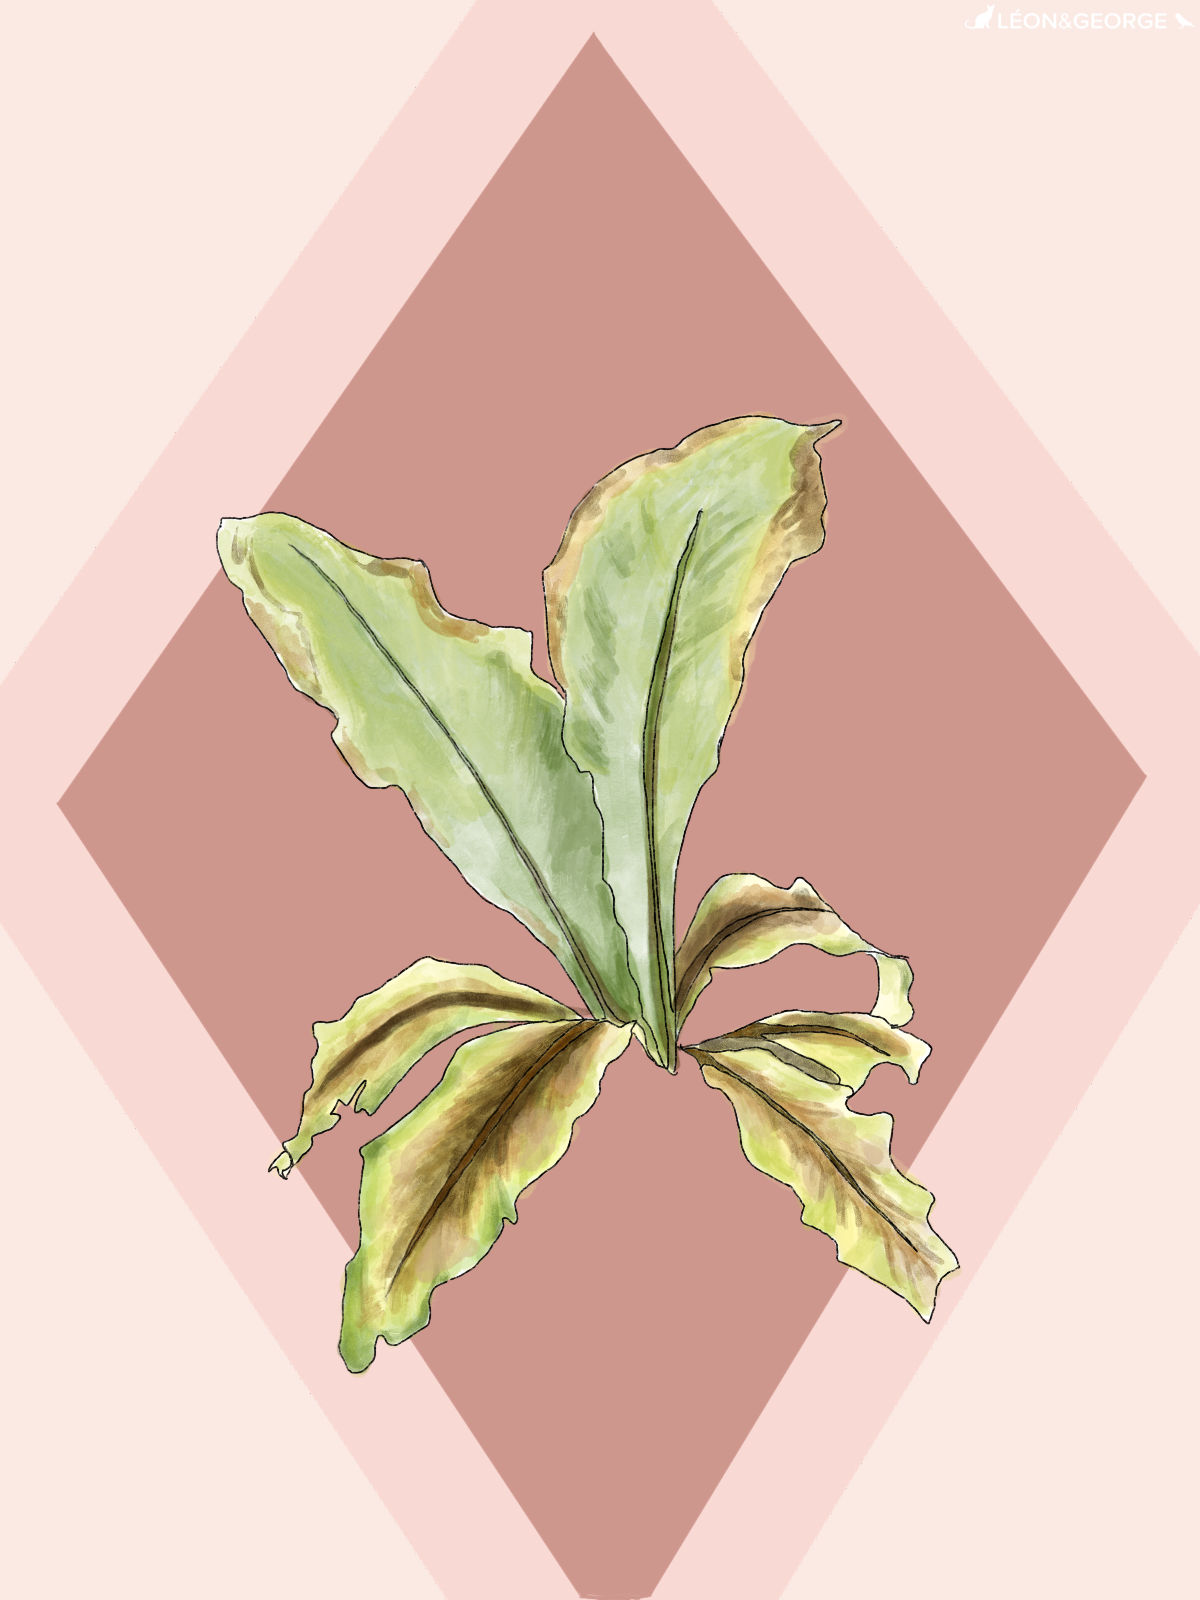
Pale leaves - too much light

  • Symptom - pale, yellowish leaves

  • Cause - too much light

  • Remedy - Bird’s Nest Ferns do best with medium indirect light — avoid putting the plant in a place where it is exposed to too much light or direct sunlight.

Brown edges - underwatering, too cold or too dry

  • Symptom - leaves turning brown at the edges

  • Cause - most likely underwatering, but could also be that the temperature is too cold or the air is too dry

  • Remedy - Be sure to keep a consistent watering schedule to ensure the plant’s soil is just moist to the touch. You may also mist the plant weekly to boost moisture levels, and make sure it is not placed near any air vents, heaters, or air conditioners.

Yellow and/or wilting leaves - overwatering

  • Symptom - yellowing or wilting leaves

  • Cause - overwatering

  • Remedy - Unless a very minor case of overwatering, you will most likely need to repot your plant to avoid root rot. See instructions below on how to repot a Bird’s Nest Fern.

How to maintain a beautiful and healthy Bird’s Nest Fern

Take care of your Bird’s Nest Fern and it will take care of you! Below are simple tips to continue caring for and growing your Bird’s Nest Fern over time.

How to care for and grow a Bird’s Nest Fern

Pruning

The birds nest fern does not need much pruning, though it is normal for lower leaves to grow old and scraggly, in which case you can remove them at the base with sharp, clean pruning shears.

Cleaning

Take each leaf between two soft tissue cloths and wipe off the top to reveal a healthy shine (also helps the plant soak in more light!).

Repotting the Bird’s Nest Fern

Ferns generally do not become rootbound, but if the plant is looking unstable or that it might “fall out” of its pot, consider repotting into something slightly bigger with fresh soil.

Houseplants grow much slower than they would in the wild. Depending on the size of your plant and the density of the roots, this is nice to do every 2-3 years to provide fresh nutrients and encourage new growth.

  • When to repot - if or when the plant looks unstable in its soil, it is time to repot

  • Pot sizing - if you want your plant to grow taller, find a nursery pot that’s 2” in diameter larger than the current pot.

  • Get your hands dirty - spread out newspaper on the floor, remove the plant from the pot and shake off as much of the old soil as possible so that you have clean roots. Place the plant in the center of the pot, add new soil and pat down firmly. Water the soil thoroughly and place the plant in an area with bright indirect light. Your plant will take 2-4 weeks to settle from the shock and adjust to its new home.

How to propagate a Bird’s Nest Fern

It is very difficult to propagate Bird’s Nest Ferns, though if you would like to try, it is best to use tissue culture method.

  • Harvest spores - The spores of your bird’s nest fern look like tiny brown lines on the undersides of the leaves. When the spores have grown large and fuzzy, trim the leaf they are growing on and carefully place the leaf in a paper bag. The spores should collect at the bottom of the bag after a few days.

  • Germinate spores - Place the spores on top of a small pot of sphagnum moss, and place the pot in a dish with water. Make sure there is always water in the dish, and mist the spores on top daily. After 2-3 weeks, they should begin to germinate.

  • Repot in fresh soil - Once you seedlings, pot in fresh soil and keep consistently moist for the first 3-4 weeks.


birdsnestfern-careguide2.jpg

Bird’s Nest Fern

A resilient indoor fern with large wavy fronds grow in a circular pattern, resembling a bird’s nest.

How to Care For and Grow Your Snake Plant
howtocareforsnakeplant.jpg

Snake Plant

AKA sansevieria laurentii

There are dozens of different varieties of Snake Plants (also known as sansevieria or Mother-in-law’s Tongue), but none quite as stunning (and air-purifying!) as the Laurentii. Robust and structural, this incredibly hardy indoor plant is the perfect choice for someone looking for a low-maintenance yet stylish addition to their home or office. Learn all about the many Snake Plant benefits and how to care for and grow this beautiful indoor plant.

How much light does a Snake Plant need?

Snake Plants are not picky when it comes to light requirements. Like most indoor plants, bright indirect light is ideal though they also do well in low light as well as direct sun. They are one of the most highly adaptable plants when it comes to light!

How often should you water your Snake Plant?

Snake Plants do not need a lot of water, and it’s always best to err on the side of underwatering with this plant. In fact, the sanseveria is incredible drought resistant and can go long periods without a single drop of water.. Water once every ten days to two weeks, or whenever the top soil is completely dry. Avoid overwatering, and be careful not to wet your snake plant’s leaves, a watering can with a long spout can help you water precisely.

Snake Plant growth rate

The Snake Plant can grow up to four or five feet tall, though they are generally pretty slow growers. Fertilize 1-2 times per month in the spring and summer.

Common problems with Snake Plants


How to maintain a beautiful and healthy Snake Plant

Take care of your Snake Plant and it will take care of you — literally! The Snake Plant boasts many benefits, including releasing oxygen and purifying our air. The Sansevieria Laurentii variety is one of the best air-purifying houseplants according to Nasa, and it is excellent in filtering out toxins like formaldehyde and xylene. It also makes a wonderful bedroom plant, as it converts carbon dioxide into oxygen at night. Below are simple tips to continue caring for and enjoying the many benefits of your Snake Plant over time.

Pruning

Whether your Snake Plant is overgrown or it has some damaged leaves you’d like to remove, pruning a Snake Plant is very easy. Using a sharp, clean blade, simply cut off the stalks you’d like to remove at the base, closest as possibly to the soil. If the leaf drooping, dry, or otherwise on its way out, you may also try tugging the leaf and pulling it out from the root. It will come out easily if it’s time to go!

Cleaning

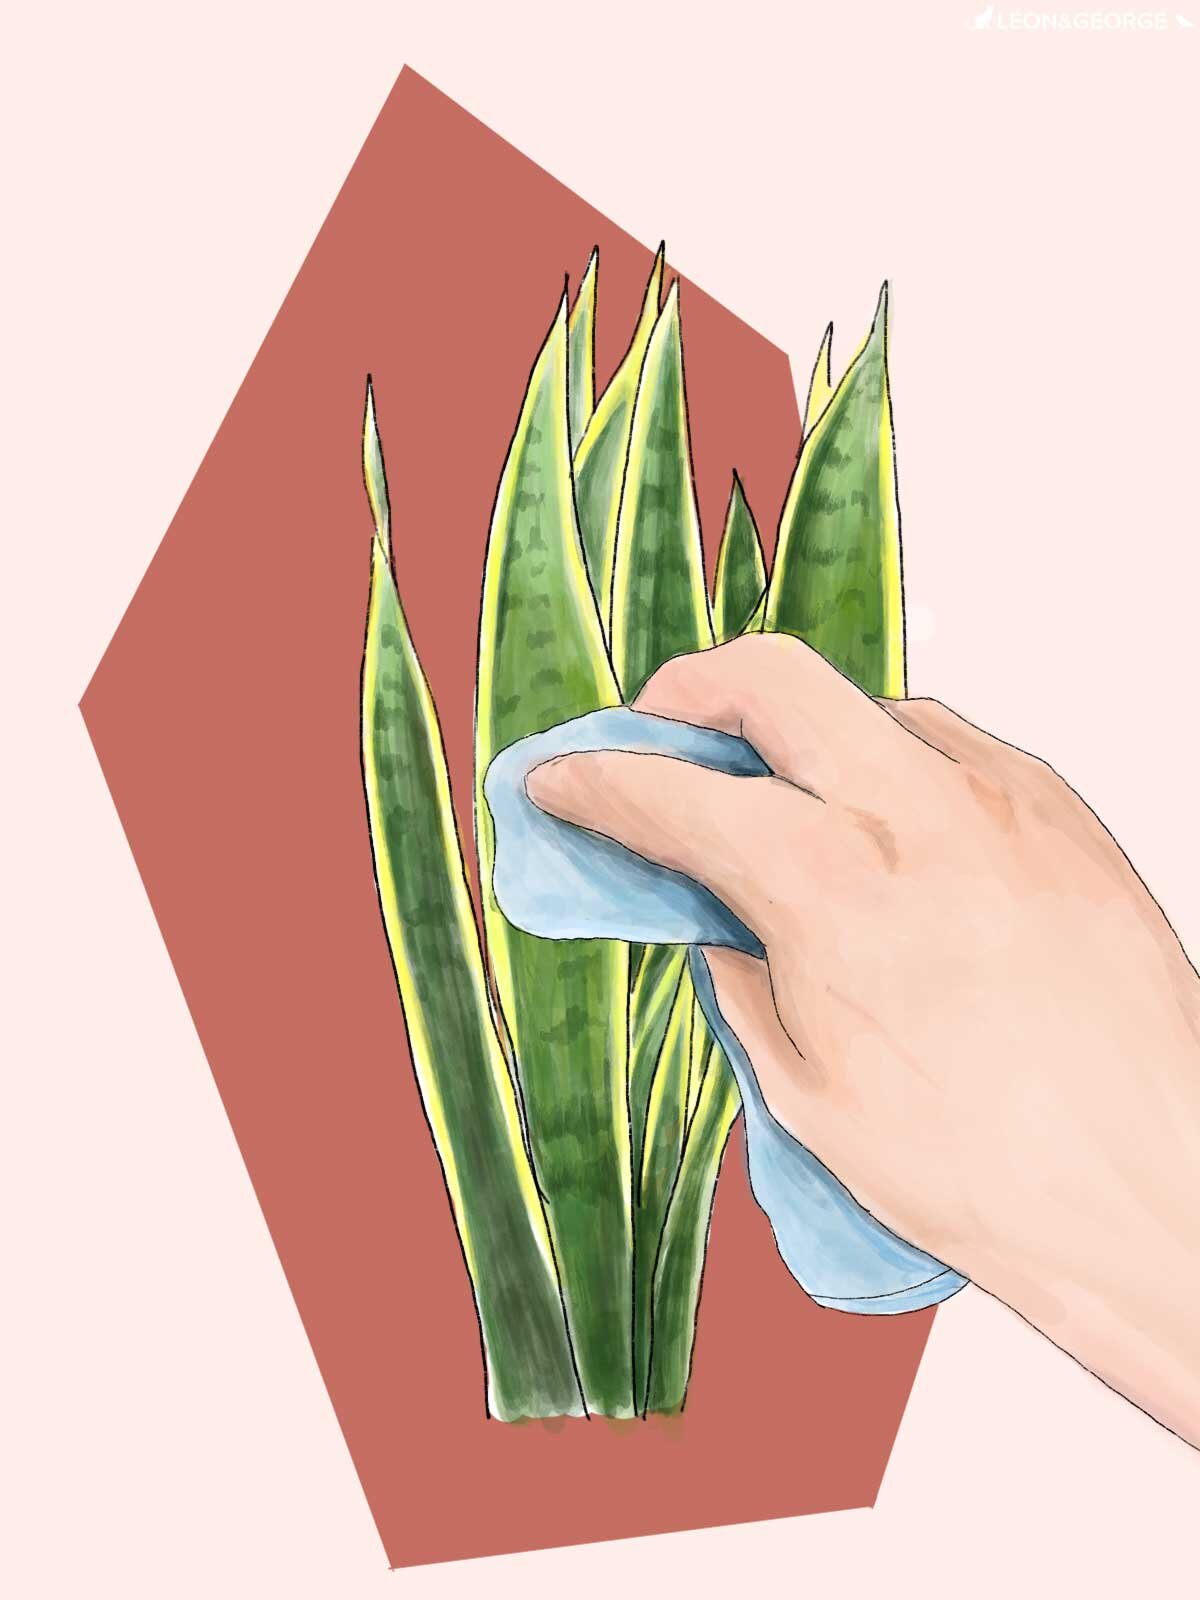
Take each leaf between two soft tissue cloths and wipe off the top to reveal a healthy shine (also helps the plant soak in more light!).

How to repot your Snake Plant

Houseplants grow much slower than they would in the wild. Depending on the size of your plant and the density of the roots, this is nice to do every 2-3 years to provide fresh nutrients and encourage new growth.

When to repot - Snake Plants have extremely strong roots and will begin to literally bust out of its pot when it’s time to repot.

Pot sizing - if you want your plant to grow taller, find a nursery pot that’s 2” in diameter larger than the current pot. If you want your plant to stay the same height, you can reuse the same pot and simply change the soil. If the latter is the case, you may need to separate some of the stalks of your Snake Plant, as they most likely will no longer all fit in the pot.

Get your hands dirty - spread out newspaper on the floor, remove the plant from the pot and shake off as much of the old soil as possible so that you have clean roots. Place the plant in the center of the pot, add new soil and pat down firmly. Water the soil thoroughly and place the plant in an area with bright indirect light. Your plant will take 2-4 weeks to settle from the shock and adjust to its new home.

How to propagate a Snake Plant

Looking to propagate your Snake Plant? They are relatively easy to propagate through a few different methods such as water propagation or division. Follow these instructions or visit our full guide on three different ways to propagate the Snake Plant:

  • Cut off a leaf - To propagate simply by cutting off a leaf, simply cut the leaf at the base near the soil with a sharp clean blade, and place the leaf in water. After a week or two, you should see roots begin to sprout. Wait until the roots are at least an inch long before placing the leaf in soil. Keep the cutting just moist to the touch and in bright indirect light for a few weeks or until it has rooted (if you tug on it, it feels firmly rooted).

  • Divide roots - You can also propagate Snake Plants through division. Start by removing your plant from it’s pot and gently separating the roots and leaves into different clusters.

  • Repot the clusters - Take each cluster or leaf and place in a small pot with fresh soil.

  • Keep hydrated - Keep your new baby Snake Plants well-hydrated during the first few weeks or until they have taken root in their new pots.

Illustrations by our talented plant stylist, Kailie Barnes.


large-snake-plant.jpg

Indoor plants, potted & delivered.

Premium plants paired with stylish ceramics, plus lifetime plant care support. Shop online at leonandgeorge.com.