Posts in Plant Care
What You Need To Know Before You Buy A Schefflera

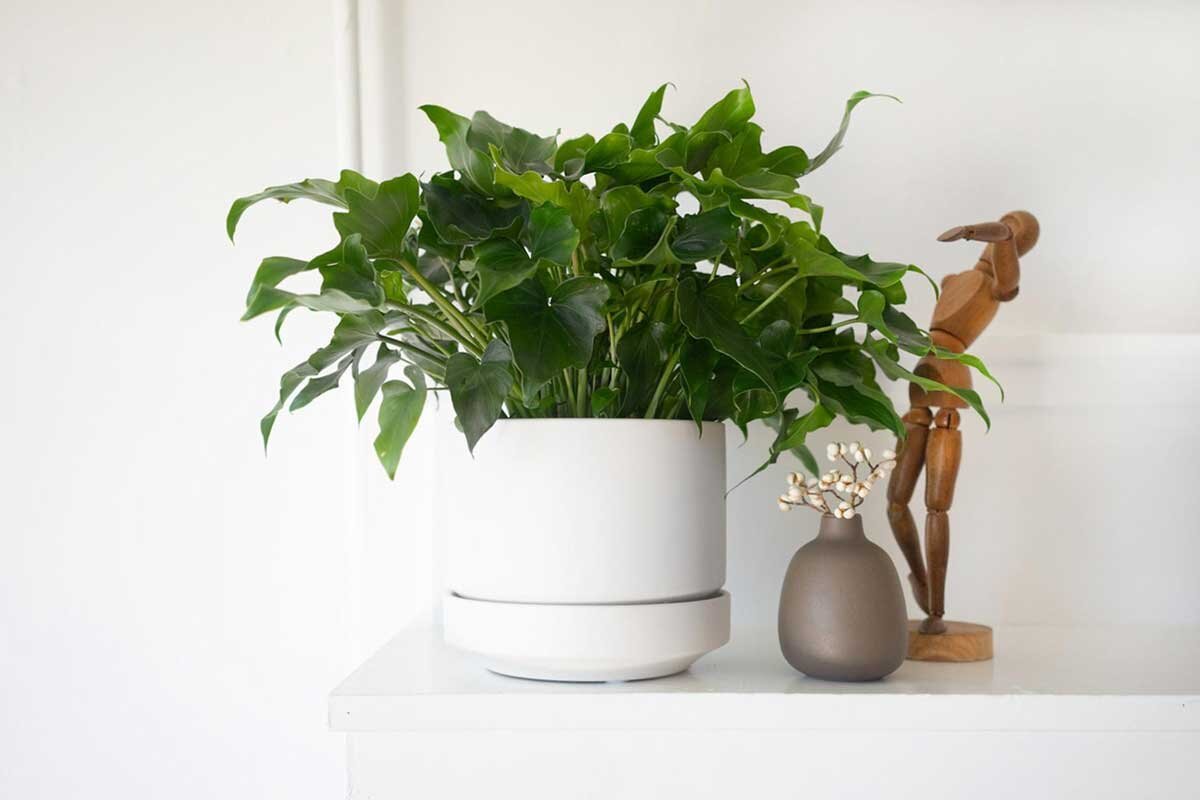
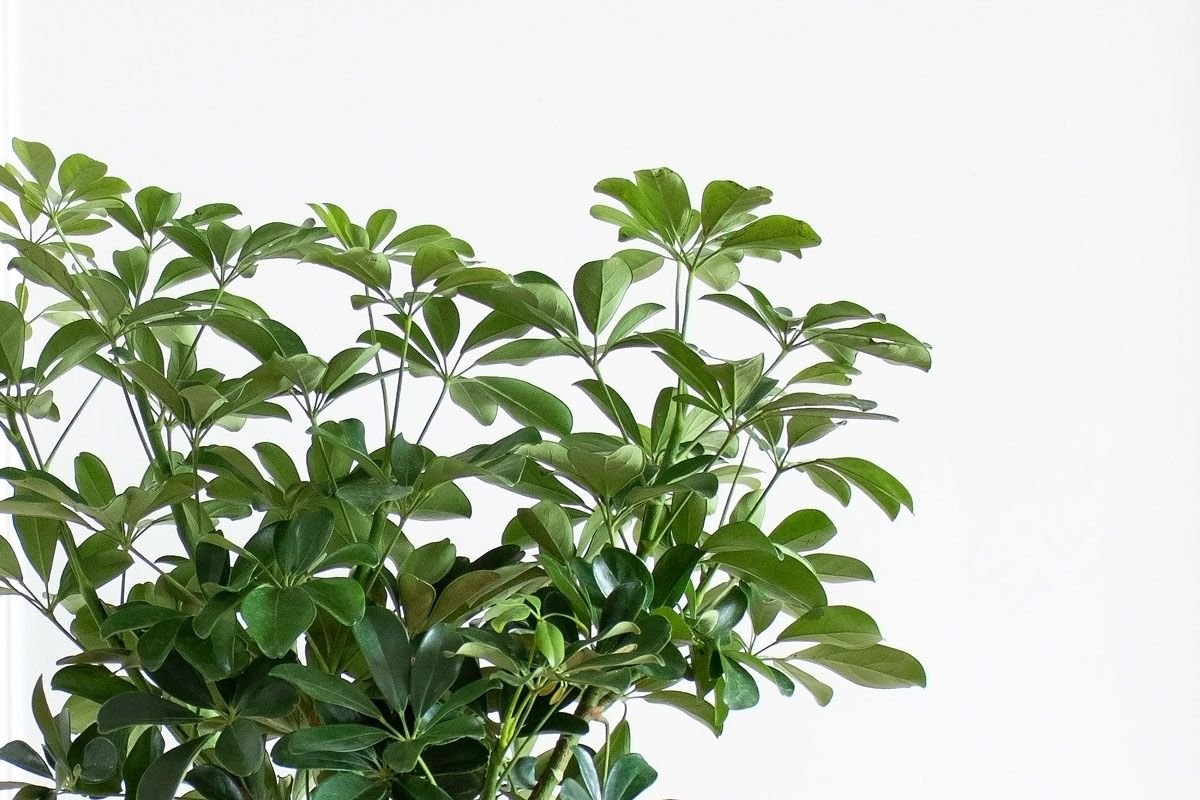
If you’re looking for a statement tree that will provide ample, gorgeous foliage without requiring lots of laborious care, a Schefflera Tree is a perfect choice. With a generous canopy of emerald leaves that grow in umbrella-shaped configurations, the Schefflera, also known as the Umbrella Plant or Umbrella Tree, is an ideal floor plant: and even better, it is truly low-maintenance. Add to this the fact that it’s a potent air purifier, and you have a dream plant on your hands! We won’t blame you if you’re eager to buy a beautiful Schefflera and bring it home today. But before you buy, take a moment to learn a bit about this gorgeous tropical plant, and what it requires to thrive. Not to worry: these charming Umbrella Trees have simple needs! And we have a quick and easy rundown on their care requirements and more, right here.

Which Schefflera Variety Is Right For Me?

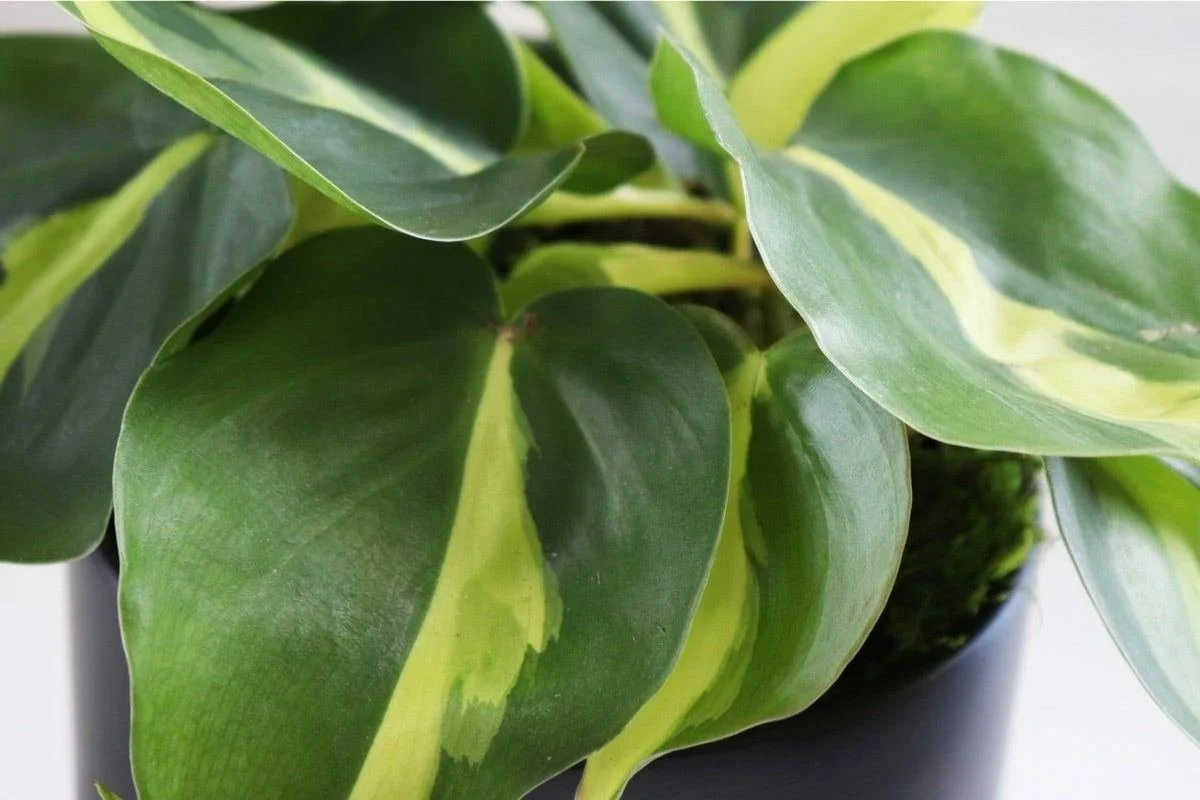
There are a number of beautiful ornamental Scheffleras, but the Schefflera arboricola is the crowning jewel. Originating from Taiwan and Hainan Province, China, the Schefflera arboricola epitomizes vibrancy. Scheffleras in general are considered to be easy-care plants, but the Schefflera arboricola is the gold standard: resilient, low-maintenance, and adaptable. And because it’s a popular and highly regarded plant, there is ample research and helpful information available to you as you care for this gorgeous tree.

Schefflera Trees Prefer Medium to Bright Indirect Light- But They’re Flexible!

There’s so much to love about the Schefflera’s easy-going nature, and its ability to adapt to varied levels of light is one of its finest attributes. Scheffleras will grow best in medium to bright, indirect light, but they’re adaptable to lower levels of light. Consider their native environments- humid, sun-dappled rainforest floors, where the light they receive is filtered by jungle canopies and tempered by shaded areas. As long as your Schefflera receives about four hours of sunlight a day, it will be a happy plant- but note that it will grow most rapidly in bright, indirect sun.

But returning to those rainforest roots: it’s important that you don’t place your Schefflera in an area that receives frequent blasts of strong, direct sunlight. The tropical Schefflera will scorch if exposed to too much direct light.

Scheffleras Are Easy To Water- Just Don’t Overdo It!

It’s simple to provide your Schefflera with the water that it needs. Like many tropical plants, the Schefflera Tree only requires water when its topsoil is dry. This typically means that your Schefflera plant will need watering about every ten days or so; whenever the top two inches of its soil are dry to the touch. Plan on probing your Schefflera’s topsoil every 7-10 days and watering accordingly. You can also use a moisture meter to keep track: these convenient tools will show you when your plant’s soil is moist (by reflecting a blue color in the window portion of the meter) or dry (by showing white in that window).

Your Schefflera Has A (Good) Reputation!

Seeking a boost of good chi for your home? Look no further than the Schefflera! Plants in the Schefflera family have a longstanding association with good fortune, prosperity and wealth in China and Taiwan, and are beloved in the feng shui tradition. Scheffleras are thought to capture positive energy or chi in the hand-like fronds of leaves. There’s some science to back all of this up: Scheffleras are scientifically researched and proven air-purifying plants, and what could be more lucky to have around than a plant that keeps the air in your home clean and healthy?

What Are The Air Purifying Properties Of The Schefflera?

You’ve probably heard about plants having air purification power and wondered, what does that really mean? It’s not just sales jargon- it’s rooted in science! Scheffleras and an ample handful of other wonderful indoor plant varieties have been shown in scientific studies to purify the air. They do this in a couple different ways: by converting carbon monoxide to oxygen, and soaking up toxins like benzene, formaldehyde and toluene (ew!). Additionally, living plants have been shown to boost the mood and productivity of humans that cohabitate with them, to enhance memory and focus, and to reduce stress and fatigue.

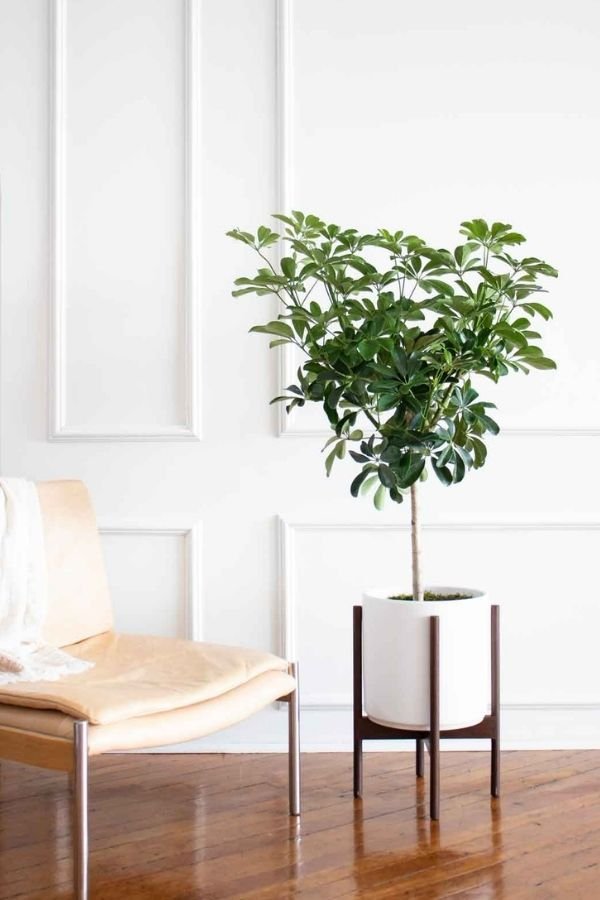
How To Place Your Schefflera

Because they’re exceptionally flexible plants, you have nearly endless options for Schefflera placement. As long as your space receives an appropriate degree of natural sunlight (ideally four or more hours a day) your Schefflera should thrive in your space. There is something important to consider, though: specifically, drafts. Scheffleras do not respond well to direct drafts, so it is crucial to keep your Schefflera away from A.C. units, vents, heaters and windows or doors that are frequently opened and closed. Beyond these practical considerations, have fun considering your Schefflera’s placement! Choose a spot that you want to adorn with elegant height and abundant foliage. You can also place your Schefflera close to other humidity-loving tropical plants. Close grouping of plants create mini-biomes of humidity, and situating plants with similar care requirements close to one another will make plant care extra-convenient. But the opposite is also true: do not place your new Schefflera next to a plant that needs daily watering, because your Schefflera does not, and will not appreciate an overdose of H2O!

Schefflera Trees Love To Be Misted

Tropical plants appreciate consistent humidity, but we know that it can be daunting to attempt to replicate a rainforest in your home! Not to worry- you don’t have to. Just plan on misting your Schefflera up to a few times a week, with either plain water or water mixed with a nutritious foliar feed. Misting is an easy way of boosting humidity levels, and it’s also a fun and tranquil way of communing with your plant. We find that humans enjoy the process of misting just as much as plants enjoy being misted!

Will A Schefflera Grow Aerial Roots?

The Schefflera arboricola can exhibit aerial roots, but they’re not a given. Aerial roots are an evolutionary feature of many tropical plants, because it is common for plants in tropical environments to grow along other plants for support in the wild. And aerial roots have benefits: they soak up moisture from humid air and provide structural support to your plant as it grows. But they’re not a sure thing for Scheffleras, and are more likely to appear when the plants are grown in very shallow pots (Scheffleras are frequently used as bonsai plants, and aerial roots are often an aesthetic feature of bonsai Schefflera). Scheffleras grown in deep pots, like the Schefflera Tree from Léon & George, are less likely to exhibit aerial roots. If you find that your Schefflera is exhibiting aerial roots that you would prefer not to see, you can tuck them gently into your plant’s soil. This will allow the roots to take in nutrients from the soil, and support the overall health of your plant.

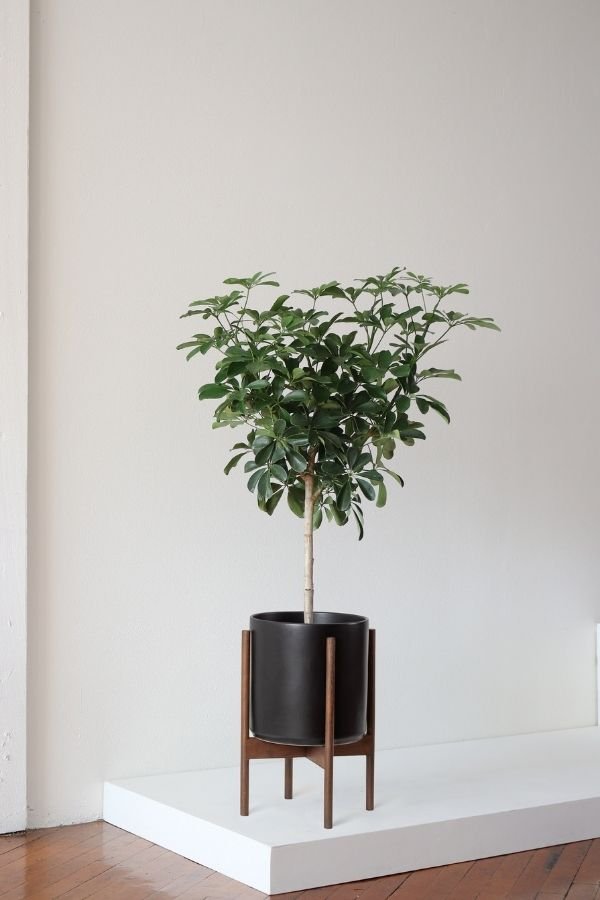
How To Select A Thriving, Gorgeous Schefflera

Your foremost priority as you shop for a new Schefflera should be to select a healthy, happy plant. So when you’re ready to buy, check out the structure of the Schefflera Tree in question carefully. Healthy Schefflera trees have vibrantly colored foliage that is firm and springy. Avoid purchasing a Schefflera that has drooping foliage, or leaves that appear yellow, brown, crispy or curly. Inspect the soil of the Schefflera as well- it should neither be soaking wet, nor bone-dry.

Avoid Purchasing Your Schefflera From A Garden Center

Buying a new statement plant for your home is a big investment of both money and time, and we know that attractively low prices are just that: attractive. But seasoned plant parents and horticulturalists alike will tell you the same thing: when it comes to living plants, you will get what you pay for. You can save yourself a world of trouble by opting for a premium plant from the get-go. Buying a Schefflera Tree from a trusted source ensures that your new plant is primed with all it needs for a lifetime of strong growth and beautiful health. Premium growers tailor the care of each plant to the species’ particular needs, treat and prevent pests prophylactically, and source plants of a higher quality than garden centers and home improvement stores.

It’s important to consider that the quality of the plants purchased from a garden center will reflect their low price. Purchasing a premium plant ensures that your plant is in great health from the start- and we promise, it pays off quickly. Treating an ailing plant can be costly, time-consuming and stressful.

Transportation is another important aspect to consider when you decide where to buy your new Schefflera tree. Transporting a large plant in your vehicle- especially one with a bountiful, diffuse canopy, like a Schefflera, can result in structural damage from the plant being jostled. And because Scheffleras are sensitive to drafts, it’s especially important to avoid placing the plant within the vicinity of forced air from a car’s A.C. or vents. All living plants are delicate and can be stressed by transit.

As you prepare to buy your new Schefflera, plan on sourcing your plant from a premium supplier. Suppliers that offer doorstep delivery, or packaging that is specifically engineered for the transport of plants, are always your best bet. When you buy from a supplier that offers these services, you reap the benefit of their expertise, and can bypass any negative effects that might result from improper care or transportation.

Even The Healthiest Schefflera Can Experience Stress From Time To Time

With appropriate water and light, your Schefflera tree is going to do beautifully- we guarantee it! But all living plants can experience periods of stress, or ailments beyond your control. Any plant can suffer from a fluctuation in its health despite your best efforts, and it’s during times like these that having the support of a responsive team of knowledgeable professionals makes a world of difference.

Every plant purchased from Léon & George includes lifetime access to our Plant Doctor service: our team of horticulturalists with decades of experience growing and caring for plants. Our Plant Doctors are here to assess your plant’s health and growth, provide tips and treatment plans, and and to offer supportive guidance as you green up your space. And no fees are required- the Plant Doctor service is just one way we work to ensure that every plant we sell is designed to thrive.

We’ve compiled a list of common problems that Scheffleras can face and helpful guidance for assessing your plant’s health. Happy plant parents are the key to our success! Click here to learn more about how to care for and grow your Schefflera.

Shop the large Schefflera Tree with Mid-Century Ceramic Pot and Wood Stand From Leon and George

Schefflera Tree From Léon & George

Explore our selection of premium Philodendrons, from the charming Little Hope to the regal Red Congo and playful Monstera Deliciosa. Ideal for spaces that receive medium to bright indirect light, Philodendron varieties add instant organic texture and style to indoor spaces.

Schefflera Tree Care Guide: Everything You Need To Know

With stunning texture and a covetable canopy, the Schefflera Tree, also known as Schefflera arbicola or Umbrella Tree, is a fresh and vibrant statement plant. And it gets even better: the Schefflera Tree is a potent air purifier and a low-maintenance plant species overall. Caring for a new Schefflera Tree can be a breeze, as long as you know the simplest 1-2-3’s. So read on, and learn all you need to know about caring for and growing a stunning Schefflera Tree. You’re guaranteed to love this easygoing beauty.

LIGHT

  • Prefers medium to bright indirect light, but is adjustable to lower light

  • Leaves may scorch in harsh direct sunlight

WATER

  • Water thoroughly when topsoil is dry, usually once every ten days or so. Avoid overwatering.

  • Watering schedule may be less frequent during winter months

GROWTH

  • In prime conditions, the Schefflera Tree is a fast grower and can grow up to 8-10 feet tall indoors

  • Fertilize your plant regularly during the spring and summer months.

Schefflera Tree

Schefflera Tree

A gorgeous statement tree with an air-purifying punch, the Schefflera is renowned for its abundant canopy of oval leaves that grow in circular, umbrella-shaped configurations. Hardy and resilient, the Schefflera thrives in medium to bright indirect light.

Common problems with the Schefflera Tree

Drooping, yellowing leaves - overwatering

  • Symptom - leaves appearing to droop or appear yellow, especially on lower portion of plant

  • Cause -overwatering and/or not enough sunlight

  • Remedy - allow Schefflera Tree’s soil to dry out completely. Check the soil’s moisture through the drainage holes at the bottom of plastic nursery pot: overwatering can lead to more severe ailments like root root, which may eventually require you change the soil. If soil has a bad odor, repotting with fresh soil will be necessary as root rot has likely set in.

Discolored or browning leaves - underwatering or insufficient humidity

  • Symptom - leaves discolored or brown, often with crispy edges

  • Cause - underwatering or insufficient humidity

  • Remedy - Water Schefflera Tree whenever its top two inches of soil are dry to the touch and mist tree once a week or more with plant water. You can also take your Schefflera Tree out of its ceramic pot, and, keeping it in its plastic nursery pot, allow the tree to sit in a shallow dish of water for a few hours so that the roots can drink from the bottom. Let the tree drain entirely before returning it to its decorative pot.

Leaf drop - overwatering, underwatering or cold drafts

  • Symptom - leaves dropping, either at the bottom of the plant or from all areas of the plant

  • Cause - often overwatering, but underwatering and cold drafts can also cause leaf drop in Schefflera trees.

  • Remedy - Follow instructions above for either overwatered or underwatered Schefflera Trees, and ensure that tree is situated in a spot away from A.C’s, vents, heaters or doors and windows that frequently open or close.

How to maintain a beautiful and healthy Schefflera Tree

Your new Schefflera Tree wants to thrive, and this low-maintenance wonder plant makes it easy for you. Follow the simple tips below, and what your Schefflera Tree flourish for years to come!

  • Pruning - Remove dry or dead leaves all year round, but save any major pruning for the late winter or early spring, when the emergence of new growth on Scheffleras is strongest. Use sharp, clean shears and cut just above nodes at a 90 degree angle.

  • Staking - Mature Schefflera Trees can grow quite large and may benefit from the extra support of a plant stake or two. You can stake your tree by inserting a wooden dowel or support stick gently into the soil near the trunk, then using plant tape or twine to secure the Schefflera’s trunk(s) to the stake at intervals of 4-5 inches.

  • Cleaning - Take a damp cloth or sponge and gentle clean each leaf (this also helps the plant soak in more light!).

  • Repotting - Houseplants grow at a much slower rate than they would in the wild. Depending on the size of your plant and the density of the roots, this is nice to do every 2-3 years to provide fresh nutrients and encourage new growth.

    • When to repot - if the roots start to become visible outside the soil (i.e. circling around the grow pot), it is time to consider repotting your Schefflera Tree.

    • Pot sizing - if you want your plant to grow taller, source a nursery pot that’s 2” in diameter larger than the current pot. If you want your plant to stay the same height, you can reuse the same pot and simply change the soil.

    • Get your hands dirty - spread out newspaper on the floor, remove the plant from the pot and shake off as much of the old soil as possible so that you have clean roots. Place the plant in the center of the pot, add new soil and pat down firmly. Water the soil thoroughly and place the plant in an area with bright indirect light. Your plant will take 2-4 weeks to settle from the shock and adjust to its new home.


Schefflera Tree

Featuring a graceful umbrella of emerald foliage, the Schefflera Tree is a gorgeous low-maintenance statement plant and a potent air purifier. Easy to care for and even easier to love, the Schefflera Tree is adaptable to low light and needs water only sparingly.

What You Need To Know Before You Buy A Philodendron
Shop The Philodendron Brasil Plant

Philodendron Brasil

Choosing a new statement plant can feel complicated, but by selecting a Philodendron variety, you’ve made a great first step! Lush and easy-going, Philodendrons are a popular low-maintenance plant family. And talk about a family: there are over 400 varieties in the Philodendron genus! So how to choose the best Philodendron for your home, and ensure it thrives for years to come? We’re glad you asked, because all the answers are right here.

Which Philodendron Variety Is Right For Me?

Ah, variety. It’s the spice of life- but can also be the root of indecision. Let’s simplify your options by focusing on a few gorgeous Philodendrons that all offer a unique aesthetic. The Little Hope is a classic, curly Philodendron that is emblematic of the famous Philodendron look. The Philodendron Brasil has the archetypal heart-shaped foliage that Philodendron lovers adore, and can grow in long, luxurious trails. For large statement plants that make an impact, both the Monstera Deliciosa and Red Congo offer iconic foliage and impressive size.

Red Congo

Philodendrons Love To Be Misted

Again we return to the tropics and the fact that Philodendrons thrive in humid climates. But not to worry: their ideal, moist biome is actually easy to replicate! Plan on providing any Philodendron with a fine mist of water up to 2-3 times a week to keep its foliage in pristine shape. Misting is fun, hard to over-do, and doesn’t require special products: misting with plain water is perfectly fine. For an additional boost of nutrients, you can mist with a foliar feed, which provides nourishment and minerals to the plant when applied directly to its leaves and stems.

Monstera Deliciosa

How To Place Your Philodendron

Because they’re flexible and forgiving plants, you have leeway in terms of Philodendron placement and can give styling extra consideration. Humidity-loving Philodendrons like the Philodendron Brasil and Little Hope are lush options for a bathroom or kitchen, and they’re equally dazzling in living spaces. Large Philodendrons, like Monstera Deliciosas and Red Congos, define organic luxury in living rooms and dining areas. Just make sure that the spot you choose receives a generous amount of indirect light, and is away from any harsh air from A.C. units, heaters or vents.

What’s An Epiphyte…And What Are Aerial Roots?

If you’ve been educating yourself on all things Philodendron, you’ve probably come across the term epiphyte and, if you’re not a Latin linguist, you might have wondered what the term means! Epiphyte is a term for any plant that grows on other plants or objects for extra physical support, and about one third of Philodendron plants are epiphytic. This characteristic is an evolutionary behavior, developed by the plant to help it attain more light. (The higher they grow, the closer they are to the sun!)

If you let an epiphytic Philodendron run wild and grow as it pleases without periodic pruning, it may very well trail along shelves and other plants. We think this makes for a gorgeous, natural look, and provides enthralling texture. But if wild trailing is not your cup of tea, you can always reign your Philodendron in by trimming it.

When it comes to aerial roots, which are commonly seen on epiphytic Philodendrons, we think that the best tact is not to trim them. Aerial roots soak up moisture from humid air and provide your plant with structural support as it grows. Aerial roots are commonly seen on Monstera Deliciosas, and they can be a bit confusing for new plant owners. In general, the safest way to approach aerial roots is to allow them to remain connected to your plant. Every part of your plant is there for a reason, after all! So instead of snipping off aerial roots, plan on tucking them into the soil if you do not want them to run wild. Gently tucking aerial roots back into your Philodendron’s pot and under the soil line will allow the roots to take in nutrients from the soil, and support the overall health of your plant. You can also utilize plant stakes and support ties to train your Philodendron to grow in a more compact shape. 

Philodendrons Prefer Medium to Bright Indirect Light

Cue the tropical vibes: Philodendrons are native to South America and the West Indies, where the forest floor receives dappled light and the environment enjoys high humidity. Although we’d be hard pressed to replicate the canopy of a rainforest in our home, Philodendrons don’t demand perfection. Just ensure that they receive ample indirect light, and are kept away from harsh, direct rays. Philodendrons can scorch in direct light.

Philodendron Brasil

How To Select The Right Size Of Philodendron

With all of the Philodendron varieties available, you have plenty of options no matter what size you’re looking for! Just keep in mind that, in prime conditions, Philodendrons can grow fast. During spring and summer, Philodendrons that receive ample light can grow as much as four inches a week! What can we say- they simply want to thrive! Keep this in mind if you are purchasing a Philodendron for a small space, like a shelf: trailing varieties will grow abundant cascades, and larger Philodendrons, like Monsteras and Red Congos, will stretch their canopies far and wide.

Monstera Deliciosa

Philodendrons Like Moist, But Not Soaked Soil

Although the watering requirements will differ with each Philodendron variety, a general rule of thumb is that Philodendrons prefer moist, but not soaked, soil. Consider their native habitat when you establish your watering routine. In tropical climates, Philodendrons receive some rain, but much of it is caught by the canopy of taller trees before it reaches them. Humidity in the air makes up a large portion of the overall moisture they receive, but their soil is rarely drenched. Aim for even moisture, and water away from the plant’s central trunks. Consider using a tool like a moisture meter do demystify the process- they are convenient, affordable and easy to read.

Little Hope Philodendron Mid Century Ceramic Pot

Little Hope


Monstera Deliciosa

A Note On Toxicity In Philodendrons

Despite the fact that they are the most widely owned and loved family of houseplants, all Philodendron plants are considered to be toxic to some degree if consumed. There is some variation by plant, but Philodendrons fall in the category of “mildly to moderately toxic” across the board, so it’s important to keep any Philodendron out of reach of children or pets. If toxicity is a dealbreaker, you still have options!

How To Select A Healthy, Thriving Philodendron

As you shop for a new Philodendron, there are a few things to look out for to ensure that you choose the healthiest plant possible. Healthy Philodendrons will have firm leaves with vibrant coloring. Examine plants’ foliage thoroughly, and avoid purchasing a plant that has drooping or yellowing foliage. Additionally, steer away from plants that exhibit brown spots on their leaves. Brown spots can be a sign of fungal infections, which, while treatable, can cause an unnecessary headache. Take a look at the Philodendron’s soil- it should neither be soaking wet, nor bone dry.

Philodendron Brasil

Avoid Purchasing Your Philodendron From A Garden Center

Premium plants sourced from trusted growers are primed with all they need for a lifetime of good health. Responsible growers care for their plants according to their specific needs, treat and prevent pests responsibly and generally offer plants of a far higher quality than garden centers and home improvement stores.

Garden centers often have attractive price tags, but the quality of the plants offered reflects that price. Ensuring that your plant is in good health from the start will pay off with strong growth and consistent health over time.

As convenient as it sounds to pop over to a garden center and grab the nearest Philodendron, there are caveats to this approach. Transporting Philodendrons in your vehicle can result in structural damage from being jostled, as well as stress from your car’s A.C. or heat. So although you may be able to purchase a plant from the same place you’d buy other necessities, it is crucial to remember that living plants are delicate and can be stressed by transit.

Buy your plants from a premium supplier that offers doorstep delivery or packaging that is specifically engineered for the transport of plants. You’ll reap the benefit of their expertise, and avoid the negative effects that can result from improper care or transportation.

Even The Healthiest Philodendron Can Experience Stress

The source of plants’ beauty is the vitality of their health, and as with our own, plant health can have ups and downs. Even Philodendrons that receive immaculate care can experience stress from factors beyond your control. If your plant experiences a bump in the road or is exhibiting signs of ill health, it makes a world of difference to have a responsive source of support.

Every plant purchased from Léon & George includes lifetime access to our Plant Doctor service, comprised of a team of professional horticulture experts. Our Plant Doctors are available to assess your plant’s health and growth, provide tips and treatments, and offer guidance on your journey of growth. No fees are required: our Plant Doctor service is just one way that we support plant owners and ensure that every plant we sell is designed to thrive.

We’ve compiled a list of common problems that Philodendrons can face and helpful guidance for assessing your plant. Happy plant parents are the key to our success! Click here to learn more about how to resolve common issues with your Philodendron.

Shop Our Selection Of Gorgeous Philodendrons From Léon & George

Explore our selection of premium Philodendrons, from the charming Little Hope to the regal Red Congo and playful Monstera Deliciosa. Ideal for spaces that receive medium to bright indirect light, Philodendron varieties add instant organic texture and style to indoor spaces.

What You Need To Know Before You Buy A Snake Plant

The Snake Plant, or Sansevieria, is one of the most beloved indoor plants around. And don’t get nervous: there’s no caveat here! What you have heard through the grapevine is all true: The Sansevieria plant family is full of low-maintenance wonder plants. With a host of varieties to choose from, you can be confident that whether you opt for a classic Sansevieria trifasciata ‘Laurentii’, or a more rarified Snake Plant, you will be in for a pleasant new plant friend. But there’s even more to love about the famed Snake Plant. If you’re considering buying a Sansevieria for your space, you’re already on the right track. All you need to know is what to look for as you shop (healthy, thriving plants only!) and how to care for your Snake Plant once you bring it home. So check out our simple guide, and prepare for a beautiful friendship with a gorgeous new Snake Plant!

Snake Plants Have Flexible Light Requirements

Here’s the first bit of great news: Snake Plants can thrive in varied degrees of light. That means that whether your space enjoys a steady glow of bright sunshine or revels in mysterious shadows, a Sansevieria can adjust to your environment over time. With a disposition this flexible, it’s hard to wrong: but not impossible. Keep in mind that when placed directly in the path of bright, direct sunlight, a Snake Plant’s blades can scorch. (Like us, they can be sunburned, and they don’t enjoy it either!)

When It Comes To Snake Plants, More Light = More Growth

This is true of most plants, but keep in mind that if you would like your Snake Plant to grow quickly and achieve great height, you will want to place it in a spot that receives consistent, indirect sunlight. This tropical plant has no problem thriving in low light, but it will not grow quickly without some natural sun. It’s the key to photosynthesis, after all.

How To Place Your Snake Plant

Now comes the fun part! Think about what you hope to achieve with your new Sansevieria’s placement. Are you seeking an air-purifying punch? Snake Plants are especially popular as bedroom accents for this very purpose. (The Sansevieria trifasciata ‘Laurentii’ is considered to be both the strongest air purifier of the Sansevieria family, and the most potent air purifying indoor plant in general in scientific studies.) Do you have your heart set on a sky-high Snake Plant? If so, you’ll want to place yours in a sunny spot a few feet from a window that receives natural light. It’s hard to go wrong with Sansevieria placement, but even so, investing in a new plant can feel daunting. Consult our illustrated Light Guide if you get stumped, and remember that more light = more growth. 

Snake Plant with Scandinavian Pot From Leon and George

Your Snake Plant Has A (Good!) Reputation

Sure, they’re sometimes known as the “Mother-In-Law’s Tongue” Plant. But don’t let that moniker put you off: Snake Plants are actually renowned for positive properties in the feng shui tradition. In many cultures, Sansevierias are considered to bring good luck and positivity to the environments in which they’re placed. They are thought to protect homes from negative chi- a property that is considered to be even more potent when they are placed in a southeastern, southern, or eastern corner of your home.

It’s Important To Avoid Overwatering Your Snake Plant

Snake Plants are so easy-going that it’s easy to think they can withstand anything. And that is almost true: but there is an exception to that rule. Overwatering is the number one cause of damage in Sansevieria health. It’s important to remember that your Snake Plant may not require water as frequently as other plants in your home. Overwatered Snake Plants can face a rough road to recovery, so prevention is the best medicine here. 

It’s Easy To Avoid Overwatering. We Promise!

Your Snake Plant is an individual, and several components affect the rate at which it uses the water you provide it. This means that Sansevierias should have their own watering schedule, tailored especially to them. But don’t worry, it’s a remarkably simple practice. Every 10-14 days, stick your finger two inches down into your Snake Plant’s soil to monitor its moisture. Provide water only when its topsoil is dry to the touch. You will likely find that you only need to water your Sansevieria every couple weeks, or even every month. Don’t worry: this is normal! Snake Plants process water at their own pace. This is not a plant variety that needs water every few days, so be sure not to treat it like one. Supplemental tools like moisture meters are also great for taking the mystery out of Snake Plant watering, by notifying you when soil is moist or dry.

Snake Plants Grow At Their Own Pace

If you’re looking for a tall and statuesque Sansevieria, consider your ideal size when you shop, not after. Snake Plants are not rapid growers in low to medium light, though they can grow quickly in brightly lit locations. All well-cared for Snake Plants will exhibit beautiful growth over time (especially when they receive ample light) but generally speaking, Sansevierias grow at a slower pace than other indoor plant varieties. The Sansevieria trifasciata ‘Laurentii’, it should be noted, is considered to be the fastest-growing Snake Plant of the lot. But generally speaking, if it’s a lofty statement plant you’re seeking, buy a Snake Plant that is already large. Sansevierias typically grow about two to three inches per season, with overall growth averaging about a foot in height per year, in prime conditions.

Snake Plant In Mid-Century ceramic pot

GET THE Mid-century Look

How To Select A Thriving, Gorgeous Snake Plant

Once you’re ready to buy a new Snake Plant, it’s time to pick the healthiest plant possible. Select a Snake Plant that is in dry to nearly dry soil. A Snake Plant that has been overwatered before you bring it home can exhibit issues down the line which can easily be avoided. Choose a Sansevieria with healthy blades that are firm and exhibit vibrant, even color. Avoid specimens that show large areas of browning, dry patches, or soggy areas on its blades. Select a Snake Plant whose size you are satisfied with, and note that growth will take time. 

Avoid Purchasing Your Cactus From A Garden Center

Snake Plants are often available at garden centers and home improvement stores, but the plants at these retailers are not typically the pick of the litter. Remember that with living plants, as with so many things, you will get what you pay for. An attractive price tag can provide a momentary thrill, but a big headache often follows in its wake. Here’s why: garden centers are able to offer low prices for plants that are not sourced from premium growers. That means that the plant may have been mistreated or incorrectly watered. These issues may not be visible from the get-go, but plants exhibit stress overtime. You can avoid an unhealthy plant by purchasing from a reputable, premium supplier.

Plants sourced from premium growers will be grown in pest-free environments and prophylactically treated for insects as well. A well-tended new plant is a gift that will keep on giving. Or to look at it another way, a plant infested with insects is a problem that can leap from plant to plant at remarkable speed. That’s right, one insect-ridden plant can easily result in every plant in your home needing treatment. 

Snake Plants are a hardy plant variety, but no plant is impervious to damage or stress. So while it’s easy to buy a mop at a home improvement store and bring it home, the same cannot be said for living plants. Purchasing a Sansevieria from a retail location and getting it home forces the plant to endure undue stress, not just from being jostled, but also from factors like dry gusts from your car’s A.C. Set your new Snake Plant up for success by having it delivered by hand or securely shipped in well-insulated packaging that has been specifically engineered for plants.

A Note On Toxicity In Snake Plants

Many pet owners find that they have no trouble with Snake Plants: their plant structure does not contain leaves or blossoms that are typically attractive to animals. However, Sansevierias are considered to be mildly toxic to pets due to the presence of saponins in their blades.

Even The Healthiest Snake Plant Can Experience Stress

The sturdy and reliable Sansevieria is a gold-standard plant due to its resilience. But because they’re living beings, all plants can experience stress caused by things like environmental changes, over-or-under watering, or pests. When questions or challenges regarding plant health arise, it’s a relief to know that a supportive plant pal that has your back. Snake Plants purchased from Léon & George are paired with lifelong access to our Plant Doctor service: a responsive team of professional horticulture experts, here to support you, provide assessments of your plant’s health, and offer helpful guidance whenever you need. No fees are required: our Plant Doctor service is just one of many ways that we support new plant parents, and ensure that every Léon & George plant is set up for success.

We’ve compiled a thorough list of common issues that Sansevierias can experience, and have a detailed care guide available. Get ready to welcome home your new Snake Plant! Click here to learn more about all things Sansevieria, and how to keep yours in prime shape for years to come.

Large Snake Plant Sansevieria Houseplant in Nouvelle Ceramic Pot from Leon and George

Snake Plant

A stunning and lush statement plant with an easy-care disposition, the Snake Plant is a low maintenance succulent that is adaptable to varied light levels and needs water only sparingly.

What You Need To Know Before You Buy A Cactus

Preparing to bring a new Cactus into your life can be a bit confusing. We all have a friend that has a thriving cactus at home, and perhaps one that has seen their Cactus fail. Cacti differ from other plant varieties in many ways, and there are important steps for both selecting and caring for your cactus that will help enormously as you explore Cacti life! The good news? It’s simple to set yourself up for success. Read on to learn everything you need to know about selecting, buying and caring for a new Cactus. 

Your Cactus Will Need Bright, Direct Light

This probably sounds a bit obvious, but Cacti require bright, direct sunlight in order to thrive- and lots of it. Because these sun-loving plants are native to extremely bright, dry deserts, they cannot tolerate insufficient light or overwatering. It is common for plant owners to overestimate the amount of light that their space receives, but it is of paramount importance that you assess your lighting environment correctly before buying your new Cactus. Indirect sunlight, or rooms that receive only a few hours of sunlight a day, will not be sufficient for keeping your Cactus healthy. If in doubt, remember their natural environment : they grow in areas that are extremely sunny, experience very little rainfall, and are in rocky soil that is almost bone-dry. That level of bright light and very light moisture is what you are aiming to replicate in your Cactus’ chosen home. 

How To Place A Cactus In Your Space

It’s time to identify the sunniest spot in your home! In general, you will want to put an indoor Cactus as close to a window that receives ample, direct sunshine as possible. South facing windows are best, but west facing windows can also do the trick. Reference our easy and informative Light Guide to determine the light that your space receives.

Your Cactus Was Made To Create An Interior Design Impact!

If you’re buying a Cactus for your home, you are likely opting for this gorgeous plant variety because you are looking to make a stunning, organic statement. Place your Cactus in a spot where it can soak up tons of sun- and tons of attention. You would be selling these eye-catching plants short by tucking them into a corner! Be sure to consider safety as well- many Cacti have needles or thorns, and your Cactus should be placed in a location where children and pets will be safe from any pokes, and your Cactus will be safe from any risk of structural damage that might occur from it being jostled or disrupted.

Shop the Extra Large Desert Cactus Euphorbia Ammak Variety with Leon and George

Consider the Euphorbia Ammak

Although varieties like the Easter and Saguaro Cacti are common ornamental varieties, they can have requirements that make them a bit tricky for indoor placement. For instance, the Easter Cactus prefers cool temperatures that can be difficult to sustain. A Euphorbia Ammak, or Desert Cactus, is ideal for sunny indoor spaces. They thrive in indoor environments, have a beautifully tall, tree-like structure, and are exceptionally easy to propagate. At Léon & George, we offer the Euphorbia Ammak because they get our vote of confidence: their health is easy to maintain, they are non-toxic and safe for children and pets, they rarely experience pests and have gorgeous height and sculptural qualities.

It’s Important To Avoid Overwatering Your Cactus

Overwatering a Cactus can be an easy mistake to make, but a difficult one to recover from. Cacti generally require far less water than plant lovers assume, and large Cacti prefer to receive about one to two cups of water a time, every few weeks in the spring or summer, and even less frequently in fall and winter: typically every month.

But Don’t Worry- It’s Easy To Avoid Overwatering!

Your standard for Cactus watering should be to water it only when the soil is dry. Because Cacti store water within their plant structure, they do not need to be watered as soon as the soil of your Cactus dries out- the plant still has water within it to cycle through. But probing the soil with your finger, by sticking it two inches down and monitoring the moisture in that layer, is a simple way to determine whether it’s time to water or not. Don’t worry if your Cactus’ soil is dry for a few days or a week before you get around to watering: it still has water in reserve. Do be sure to avoid watering if this soil is already moist.

Healthy Cacti Can Grow Fast

Now here’s great news: a healthy Cactus can grow at a quick rate. This is something to consider when you are ready to buy your new Cactus, because you will want to select a plant of a size and structure you already find pleasing, but to also account for the fact that it will grow with appropriate light and care. Consider your ceiling height, as well as the fact that Cacti are heavy! Choose a size of Cactus that you will be comfortable with, so that you will not need to go through the process of moving it within your home. Trust us, you will be glad you did.

How To Select A Thriving, Gorgeous Cactus

There are few things to look for as you choose a new Cactus to buy and take home. Look for a Cactus that is in dry to nearly dry soil. If the soil of a Cactus is soaked, you likely don’t want it, because if it has been overwatered before you bring it home, this can result in health problems down the line. Additionally, choose a Cactus with a stature that you like. Leaning Cacti can have a beautiful, natural asymmetry. But if you prefer the linear look, opt for a Cactus that grows straight up and down. Correcting a leaning Cactus by rotating it toward its main ligh source at intervals is doable, but it takes time. If the Cactus that you are considering has spikes or thorns, examine them for healthy coloration. Additionally, ensure that the Cactus’ overall structure is firm, well-colored and does not have large areas of dry or soggy texture or browning.

Avoid Purchasing Your Cactus From A Garden Center

Cacti can be expensive, but as with so many things, you will get what you pay for. Obtaining a new Cactus at the lowest possible price can be appealing, but when it comes to living, growing plants, it is not always the best choice. Garden centers may have great price tags, but they often treat all plants the same, which means that your new Cactus may receive as much water as whichever plant happens to be standing next to it. This is not a recipe for exceptional plant health, and can result in health issues that could easily be avoided.  

Another aspect to consider is pests. When many plants are housed together, bugs have a chance to leap. And leap they do, from plant to plant, often leaving havoc in their wake! Buying your Cactus from a trusted, premium supplier will ensure that it has not been exposed to pests, and has been treated prophylactically as well. There is nothing more frustrating than buying a new plant, bringing it home, and noticing that insects hitched a ride on it. This creates an environment in which the pests can travel to all of your plants, necessitating a lot of unnecessary treatment and laborious troubleshooting. 

Cacti are delicate, and so are you! You can probably imagine that buying a large, statement Cactus from a retail location and then getting it home is a recipe for trouble. Heavy, spiky Cacti do not belong in our cars. Having your Cactus delivered by hand is the best option for your new plant and for you.

A Note On Toxicity In Cactus Varieties

You’ll be relieved to know that many, but not all, Cactus varieties are non-toxic. Simply put, many Cacti have evolved to deter predators in other ways, as their thorns will attest! However, a handful of very popular Cacti varieties are toxic, and should be avoided if you have curious pets or children in your home: including the Saguaro Cactus, Cholla Cactus, and Barrel Cactus. These plants can be toxic when ingested, and some produce toxic sap. The non-toxic nature of the Euphorbia Ammak is another reason we think it is the gold standard for indoor ornamental Cacti.

Even The Healthiest Cactus Can Experience Stress

Plants are not so different from us after all! Even a healthy Cactus can experience stress. Add to that the fact that user error does occur from time to time despite our best efforts (hello, overwatering), and you can see why buying your Cactus from a supportive supplier is key. Cacti purchased from Léon & George come with lifelong access to our Plant Doctor service: our team of professional horticulture experts, on hand to support you in your journey, assess your plant’s health, and provide tips and adjustments where necessary. And nope, there’s no hitch here: no fees are required. Our Plant Doctor service is just one way that we support plant parents and ensure that every Léon & George plant is set up for success.

We’ve compiled a helpful list of common issues that Cactus plant varieties can face, and have a detailed care guide available. Cacti paradise is right around the corner! Just click here to learn more about your new Desert Cactus and how to keep it in tip-top shape for years to come.

Desert Cactus

Make a statement with the ultimate extra-large floor plant: the Desert Cactus. Angular and resilient, the Desert Cactus has gorgeous green and yellow variegation and trademark thorns. Low-maintenance and attractive, the Desert Cactus requires ample bright, direct light to thrive.

How to Care For and Grow Your Ponytail Palm

The Ponytail Palm is an immediate standout. With a charming, bottle-shaped trunk and a burst of vibrant, blade-like foliage, the Ponytail Palm imbues instant texture and character into any space. The best news of all? Ponytail Palms, alias Beaucarnea recurvata, have a truly low-maintenance disposition. A member of the Agave family, they have simple needs that make this voluminous beauty an ideal plant for beginners and those on-the-go. Read on for simple tips on how to care for and grow your Ponytail Palm.

How much light does the Ponytail Palm need?

Ponytail Palms prefer bright light and plenty of it. Direct sun is best, but they can also thrive in bright, indirect light. With careful conditioning, they can also adapt to medium levels of light.

How often to water your Ponytail Palm

Ponytail Palms store water in their bulbous trunk, and need to be watered only sparingly. These drought-tolerant plants typically need water only every every two weeks and should be watered only when their top 2-3 inches of soil are dry to the touch.

Ponytail Palm Growth Rate

In prime conditions, Ponytail Palms can grow up to twelve inches a year, though indoors this is uncommon. Inside homes and offices, growth is slow and steady, and you can expect more like 2-4 inches a year. As an extra boost, your Ponytail Palm can be fertilized during its prime growing seasons, spring and summer.

Common problems with the Ponytail Palm

Yellow leaf tips - too much water

  • Symptom - yellow, droopy leaf tips

  • Cause - too much water

  • Remedy - Remove your Ponytail Palm from its ceramic pot and dump out any standing water. Place the palm, still within its plastic nursery pot, in a spot that receives ample, bright light and allow its soil to dry entirely before dressing back up. Gauge soil every two weeks for moisture, and provide water only when top 2-3 inches of soil are fully dry moving forward.

Browning leaves - underwatering

  • Symptom - Crispy, browning foliage

  • Cause - Underwatering or lack of humidity

  • Remedy - Prune browning foliage off with clean, sharp scissors or shears by cutting along the leaf’s natural curve in the direct of its growth. Do not remove more than 20% of your plant’s foliage at a time. Remove the Ponytail Palm from its ceramic pot to survey its soil. If the soil is dry but not parched, provide 2-3 cups of water. If the soil is entirely parched, fill a sink or bathtub with 3-4 inches of water, then place your Ponytail Palm in the water, while still housed in its plastic pot. Allow the Ponytail Palm to soak up water through its roots for about 45 minutes before returning to its ceramic pot, then proceed with standard watering routine, gauging the soil every 2 weeks and watering when the top 2-3 inches are dry to the touch.

How to maintain a beautiful and healthy Ponytail Palm

Take good care of your Ponytail Pam and it will thrive beautifully for years to come! Below are simple tips to continue caring for and growing your Ponytail Palm over time. Trust us, it’s easy!

Pruning

As your plant ages, yellowing or browning foliage is normal and part of the plant’s regular upkeep.To remove, snip blades at the base of the leaf, where they meet the Ponytail Palm’s trunk, with sharp, clean pruning shears. To manicure individual blades, cut discolored areas off with scissors while following the natural curve.

Boosting Humidity

Liberally mist your Ponytail Palm once a week to boost its humidity levels and keep its canopy free of dust. A gentle foliar feed can also be used as part of your regular upkeep.

Repotting the Ponytail Palm

Ponytail Palms grow fairly slow and it is uncommon for them to become rootbound, but if your plant is beginning to look unstable or like it is outgrowing its pot, you can consider repotting into a bigger container with fresh soil.

Indoor houseplants grow much more slowly than they do in the wild. Depending on the size of your Ponytail Palm and the density of the roots, repotting every 2-3 years can provide the benefit of fresh nutrients and encourage new growth.

  • When to repot - if or when the plant looks unstable as if it has outgrown its container, it may be time to repot

  • Pot sizing - if you want your plant to grow taller, find a nursery pot that is two inches larger in diameter than its current container.

  • Grab your gardening gloves - spread newspaper or a tarp on the floor and remove your Ponytail Palm from its pot. Shake off old soil, but leave at least 1/3 of its original soil to prevent shock. Place the plant in the center of the new pot, add new soil and pat down firmly. Water the soil if dry and place the plant in an area with bright light. Your plant will take 2-4 weeks to settle and adjust to its new container.

How to propagate a Ponytail Palm

Ponytail Palms can be propagated with their “pups"“, or healthy, growing offshoots. They are also referred to as “clones”, and look like mini-palms growing off of or around the trunk of the plant.

  • Carefully remove pups - You can carefully dig around and remove healthy Ponytail Palm pups for propagation. Use a gentle touch as you excavate the pup and loosen its roots before removing from soil.

  • Transplant pups into new soil - Transplant the pups into pots containing a cactus/succulent soil mix. Bury the pup in the soil, leaving its plant structure (its foliage and stems) above the soil line. Add more soil if needed and pat down firmly.

  • Provide water, but not too much - Provide only enough water to moisten the soil and remove any air pockets. As you move forward, water the pups only when their soil is dry to the touch. No Ponytail Palm, not even the smallest, like being overwatered!


Ponytail Palm

A stunning and spirited agave variety with a charming, bottle-shaped trunk and mane of lush blade-like foliage.

How to Get Rid of Spider Mites on Indoor Plants
A Fiddle Leaf Fig shows signs of spider mites.

A Fiddle Leaf Fig shows signs of spider mites.

Checked your plant's fronds lately? Aside from watering and dusting, checking for insects from time to time should be part of maintaining your plant's health. Check the undersides of leaves and all the stems. If you spot any thin silky webs, it's likely that a few spider mites have decided to take up residency. Treat the problem ASAP to prevent it from spreading.

What are spider mites?

Spider mites, contrary to popular belief, are actually not spiders. They are rather tiny arachnids (that do spin webs, hence “spider” in the name!), that often appear on the undersides of leaves, most commonly in hot and dry conditions. They make large colonies, breed quickly in 1-2 weeks, and feed off plants’ tissue and sap.

Here are a few simple steps to naturally get rid of spider mites:

  • Clean off your plant with a sturdy stream of cold water in your sink, shower, or outdoors with a hose. Thoroughly spray the tops and bottoms of leaves and stems to completely wash away all webs, mites, and eggs.

  • Let your plant dry off, then treat the infested areas with a natural pesticide like Neem Oil

  • Repeat this process once a week for three weeks to make sure the mites don't come back

As mentioned earlier, spider mites often appear when conditions are hot and dry. If this is a regular issue for you, try adding humidity and air circulation to your plant's environment, or using our black olive oil soap as a preventative measure by regularly cleaning your plant with the spray. These pesky critters essentially feed on your plants, draw out their nutrients needed to survive, and cause leaves to drop until the plant eventually dies. Luckily, they're easy to control if caught early!


main (4).jpg

Indoor plants, potted & delivered

Premium plants paired with stylish ceramics, plus lifetime plant care support. Order online at leonandgeorge.com

5 Tips For Pruning Away Dead Leaves
4be09668-a24f-4a10-93b4-5ca3c9e8155c.jpg

If your plant is exhibiting foliage issues like yellowing, browning or dry leaves that no longer appear viable, don’t panic! This is nature at work: as plants age, some of their leaves will lose liveliness and strength. New leaves will grow to replace them, and they’ll grow even quicker with a little help. Pruning off old foliage signals to your plant that it can direct its energy toward pushing out new growth. So don’t be afraid to give your plant a snip — follow the steps here, and prune with confidence.

Shape It Up

Your plant is like a living sculpture: you can maintain the ideal shape and size for your space by pruning off unruly stems and leaves. Simply cut close to the base of the stem or tug on the root and see if you can pull it out completely. Maintaining a balanced structure has the additional benefit of preventing tilting and sagging.

Clean Up The Edges 

Every plant can use a manicure from time to time. With sharp scissors, you can trim off imperfect or discolored leaf edges and re-shape your plant’s edges for uniform foliage. Unless you’re aiming for a complete reshape of the leaf, be sure to leave the slightest sliver of brown, right before the green. Cutting into a healthy part of the leaf will create fresh wounds that will need to dry out and heal.

A Light Touch 

Plan on pruning no more than 25% of the plant’s overall foliage at any one time. This ensures that your plant doesn’t go into shock and allows you to take time to consider the overall desired shape.

Take a Step Back

Once you’ve finished your first round of pruning, take a step back and look at the plant from a distance. If any leaves you’re considering pruning contribute nicely to the overall shape, leave them on. Pruning is essentially an art (think bonsai and ikebana) and it allows you to take the reins in determining how you would like your plant to look. Assess the plant regularly throughout your pruning routine to ensure that it’s headed in the direction that is beautiful to you. 

Last but not least, a *pro tip*: scared of pests? Keep your plant well-pruned! Pests are significantly less likely to make your plant their new home if it has well-maintained foliage. (Think of it like this: fewer branches to hang their hammocks from!) 


BIRD OF PARADISE

With long elegant leaves rising up from the bottom, the Bird of Paradise is a popular indoor plant for creating that instant jungle atmosphere.

Rotating your plants in the winter
bathroom.jpg

The latest in plant care tips for keeping your foliage happy and healthy, brought to you by premium plant delivery service Léon & George.

Rotating indoor plants is always a good idea, but during shorter winter days and sometimes gloomy periods, it’s more necessary than ever. Here are a few tips for how and why to rotate your houseplants:

  • Does one side of your plant look nicer than the other? Try leaving the less bushy side facing the window for a bit longer than usual to even things out. Hint: You can always turn your plant back around when people visit to put its best face forward. 

  • Do any of your plant stems seem to be leaning or growing more on the sides closer to the windows? Plants will always follow the sun, so this is normal if you're not rotating them for even light exposure.

  • While you're there, take a second to dust off the leaves so your plants can soak in more light, and give any brown tips a trim as these tend to appear more during winter.


zz.jpg

ZANZIBAR GEM

Long and graceful wandlike stems with lush fleshy leaves, resembling a group of feathers, the Zanzibar Gem is a near indestructible indoor plant.

Fertilizing Plants In Winter: What To Know

Should you fertilize your plants in the winter?

One of the most common questions our customers ask us is if they should continue fertilizing their plants in the winter. While we are big proponents of regularly feeding indoor plants, there are a few things to know when it comes to boosting their nutrient intake in the winter.

When to fertilize indoor plants

The general rule of thumb when it comes to feeding your plants is to only do it when they are actively growing. Most indoor plants are actively growing during the spring and summer, which is why we recommend fertilizing 1-2 times a month between April and September.

Why You Might Still Fertilize in the winter

Even though most plants see the majority of their growth in the spring and summer, some plants will continue to show new growth well into the winter months--especially if you live in an area that sees mild, sunny winters. Feeding your plants when they are actively growing will help support this new growth and result in fuller, more beautiful foliage. 

Which fertilizer should you use?

Our all-natural plant food, Boost Vitaminé, is a mild and effective formula specially designed for indoor greenery. Whether or not your plant is actively growing, you can use it up to one time per month in the winter during your regular watering routine.


Natural Plant Food

A gorgeous statement plant ideal for narrow spaces, the Dragon Tree has lush, spiky foliage and beautifully tonal trunks. Low-maintenance and tolerant of varied lighting conditions.

Easy Breezy: How to Aerate Your Houseplants' Soil, and Why You Should!

The benefits of aerating your plant’s soil

Did you know that loosening up your plant's soil before watering allows better and more even distribution of moisture? And that it also helps oxygen flow more easily through the plant’s roots? Most people think of watering when it comes to basic plant care, but what they don’t realize is that aerating the soil is also a small task that can make a big difference.

How to aerate houseplants’ soil

Follow these easy steps and enjoy healthier, happier houseplants:

Step 1: Find a chopstick

Step 2: Gently poke a few holes through the top of the soil (you may strike a root or two, don't worry)

Step 3: Give your plant a thorough watering around the base towards the center, allow all the water to drain through the bottom of the nursery pot

Will aerating the soil damage roots?

Worried about damaging roots along the way? Rest assured that even though you might break some roots in the process, this is nothing compared to what overly-compact soil might cause.

If your plants are staged in a decorative pot, empty out any excess water from the bottom and fluff up any soil toppings like moss or rocks. Within a few hours, you should notice a more refreshed look on your foliage.

How often should you aerate the soil?

Houseplant whisperer Derryl Cheng of @houseplantjournal prescribes doing this approximately every other watering for best results.

As always, keep an eye on your leafy friends to notice any changes or trends!


Indoor plants, potted & delivered

Premium plants paired with stylish ceramic pots, plus lifetime plant care support. Order online at leonandgeorge.com

How to Care For and Grow Your Bird's Nest Fern

The gorgeous Bird’s Nest Fern, whose name comes from the nest-like center of the plant, is not your typical fern. Hardier than most of its kind, the Bird’s Nest Fern boasts thick, waxy leaves that slowly unfurl to create a beautiful and unique accent on a table, shelf, or bedroom dresser. But though it trumps most other ferns in terms of maintenance, it is still unforgiving to things like too much sun or an inconsistent watering schedule. Read on to find simple tips on how to care for and grow your Bird’s Nest Fern.

How much light does the Bird’s Nest Fern need?

This plant prefers medium to bright indirect light, and will scorch in direct sunlight. Ferns can also adjust to medium-low light over time.

How often to water your fern

Keep the soil evenly moist, never allowing it to completely dry out. Water around the edge of the pot and never in the center of its “nest”, a watering can with a long spout will help you be precise!

Bird’s Nest Fern Growth Rate

In prime conditions, the Bird’s Nest Fern will unfurl new leaves regularly from the center of its “nest”. Fertilize once a month during spring and summer, and consider foliar feeding year round.

Common problems with Bird’s Nest Fern

Pale leaves - too much light

  • Symptom - pale, yellowish leaves

  • Cause - too much light

  • Remedy - Bird’s Nest Ferns do best with medium indirect light — avoid putting the plant in a place where it is exposed to too much light or direct sunlight.

Brown edges - underwatering, too cold or too dry

  • Symptom - leaves turning brown at the edges

  • Cause - most likely underwatering, but could also be that the temperature is too cold or the air is too dry

  • Remedy - Be sure to keep a consistent watering schedule to ensure the plant’s soil is just moist to the touch. You may also mist the plant weekly to boost moisture levels, and make sure it is not placed near any air vents, heaters, or air conditioners.

Yellow and/or wilting leaves - overwatering

  • Symptom - yellowing or wilting leaves

  • Cause - overwatering

  • Remedy - Unless a very minor case of overwatering, you will most likely need to repot your plant to avoid root rot. See instructions below on how to repot a Bird’s Nest Fern.

How to maintain a beautiful and healthy Bird’s Nest Fern

Take care of your Bird’s Nest Fern and it will take care of you! Below are simple tips to continue caring for and growing your Bird’s Nest Fern over time.

How to care for and grow a Bird’s Nest Fern

Pruning

The birds nest fern does not need much pruning, though it is normal for lower leaves to grow old and scraggly, in which case you can remove them at the base with sharp, clean pruning shears.

Cleaning

Take each leaf between two soft tissue cloths and wipe off the top to reveal a healthy shine (also helps the plant soak in more light!).

Repotting the Bird’s Nest Fern

Ferns generally do not become rootbound, but if the plant is looking unstable or that it might “fall out” of its pot, consider repotting into something slightly bigger with fresh soil.

Houseplants grow much slower than they would in the wild. Depending on the size of your plant and the density of the roots, this is nice to do every 2-3 years to provide fresh nutrients and encourage new growth.

  • When to repot - if or when the plant looks unstable in its soil, it is time to repot

  • Pot sizing - if you want your plant to grow taller, find a nursery pot that’s 2” in diameter larger than the current pot.

  • Get your hands dirty - spread out newspaper on the floor, remove the plant from the pot and shake off as much of the old soil as possible so that you have clean roots. Place the plant in the center of the pot, add new soil and pat down firmly. Water the soil thoroughly and place the plant in an area with bright indirect light. Your plant will take 2-4 weeks to settle from the shock and adjust to its new home.

How to propagate a Bird’s Nest Fern

It is very difficult to propagate Bird’s Nest Ferns, though if you would like to try, it is best to use tissue culture method.

  • Harvest spores - The spores of your bird’s nest fern look like tiny brown lines on the undersides of the leaves. When the spores have grown large and fuzzy, trim the leaf they are growing on and carefully place the leaf in a paper bag. The spores should collect at the bottom of the bag after a few days.

  • Germinate spores - Place the spores on top of a small pot of sphagnum moss, and place the pot in a dish with water. Make sure there is always water in the dish, and mist the spores on top daily. After 2-3 weeks, they should begin to germinate.

  • Repot in fresh soil - Once you seedlings, pot in fresh soil and keep consistently moist for the first 3-4 weeks.


birdsnestfern-careguide2.jpg

Bird’s Nest Fern

A resilient indoor fern with large wavy fronds grow in a circular pattern, resembling a bird’s nest.