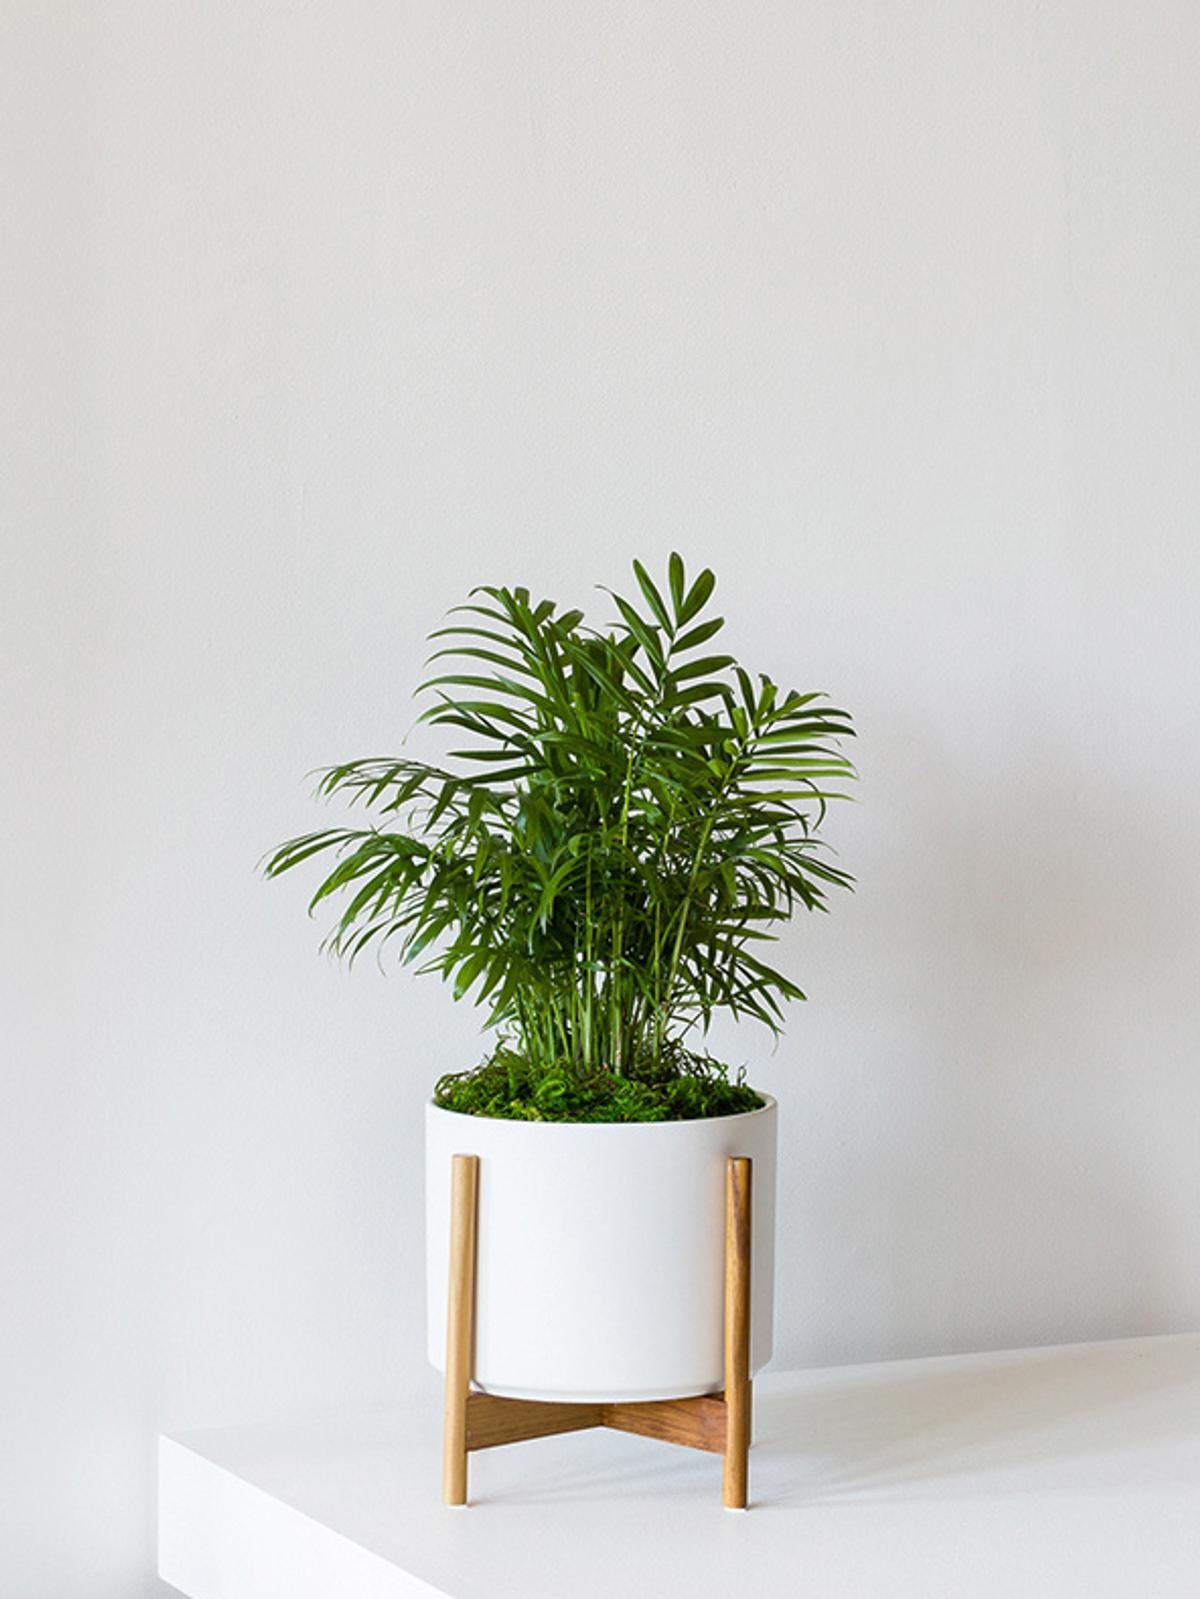
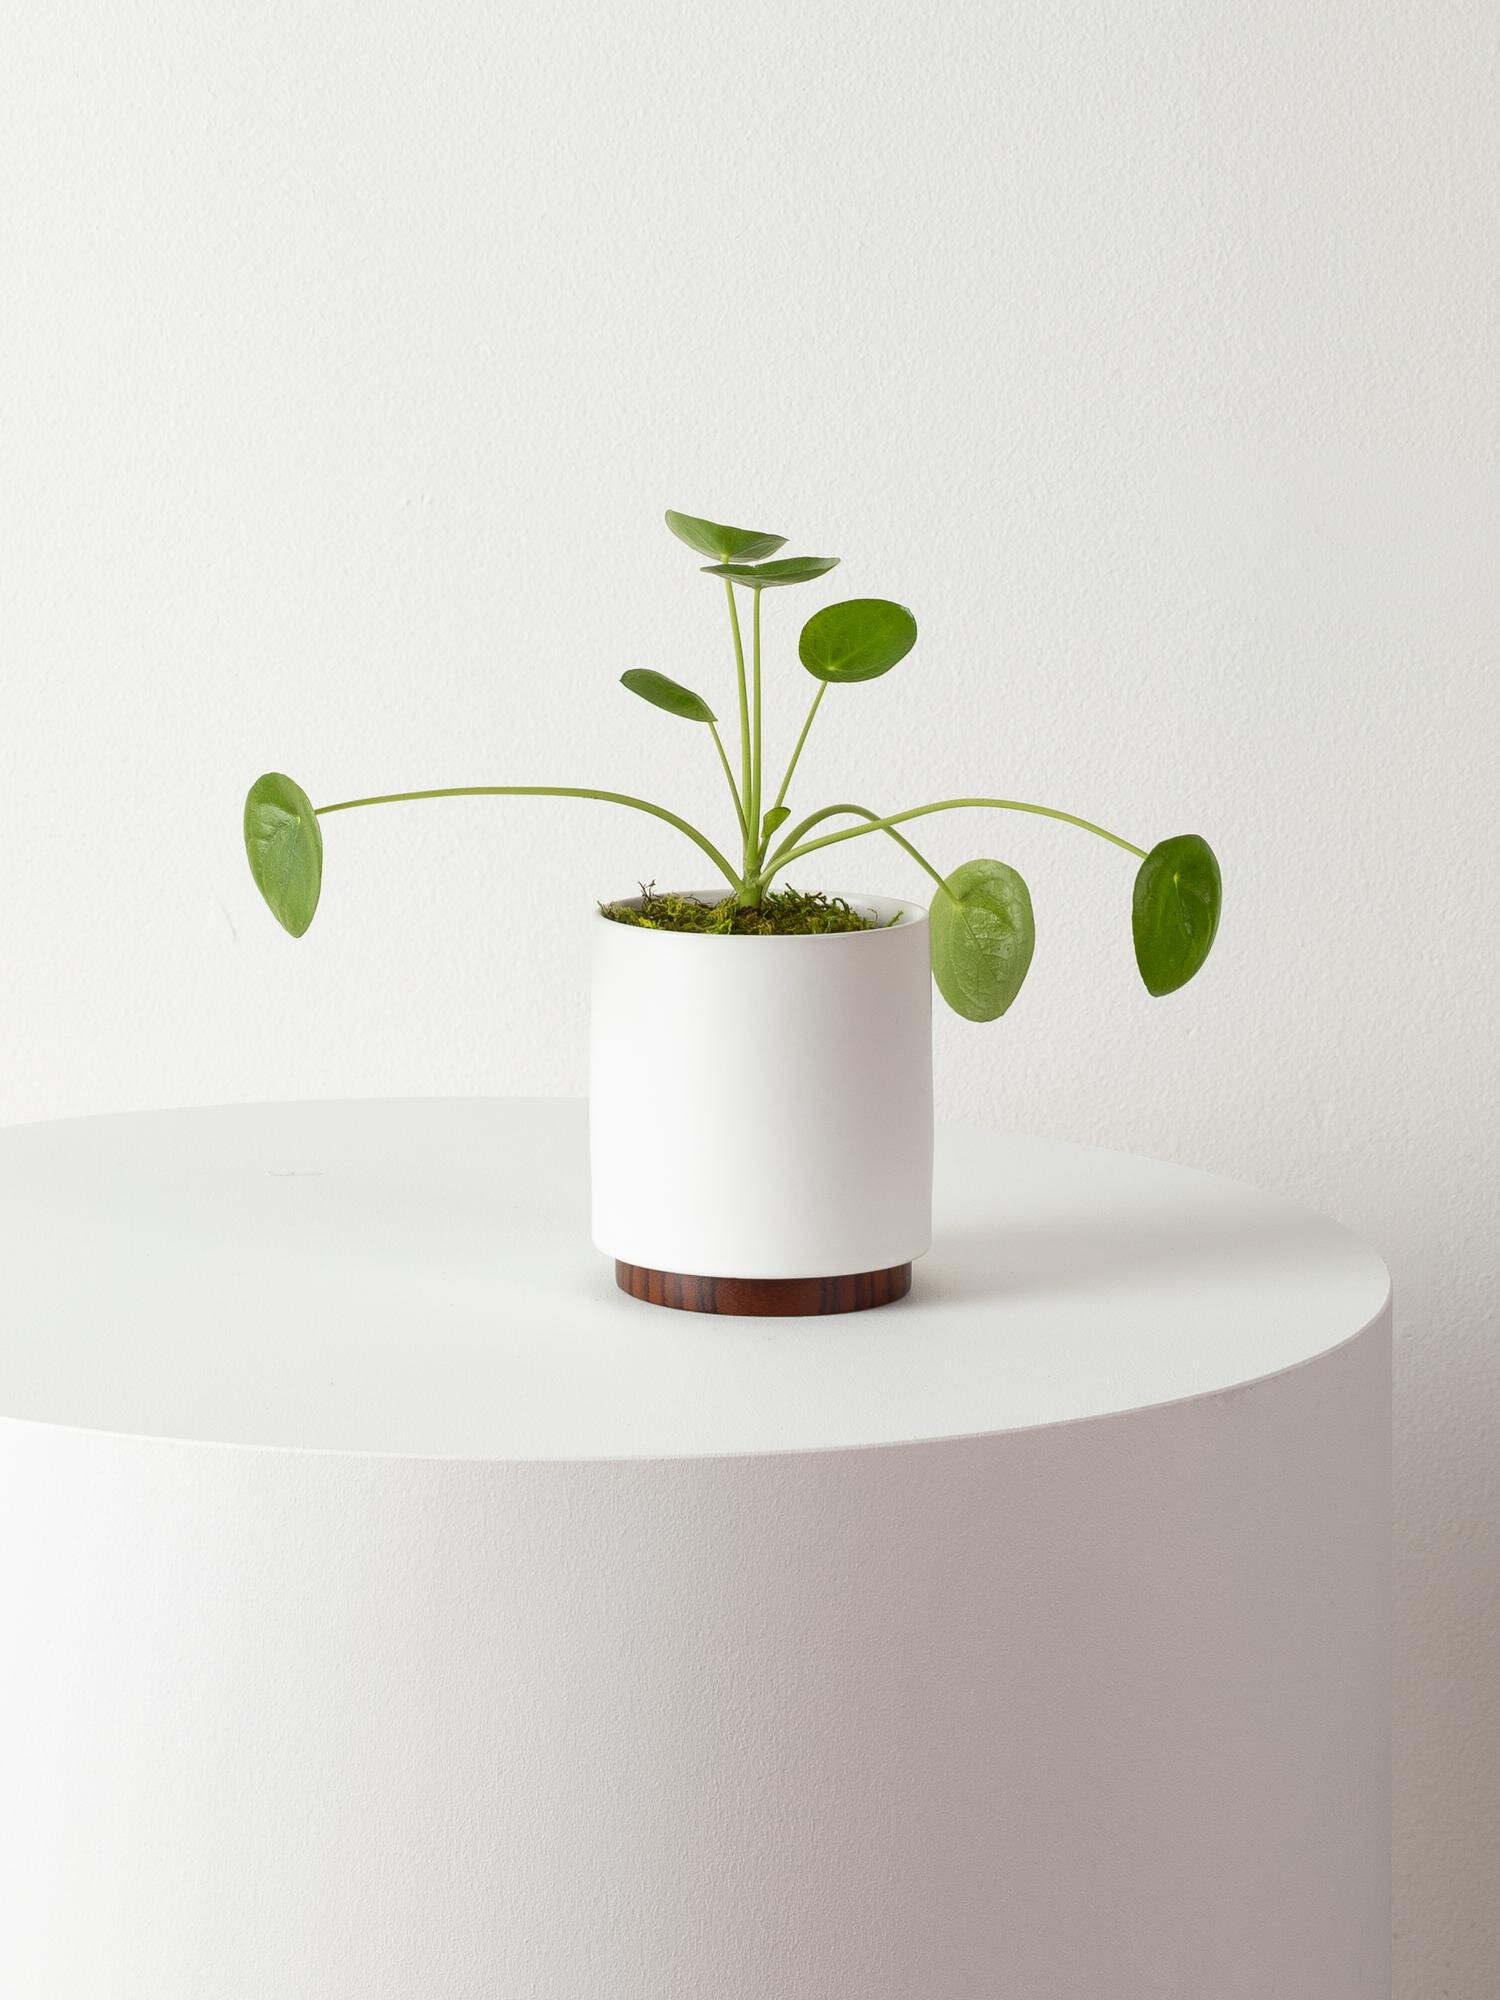
Posts in Plant Care
How to Care for and Grow Your Pilea Peperomiodes

Chinese Money Plant

AKA pilea peperomiodes

The peculiar Pilea Peperomiodes, also known as the Chinese Money Plant or the Friendship Plant, has one of the most unique stories of the houseplant world. Originally hailing from the Himalyan mountains, this plant was brought to Europe by a Swedish missionary, and, being incredibly simple to propagate, was multiplied and passed around from friend to friend. As such, for many years it was very difficult to actually purchase, given that horticulturists did not typically grow it. Luckily that’s no longer the case, and these plants are not only relatively easy to find but also incredibly easy to care for. With just a little light, water, and love, you too can grow— and pass on— the lovely Pilea Peperomiodes!

Light requirements for the Pilea

Pileas are not too picky when it comes to light. They prefer bright indirect light, though they can adjust to medium levels of light and also stand a few hours of direct sunlight.

How to water your Pilea

Let your Pilea dry out between waterings, and water thoroughly when topsoil is dry, usually once a week. Avoid overwatering, and note that your watering schedule may be less frequent during winter months.

Are Pileas fast growers?

The Pilea can be a pretty fast grower, though its leaves generally remain quite small. In prime conditions, the Pilea can grow over three feet tall. Fertilize your Pilea 1-2 times per month in the spring and summer with indoor plant food, or foliar feed year round.

Potion Magique

An all-natural elixir to add to your misting routine, providing extra nutrition and pest control for your plants through their foliage.

$28

Common problems with Pileas or Chinese Money Plant

Leaves drooping

It is not uncommon for Pileas’ leaves to droop, and unfortunately there are many different things that cause this. The first thing to check is if the plant is thirsty — if you haven’t watered it in a while, it’s possible that it’s just too dry and has lost its perkiness. Check the soil and if you find this the case (the soil is bone dry), simply give it a good water—ideally in the sink, and even leave it in a bowl with water for a few hours!

Drooping leaves on a Pilea can also be the result of overwatering. Make sure you are only watering when your plant’s soil is dry. If the plant has been severely overwatered, you may have a case of root rot and will need to repot.

Leaves curling

When the Pilea has curling leaves, it most likely is a case of too much sunlight, for example several hours of hot summer sun or strong afternoon sun.

Brown spots

Brown spots, like other issues with the Pilea, can mean many different things. For one, it could mean sunburn—make sure your plant is not getting harsh rays of sunlight for extended periods. Do you fertilize your Pilea? Make sure not to give it more than the recommended dose, as this could lead to fertilizer burn on the plant’s foliage. Finally, and particularly during the winter, make sure your plant isn’t too close to a drafty or freezing window. These plants like moderately warm environments and their leaves will show if exposed to cold temperatures.

White grains on the leaves

Worry not! Pileas develop white grains on their leaves which are simply mineral deposits. You can leave them be, or clean the leaves with a damp cloth.


How to maintain a beautiful and healthy Pilea Peperomiodes

Take care of your Pilea and it will take care of you! Below are simple tips to continue caring for your Pilea or Chinese Money Plant over time.

  • Pruning & Shaping - Remove dry or dead leaves all year round, but save any major pruning for the spring and summer months. If you would like to modify the shape of your Pilea, simply pinch off any undesired leaves at the base of the stem.

  • Cleaning - The thick leaves of the Pilea can accumulate a lot of dust! Rinse them under the sink when watering, or gently wipe away dust with a wet cloth once every few weeks (this also helps the plant soak in more light!).

  • Repotting - Houseplants grow much slower than they would in the wild. Depending on the size of your plant and the density of the roots, this is nice to do every 2-3 years to provide fresh nutrients and encourage new growth.

    • When to repot - Pileas do not need to be repotted often. Repot with fresh soil once every 1-2 years.

    • Pot sizing - if you want your plant to grow taller, find a nursery pot that’s 2” in diameter larger than the current pot. If you want your plant to stay the same height, you can reuse the same pot and simply change the soil.

    • Get your hands dirty - remove the plant from the pot and shake off as much of the old soil as possible so that you have clean roots. Place the plant in the center of the pot, add new soil and pat down firmly. Water the soil thoroughly and place the plant in an area with bright indirect light. Your plant will take 2-4 weeks to settle from the shock and adjust to its new home.


How to propagate a Pilea Peperomiodes

The Pilea is one of the easiest plants to propagate, hence earning itself the name “the friendship plant”, as it is so commonly propagated and passed on from one friend to another. Propagating is very simple, but see our full guide (with images) on how to propagate the Pilea if you need more assistance!

  • Select a stem to propagate - Your Pilea will have one main mother plant and smaller babies that grow at the base of the mother plant. Using sharp, clean scissors or shears, remove one of these babies at the base. This will be the piece you propagate. Don’t have any babies yet? Wait for them to sprout up before propagating!

  • Place in water - Find a clear glass and fill with water. Make sure only the stem is submerged, and no leaves are sitting in the water.

  • Place in a bright area and wait! - Avoid any direct sun. You may need to change the water out every few days to keep it fresh. It usually takes just a few days for the root to start growing.

  • Transfer to soil - After a week or so, transfer to indoor potting soil. A small pot is best — no larger than 6” in diameter.

  • Keep hydrated - During the first few weeks, or until your plant feels firmly rooted in its soil, regularly water and drain your Monstera. The soil should be just barely moist to the touch at all times.


Indoor plants, potted & delivered

Premium plants paired with stylish pots, plus lifetime plant care support. Order online at leonandgeorge.com

How to Increase Humidity for Your Plants
The Zanzibar Gem enjoying a routine misting.

The Zanzibar Gem enjoying a routine misting.

The typical home or office has low levels of humidity, but many common houseplants prefer moisture-rich environments. Particularly during the summer and winter when we use air conditioning or heaters, houseplants may suffer from a lack of humidity that they normally enjoy in the wild. Boosting moisture levels is an easy and simple way to help them thrive throughout the year.

How to increase humidity for plants

There are several ways to increase humidity for plants in the home or office. Here are some of the most popular methods:

  • Mist your plants. Simple, right? Just remember to do it! Misting every day is great, though even just a few times a week can help. Though this is a more hands-on approach, caring for plants is indeed therapeutic and misting is no exception! We love this stylish polished brass mister, or this watering can with an already-integrated mister.

  • Use a humidifier. Want to keep the humidity levels up all day long? Add a small humidifier to your space. This will of course increase humidity in your entire space, and you will need to refill it every few days or so, but this is an excellent way to keep moisture levels up for your plants.

  • Create groupings. Plants release moisture through their leaves and as such can benefit from being grouped together. Group plants that require similar environments — Calatheas, for example, need lots of moisture — or use this as a method to keep humidity levels up while you travel.

  • Use pebble trays. Another way to increase humidity for plants is to place them over a shallow tray with about one inch of pebbles. Fill the tray and pebbles about halfway up with water and place the plant on top (make sure the plant is not sitting in water as this may cause root rot). Change out the water periodically so that it doesn’t become a breeding ground for pests.

  • Watch out for air vents. If you're turning on the AC or heater, move your plants out of the direct path of any air vents. Plants do not like getting blasted with hot or cold air, this will dry them out can lead to greater health issues over time.

Remember that mimicking our plants’ natural environments is key to keeping them happy and healthy. Stay curious about what makes your plant tick, and it will reward you for years to come!


fiddle-bush-white-stand-nude-leather-chair.jpg

Indoor plants, potted & delivered

Premium plants paired with stylish ceramics, plus lifetime plant care support. Order online at leonandgeorge.com

Air Purifying Plants: Can plants really improve air quality?
deskbirdofparadise.jpg

In the age of wellness and self-care, it has become abundantly clear that plants are good for us. But when it comes to air purification, there’s a lot of misleading information out there. How do plants improve our environments, and which plants clean the air? Will just one plant make a difference? What are the best air purifying indoor plants, including for low light spaces?

Let’s dive a little deeper and lean about how plants clean the air, and which are the best air purifying plants to add to your space!

How do plants clean the air?

Plants purify the air during photosynthesis, the process by which plants convert light and carbon dioxide into food to fuel growth and creating oxygen along the way. And in addition to removing CO2 and creating oxygen, many plants also absorb other gases and VOCs (volatile organic compounds) such as benzene and formaldehyde, which are found in many common household goods and are linked to various respiratory health issues.

TOp air purifying plants

Some plants are better at cleaning the air than others. According to the NASA clean air study, below are a few of the most powerful air-purifying plants:

And many more! Check out our full collection of air purifying plants here.

do plants actually remove toxins from the air in my home?

While plants do in fact clean the air, one plant won’t necessarily make a big dent in your air quality. You need a relatively high concentration of plants in order to reap the benefits. That said, though a single desk plant might not make a difference, it certainly won’t cause any harm!

Thinking of adding a few plants to help freshen up your space? Shop our full collection of air purifying plants and get them delivered straight to your door.


fiddle-bush-white-stand-nude-leather-chair.jpg

Indoor plants, potted & delivered

Premium plants paired with stylish ceramics, plus lifetime plant care support. Order online at leonandgeorge.com

How to Care For and Grow Your Parlor Palm

The Parlor Palm

AKA chamaedora elegans

AKA neanthe bella palm

An attractive and popular indoor plant, the Parlor Palm is an easy addition to any space. Its bright green foliage grows in clusters, giving it a lush, tropical feel. Read on for simple tips on how to care for a Parlor Palm indoor plant. This plant is also sometimes called the neanthe bella palm or by its botanical name chamaedora elegans.

What type of light does the Parlor Palm need?

The Parlor Palm enjoys bright indirect light, but can also easily adjust to medium and even low levels of light. Avoid direct sunlight that may burn your plant’s leaves.

How to water your Parlor palm

Water about once a week (or more often if environment is very warm) to keep soil evenly moist but never soggy. Mist between waterings to provide humidity

How fast does the Parlor Palm grow?

The Parlor Palm is a slow grower and can reach up to one to two feet in height. Fertilize your Parlor Palm 1-2 times per month in the spring and summer with indoor plant food, or foliar feed year round.

plant food

Potion Magique

An all-natural elixir to add to your misting routine, providing extra nutrition and pest control for your plants.

$28

Common problems with the Parlor Palm

Brown or yellow leaves - underwatering or overwatering

  • Symptom - brown leaves that wilt or dry out

  • Cause - usually underwatering, or too dry of environment. However, if you water this plant excessively (allowing it to become soggy or waterlogged), this could also be the cause

  • Remedy - If underwatered, remove the plant from its decorative pot and give a good shower in the sink. Regularly mist to increase moisture levels. If overwatered, aerate the soil, or simply hold off until the plant dries out a bit until the next watering. If it is very damaged, you may need to repot.

Brown tips - underwatering or over-fertilization

  • Symptom - dried out, brown tips

  • Cause - underwatered or too much fertilizer

  • Remedy - Thoroughly water your plant by removing it from its decorative pot and watering in the sink. Alternatively, only fertilize once or twice in the spring/summer, and make sure to use a diluted dose.

How to care for a Parlor Palm

How to maintain a beautiful and healthy Parlor Palm

Take care of your Parlor Palm and it will take care of you! Below are simple tips to continue caring for and growing your Parlor Palm over time.

  • Pruning - remove old, unattractive or damaged leaves from the base of the plant with a clean blade, ideally during the dormant period.

  • Trimming - if there is just a small portion of a leaf that was damaged such as the edges or tips, trim off any discoloration or blemishes by following the natural lines and shape of the leaf.

  • Cleaning - regularly mist the Parlor Palm to keep it clean. If it is very dusty, you may want to use a damp cloth to wipe the leaves clean.

How to grow and repot the Parlor Palm

  • Growing - Parlor Palms are slow growers and will grow even slower in low light conditions. During spring or summer, use a diluted fertilizer just once or twice to give your plant a vitamin boost.

  • Repotting - L&G Parlor Palms come in 4” or 6” grow pots and only need to be repotted every few years and only if the plant is unhappy (i.e. has been overwatered) or to refresh the soil and give it new nutrients. If you’d like your plant to grow larger, find a new grow pot that is 2” larger than its current pot. If you’re happy with the current size, you can reuse the same pot and simply change the soil.

    • Getting your hands dirty with or without a yard - spread out newspaper on the floor, remove the plant from the pot and shake off as much of the old soil as possible so that you have clean roots. Be gentle— Parlor Palms have very delicate roots! At the bottom of the grow pot, and a layer of soil, then place the plant in the center of the pot and cover with new soil. Pat down firmly and water thoroughly. Place the plant in an area with bright indirect light. Your plant will take 2-4 weeks to settle from the shock and adjust to its new home.

How to propagate the Parlor Palm

The only way to propagate a Parlor Palm is by germinating the seeds. However, this is incredibly difficult to achieve indoors, and unfortunately, propagating is best left to growers.


PARLOR PALM

A compact palm with bright green foliage and jungle vibes.

How to Care For and Grow Your False Aralia

False Aralia

AKA Dizygotheca elegantissima

A beautifully unique houseplant with wispy, textured foliage, the False Aralia (also known as Threadleaf Aralia and Spider Aralia) is a wonderful plant for any level of green thumb. Read up on what it takes to care for a False Aralia, from watering and light needs to problems and more.

What type of light does my False Aralia need?

The False Aralia does best bright indirect light. Be sure to keep it out of harsh direct sunlight as this will cause its leaves to brown.

How to water your False Aralia

Let your False Aralia dry out between waterings. Water thoroughly when topsoil is dry, usually once a week. Avoid overwatering, and note that your watering schedule may change during winter months. False Aralias also love an occasional bottom watering. Consider using a tool like a moisture meter to take the mystery out of your watering schedule.

How fast does the False Aralia grow?

False Aralias are relatively slow growers, but can reach a height of about 6ft when grown in a container.

Common problems with False Aralias

Leaves drooping

The most common cause of leaves drooping on a False Aralia is underwatering. Check the soil: f you suspect your plant is dry, give it a healthy watering and wait 24 hours to see if it perks back up.

Leaf shedding

False Aralias can be sensitive to change. When this plant begins to loose leaves, it is usually due to a change in its environment, whether that’s light, humidity levels or both. Be patient, sometimes it will take a few weeks for plants to adjust to their new home.

Another thing to keep in mind with leaf drop on False Aralias is that this plant typically loses its lower leaves over time. If you’d like to maintain its bushiness, prune it back once a year.

How to maintain a beautiful and healthy False Aralia

Take care of your Aralia and it will take care of you! Below are simple tips to continue caring for your False Aralia over time.

Pruning Your False Aralia

The False Aralia is a slow grower that requires very little pruning and maintenance over time. You will only need to prune your plant if you’d like to control its height or to encourage bushiness. If you’d like your plant to maintain it’s bush-like form, prune it back in the spring for fuller growth. Otherwise, it will slowly lose its lower leaves and take on a more tree-like appearance.

Cleaning Your False Aralia

With so many thin leaves, the False Aralia can be difficult to clean! We recommend regularly misting to keep dust off, and occasionally cleaning the leaves with a moist towel and L’Original black olive oil soap for plants.

How To Repot A False Aralia

Houseplants grow much slower than they would in the wild. Depending on the size of your plant and the density of the roots, this is nice to do every 1-2 years to provide fresh nutrients and encourage new growth.

  • When to repot - Aralias are particularly slow growing plants, but repotting them once a year in the spring will help them grow faster.

  • Pot sizing - if you want your plant to grow taller, find a nursery pot that’s 2” in diameter larger than the current pot. If you want your plant to stay the same height, you can reuse the same pot and simply change the soil. You may need to cut back some of the roots to do this.

  • Get your hands dirty - spread out newspaper on the floor, remove the plant from the pot and shake off as much of the old soil as possible so that you have clean roots. Place the plant in the center of the pot, add new soil and pat down firmly. Water the soil thoroughly and place the plant in an area with bright indirect light. Your plant will take 2-4 weeks to settle from the shock and adjust to its new home.

Need help repotting? Check out our Deluxe Repotting Kit which includes everything you need to repot your plant, including step by step instructions and a video tutorial with our Plant Doctors.


False Aralia

A unique plant with textured, serrated foliage that requires little maintenance over time.

How to Care For and Grow Your Rubber Tree
RubberTree (1).png

The Rubber Tree

AKA ficus elastica
AKA ficus decora
AKA ficus robusta

The Rubber Tree, also known as a Rubber Plant or Ficus Elastica, is one of the hardiest members of the ficus family, often times notorious for being fickle, finicky, and for some just plain difficult. That tends to not be the case with the rubber tree, whose dark burgundy leaves shine with just a little TLC. Read on for simple tips to care for the Rubber Tree!

What type of light does the Rubber Tree need?

Rubber Trees perfer bright indirect light, though they can also adjust to medium levels of light. Place your Rubber Tree no further than three to four feet away from a bright window for best results.

How to water your Rubber Tree

Consistency is key! Water your Rubber Tree when the topsoil feels dry, usually once a week to every ten days. Avoid overwatering, and keep in mind that your watering schedule may be less frequent during winter months.

black-soap-spray.jpg

BLACK SOAP SPRAY

All natural and made with just four ingredients, L'Original acts as a natural leaf shine, insecticide, and fungicide for all living plants.

$24

How fast does the Rubber Tree grow?

In prime conditions, the Rubber Tree is a fast grower and can grow up to 10 feet tall indoors. Fertilize your Rubber Tree 1-2 times per month in the spring and summer with indoor plant food, or foliar feed year round.

Shop leaf shine, insecticide and fungicide at leonandgeorge.com

Common problems with Rubber Trees

Yellow leaves on a rubber tree

Yellow or brown leaves - overwatering

  • Symptom - leaves turning yellow or brown, usually at the bottom of the tree

  • Cause - too much water, not enough light

  • Remedy - allow soil to dry out completely, sometimes this can take 2-3 weeks. Check the soil’s moisture through the drainage holes at the bottom. Overwatering can lead to more severe ailments and that may eventually require you change the soil.  

Read more about discolored leaves here.

Droopy leaves on a Rubber Tree

Leaf drop - unstable temperatures

  • Symptom - leaves dropping

  • Cause - cold air drafts, overly dry climates, or not enough light

  • Remedy - make sure your plant is placed away from air vents or cold air drafts. While rubber trees can adapt to indoor climates, they prefer warmth and high humidity. If the possible cause is not enough light, move the rubber tree to medium to brightly lit area.

Read more about Rubber Tree leaf drop.

Leaf droop - over or underwatering

  • Symptom - leaves sagging or drooping

  • Cause - most likely underwatering, but could also be overwatering

  • Remedy - always check the soil before watering a Rubber Tree. It should be dry to the touch before watering again. If you suspect it’s been overwatered, allow soil to dry out completely before watering again.

How to maintain a beautiful and healthy Rubber Tree

Rubber tree plant care

Take care of your Rubber Tree and it will take care of you! Below are simple tips to continue caring for your Rubber Tree over time.

  • Pruning - Remove dry or dead leaves all year round, but save any major pruning for the spring and summer months. When pruning your rubber tree, wear gloves and protect your floor with newspaper — the sap that leaks out can be sticky and damage floors. Use sharp, clean shears and cut just above the node at a 90 degree angle.

  • Cleaning - Take each leaf between two soft tissue cloths and wipe off the top to reveal a healthy shine (also helps the plant soak in more light!).

  • Repotting - Houseplants grow much slower than they would in the wild. Depending on the size of your plant and the density of the roots, this is nice to do every 2-3 years to provide fresh nutrients and encourage new growth.

    • When to repot - if the roots start to become visible outside the soil, it is time to consider repotting your rubber tree

    • Pot sizing - if you want your plant to grow taller, find a nursery pot that’s 2” in diameter larger than the current pot. If you want your plant to stay the same height, you can reuse the same pot and simply change the soil.

    • Get your hands dirty - spread out newspaper on the floor, remove the plant from the pot and shake off as much of the old soil as possible so that you have clean roots. Place the plant in the center of the pot, add new soil and pat down firmly. Water the soil thoroughly and place the plant in an area with bright indirect light. Your plant will take 2-4 weeks to settle from the shock and adjust to its new home.


How to propagate a Rubber Tree

Whether you want to recycle your Rubber Tree cuttings or you simply want to create a new plant, propagating the Rubber Tree is simple. Though there are many ways to do this, water propagation is generally the easiest way to go about it. Follow these instructions to propagate your Rubber Tree:

  • Select a small branch to propagate - Using sharp, clean scissors or shears, cut a two to three inch branch just above a node (a leaf joint).

  • Place in water - Find a clear glass and fill with water. Make sure only the stem of the branch is submerged, and no leaves are sitting in the water.

  • Place in a bright area and wait! - Avoid any direct sun. You may need to change the water out every few days to keep it fresh. It could take up to several weeks for your cutting to form roots.

  • Transfer to soil - After some time, you will start to see tiny white roots emerging from the cutting. Give it a few more days until the roots have grown, and then transfer to indoor potting soil. A small pot is best — no larger than 6” in diameter.

  • Keep hydrated - During the first few weeks, or until your plant feels firmly rooted in its soil, regularly water and drain your plant. The soil should be just barely moist to the touch at all times.


201804-LÉON&GEORGE_Jessica-isaac-8 (1).jpg

RUBBER TREE

This plant grows quickly in ideal conditions and is easy to care for. The crimson casings of new leaves adds a pop of color and is the perfect statement piece for budding plant parents.

Why Are The Tips of My Dracaena Lisa's Leaves Browning and Dry?

We think that the Dracaena Lisa is an elegant hero of the indoor plant game. Its statuesque height and fun, textural foliage belie the fact that the Lisa is actually a truly low-maintenance Dracaena variety, with a tolerance for varied light (from low/medium indirect light to brighter, indirect rays) and a low-key approach to watering. Still, pesky, browning leaf tips can occur with any plant, even the lax Lisa. But don’t worry! It’s also easily resolved. Just read our tips below.

Not Enough Humidity

The Dracaena Lisa is native to tropical, Southeast Africa, and in its natural habitat it enjoys high humidity levels. These are tough to re-create at home, but we have our ways around that. If you notice drying, brown edges and tips on your Dracaena Lisa’s foliage, it is likely due to low humidity in your home. This can be rectified by misting your Dracaena Lisa up to three times a week. Additionally, you’ll want to make sure that your Dracaena Lisa is not placed too closely to appliances that emit dry air: like vents, air conditioners, or even doors that are constantly opened and closed.

How to fix your Dracaena Lisa’s brown and dry leaves

You can rehab your Dracaena Lisa’s leaf tips by trimming brown edges and tips off with clean, sharp scissors or shears. Cut the brown area off of the leaf with the scissors or shears pointed in the leaf’s natural growth direction. Once you have manicured your Dracaena Lisa’s foliage, give it a thorough misting, and it will look brand-new.

Plant Doctor Support

If you follow the steps above and your Dracaena Lisa continues to exhibit a high percentage of dry, browning leaf tips, you can reach out to the Plant Doctor for an assessment and custom assistance. Just log into your Léon & George account, click “Contact Plant Doctor”, and attach photos of your Lisa as a whole, as well as close-ups of the dry and browning foliage areas. The Plant Doctor team will get back to you with an assessment and care instructions within 2-3 business days.


Dracaena Lisa

Our statuesque and low-maintenance wonder plant, with lush, textural foliage and a varied light tolerance. The Dracaena Lisa is an exquisite floor plant for any space.

Why Are My Philodendron's Leaves Turning Yellow?

Why are my Philodendron’s leaves turning yellow?

Philodendrons are so charming and vibrant. They often have variegated foliage and can grow in gorgeously long cascades, and they’re a beloved low-maintenance houseplant variety. But even with their easy-going temperament, they can exhibit yellowing foliage which can be troubling (in truth, all plants can!). Read on to learn why your Philodendron’s foliage may be yellowing, and for our quick tips to get it back on track!

Aging

You’ll find that most plants will exhibit some yellowing foliage from time to time. It happens when they shed old growth to concentrate on pushing out new leaves, and sometimes particularly young new leaves simply don’t thrive. This isn’t the result of a systemic health issue, just normal plant behavior. If your Philodendron is receiving appropriate care, appears healthy overall, but is showing some yellow leaves, they can just be pulled off gently or trimmed off using clean, sharp scissors or shears.

Overwatering

Philodendrons can be overwatered, and yellowing foliage is one of the most common signs of this issue. These plants should only be watered whenever their top two inches of soil are dry to the touch, rather than based on a timetable. To check your plant’s moisture, lift up a portion of its decorative moss and stick your finger two inches down into its soil. If the soil is dry, it’s time to water the plant. But if it is still moist, hold off! 

Incorrect Light

We all know that we need to drink more water when we’re out in the sun all day, and the same goes for our plants. The more light that your Philodendron receives, the faster it will use up the water in its soil. So check its moisture levels frequently, and adjust as necessary during the sunnier, warmer months of the year.

If your Philodendron is receiving too much light, this will affect its overall health and foliage. Remember that Philodendrons cannot tolerate direct, bright sunlight, as it will sunburn their leaves, a symptom which will exhibit itself as discoloration and sometimes, as yellowing.

A Lack of Humidity

In especially dry climates, Philodendrons can suffer from a lack of humidity. If your home is regularly dry, or an air conditioner or heater is often on, it is helpful to boost your Philodendron’s humidity by misting it a few times a week. 

More Support!

Yellowing foliage can be a completely normal aspect of all living plants, but if you are concerned that your plant is receiving all appropriate care and continues to display foliage issues, you can always contact our Plant Doctor service via your Léon & George account. Our Plant Doctors are here to help! 


Screen Shot 2021-07-07 at 1.55.33 PM.png

Philodendron Brasil

With jewel-tone variegated foliage and gentle tendrils, the Philodendron Brasil is a lush, easy-care houseplant with a tropical aesthetic.

5 Easy Steps To Propagating Pothos

How to propagate the Pothos with cuttings: cut just below the node!

When it comes to propagation, Pothos is the way to go. There is no plant quite as simple to propagate as the Pothos, and given the lushness of this particular plant, you can literally make dozens of new Pothos from one in just a few simple steps!

Looking for Pothos plant care? Check out our full care guide, or read up on everything you should know before buying a Pothos.

How to propagate Pothos plants

Pothos propagation is incredibly simple:

Step one: Select a stem with a leaf and locate the node. The node is like a joint: it is where new stems erupt, and often appears just below the stem of a leaf.

Step two: Using a clean blade, cut just below the node. You can also include a few different nodes in one cutting!

Step three: Place the stem and its node in a glass or jar with water. Make sure only the stem and node are submerged — do not submerge any leaves as they will rot.

Step four: Place in an area with bright, indirect light and wait. You may like to change the water every few days to keep it fresh. After a week or two, you should see roots begin to sprout.

Pro tip: your cutting can “live” like this for ages as a beautiful and minimal piece of decor! Feel free to stop here or go on to step 5 if you’d like to grow a full new plant.

Step five: Once the roots are visible, carefully place them in a small pot with fresh indoor potting soil and gently press down. Keep the soil just moist to the touch, ideally by misting it heavily, for the first few weeks until the plant has taken root.

Good luck, happy propagating, and show us your new plant babies by tagging us @leonandgeorge on Instagram!


cascading pothos

A lush and incredibly forgiving easy-care houseplant, the Cascading Pothos is the perfect plant for beginners and seasoned green thumbs alike.

The Ultimate Guide To Watering Your Calathea
The ten commandments of Calathea care

It’s normal to feel nervous when you first implement your new plant’s watering routine, and this can be especially true with the beautiful Calathea. The last thing anyone wants to do is cause this enchanting plant undue stress! 

But breathe a sigh of relief, because our Ultimate Guide is exactly the resource you need to take the mystery out of the ever-mysterious Calathea’s care routine!

How to water your Calathea

Learn to Test the Soil by Touch 

We know that the beautiful bed of moss that blankets your Calathea’s soil looks perfect the way it is- but don’t be afraid to lift it up! (You can pat it right back down after, and it will still look gorgeous.) 

Using your finger to test the dryness of the top one to two inches of soil is a great way to determine the watering needs of your Calathea. In any environment, conditions are changeable: Winter turns to Spring; heaters are cranked then turned off entirely as seasons change. All of these things affect the watering needs of your plants, so going by touch can be preferable to simply following “Once a week”-style guidance.

You will learn to trust yourself as a plant parent, and cultivate your green thumb, by getting down and dirty with your plant. 

Once or twice a week, probe your Calathea’s soil with your finger. If the top inch of soil feels like it is getting dry, go ahead and water your Calathea. 

The Many Marvels of Misting 

There’s so much to love about misting- and not only for those of us who can’t get enough of cute accessories

Calatheas are native to humid jungles, so they love a good misting, and appreciate being misted every few days.

Consider using lukewarm water when misting, or even leaving a bowl of water out overnight before misting your plants with it. Allowing the water to rest will cause its harsh minerals to evaporate. 

Another benefit of misting is that it gives you a way of interacting with your plant, without the risk of overwatering it- which is by far the most common plant parent mistake and can result in serious health issues for your plant, including the dreaded brown leaves that too often occur.

Potion Magique

An all-natural formula to add to your misting routine, providing extra nutrition and pest control for your plants through their foliage.

$28

Bottoms Up! 

We all know that plants use their roots to drink, but did you know that those roots can function as straws, sucking up just the right amount of water to perk your Calathea up?

You can hydrate your Calathea by allowing it to soak. Remove your Calathea from its ceramic pot, but keep it in its plastic nursery planter. 

Then, place your Calathea in a bowl or sink filled with three to four inches of lukewarm water. Let the Calathea soak for about 45 minutes before testing its soil by touch. (By now, you know exactly what to look for!)

If the soil feels moist, your plant is good to go! Allow it to drain entirely before replacing it in its ceramic pot.

Overwatered? Give it a rest! 

Overwatering any plant can feel heartbreaking. But there are solutions, although recovery will take time. Here are two options for rehabbing your overwatered Calathea: 

  • The True Beginner Method

Take your Calathea out of its ceramic pot, but leave it in its plastic nursery planter. If any water has collected in the ceramic pot, dump it now! Move your plant to a warm spot with medium to bright indirect light, and allow it to dry until moist before returning it to its ceramic pot. 

  • The Practiced Plant Parent Method 

Lay out newspapers in a spot that receives medium to bright indirect light. Once you have those set out, remove your Calathea from both its ceramic pot and its plastic nursery pot. Allow it to rest on the newspapers, roots and all! 

The newspapers will likely soak, so replace them as they fully saturate, until your Calathea stops draining excess water. Then return your Calathea to its plastic nursery pot, and allow it to dry until moist before returning it to its ceramic pot. 

And there you have it! If you’re a Calathea lover (and who isn’t!) these steps will serve you well. So go ahead- add a Calathea to your growing plant family with confidence! 

Ready for more? Read our full guide on Calathea care, including tips for propagation, repotting, and more.


isaac-leon-and-george-09-2019-0546 (1).jpg

Indoor plants, potted & delivered

Premium plants paired with stylish ceramics, plus lifetime plant care support. Order online at leonandgeorge.com

What You Need To Know Before You Buy A Pothos

When it comes to houseplants, it doesn’t get any more classic than the Cascading Pothos, also known as Devil’s Ivy, Golden Pothos, Money Plant, and (erroneously) philodendron. This trailing plant is by far one of the easiest to care for and is a great option for beginners. If you’re eyeing one of these no-fuss beauties, read up on it first so you can be sure it’s the right fit!

The Pothos Plant: What Makes It So Easy To Care For?

The Pothos (epipremnum aureum) is known for its hardiness and ease of care. That’s because unlike other houseplants, it can survive and thrive in a wide variety of conditions. From bright light to low light, high humidity to extremely dry air, the Pothos is not a picky plant.

How fast does the Pothos grow?

Pothos are fast growers through and through. With proper care, this plant can grow up to a foot each month during the spring and summer. Of course, Pothos plants are great for low light spaces, and as with any plant, it will grow more slowly in low light.

What kind of light do pothos require?

Pothos are very flexible in terms of light. Anything from low light to bright light will do. Avoid direct sunlight with this plant as its leaves may burn.

It’s important not to overwater your Pothos

Pothos like to have their roots dry out in between waterings. As such, always check the soil before watering and don’t water unless it feels dry.

In fact, the Pothos is a great plant for beginners because it communicates when it’s thirsty: when Pothos start to droop, that’s when you know you need to water.

Pothos are great air purifiers

Looking for an excellent air-purifying plant? Look no further. In a NASA clean air study, the Pothos showed effectiveness in clearing the air of common toxins like benzene, formaldehyde, toluene, carbon monoxide and xylene. While it’s true that one Pothos in a large living room may not make a big dent, anything helps!

Propagating Pothos is SO easy!

Pothos plants are by far some of the easiest out there to propagate. If you are not familiar with propagation, it is essentially making multiple new plants from one! How to propagate a Pothos? Simply snip a stem below the node and place in water. Once roots have sprouted, you can plant in potting soil and watch it grow! Not sure what a node is? Read our full guide on propagation here.

are pothos plants safe for pets?

Unfortunately the Pothos plant is mildly toxic for cats and dogs. That said, given its trailing nature, you can easily place it out of reach of curious pets and thus enjoy its beauty alongside your furry companions.

How many pothos varieties are there?

The short answer: so many! Some of the most popular Pothos varieties include the Golden Pothos, Cascading Pothos, Neon Pothos, N’Joy Pothos, Satin Pothos, Marble Queen Pothos and Jade Pothos. All Pothos varieties are easy to care for and great for beginners.

EXPLORE THE BEAUTIFUL CASCADING POTHOS

A lush and trailing houseplant, perfect for beginners and seasoned plant parents alike!

The Do's and Don'ts of Repotting Plants

Repotting plants is a simple task, but there are a few tips and tricks to maximize the benefits of this plant care routine. Here are our Plant Doctor’s top ten Do’s and Don’ts when it comes to repotting your plants!

Don’t Size Down (Usually)

In most cases, you will either keep the same size or size up when repotting. There is no benefit to repotting in a smaller pot unless you are propagating and separating the plant into two or more new ones, or you are repotting a plant that has had root rot and as a consequence has very few healthy roots left.

Don’t Repot Into A Huge Container

A big part of repotting is giving plants more room to grow. That said, you don’t want to give them too much room. Why’s that? Most plants like to have their roots very snugly packed. A pot that’s too big may lead to poor root health and a sad looking plant overall.

DON’T Leave Any Air In The Soil

Make sure that your plant’s new soil is well-packed when repotting. This not only adds stability to the plant, but also ensures their soil is as nutrient-dense as possible!

DON’T Fertilize right after repotting

Moving can be stressful! Let your plant acclimate for at least a week or two after repotting before introducing any plant food.

DO Repot in the spring or summer

The best time to repot is when your plant is in active growing phase, or during the spring and summer. This is when your plant is at its strongest, and will bounce back from any stress more easily.

DO Repot in the Same or Slightly Bigger Container

Repotting doesn’t always mean giving your plant a bigger pot. Sometimes you’ll repot just to provide your plant with fresh new soil. That said, if you do decide to size up, use a pot that’s only slightly bigger in diameter — 2 inches is great — so that your plant still enjoys a snug home.

Do Consider Separating If Necessary

Sometimes plants will be too big for their own good. If sizing up is not an option, you may consider separating your plant into two or more plants (this is a method of propagation).

Do Use Fresh Potting Soil

When it comes to soil, it’s best not to recycle. Fresh, unused potting soil will have plenty of nutrients that your plant craves.

Do Water Thoroughly After Repotting

Give your plant one big drink once it’s settled in its new home, and get ready to watch it flourish!

Ready to get repotting? Our Deluxe Repotting Kit is a complete set of everything you need (and nothing you don’t) to repot large and XL Léon & George plants.


Indoor plants, potted & delivered.

Premium plants paired with stylish ceramics. Order online at leonandgeorge.com