Posts in Plant Care
How to Care For and Grow Your Calandiva
calandivaemail.jpg

The Calandiva

AKA Snowdrop Calandiva

AKA Florist’s Kalanchoe

AKA Flaming Katy

With dainty clusters of rose-like flowers, the Calandiva is a popular cultivar (variety) of the Kalanchoe succulent family. Though this plant’s buds typically appear in the fall, followed by flowers in late winter and spring, with a bit of patience it can be “tricked” to blooming at its owner’s desire. Read on for simple tips on how to care for the beautiful Calandiva.

How much light does the Calandiva need?

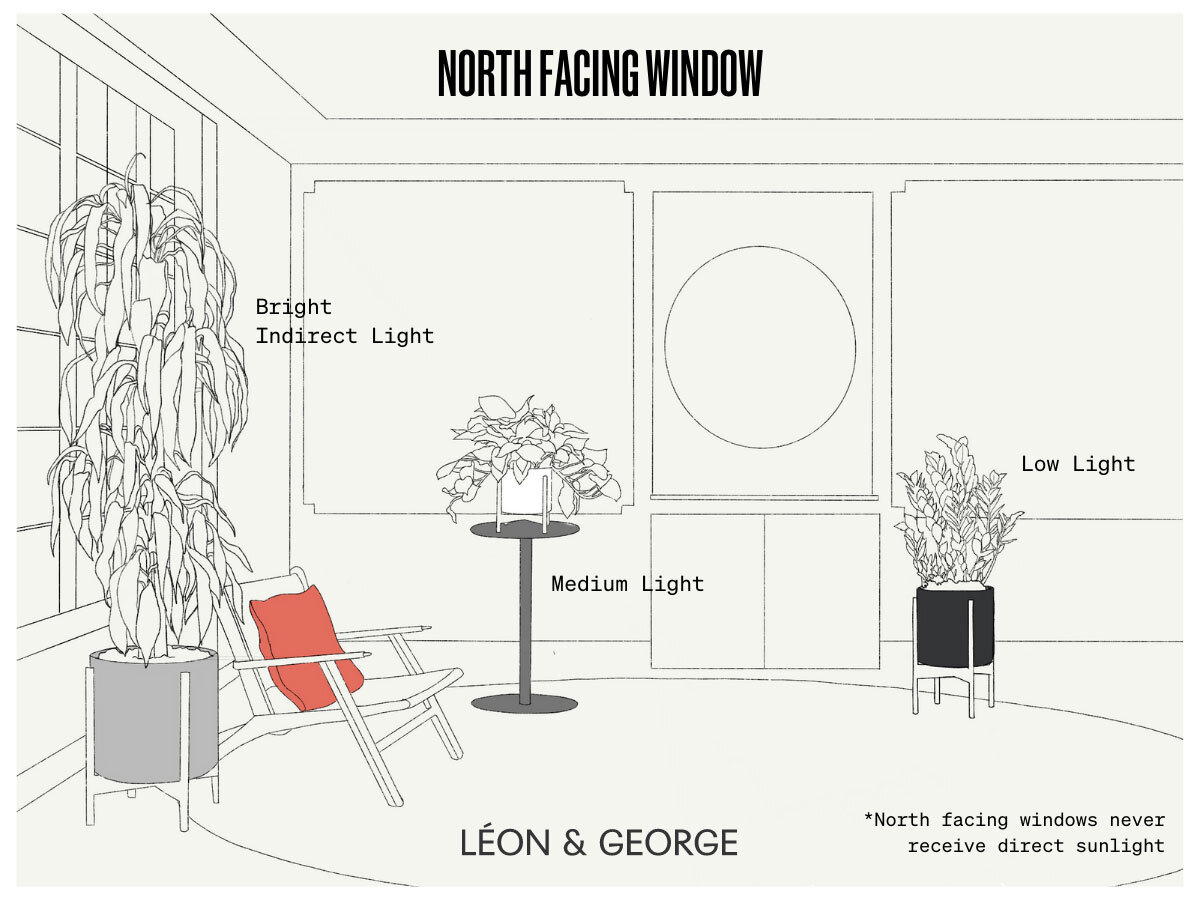
As a succulent, this plant does best with plenty of bright indirect light. Avoid harsh direct sunlight. In the winter or once their flowers have bloomed, they can withstand medium levels of light.

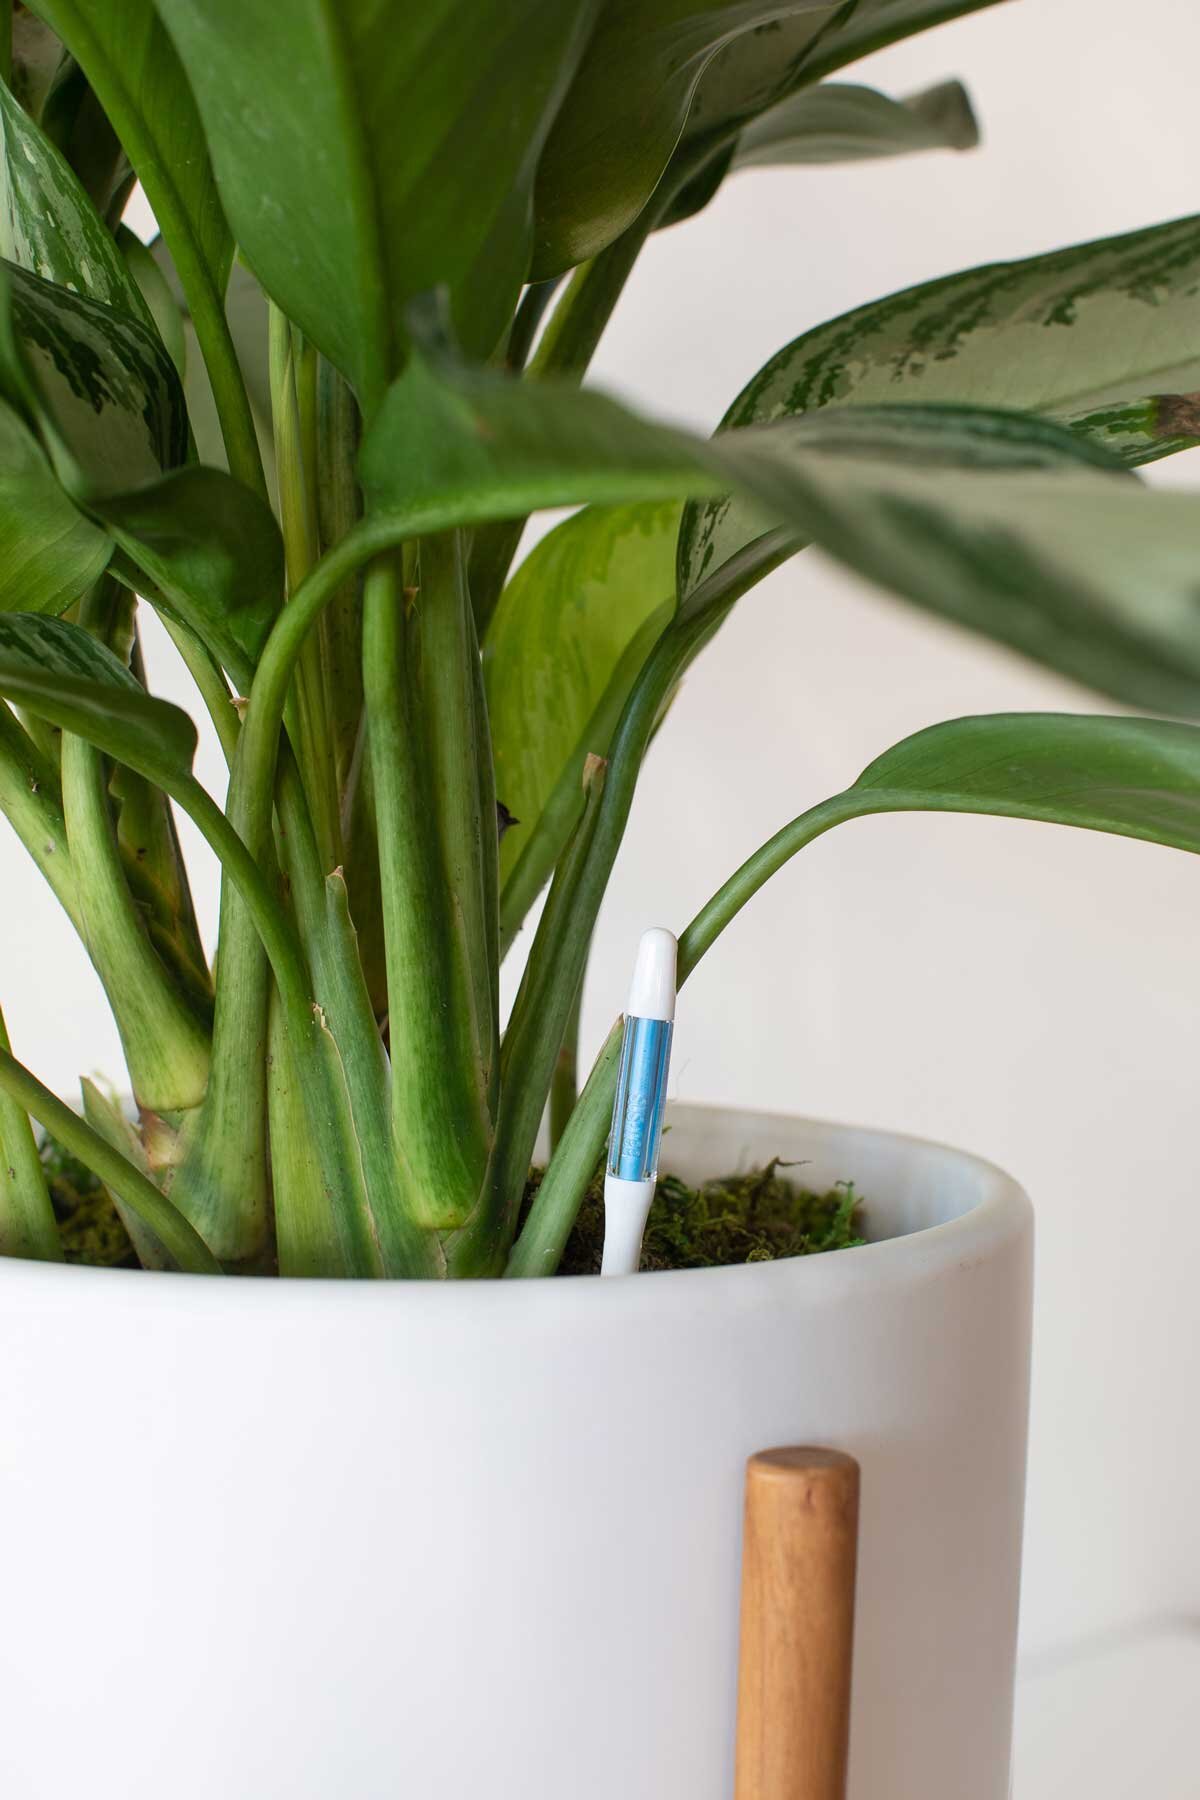
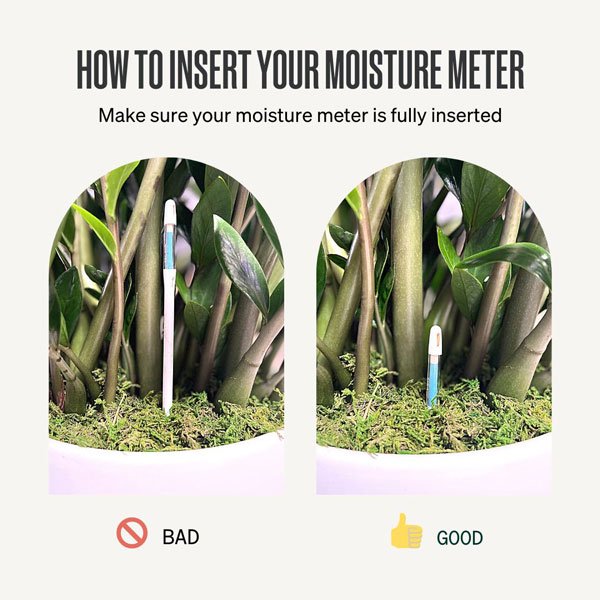
How to water a Calandiva

Water your plant sparingly and keep in mind that it is best to err on the side of under-watering. Water the base of the soil once every one to two weeks, or when it feels completely dry to the touch. You may water a bit more when the plant is in bloom.

Are Calandivas fast growers?

The Calandiva is a relatively slow grower that will reach approximately 12-18” tall. Fertilize your plant once a month in the spring and summer.

Common problems with the Calandiva

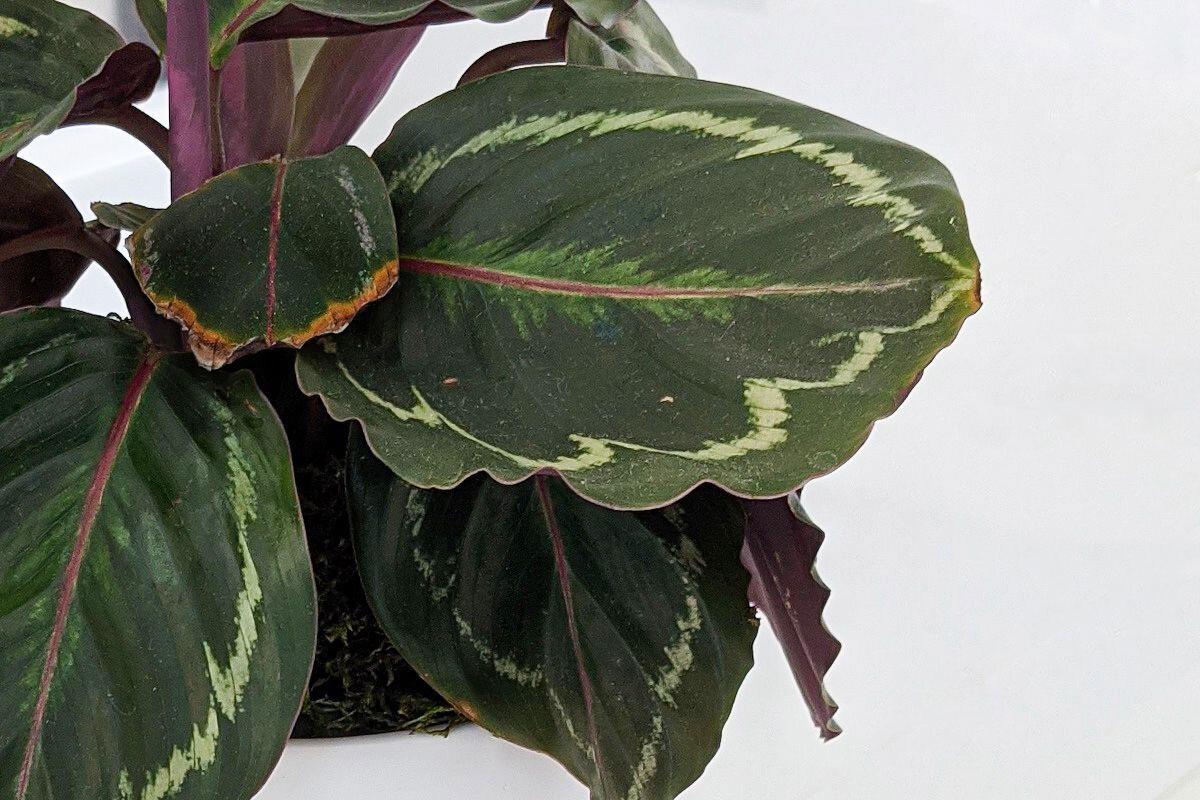
Yellow or brown edges

If you see yellow or brown edges on just one or two leaves of your Calandiva, odds are it’s just those leaves’ time to go (nothing is wrong with your plant!). Simply remove them at the base of the stem so the plant does not waste any more energy on these leaves. However, if you see yellow or brown edges all over the plant, it’s most likely due to either overwatering or not enough light, or a combination of both.

No flowers

The Calandivas’ flowers have seasons: during the fall as the days get shorter, the plant prepares to bloom, and will show flowers in the winter and spring. As such, short days and long nights are what make the Calandiva naturally bloom. While this may happen naturally indoors, it’s also possible it won’t. That’s because your plant may be receiving too much artificial light once the sun goes down (yes, plants notice artificial light!). If possible, place your Calandiva in an area that is dark for at least 14 hours a day. This may require moving it in the early evening as you begin to turn lights on in your home, or placing it in an area of your home that you do not use at night. Once your plant’s buds have formed, the plant can remain anywhere in bright indirect light.

Once the buds open up, flowers will last generally around six weeks. Read more detailed, step-by-step instructions on how to make your Calandiva flower below.

How to maintain a beautiful and healthy Calandiva

Take care of your Calandiva and it will take care of you! Below are simple tips to continue caring for and growing your plant over time.

Pinching

Trim or pinch off (with your fingers) spent flowers about six weeks after they’ve bloomed, or once they shown signs of withering, and cut back the tall stem that rises from the flowers after this period.

Pruning

Minor pruning goes a long way with the Calandiva. After the flowering period, cut back the taller leaves of the plant, cutting below the second or third new leaf of each stem. Take a step back to take note of the plant’s overall shape, and remove leaves as necessary to maintain the full and bushy appearance.

How to grow and repot the Calandiva

  • Growing - Calandivas are slow growers. During spring and summer, fertilize once a month. As detailed above, minor pruning and pinching will help maintain its full shape and appearance.

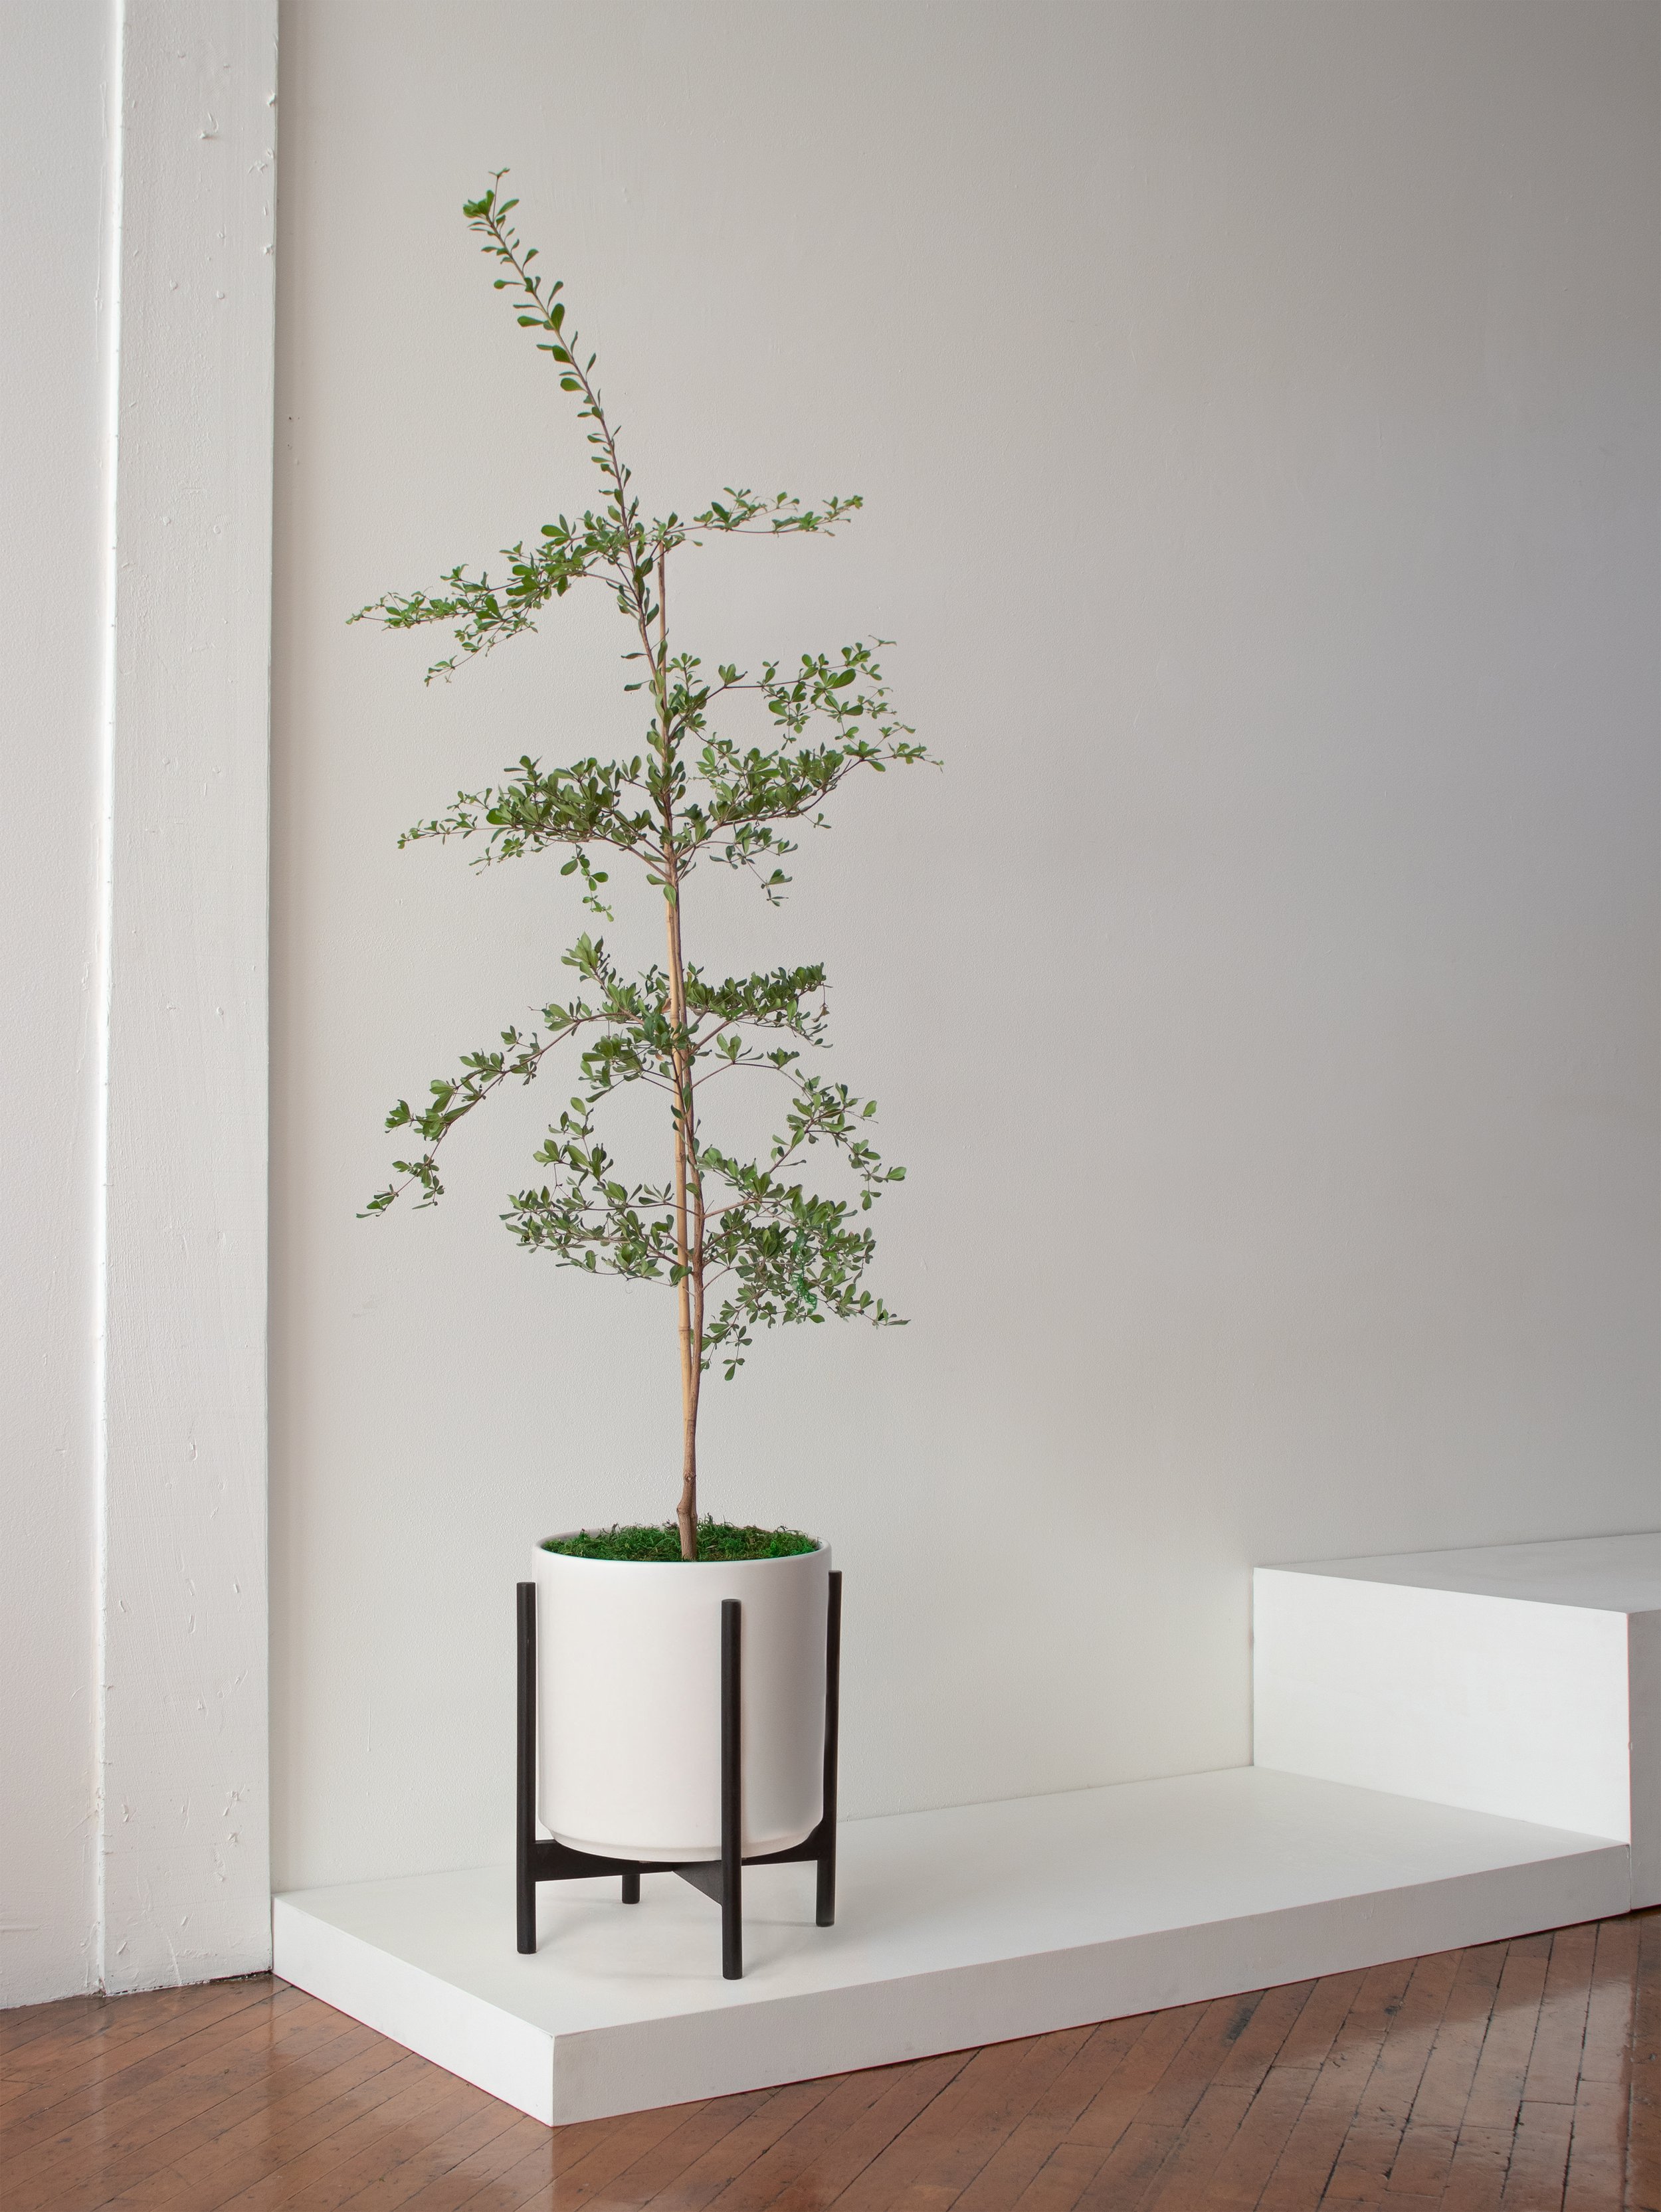
  • Repotting - Léon & George Calandivas come in 6” grow pots and only need to be repotted every few years and only if the plant is unhappy (i.e. has been overwatered) or to refresh the soil and give it new nutrients. If you’d like your plant to grow larger, find a new grow pot that is 2” larger than its current pot. If you’re happy with the current size, you can reuse the same pot and simply change the soil. Make sure to use well-draining or succulent soil for the Calandiva.

    • Getting your hands dirty with or without a yard - spread out newspaper on the floor, remove the plant from the pot and shake off as much of the old soil as possible so that you have clean roots. At the bottom of the grow pot, and a layer of soil, then place the plant in the center of the pot and cover with new soil. Pat down firmly and water thoroughly. Place the plant in an area with bright indirect light. Your plant will take 2-4 weeks to settle into its new home.

How to promote flowering on your Calandiva

As mentioned above, Calandivas flower typically in the winter and spring, encouraged by the short days and long nights that begin in the fall. In order to ensure your plant flowers to its full potential each year, you may need to take a few extra steps to meet its needs:

  • Come fall, place your plant in an area that is dark at least 14 hours a day (no artificial light). This could be a room in your home that you do not use at night, or if you must, move the plant to a closet in the late afternoon as you begin to turn lights on in your home.

  • Make sure your plant receives “long nights” (~14 hours) for about six weeks. Water sparingly or less than you normally would during this time.

  • After about six weeks, you should start to see buds form. At this time, you can place your plant anywhere you like so that it receives bright indirect light. Your flowers should bloom shortly thereafter!

How to propagate the Calandiva

There are a few different ways to propagate the Calandiva. You can either divide your Calandiva, or, more easily and without making a mess, take cuttings from your plant:

  1. Select a leaf to cut or snap off - Ideally you can use some of the cuttings after pruning! Make sure the cutting has at least two leaves, and do not to take any stems that are flowering.

  2. Cut it off - Using a clean blade, cut the stem off, or snap it off with your fingers.

  3. Let it heal - Let the leaf dry out for a few days. It should “heal”, forming a callus over where it was cut off.

  4. Place in soil- Put the calloused end into moist, well-draining soil (succulent mix). Keep the soil just damp to the touch until the plant is rooted, usually within two to three weeks.


1 TO 1 VIDEO CALL WITH AN EXPERT

Yellow leaves? Worried about watering or struggling with incorrect lighting? Book a call and get truly personalized support for all your plant-related needs.

The 10 Commandments of Calathea Care

Are you ready to care for your very own Calathea?

With their ethereal beauty and deeply colored foliage, Calatheas are beloved for the spellbinding presence that they bring to any space. 

They also have a special quality, known as nyctinasty: their sensitive leaves move in reaction to the light they receive. In the evening, they turn their leaves up, and during daylight hours, they lower them in a beautiful Calathea sun salutation. This behavior is why they’re lovingly referred to as Prayer Plants.

But like any goddess accustomed to being adored, Calatheas appreciate care and consideration. Praise them as you should, and they’ll flourish for years to come. Just follow these 10 commandments! 

  1. Lighting requirements for Calatheas

  2. Humidity requirements for Calatheas

  3. A note on A/C and heating

  4. Temperature requirements for Calatheas

  5. Fertilizing your Calathea

  6. Tips and tricks for watering

  7. Pruning unattractive leaves

  8. Common problems that may arise

  9. Repotting your Calathea

  10. Grouping other plants with the Calathea

1. Give Them the Lighting They Love 

Your Calathea does not want a sunburn. Ensure that it receives indirect light- medium is best, but low light can be well-tolerated- without exposing your plant to the sun’s direct harsh rays. When in doubt, picture your Calathea in its native habitat: a moist, humid rainforest. The light is filtered by a thick canopy of trees, and the air is heavy with mist. These are the conditions that Calatheas love. So don’t be afraid to keep her in the bathroom!

2. Like all of us, Calatheas Need the Occasional Spa Day 

A Native of Brazil, the Calathea appreciates a humid environment which can be difficult to create in indoor spaces. So plan on misting your Calathea regularly (once a week is ideal) to ensure it receives the moisture it craves. Misting is also a great way of interacting with your Calathea and keeping yourself busy without overwatering it, a common mistake that can cause damage that is difficult to undo!

3. Keep Your Calathea Away From Dry Breezes and Appliances

Calatheas are sensitive to even small changes in their environment. Because of this, it’s best to keep them away from vents, air conditioners or heaters, and doors that are frequently opened and closed. 

4. A Steady Temperature Is A Must

Seasons change, but your Calatheas should never have to feel a significant temperature shift. Keep these tropical plants comfortable by ensuring a steady temperature within the range of 65-80 degrees year-round, and your Calathea will thank you for it! 

Plant Care Essentials by Léon & George

Plant Care Essentials

Our full set of apothecary plant essentials was designed to keep your plants clean, insect free and ready to grow. Inspired by the tradition of soaps and perfumes crafted in the south of France, you and your plant alike are sure to enjoy this set of luxurious elixirs

5. Fertilize Your Calathea With Care- and Only During Its Growing Seasons

Calatheas do not need to be fertilized during the winter months, but once Spring arrives, your Calathea will appreciate a monthly dose of foliar plant food like our Foliar Feed, or another gentle fertilizer. This feeding schedule can be continued through the Summer and Fall. 

You may feel the urge to feed your Calathea during the slow winter months, but remember that these plants do not grow nearly as much during the cold season and require less food and water during this time. Over-fertilizing has consequences, so be mindful of the particular needs of this delicate and beautiful plant variety.

6. Give Your Calathea A Long Drink of Water

If you notice that your Calathea’s leaves are curling inward and appear dry, your plant may be signaling that it is under-watered. You can give your Calathea a long drink by removing your plant from its ceramic planter, while keeping it in its plastic nursery pot, and placing it in a sink or bowl. Water the Calathea thoroughly and allow it to sit in the collected water for a few hours. Its roots will drink up exactly as much water as they need. After a few hours, remove your Calathea from the sink or bowl and allow it to drain. Your Calathea should show signs of improving health within a day.

7. Prune Unhealthy Leaves 

It’s normal to feel trepidation about pruning (cutting leaves or stems off of your plant.) However, it’s actually great to get in the practice of pruning your plants because pruning offers so many benefits to the plant’s overall health. All plants will grow over time if they receive the light and water that they need, and all plants will experience occasional dying leaves. It’s just part of life! 

Don’t be afraid to prune off leaves of your Calathea that appear dead or mostly dead. You can simply cut them with scissors or pruning shears at the spot where they meet the stem or base of the plant. If your Calathea’s leaf has only one area of browning, you can trim the brown area off by following the natural curve of the leaf with scissors. If you need a little more guidance, head here for a full step-by-step guide to pruning houseplants.

8. As With All Living Things, Patience is Key!

Calatheas are known for being fussy plants. Like many indoor plants, they’re native to very moist and tropical locations that are a world away from most of our home environments. Your Calathea may experience leaf drop, browning or other growing pains- especially as it becomes accustomed to a new home. 

The flip side, of course, (and it’s so worth it!) is that it will also generate new growth and adorn your home with beauty in the months and years to come. So be patient as your Calathea settles in, and take time to give her special care. She may be a diva, but it’s all part of what makes her a beautiful and unique plant. 

9. Don’t Be Afraid to Repot

As with pruning, repotting can feel like a daunting responsibility, and one that you might rather avoid. That being said, there are tremendous benefits to repotting your Calathea every year or two. 

Over time, soil loses its nutrients- they’re used up by the plants to keep them growing healthy and strong. Repotting is a great opportunity to replace some of that old soil with new, nutrient-rich soil for your Calathea to enjoy. Repotting your Calathea in a larger pot also ensures that your plant has the space to spread out and push out new growth! First time repotting? See our full guide to learn how to repot your plant.

10. Introduce the Company of Friends

Did you know that plants love to be grouped together? By arranging your houseplants close to one another, they create a mini-biome of moisture that can benefit them all. Grouping your plants together also makes it easier to remember to water, feed and pamper them! Just remember to be sure that the plants you’re grouping together will thrive in the conditions of the space, and that their light and water requirements align. 

Consider the rule of three: groupings of three plants in one space are aesthetically harmonious and easy to tend to- especially if you keep your mister and watering can right by them. (The House of Botanicals Watering Can, for instance, contains a mister and watering spout in one, and it’s so pretty that it functions as decor!) 

Every new plant is a new adventure, and Calatheas are no exception. 

They’re gorgeous, spiritual and have a vibrant history of varied uses. So embrace your Calathea, and don’t forget that there’s a wealth of information available to support you on your journey right here


1 TO 1 VIDEO CALL WITH AN EXPERT

Yellow leaves? Worried about watering or struggling with incorrect lighting? Book a call and get truly personalized support for all your plant-related needs.

How to Care for and Grow Your Pothos
pothos-care-guide.jpg

The Cascading Pothos, also known as simply Pothos or Devil’s Ivy, is one of the easiest plants out there to care for, and a great plant for beginners. Learn the basics of Pothos plant care including light requirements, watering frequency, and how to troubleshoot common problems you may encounter along the way.

How much light does a Pothos need?

Pothos prefer bright indirect light, though they can easily survive in low-light environments. Keep your plant out of harsh direct sunlight as their leaves will quickly burn.

How to water your Pothos

Let your plant dry out between waterings. Water thoroughly when topsoil is dry, usually once a week.

  • Avoid overwatering, and note that your watering schedule may be less frequent during winter months or if the plant is getting little light.

How fast does a Pothos grow?

In prime conditions, the Pothos is an incredibly fast grower and its tendrils can grow over 10 feet long! Fertilize your plant 1-2 times per month in the spring and summer with indoor plant food, or foliar feed year round.

Pothos leaves turning yellow

Are your Pothos’ leaves yellow? Pothos have many leaves and if it’s just one or two and the rest of the plant looks healthy, most likely those leaves are just on their way out. You should be able to easily pluck them off. This is totally normal and nothing to worry about!

If you notice many yellow leaves on your Pothos, it could be a sign of overwatering. Check the soil and make sure it dries out before watering again.

Monstera no holes on leaves

Pothos leaves wilting or drooping

If your Pothos looks droopy or the leaves are wilting, most likely your plant is under-watered. This is easy to check by simply touching the soil, or checking the weight of the plant (lift it up— does it feel very light? If so, it needs a good drink!). Sometimes Pothos become so dry that when you water it, the water just drains right through. If this seems to be the case, let your plant sit in water for a few hours (no more than one day) to drink as much as it needs from the bottom up.

 
Keep your (plant’s) medicine cabinet fully stocked. Our complete set of natural vitamins and pest solutions is the ultimate curative remedy for plants undergoing stress due to common ailments such as fungus or infestation.

RESTORATIVE PLANT CARE ESSENTIALS

Keep your (plant’s) medicine cabinet fully stocked. Our complete set of natural vitamins and pest solutions is the ultimate curative remedy for plants undergoing stress due to common ailments such as fungus or infestation.

Shop the Cascading Pothos at leonandgeorge.com

How to maintain a beautiful and healthy Pothos

Take care of your Pothos and it will take care of you! Below are simple tips to continue caring for your Pothos over time.

  • Pruning your pothos - Remove yellow leaves all year round, and prune often if you’d like a fuller, bushier look. Simply cut the tendrils just below the node.

  • Cleaning your pothos - With so much foliage, the Pothos can be annoying to clean! Mist regularly to keep dust off, and once ever few months use a damp cloth to clean each leaf and reveal a healthy shine (also helps the plant soak in more light!).

  • Repotting your pothos - Houseplants grow much slower than they would in the wild. Depending on the size of your plant and the density of the roots, this is nice to do every 2-3 years to provide fresh nutrients and encourage new growth.

    • When to repot - Pothos are incredibly hardy plants and can live in the same pot for years. If you want your Pothos to grow very large, repot every 2-3 years.

    • Pot sizing - if you want your plant to grow bushier, find a nursery pot that’s 2” in diameter larger than the current pot. If you want your plant to stay the same height, you can reuse the same pot and simply change the soil.

    • Get your hands dirty - spread out newspaper on the floor, remove the plant from the pot and shake off as much of the old soil as possible so that you have clean roots. Place the plant in the center of the pot, add new soil and pat down firmly. Water the soil thoroughly and place the plant in an area with bright indirect light. Your plant will take 2-4 weeks to settle from the shock and adjust to its new home.

  • Staking your pothos - Some Pothos owners like to stake their plant to encourage vertical growth. You can do this by simply inserting a moss totem and attaching the stems of the plant to it with prongs.


Shop the Cascading Pothos at leonandgeorge.com

How to propagate a Pothos

Whether you want to recycle your Pothos cuttings after pruning or you simply want to create a new plant, know that the Pothos, thanks to its aerial roots, is one of the easiest plants to propagate. Though there are many ways to do this, water propagation is generally the easiest way to go about it. Follow these instructions to propagate your Pothos:

How to propagate a pothos
  • Select a stem to propagate - Using a clean blade, cut an inch or two below an aerial root. You don’t have to propagate with an aerial root, but this is a guaranteed way of propagation success!

  • Place in water - Find a clear glass and fill with water. Make sure only the stem is submerged, and no leaves are sitting in the water.

  • Place in a bright area and wait! - Avoid any direct sun. It usually takes just a week or so for the root to start growing.

  • Transfer to soil - After a couple weeks, transfer to indoor potting soil. A small pot is best — no larger than 6” in diameter.

  • Keep hydrated - During the first few weeks, or until your plant feels firmly rooted in its soil, regularly water and drain your new Pothos. The soil should be just barely moist to the touch at all times until the plant is thoroughly rooted in the soil, at which point you can water every time the soil dries out.

Illustrations by our talented plant stylist, Kailie Barnes.


pothoscoral.jpeg

Cascading Pothos

A popular, attractive, and truly easy-care plant, the Cascading Pothos has smooth and leathery heart-shaped leaves and is adaptable to virtually any environment.

Winter Plant Care: Tips To Keep Your Plants Thriving This Season
The Monstera Deliciosa, prepared for winter!

The Monstera Deliciosa, prepared for winter!

Winter is here, and your plants know it.

Just like us humans, plants also notice the changing of the seasons and winter is no exception. During this time, plants go into dormancy and are often not actively growing. Shorter days mean less sunlight, and less sunlight means less energy to use for growing. Read our tips on how to care for your plant in the winter and successfully make it to spring.

Adjust your watering schedule

Shorter days in winter translates to plants grow more slowly, and this also means they often tend to take longer to dry out between waterings. That means you should water less frequently, making sure to always check the soil before watering. Depending on where you live, you may have already adjusted your watering schedule in the fall.

Let there be light

Another adjustment you may have already made in the fall, make sure your plant is getting enough sunlight during the short and sometimes dreary days of winter. Plants that do well in one area of your home may not be as happy as they were before. Signs that your plant is not getting enough light may include pale, yellow, or brown leaves, leggy branches, or leaning towards the light. If this might be an issue for you, there are a few things you can do to mitigate during these darker months of the year: move the plant closer to a light source for the fall and winter, rotate it every few weeks, or install an artificial (grow) light.

Cut back fertilizing

The best time to regularly fertilize your plant is when it’s actively growing in the spring and summer. That said, you may try using gentle fertilizers like Boost Vitaminé natural plant food once a month during the winter to help keep your plant nourished. Do not use more than once a month during this time, though, as you may risk fertilizer burn on the leaves of your plant.

Put away the pruners

You may remove dry, old, or unattractive leaves all year round, but save any major pruning for the spring or summer. While it is healthy to periodically prune indoor plants, pruning during the winter may come as a shock to a plant whose resources are already limited.

Up the humidity

Similar to air conditioning, strong heaters can have a negative effect on our plants in the winter as they dry out the air. To combat dry atmospheres, mist your plant here and there (daily is great, but once or twice a week works too!).

Keep them warm

Like us our plants don’t like air that is too cold. This may be hard to avoid in the middle of winter, but aim to keep your plants at a temp that would be comfortable for you, somewhere between 65º-75ºF.

Move plants away from icy windowpanes

Depending on where you live and the type of window in your home, your plant may not like to be close or touching a window. If the window feels cold to you, it probably feels cold to your plant, which may cause leaf damage or shock.

Feel prepared for the long winter ahead? You got this! Head back to our blog for more simple plant care tips for your indoor greenery.


IMG_0689.jpg

INDOOR PLANTS, potted & DELIVERED

Premium plants paired with stylish ceramics, plus lifetime plant care support. Order online at leonandgeorge.com

Is Rainwater Good for Houseplants?

Is watering your plants with rainwater a good idea?

When it comes to watering our houseplants, tap water is most people’s go-to. But did you know that using natural sources like rainwater can be beneficial for your plants? Here are three key reasons why catching those raindrops for your houseplants is worth the extra effort:

  1. Rainwater is naturally soft, meaning it is free of many salts, minerals, and chemicals that can build up in soil, stems and leaves over time. Not only is it gentler on our plants, but it can also help flush out excess salts and chemicals in the soil, bringing your plant back to a healthier state.

  2. Rainwater also has a slightly acidic pH, which is beneficial for most plants as it tends to be more in line with the pH levels they prefer, helping to balance out the soil's pH.

  3. Rainwater contains nitrates, a form of nitrogen essential for plant growth and function, that can be easily absorbed by plants. All fertilizers contain varying levels of three macronutrients— potassium, phosphorous, and nitrogen—so see this as a way of naturally giving your plants a little vitamin boost!

Photo credit: @milivigerova


PLANT ACCESSORIES AND POTTED PLANTS

Premium plants paired with stylish ceramics and luxurious plant care accessories. Order online at leonandgeorge.com

A Complete Black Olive Tree AKA Shady Lady Care Guide

Black Olive tree

AKA bucida buceras

The Black Olive Tree, also known as bucida buceras or Shady Lady Olive Tree is a gorgeous indoor plant native to tropical regions and is known for its dark, glossy leaves and durable bark. Not to be confused with the regular Olive Tree, the Black Olive Tree does not actually produce any fruit, and in fact is not even an olive tree! Given this name simply for its airy, olive tree-like appearance, this plant is an excellent indoor alternative to its close cousin who prefers to be outdoors.

Light requirements for the Black Olive Tree

Black Olive Trees need at least 6-8, preferably 10 hours of unobstructed direct sunlight a day. It can be placed either outside in full-sun, partial shade, or indoors by a south-facing window. All of the foliage should be exposed to direct light to maintain a full, lush canopy.

How to water your Black Olive Tree

Black Olive Trees require a lot of water when they first acclimate to a new environment. After a few weeks, you’ll start to see how fast your tree is drinking. Allow your Black Olive Tree to dry in between waterings, and water thoroughly when the top 2-3 inches of soil is completely dry, usually once every 5-7 days. The frequency of watering depends on where your tree is placed and how much direct sunlight it is receiving. Avoid overwatering, and note that your watering schedule may be less frequent during winter months.

Are Black Olive Trees fast growers?

Black Olive Trees are relatively slow growers, and will grow even more slowly indoors. An ideal plant for a chic indoor setting, it requires very little maintenance over time!

Potion Magique

An all-natural elixir to add to your misting routine, providing extra nutrition and pest control for your plants through their foliage.

$28

Common problems with the Black Olive Tree

Leaf drop

The Black Olive Tree is prone to leaf drop, particularly with environmental changes, inconsistent care, or changing seasons. You may see your plant drop all its leaves—and very quickly—causing understandable alarm and concern. However, if your plant is receiving the care it requires, then there is nothing to worry about: sudden leaf drop is normal for the Black Olive Tree and the leaves usually grow back with some time. If you’d like to speed up the process, expose your plant to more light by either shifting its position in your home (or putting it outdoors if that’s an option for you), or investing in a grow light.

How to maintain a beautiful and healthy Black Olive Tree

Take care of your Black Olive Tree and it will take care of you! Below are simple tips to continue caring for your Black Olive Tree or bucida buceras over time.

  • Fertilizing - Fertilize during the growing season (spring and summer) every 6-8 weeks, using a balanced, slow-release fertilizer.

  • Pruning & Shaping - Remove dry or dead leaves all year round, but save any major pruning for late winter or early spring. It’s important to thin out the canopy to improve air circulation and maintain its shape. Use clean, sharp pruning shears to prevent damage to the tree and spread of disease.

  • Cleaning - The Black Olive Tree is not an easy one to clean! Keep your plant dust-free by regularly misting.

  • Repotting - Houseplants grow much slower than they would in the wild. Depending on the size of your plant and the density of the roots, this is nice to do every 2-3 years to provide fresh nutrients and encourage new growth.

    • When to repot - Repot your plant with fresh soil once every 2-3 years.

    • Pot sizing - if you want your plant to grow taller, find a nursery pot that’s 2” in diameter larger than the current pot. If you want your plant to stay the same height, you can reuse the same pot and simply change the soil.

    • Get your hands dirty - remove the plant from the pot and shake off as much of the old soil as possible so that you have clean roots. Place the plant in the center of the pot, add new soil and pat down firmly. Water the soil thoroughly and place the plant in an area with bright indirect light. Your plant will take 2-4 weeks to settle from the shock and adjust to its new home.

    By following these care guidelines, you can ensure that your Black Olive Tree remains healthy and thrives in its environment.


Black Olive Tree

Black Olive Tree

Airy and bonsai-like, and a beautiful addition to any style and space.

What's The Ideal Temperature For Houseplants?
a9e81245-68dd-466c-a4fb-019e76870419.jpg

Wondering how your climate control affects your plants? Houseplants, like us, can feel too cold, or too warm, and do best in mild temperatures that fall somewhere between 65-75 degrees farhenheit. As the seasons change, consider how reaching for the thermostat may affect your houseplants:

  • Many common indoor plants enjoy balmier temps and thrive in warmer and sunnier conditions. Think Money Trees, Calatheas, Cacti, some Palm varieties and Philodendrons. If you have any of these in your collection, make sure things don’t get too chilly inside (particularly if you’re away and the heating is turned off).

  • Others can survive just fine in colder temps if needed - think Sansevieria, Cast Irons, Zanzibar Gems, and Silver Evergreens. They do fine with winter temps, but you may need to water less if they regularly live in a chilly environment. 

  • Most indoor plants are happiest in temperatures that falls somewhere in between hot and cold. *Cue Miss Rhode Island from Miss Congeniality and her idea of a perfect date: "April 25th. Because it's not too hot, not too cold, all you need is a light jacket." Our plant babies don't have a huge selection when it comes to jackets though, so we recommend keeping them happy with indoor temps somewhere between 65º-75º F. 

  • *Pro tip*: Whether you're adjusting temps up or down in your space, make sure you don't sacrifice humidity! Blasting the heat or the AC will dry out the air, and that will cause most plants to wilt, dry out, or drop leaves.


zz.jpg

INDOOR PLANTS, POTTED AND DELIVERED

Premium plants paired with stylish ceramics, plus lifetime Plant Doctor support. Order online at leonandgeorge.com

Light Requirements for Plants: Explained!
indirect vs. direct light

A Definitive Light Guide for Plants

It’s time to welcome a new plant into your home, which means that it’s also time to identify the light your space receives! The number one thing to consider when you select a new plant friend is their light requirement. And we know it can feel a little confusing at first, but don’t fret!  This page was specially designed to set you up for success when choosing the right plant for your space. We will identify the light that your space receives, what terms like bright indirect light really mean, and of course, ensure your choice is a perfect match with suggestions for each area of your home.

  1. Direct light vs. indirect light

  2. Artificial light

  3. Understanding the light in your space

  4. North facing window light

  5. South facing window light

  6. East facing window light

  7. West facing window light

  8. Best plants for each type of light

  9. Signs your plant isn’t getting the right light

What is Indirect Sunlight?

What’s the difference between indirect vs. direct light, and what how do green thumbs define low light? While there admittedly isn’t an exact way to define some of these terms, getting a general sense of each will go a long way in selecting the right plant.

Direct Light - The light that comes in through west or southern-facing windows. Direct light is the most intense light that indoor spaces receive, and will expose plants directly to the sun's rays. Most common houseplants don’t love direct sunlight, but a few that can take the heat are Birds of Paradise, Fishtail Palms, cacti and succulents.

Bright Indirect Light - It’s not direct, but it is steady and bright. Think: the spots right next to a window that receives a dash of direct light (but not more than an hour a day) before being obstructed. It’s ideal for plants in this collection

Medium Light - The areas of a room that are about half the distance between a window and back wall receive medium light. These areas still receive steady light from windows, but it is not direct. This light is ideal for many palms, Dracaenas, Philodendrons, and the plants in our medium light collection.

Low Light - Low light areas are seven or more feet from windows, and can also be places that receive no natural light, like some office spaces and bathrooms. Some plants love low light, and many can adapt to it. Low light plants tend to grow more slowly than other plants, but there is still a wealth of options. Our low light collection is a great trove of shade-loving indoor plants.

Can I Use Artificial Light for my Plants?

The short answer is yes. Artificial light, including indoor grow lighting, is light that is emitted by lightbulbs, and particularly by grow lights. Ordinary lamps and overhead lighting do not offer a lot of light for plants to photosynthesize (though they will still contribute something!), so if the only sources of light are ordinary lamps and overhead lights, you’ll want to select a low light plant. However, if you're keen to discover how to determine your plant light conditions and promote healthy plant growth, grow lights offer light that plants can readily photosynthesize. You can read more about them and other ways to optimize light for your plants here.

Understanding Your Light and Space

What kind of light do you have? A quick way to tell is with a quick hand test. Take a piece of paper or some other plane surface and hold your hand about a foot away from it, between it and the light source. If you can’t see much of a shadow or it’s very faint, you’re getting low light. In a medium light situation you’ll see a blurry or fuzzy shadow of your hand, and in bright light you’ll get a crisp clear shadow.

Knowing what direction your windows face will also be helpful in determining what types of light you’re working with:

North Facing Windows

Windows that face true north do not receive direct sunlight at any time of day (at least in the Northern Hemisphere). They receive consistently diffuse, gentle light. Plants from the Medium Light Collection, like the Dracaena Lisa, Braided Money Tree and Snake Plant will do well when placed four or more feet from north facing windows.

indirect vs. direct light

South Facing Windows

South facing windows are the star of any room, because this direction receives the most light throughout the day. The sun rises in the east, and as the planet rotates, the sun’s rays hit south facing windows from the hours of late morning to mid afternoon. South facing windows provide a good deal of bright light for most of the day, so most plants will love being closely situated to this window, especially bright light plants like the Bird of Paradise, Fishtail Palm, and Desert Cactus

A note on direct sunlight: unobstructed south-facing windows will receive a fair amount of direct sunlight, and most plants don’t love to sit in harsh direct rays of sun. Take care when placing certain plants directly in front of a window that receives lots of direct sunlight.

Live in a super sunny city? Check out our feature on The 10 Sunniest Cities in the U.S. That You Should Move To, where we include tips on which plants to invest in for cities that are sunny all year round.

indirect vs. direct light

East Facing Windows

Windows that face east receive sunlight in the morning (the sun rises in the east). Morning light is typically soft, which makes east facing windows a gentle match for plants that appreciate indirect bright light. If you can see the sun rising from your window, that is an east facing window. Plants that like bright, indirect sunlight, like the Fiddle Leaf Fig and Monstera Deliciosa, are great picks for placing near east facing windows.

A note on direct sunlight: morning sunlight is generally a soft light, and most plants will tolerate direct sunlight from east-facing windows. However, if you live in a place that sees lots of sunshine (lucky you!), keep an eye on things in the summer when the sun may become too harsh for plants that otherwise enjoy basking in it during the rest of the year.

indirect vs. direct light

West Facing Windows

By midday, the sun is high in the sky and ready to begin its slow descent as it sets in the west. Sunlight will filter through west facing windows from mid afternoon until evening. If you can see the sun set through your window in the afternoon, it is a west-facing window. The light received by west-facing windows is very strong when direct, so most plants should be placed outside the areas where direct sunlight hits. A Braided Money Tree or Tiger Evergreen will benefit from indirect sunlight from this direction, and plants like the Desert Cactus and succulents are some of few that will tolerate west-facing window’s direct sunlight.

indirect vs. direct light

You can also utilize landmarks to determine what direction your windows are facing.

Meet Your (Light’s) Match

Shop from this list of our all-time favorite plants for every light requirement. You may notice that some plants are on multiple lists. This is no mistake! Some lucky plants can thrive in varied degrees of indirect light. Braided Money Trees and Snake Plants are among these superstars. 

Best Plants for Direct Light

Bird of Paradise

Fishtail Palm

Desert Cactus

Best plants for bright indirect Light

Fiddle Leaf Fig

Dragon Tree

Fishtail Palm

Bird of Paradise

Dracaena Compacta

Rubber Tree

Monstera Deliciosa

Braided Money Tree

Snake Plant

Best Plants for Medium Light

Dracaena Lisa

Dragon Tree

Braided Money Tree

Snake Plant

Tiger Evergreen

Silver Evergreen

Best Plants For Low Light

Lady Palm

Dracaena Lisa

Cast Iron Plant

Zanzibar Gem

Silver Evergreen

Snake Plant

Parlor Palm 

Keep in mind that plants can also be "conditioned" to different light levels, but be careful to do this over a period of a few weeks. A sudden shift in light levels will cause your plant to go through shock.

Signs you haven’t found the sweet spot yet

If you see yellow or dropping leaves or longer spindly stems, this may indicate your plant wants more light. A change of position in the room, a different room, or adding a lamp nearby may be what your plant is looking for.

Noticing pale leaves or crispy browning areas? This may mean your plant needs a step back from too much light or direct light.

Illustrations by our talented Plant Stylist, Kailie Barnes


1 TO 1 VIDEO CALL WITH AN EXPERT

Yellow leaves? Worried about watering or struggling with incorrect lighting? Book a call and get truly personalized support for all your plant-related needs.

Welcome to Léon & George

Discover the joy of indoor gardening with Léon & George, where each houseplant is a living work of art, chosen to create blooming havens in your personal spaces. Our selection of easy-to-grow plants includes everything from the vibrant golden pothos to the sturdy philodendron, all nurtured to promote clean indoor air and enhance the humidity levels of your home.

As purveyors of greenery, we cater to both the enthusiast with a green thumb and the beginner eager to foster their first potted plant. We understand the importance of potting soil that provides optimal drainage, the right fertilizer to encourage growth, and the knowledge on how to propagate and prune to prevent issues like root rot and pests.

In every planter and terrarium, gardening meets style, and house plants become an essential element of home decor. We help you select foliage plants that thrive in variegated light, from bright sunlight to damp corners where air plants might flourish. We offer guidance on watering needs, whether your plants will be potted, repotted, or displayed in chic hanging pots.

And it doesn't stop at succulents and bromeliads; our expansive greenhouse nurtures a collection of tropical plants, ferns, and flowering species like anthuriums and orchids. We make gardening in any space possible, even in urban environments where humidity and sunlight may be challenging to manage.

Join us at Léon & George, and let's cultivate beauty and well-being, one houseplant at a time, turning every nook into a lush, foliage-filled sanctuary.

How To Use Your New Moisture Meter
How to use moisture meter

A moisture meter that is as simple to use as it is sleek.

Did you know that the number one cause of indoor plant trouble is over-watering? That’s because it can be hard to know what’s happening below the soil of your plant. But what if you could get a clear and accurate picture of your plant’s needs, and know exactly when it’s time to water, and when it’s time to hold off?

As it turns out, you can, with sleek and simple to use moisture meters.

Why this moisture meter?

There are so many moisture meters and watering tools out there, from classic probes to tech-enhanced apps, but not all moisture meters are created equal.

Designed, developed, and manufactured in Japan, this particular moisture meter is the first of its kind to incorporate a pF indicator that gives a more accurate and concise picture of when it’s time to water. Tested by research institutions, agriculturalists, and our very own team of Plant Doctors, we’ve found this moisture meter to be the highest quality, easiest to use, and all around most attractive design.

How to use moisture meter

Thirsty for more? Unlike traditional water detectors that simply detect moisture, a pF indicator detects the soil’s available water capacity, also understood as the roots’ ability to absorb water. The moisture meter then uses a simple color scale to let you know when it’s time to water and when you should hold off.

How to use your moisture meter

Using your moisture meter is simple. Follow these instructions to ensure proper use of your sleek new tool!

  1. Gently insert the moisture meter deep into the soil of your plant, taking care not to damage any roots along the way. Don’t worry if you bump into a few roots, but avoid using force.

  2. Allow the moisture meter to sit in the soil for 20-30 minutes before reading.

  3. The window at the top will be completely white if it’s time to water. If it is at all blue, hold off on watering until it becomes white.

  4. If it is indeed white, water your plant thoroughly as instructed in your care card. You will see the moisture meter gradually turn blue.

  5. You may leave your moisture meter in the soil of your plant, or remove it in between waterings. Up to you!

How to take care of your moisture meter

Over time, your moisture meter may need cleaning of any soil particles that have collected from use. To clean, place your moisture meter upside down (with the window indicator facing down) in a mix of neutral detergent and warm water, letting it soak for about an hour.

Every six to nine months, the core will need to be replaced. Follow these instructions to replace the core of your moisture meter:

  • Remove the top screw cap and remove the core, blue sheet, and straw.

  • Keep the refill in its package until just before use.

  • Place the new core inside the moisture meter and screw the cap back on.

We know finding the perfect watering routine is tough, especially when it comes to larger plants. And we know, unlike that beautiful armchair you bought last year, this investment requires a little more attention. We believe that offering the knowledge and tools to take care of your new living greenery is key to setting you up for success in the long run. And we hope it’s a long run with your plant!


fiddleleaffigbush.jpg

Indoor plants, potted & delivered.

Premium plants paired with stylish ceramics, plus lifetime plant care support. Order online at leonandgeorge.com

Moss For Plants: What It Is & How To Maintain It

All Léon & George plants include Preserved Forest Moss as a final touch.

So you want to put moss on your indoor plants. Decorative moss is a wonderful covering for potted plants, and there are a few things you should know to keep your houseplants and moss looking beautifully polished year round.

What is moss for plants?

Preserved forest moss is exactly what it sounds like— real forest moss that’s been preserved! That means it’s not alive, and requires no major maintenance over time. Moss is used widely as a decorative topping for indoor potted plants. Moss is also the material of choice for assembling terrariums or maintaining soil humidity. When following the method for staging your plant, it’s the finishing touch for hiding less attractive details such as nursery pots and staging materials.

Our Preserved Forest Moss is non-toxic and safe to have in homes with curious pets and children. It’s placed as a light covering and can be watered over during your usual watering routine.

How to use your moss

Giving your houseplants a polished look is easy! Follow these simple tips when using moss covering on your plants:

Separate - Using your hands, separate any clumps and shake out dust particles. You want your moss to be nice and fluffy, leaving space for the soil to access natural airflow.

Spread - Place the moss over the topsoil of your plant and spread out evenly between plant stems, to the inside edges of your decorative pot.

Fluff - Fluff the moss one more time to create a nicely balanced look and to double check that the soil has space for airflow.

Here’s how to fluff the moss atop your plant:

Using your fingers, rub pieces of moss together to create space and break up any clumps. The moss should appear light and curly, not flat and condensed. Occasionally life the moss to check the soil beneath. If you see white spots or mold-like growth, worry not! Most fungi is beneficial for plants, though this would be a good time to fluff the moss and check for air flow.

Despite not needing any maintenance like real, living moss would, we recommend fluffing yours on occasion for optimal plant health. This maintains better soil aeration (aka air flow to your plant's roots), and let's be honest -- it just looks nice! 

Maintaining your moss over time

While decorative moss can last for years, it will dry out and fade over time. Replace your moss every 1-2 years for a fresh look.

What about water? Preserved moss does not need water, but it also doesn’t mind getting wet. Water freely over your moss during your regular watering routine.

All Léon & George indoor plants come with preserved forest moss as the final touch. It requires no upkeep and serves no purpose beyond simply giving your plant a polished look!

Leon & George Large Zanzibar

Large Zanzibar Gem by Léon & George, complete with plant, ceramic pot, wood stand and preserved forest moss


PLANT ACCESSORIES AND POTTED PLANTS

Premium plants paired with stylish ceramics and luxurious plant care accessories. Order online at leonandgeorge.com

Tips for Happy Houseplants While You're Away

Who doesn’t like to travel now and then? But it can be hard to enjoy yourself if you’re worrying over your houseplants. Whether you are jetting off on a summer vacation or going home for the holidays, leave your plants with peace of mind knowing that they will be well while you’re away. Before you head out the door complete this simple checklist to ensure your plants will be alive and thriving when you get home!

What to do before you leave

When it comes to hectic holiday travel, your plants are probably low on the list of priorities. It's a busy time of year-- we get it! But whether you'll be gone for a few days or a few weeks, here are some tips to act on (or bookmark for later) for happier plants upon your return:

  • Water before leaving - The day before you leave, give your plants a good watering. If you'll be gone for a long time (over two weeks), you may even consider bottom watering, or letting them soak in a few inches of water before returning to their decorative pot.

  • Climate control - Most indoor plants prefer to live in temperatures somewhere between 65-75 degrees, so do what's necessary to make sure the temperatures don't go too far above or below that window while you're gone.

  • Maintain humidity - To avoid those crispy edges and keep humidity levels up, try grouping your plants together so they can create a mini-biome and help each other out in your absence.

  • Self-watering adapter - If you're going to be gone longer than two weeks, we recommend getting a self-watering adapter. Depending on the size of your plant, these can keep it quenched for up to two weeks.

  • For travel longer than three weeks - Ask a friend to stop by. Plants are living beings and need love and attention just like us and our pets!

What to do when you return

  • Soak - check the moisture of the soil at the top and bottom of the nursery pot (you have to remove it from its decorative pot). If still slightly moist, return to your regular watering schedule. If completely dry, bring your plant to the shower and give the soil a nice soak through. Let the water drain completely before returning to its home. 

  • Prune - after the shower and when your plant has dried a bit, you should see the leaves perk back up. (occasionally after long droughts, your plants may need a second shower before this happens.) Sift through all the green and thoroughly remove any brown or yellowing leaves.


drought resistant plants

DROUGHT-RESISTANT PLANTS

Whether you travel a lot or are just plain busy, plants that resist drought for several weeks are the way to go!

What You Need To Know Before You Buy An Anthurium

The King of Hearts Anthurium is an easy care plant with bright red flowers that bloom year-round.

The Anthurium is a genus within the Araceae, or arum, family. They are related to other well-loved houseplants like philodendrons and peace lillies, and are a popular choice for homes, office spaces, and gifting because of their vibrant, exotic foliage, and year-round, colorful blooms.

A common question we face with Anthuriums is—if the flowers seem to last for ages, then are they real?! Read on to learn about the Anthurium and why itʼs the perfect cross between living houseplant and gorgeous cut flowers.

The flowers may look like flowers…

The “flowers” on Anthuriums last for ages, and bloom year-round!

The waxy, colorful, heart-shaped “flowers” we see on Anthurium plants aren’t actually flowers themselves -- they are spathes, or specially-shaped leaves to protect the smaller flowers inside! The spathe covers the cluster of tiny flowers, or the spadix, on the plant, which is actually the plant’s bloom. But due to their beauty and wide variety of colors, plant hobbyists and the general public often just refer to Anthuriums’ spathes as flowers. 

Unlike many other flowering plants, Anthuriums can produce their “flowers” year-round -- so don’t worry if you need to cut off a bloom once it’s past its prime; you’re bound to see another one in no time! 

They’re light lovers

While some Anthurium varieties are tolerant to lower light environments, most Anthurium plants -- including the popular Queen of Spades Anthurium -- do best in bright, indirect light. These sun-sensitive plants shouldn’t receive much direct sunlight, but should get filtered or gentle sunlight to help it photosynthesize. 

Where to place your Anthurium

Most types of Anthuriums prefer spaces with ample humidity (more than 50 percent), given their native environment is the tropics. Your new Anthurium plant is likely to do well in a bathroom or similarly humid area of your home, especially if the space gets bright, indirect light. 

If your bathroom is too dark or doesn’t have space for your Anthurium, the next best option is a space where your plant will get plenty of bright indirect light throughout the day, such as a few feet from an east or west-facing window. Try to increase humidity, using a humidifier, regularly misting it, or by grouping plants together. To encourage “flowers” and healthy leaves, and avoid placing the plant in direct sunlight.

Can Anthuriums go outside?

While Anthurium plants grow nicely outdoors in many climates -- especially tropical ones -- they will not survive in low temperatures during the winter. If you choose to keep your Anthurium outside, make sure you overwinter it in your home or greenhouse when it gets chilly out (under 55-60 degrees Fahrenheit)!

They’re sensitive to overwatering

Ensure you’re watering your Anthurium plant regularly, but avoid overwatering -- these flowering plants are sensitive to root rot. A regular watering cadence is key to keeping any type of Anthurium happy and healthy, as watering too seldomly can make it harder for the plant’s roots to absorb the water and nutrients it needs to grow. 

You can fertilize for more flowers

One of the many benefits of growing or gifting an Anthurium is its low maintenance in regards to fertilizing; these extra nutrients are completely optional, and your plant is bound to do fine without. However, fertilizing regularly will increase the amount of blooms you see, opt for a phosphorus-rich, organic fertilizer and apply it sparingly only during the spring-to-summer growing season.  

Find the perfect balance of light and water

Anthuriums are resilient, beginner-friendly plants for the most part, but even the heartiest of plants may come with challenges. 

The most common issues are related to lighting and watering. If you’re noticing your plant has decreased vibrancy in color on its leaves, or brown spots on its foliage, your plant might be getting too much or too little light. Like many other aroids, Anthurium plants are susceptible to sunburn, so avoid placing the plant in overly sunny spaces like south-facing windows, or too close to a room’s interior. Over-fertilizing can also cause similar symptoms to sunburn, such as large, burn-like splotches on the leaves or crisping brown leaf tips. 

The Queen of Spades Anthurium makes a beautiful addition to any decor.

If you’re experiencing problems with a brand new Anthurium plant, such as yellowing or dropping leaves, it might just be adjusting to its new home. Try to wait it out and let it acclimate, or try adjusting its lighting or watering schedule. 

Anthuriums and pests

Pests can also pose a threat to your Anthurium plant. Common pests include spider mites, mealybugs, scale, and thrips, many of which feed on new growth. To treat pests, give your plant a good soak-through to try to rinse off the insects naturally, but you might also want to utilize a natural horticultural oil or spray, such as neem oil.

How to select a healthy Anthurium

While types of Anthuriums will vary in foliage color and shape, telltale signs of a healthy plant include firm, lush leaves, healthy, odor-free soil, and waxy, vibrant “flowers.” Floppy leaves or drooping stems might be a sign of a fungal infection on Anthurium plants, so make sure the plant isn’t wilted or showing any signs of a pest infestation. 

Buying this flowering plant online as a gift

Anthuriums make excellent gifts, especially as replacements to cut flowers for Valentine’s Day, Mother’s Day, birthdays, or anniversaries. The plants’ colorful blooms last much longer than a generic bouquet does, so your loved one can enjoy greenery year round, as well as recurring pops of color or elegant white. 

Ordering these flowering plants online for direct delivery is a great way to celebrate your loved one’s special day or let them know you’re thinking of them -- as well as make sure the plant arrives healthy, on time, and in bloom!

With Anthuriums, be careful with pets

All anthurium varieties are poisonous if eaten, and the anthurium plant’s sap can cause skin irritation, so keep these beauties out of the reach of pets and children. 

Avoid purchasing your Anthurium from a garden center 

It’s best practice to purchase your plants from a trusted supplier to ensure you’re receiving or gifting the highest-quality plants. Unfortunately, large garden centers and big-box stores tend to overwater their plants, and often aren’t able to keep them in optimal conditions given their large inventory and warehouse-like spaces. 

There are more than 1,000 species in this plant family!

Anthurium is the largest genus in the Araceae family, encompassing more than a thousand species! Some of the most coveted, expensive houseplants on the market today are “rare” Anthuriums, such as the Anthurium Clarinervium. 

A Symbolic Gift

Many types of Anthurium have special meanings or spiritual representations, such as abundance, sensuality, and hospitality. It’s just one of the many reasons why they make a great gift for countless occasions!

Queen of SPADES Anthurium

An elegant, giftable plant that gives colorful, long lasting blooms year-round.