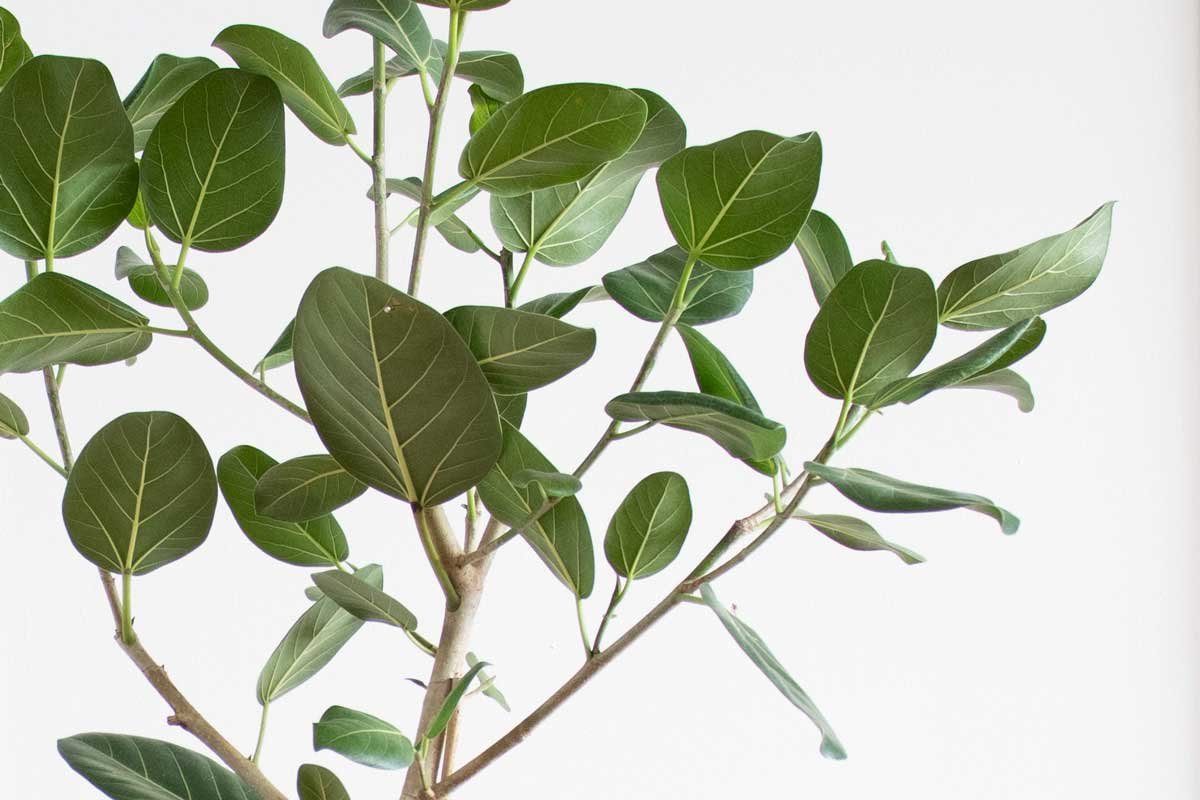
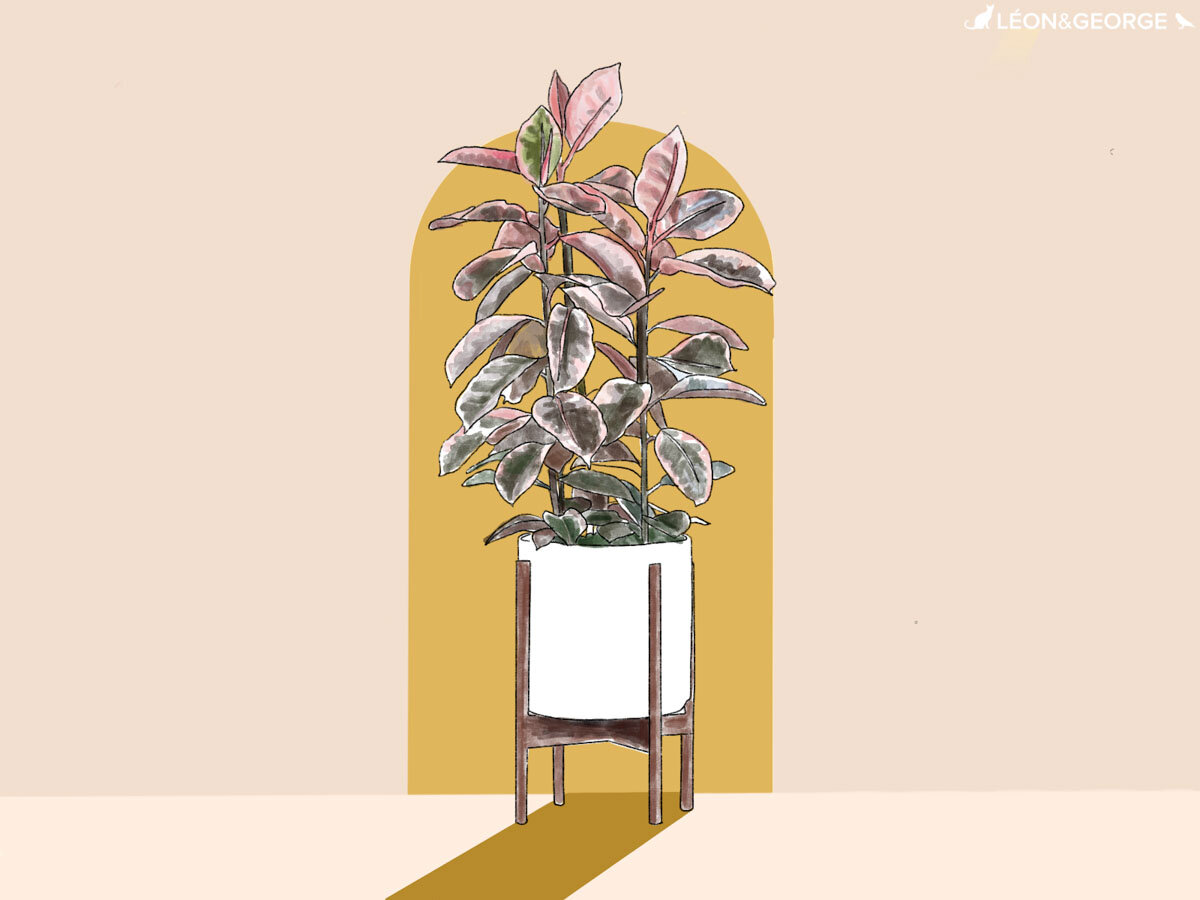
Pink Rubber Tree Care Guide: Everything You Need To Know

Pink Rubber Tree

AKA ficus elastica ruby

A gorgeous variegated version of the burgundy Rubber Tree, the strawberry-colored leaves of the Pink Rubber Tree make this plant a unique addition to any indoor space. But like so many variegated plants, the Pink Rubber Tree can be slightly more sensitive and requires the right balance of light and humidity to thrive. Read on for simple care instructions for the Pink Rubber Tree, including light requirements, watering frequency, and how to troubleshoot common problems you may encounter along the way.

What type of light does the Pink Rubber Tree need?

Pink Rubber Trees prefer plenty of bright indirect light, though they can also adjust to medium indirect light as well. Keep out of harsh direct sunlight as this may scorch their leaves.

How to water your Pink Rubber Tree

The Pink Rubber Tree likes to dry out between waterings — water whenever the top two inches of soil are dry, or about once a week to 10 days. Avoid overwatering, and note that your watering schedule may be less frequent during winter months.

Is the Pink Rubber Tree a fast grower?

During the spring and summer is when the Pink Rubber Tree usually grows the most. It can grow up to eight feet tall indoors. Fertilize your your Pink Rubber Tree 1-2 times per month in the spring and summer with indoor plant food, or foliar feed year round.

Common problems with Pink Rubber Trees

Yellow or pale leaves

Yellow leaves on a Pink Rubber Tree can be common. Keep in mind if it’s just one yellow leaf here and there (and it may drop off the plant), it most likely is just an older leaf that’s on its way out. However, if there are many yellow leaves, particularly at the bottom of the plant, this could be a sign of overwatering. Make sure the top soil of your plant is dry before watering, and also look at the roots to make sure it’s not waterlogged.

If the leaves are pale or not that “pink”, this could be a sign of the plant not getting enough light or warmth. Pink Rubber Trees, like most ficus, do not like changes in temperature or cold drafts. They also do best with loads of bright indirect light.
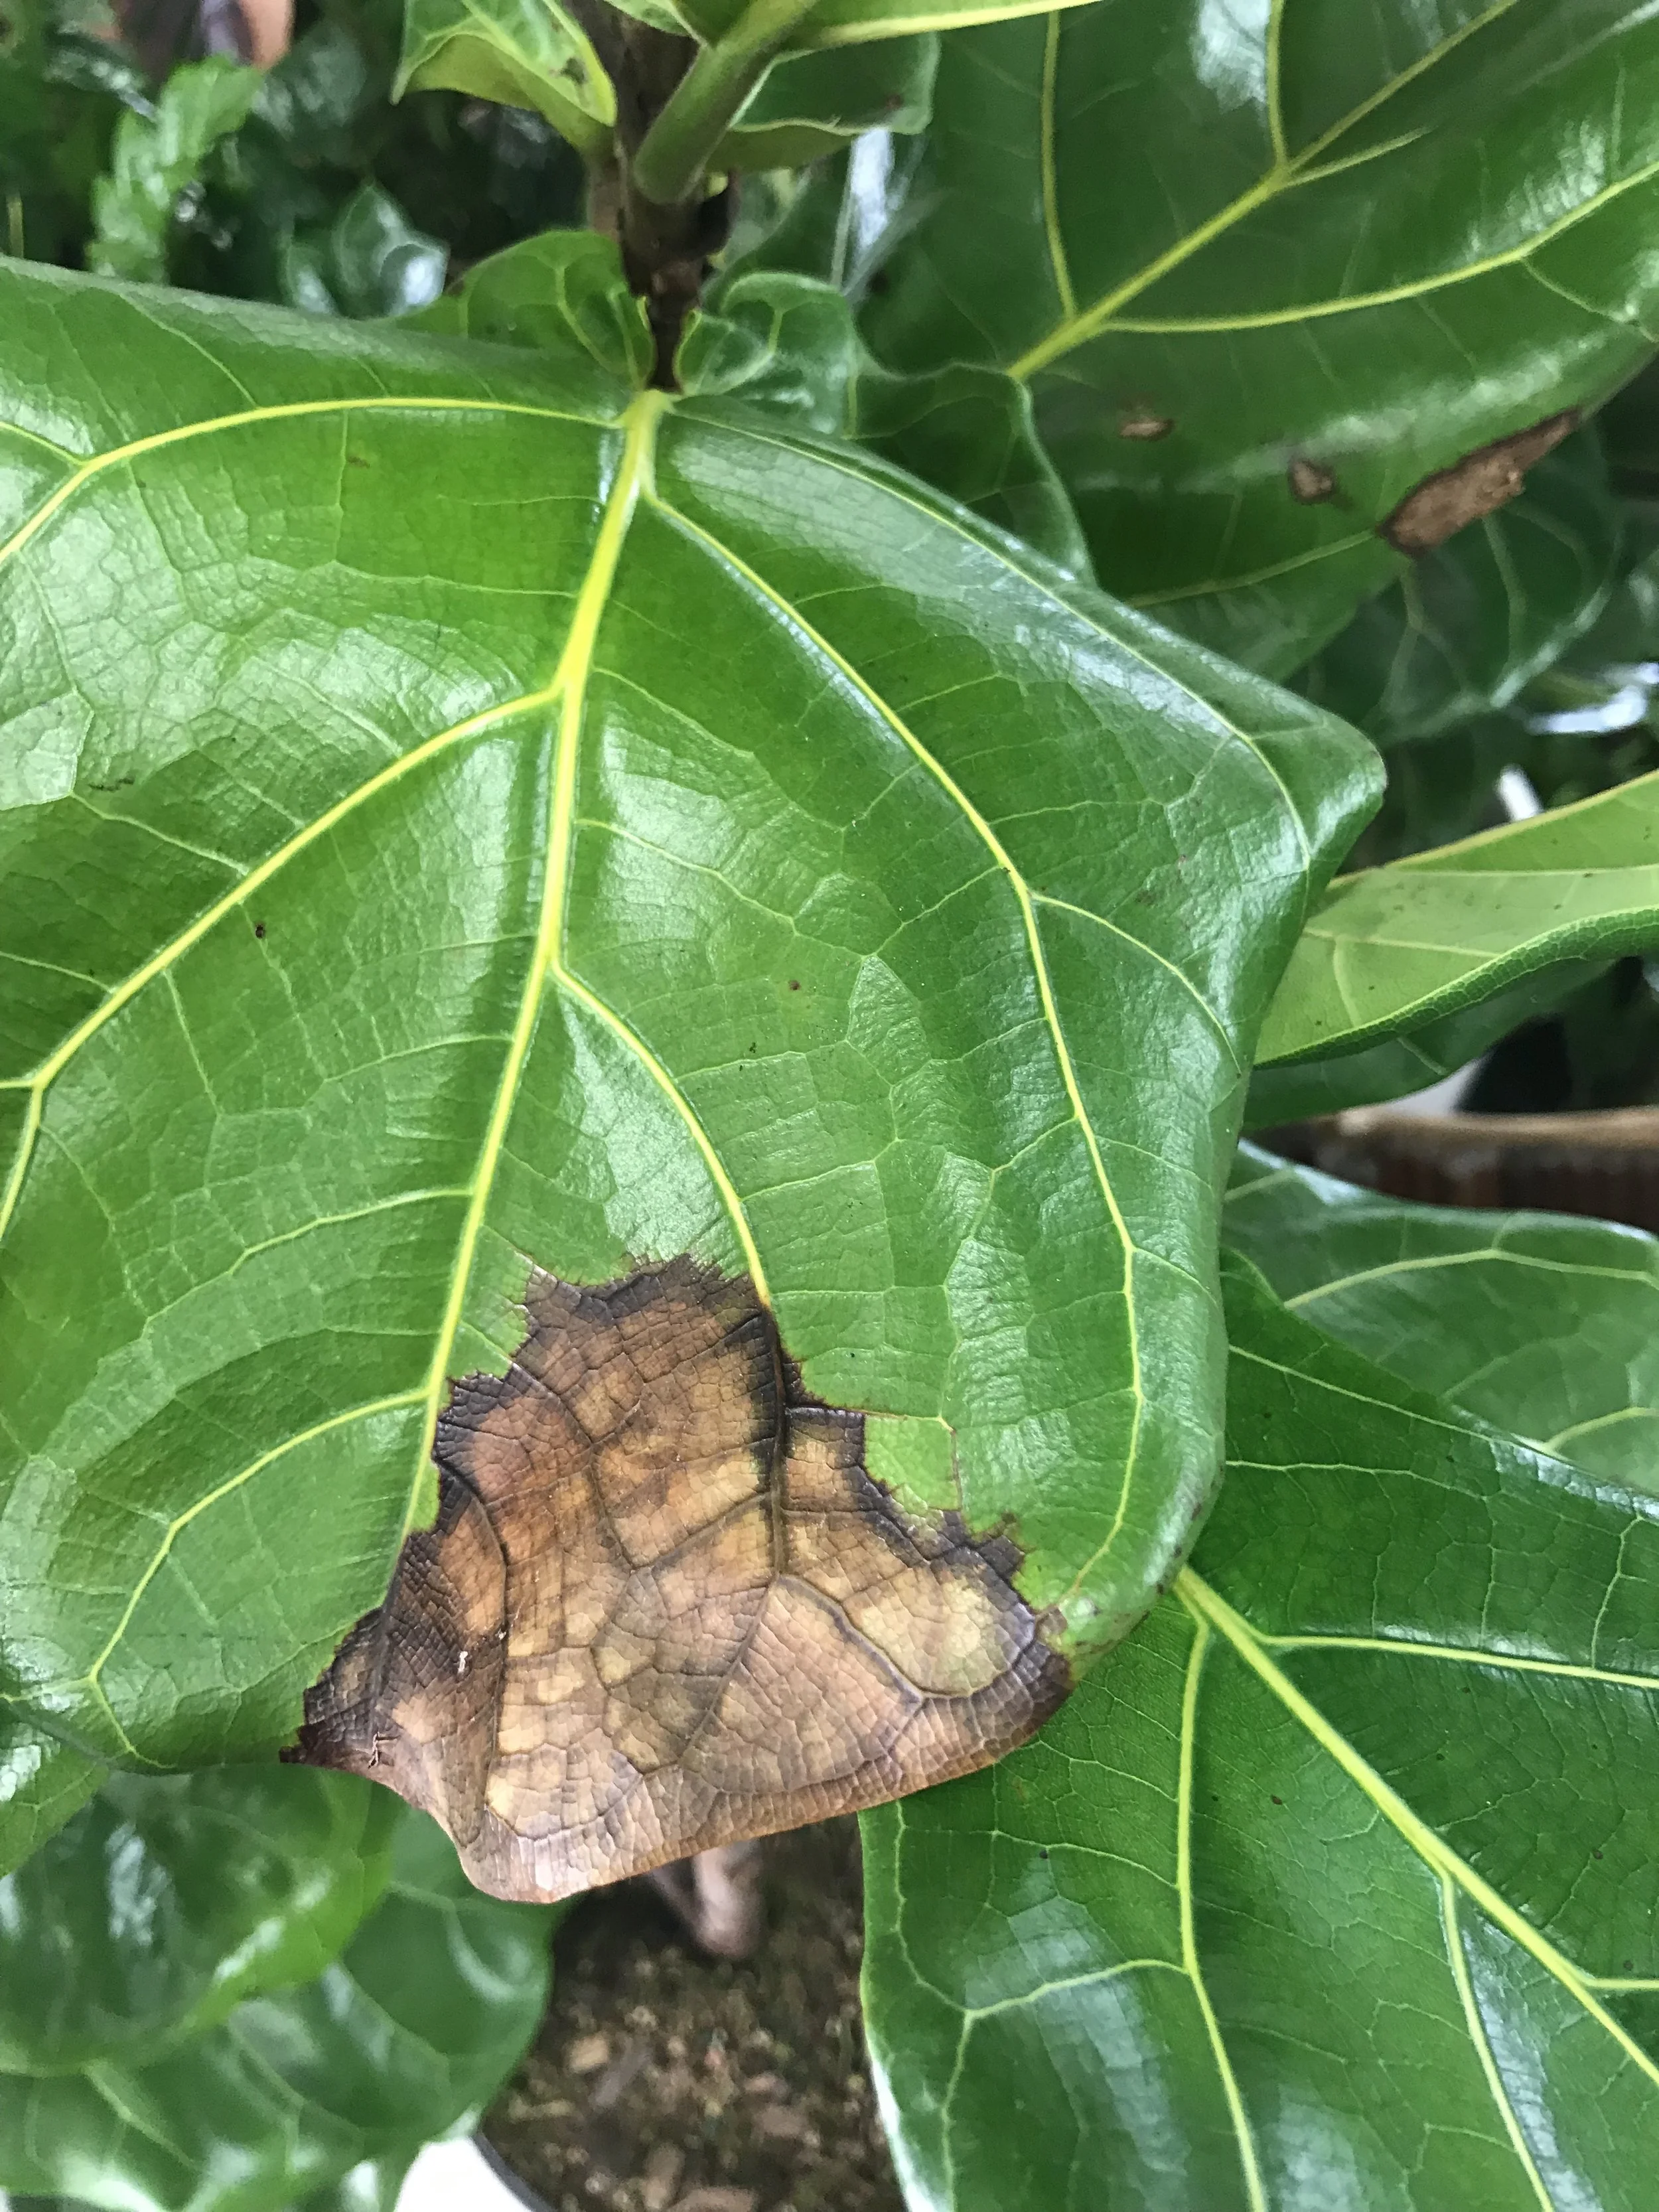
Brown edges

Brown edges on a Pink Rubber Tree leaf usually indicate underwatering, though like many plant issues, there could be other reasons! First, rule out that your plant is not underwatered. One way of quickly assessing the water situation if you are unsure is to lift your plant up. If it feels lighter than you’d expect, it may be very thirsty! Check the soil with your finger — if it’s bone dry, that’s another sign your plant needs a bit more water. If your plant definitely does not seem underwatered, it could also be overwatered, again check the soil, as well as the roots, for accumulated moisture.

Dropping leaves

Pink Rubber Trees like other ficus can be sensitive to change, and it is not uncommon for this plant to drop leaves after being moved. Your plant may also drop leaves if it is subject to temperature changes or drafts. Make sure your plant is moved away from air vents, heaters, or windows with cold air drafts.

How to maintain a beautiful and healthy Pink Rubber Tree

Take care of your Pink Rubber Tree and it will take care of you! Below are simple tips to continue caring for your Pink Rubber Tree over time.

Pruning Pink Rubber Trees

Remove occasional dry or dead leaves all year round, but save any major pruning for the spring and summer months. When pruning your Pink Rubber Tree, wear gloves and protect your floor with newspaper — the sap that leaks out can be sticky and damage floors. Use sharp, clean shears and cut just above the node at a 90 degree angle.

Cleaning Your Plant

Take each leaf between two soft tissue cloths and wipe off the top to reveal a healthy shine. Do this at least once a month to keep away pests and help the plant soak in more light!

How to repot Pink Rubber Trees

Houseplants grow much slower than they would in the wild. Depending on the size of your plant and the density of the roots, this is nice to do every 2-3 years to provide fresh nutrients and encourage new growth.

  • When to repot - if the roots start to become visible outside the soil, it is time to consider repotting.

  • Pot sizing - if you want your plant to grow taller, find a nursery pot that’s 2” in diameter larger than the current pot. If you want your plant to stay the same height, you can reuse the same pot and simply change the soil.

  • Get your hands dirty - spread out newspaper on the floor, remove the plant from the pot and shake off as much of the old soil as possible so that you have clean roots. Place the plant in the center of the pot, add new soil and pat down firmly. Water the soil thoroughly and place the plant in an area with bright indirect light. Your plant will take 2-4 weeks to settle from the shock and adjust to its new home.

How to propagate a Pink Rubber Tree

There are many ways to do propagate Pink Rubber Trees, but water propagation is generally the easiest way to go about it. Follow these instructions to propagate your Pink Rubber Tree:

  • Select a small branch to propagate - Using sharp, clean scissors or shears, cut a two to three inch branch just above a node (a leaf joint) of your Rubber Tree.

  • Place in water - Find a clear glass and fill with water. Make sure only the stem of the branch is submerged, and no leaves are sitting in the water.

  • Place in a bright area and wait! - Avoid any direct sun. If desired, change the water out every few days to keep it fresh. It could take up to several weeks for your cutting to form roots.

  • Transfer to soil - After some time, you will start to see tiny white roots emerging from the cutting. Give it a few more days until the roots have grown, and then transfer to indoor potting soil. A small pot is best — no larger than 6” in diameter.

  • Keep moist - During the first few weeks, or until your plant feels firmly rooted in its soil, regularly water and drain your plant. The soil should be just barely moist to the touch at all times. Once it is rooted, you can begin to water less frequently, whenever the topsoil is dry to the touch.

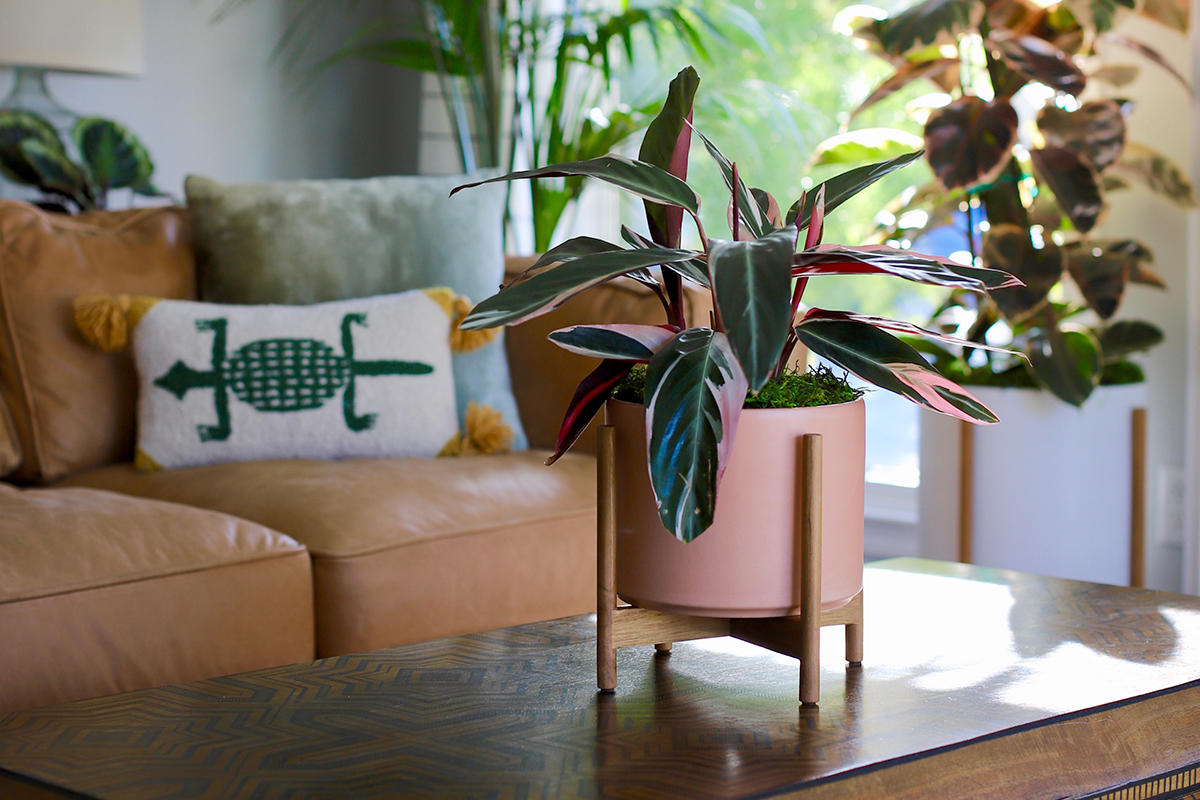
Illustrations by our talented plant stylist, Kailie Barnes.


Indoor plants, potted & delivered

Premium plants paired with stylish pots, plus lifetime plant care support. Order online at leonandgeorge.com

Songs To Grow With: Le Week-end

Welcome to Le Week-end! Warm breezes, gentle spring light and brunch al fresco are all in store. And you don’t have to travel to the south of France to enjoy the luxe light of spring in bloom. Transport yourself to the most idyllic locale your heart desires with the perfect playlist for a weekend to remember. And while you’re at it, you may as well click “Save”, because it’s the ideal tonic anytime your workweek needs a boost!


Indoor plants, potted & delivered

Premium plants paired with stylish ceramics, plus lifetime plant doctor support. Order online at leonandgeorge.com

The Best #LeonAndGeorge Moments Of April
brittaneyelise1.jpg

Spring styling may be in full swing, but so are occasional cat naps during those cozy April showers. From dining room set ups (who’s ready to host again?!) to living room jungles, we love seeing your #LeonAndGeorge moments at home. See which posts our Plant Stylists admired the most this month, and make sure to keep tagging us to show off your style!

Taking cat-napping very, very seriously with the pet-safe Cast Iron Plant.

@emmalwillet

See on Instagram

Gorgeous spring styling by the talented Los Angeles based designer Brittaney Elise. Is there a plant that says “fresh” as much as the Bird of Paradise?

@brittaneyelise

See on Instagram→

We love seeing your plants and pets! Especially when they’re this cute (not just the puppy, the Silver Evergreen, too!).

@danniremender

See on Instagram

Spot the pup! Good luck finding him in this indoor jungle, featuring big beauties like the Bird of Paradise and Kentia Palm. A tastefully verdant living room like this is a dream come true.

@theweekendmixologist

See on Instagram→

Money can’t grow on trees, but if something this cute could bring some good luck, why not give it a try?! This little Braided Money Tree is well taken care of with our new moisture meters (included with all large and XL plant sets!).

See on Instagram→


The 10 Commandments of Monstera Deliciosa Care
Monstera deliciosa care

Oh, the Monstera Deliciosa! She’s been enjoying a place in the spotlight lately, but Monsteras have long been a desirable and iconic plant for stylish interiors. This sculptural plant enjoyed wild popularity from the 1950s to the 1970s, and like most things retro, she is making her mark once more!

Monsteras radiate positivity, playfulness, and an aura of vibrant growth. What many plant enthusiasts don’t realize is that they are also a flexible, easy-going plant that can adapt to almost any environment- so shop with confidence and follow these simple commandments. Your Monstera will be a joyful presence for years to come!

1. A Place Near the Sun 

The Monstera Deliciosa is tropical (native to Central America) so like many indoor tropical plants, they appreciate light and warmth, but don’t need a lot of direct light. Monsteras tend to do best in rooms where they receive bright, indirect light, but they can also adjust to medium levels. Again, they’re low-maintenance! Just be sure not to place your Monstera too close to direct bright sun. As with many tropical plants, this can cause a Monstera’s leaves to scorch.

2. Misty Mornings…In Moderation!

When warmer weather hits, many of us instinctively reach for our Evian atomizers. Your Monstera does not need to be misted, but they enjoy a touch of humidity from time to time. If you would like to bond with your plant through misting, limit misting to once weekly. Misting in the morning will ensure that the plant has time to enjoy the moisture before the temperature drops for the evening. 

3.  Don’t overwater! 

We know, we know— we say this all the time, but don’t overwater your Monstera. Monsteras like to dry out between waterings, so plan on watering your Monstera only when its topsoil is dry. Which brings us to...

4.  Get Used to Getting Dirty!

It’s tempting to want to schedule the things that are important to you (ahem, Google Calendar and constant Zooms.) But going based on a calendar- or a clock- is not the best way to keep track of when to water any of your plants. 

This is where getting dirty comes into the equation. The Monstera Deliciosa wants to be watered only when its topsoil (the top 1-2 inches of soil, beneath the decorative moss) is dry. So check your Monstera by lifting up a bit of its moss, sticking your finger into the top 1-2 inches, and determining whether it is dry or still moist. If it’s moist, hold off on watering until it dries.

leon-and-george-moisture-meters.jpg

MOISTURE METERS

Finally, a moisture meter that actually works. Tested by our very own Plant Doctors, all orders of Large or Extra Large Léon & George plant sets include a moisture meter

$24-$29/pack

5. Ga-Ga for Growth? Monsteras Like to Be Fed!

When the conditions are right, Monsteras can grow fast. And this may or may not be what you’re going for, but if you would like your Monstera to rise to meteoric heights, you can fertilize it 1-2 times a month in the warmer months of spring and summer. You can also feed it using gentle foliar feed (plant food that is misted directly on a plant’s leaves) year round. 

6. Curling Leaves? Consider a Refreshing Shower.

Monsteras will occasionally experience curling leaves if they are not receiving enough water. You can remedy this by giving your Monstera a shower. Just  take it out of its decorative pot (but keep it in the plastic nursery pot, or you’re in for something of a landslide) and place it outside or in a bathtub. Water it copiously, but let the water drain entirely before returning the Monstera to its ceramic pot. 

7. A Little Haircut

It’s normal to feel trepidation about pruning (cutting leaves or stems off of your plant). However, it’s actually great to get in the practice of pruning your plants because pruning offers so many benefits to the plant’s overall health. 

You can safely remove dead or dry leaves from your Monstera year round, by cutting them off at the base of their stem using sharp, clean scissors or shears.

Major pruning jobs (or “haircuts”) should be saved for the warmer spring and summer months, when your Monstera has the most energy to generate new growth. 

Need a little more guidance on pruning your plant? See our step by step guide here.

Léon & George Monstera Deliciosa. Photo by Apt2B.

Léon & George Monstera Deliciosa. Photo by Apt2B.

8. No Holes? No Problem! 

If you notice that your Monstera does not have holes in some of its leaves, don’t worry! This feature can take time. You’ll likely find that when your young Monstera grows up a bit and pushes out new leaves, they’re wonderfully holey. If you love the swiss cheese look and want to encourage more holes, move it to a spot that receives brighter (but still indirect!) light. 

9. Don’t Be Afraid to Repot

Again, the Monstera Deliciosa is a prolific grower. Like a B-52 with a burgeoning beehive, they long to reach toward the light! So don’t be afraid to repot. 

Monsteras are known for exhibiting aerial roots, and some may grow outside of the pot at any point in a Monstera’s life cycle. But when it’s time to repot, you’ll likely see that your Monstera’s stems have grown significantly larger, and their roots have as well. They may appear to flow outside of the pot at this point. 

Follow the directions here under “Repotting” to safely and securely repot your Monstera.

10. Consider Supporting Your Monstera with Stakes

Like your favorite friend after happy hour, your Monstera can get a little floppy. It’s part of her charm! But it can also be controlled. If you’d like your Monstera to grow with a more pronounced vertical climb, you can stake the plant.

Bamboo poles make beautiful stakes, and nurseries and home improvement stores have great options for stakes that blend into the palette of the plant and won’t disrupt the aesthetic of your gorgeous Monstera’s foliage. 

Read our full guide on how to stake the Monstera here.

Celebrate! The Monstera Deliciosa is all about positivity and joy.

In Feng Shui, Monsteras are renowned for bringing good luck (and even money!) to their owner. For guidance on all things Monstera, keep an eye on our blog, which features many posts on this beloved plant variety and is always being updated! 


isaac-leon-and-george-09-2019-0546 (1).jpg

Indoor plants, potted & delivered

Premium plants paired with stylish ceramics, plus lifetime plant care support. Order online at leonandgeorge.com

A Mother’s Day Gift Guide From Our Co-Founder, Léon
Mother’s Day Gift Guide

Bonjour! Léon here, dropping in from Paris to assist our American customers with the gifting occasion that can stump even the most savvy son or daughter: Mother’s Day!

In preparation for this special Spring day, I’ve curated a collection of gifts for Maman. Some of them are French (like me!) some are local to Southern California (where our headquarters resides!) and some are simply dreamy, one-of-a-kind gifts that no Mother could ever forget. (As for our plant sets, they are all three, and sure to thrill Maman’s green thumb!).

So enjoy this list, mes amies, and in case you are wondering, I will never refuse a gift of catnip, dry champagne, or a bit of ripe fromage (as a treat!).

Wary Meyers Mediterranean Fig Candle

I like this American brand, with its aesthetic so reminiscent of the 1970s. All of their candles are simply magnifique, but why not try the Mediterranean Fig Candle? It’s a vacation in a (recycled glass) jar, sure to remind Maman of that trip she took to Saint-Tropez back in the day. If you’re lucky, she might even tell you the story of what happened there!

Officine Universelle Buly Alabaster Set

Officine Universelle Buly is more than just a Parisian iconoclast (and it takes one to know one). They carry some of the most rare and luxurious home interior scents around! With a whole flock of unique fragrances from which to choose, the alabaster set is an elevated alternative to incense or diffusers. I guarantee that your Maman will be the only one on her street in possession of this olfactory treasure! (That is, until they inevitably explode in popularity).

Léon & George Ruby Ficus

Your Maman is a rare jewel, and deserving of a rare and precious gift! Treat her to the Ruby Ficus. Its sangria-hued foliage and lush texture make the Ruby Ficus truly one-of-a-kind among indoor plants. But don’t wait, readers, because this enchanting variety is Limited Edition! Paired with our hand-finished, high-fire ceramic planter and overflow saucer.

Erica Tanov Lovebird Hand Stitched Cotton Quilt 

George and I have special places in our hearts for San Francisco, and we never miss the latest release from the beloved Bay Area designer, Erica Tanov. Her cotton is as soft as a cloud, and this limited run of bedding featuring her iconic Lovebird print will sell out soon, so now is not the time to catnap! Snap up a piece of this storied textile now— it’s even available in luxe tablecloths and napkins. 

House of Botanicals Watering Can & Mister 

If your Maman is anything like mine, her mantra may be “Simplify, simplify!” And with a to-do list that’s always chock full, your mother will appreciate a treat that’s both streamlined and charming. The House of Botanicals Watering Can & Mister is available in classic black and Robin’s egg blue, and is outfitted with both a traditional spout and a spray nozzle for misting. A perfect addition to any of the plant sets that George and I have painstakingly curated for you, mes amies.

OLO Cedar & Rose Perfume Oil   

What is it about the scent of cedar that’s so... transcendent? With its dreamy accord of earthy, arboreal cedar paired with an exceptionally dewy and natural rose note, we think that OLO’s Cedar & Rose is a perfect fit for the force of nature that is Maman. 

Jungmaven Hemp Napkins and Tablecloths

J’adore Jungmaven, and their stylish and elegant hemp goods! Did you know that their hemp has been sustainably sourced by the same partners for over 20 years? Wildly (no pun intended) more sustainable than cotton, hemp is a renewable resource. The hemp-centric Jungmaven is a SoCal mainstay, and their gorgeous tablecloths and napkins make it a no-brainer to say “Environment, Je t’aime,” and choose hemp! 

Léon & George Zanzibar Gem

Get dear Maman a plant that will care for itself! And while you’re at it, why not pair it with our charming Nouvelle planter, hand-finished and made of super-strong stoneware? The Zanzibar Gem is a delight: it needs to be watered only every couple weeks (when the top 1-2 inches of soil are dry) and it doesn’t have high-maintenance light requirements- simply provide it with bright-to-medium indirect light, and it will thrive. 

leonparis.jpg

Léon is the co-founder of Léon & George. Along with her feathered business partner, George, she helps reconnect people with nature by offering stylish indoor greenery that fits busy lifestyles and enhances indoor spaces. Léon resides in Paris, France.


fiddle-bush-white-stand-nude-leather-chair.jpg

Indoor plants, potted & delivered

Premium plants paired with stylish ceramics, plus lifetime plant care support. Order online at leonandgeorge.com

Kentia Palm Care Guide: Everything You Need To Know

The Kentia Palm

AKA howea forsteriana

Tall, full, and majestic, the Kentia Palm is known for its lush fans of foliage and tropical island vibes. An excellent air purifier, this popular houseplant is a slow grower which blossoms new fronds from the center of its narrow trunk. Though the Kentia Palm is a relatively easy plant to care for, it does require a certain set of conditions to thrive. Read on to find simple care tips and solutions for how to successfully care for and grow a Kentia Palm.

How much light do Kentia Palms need?

This plant prefers medium to bright indirect light, but can adjust to medium-low light. Keep in mind that it will scorch in direct sunlight.

How to water your Kentia Palm

Keep the just slightly moist — water when the top 1-2 inches of soil is dry. When watering, take care not let the plant become oversaturated or waterlogged, and regularly mist to boost humidity levels.

How fast does the Kentia Palm grow?

The Kentia Palm is a slow grower and will take many years to reach the majestic heights it’s known for. Fertilize your Kentia Palm 1-2 times per month in the spring and summer with indoor plant food, and consider foliar feeding year round.

Common problems with the Kentia Palm

Yellow leaves - overwatered

  • Symptom - yellowing leaves

  • Cause - too much water, potential root rot

  • Remedy - Allow the soil to air out (aeration could help for minor cases) or change the soil entirely to reduce the risk of root rot. You may cut the yellow leaves off at the base.

Brown tips- underwatered

  • Symptom - leaves turning yellow or brown at the tips

  • Cause - most likely underwatering, but could also be a result of too much fertilizer

  • Remedy - Be sure to keep a consistent watering schedule to ensure the plant’s soil does not dry out too much between waterings. You may also mist the plant weekly to boost moisture levels, and make sure it is not placed near any air vents, heaters, or air conditioners.

Heavily drooping leaves - overwatering or underwatering

  • Symptom - fronds drooping more so than usual

  • Cause - overwatering or underwatering

  • Remedy - Depending on your watering schedule, this could be either! If you suspect it’s underwatering, take your plant out of its decorative pot and place outside or in a bathtub or shower to give it a deeper watering, allowing all the roots to drink evenly. For overwatering, follow the instructions above.

How to maintain a beautiful and healthy Kentia Palm

Take care of your Kentia Palm and it will take care of you! Below are simple tips to continue caring for and growing your Kentia Palm over time.

Pruning your Kentia Palm

Kentia Palms don’t love to be tampered with too much. If you have yellowing or old fronds, you may cut them at the base with clean, sharp pruning shears. Otherwise, avoid pruning.

Cleaning your plant

Take each frond between two soft tissue cloths and wipe off the top to reveal a healthy shine (also helps the plant soak in more light!). Regularly misting will also help to keep your plant clean and dust-free.

How to repot a Kentia Palm

Avoid repotting the Kentia Palm unless absolutely necessary (risk of root rot, for example). Kentia Palms have delicate roots and do not like to be repotted.

  • When to repot - Only when your plant is at risk of root rot

  • Pot sizing - if you want your plant to grow wider, find a nursery pot that’s 2” in diameter larger than the current pot. If you want your plant to stay the same size, you can reuse the same pot and simply change the soil.

  • Get your hands dirty - spread out newspaper on the floor, remove the plant from the pot and shake off as much of the old soil as possible so that you have clean roots. Be gentle with the delicate root ball! Place the plant in the center of the pot, add new soil and pat down firmly. Water the soil thoroughly and place the plant in an area with bright indirect light. Your plant will take 2-4 weeks to settle from the shock and adjust to its new home.

How to propagate the Kentia Palm

The only way to propagate a Kentia Palm is by germinating the seeds. However, this is incredibly difficult to achieve indoors, and unfortunately, propagating is best left to growers.

Illustrations by our talented plant stylist, Kailie Barnes


kentiapalm.jpg

Indoor plants, potted & delivered

Premium plants paired with stylish ceramics, plus lifetime plant care support. Order online at leonandgeorge.com

The Ceramic Pot Made Simple: Fine Materials Meet Alluring Details

What makes a ceramic pot such a high-value object? It’s not just the sensation of luxury and permanence that they imbue an environment with. Functionality and quality are also key, for reasons both pragmatic and aesthetic. 

At Léon and George, we believe that stoneware ceramic pots are the natural choice of vessel with which to pair our plants, and we’d love to tell you why. The history of ceramics is fascinating, and we think you’ll agree that it takes more than a little alchemy to craft the perfect ceramic pot for a beloved plant.

A Little History

Ceramic was first fired in high-heat kilns as long ago as the 1700 BCE in China, during the Shang dynasty period. The pottery from this period was stunning and surprisingly modern— from geometric vessel shapes to incised etching and vibrant glazes, this early pottery feels almost uncannily aligned with current trends. True style never expires, we suppose! As history progressed, ceramics evolved, reflecting the aesthetic trends of their era and serving a host of practical functions. 

Large glazed ceramic planters

The Material World

Léon and George pots are constructed of stoneware, a mixture containing predominantly clay, as well as kaolinite, mica and quartz among other minerals. These ingredients, combined with the process of firing the clay in super-high heat, combine to ensure that stoneware is exceptionally strong, while still being able to maintain stunningly vivid and delicate glazing. 

Stoneware and high-fire clay feature superior waterproofing, and high-fire clay pots are extra-hard and durable. These vessels are resistant to cracking and chipping, and gleam with a gorgeous finish. 

Details, Details

The devil’s in the details, and ceramics have long inspired the creative imagination. From the opulence of porcelain (Miessen, Limoges and so much more) to the fantastically functional and moderne stoneware ceramics of the Mid-Century (we love Gainey, Bauer, Heath and of course Homer Loughlin’s Fiestaware) the lines and shapes that make up a ceramic pot are exceptionally deliberate design details.

Shop our handmade ceramic planters here.

Shop our handmade ceramic planters here.

Story and Sustainability

A well-loved object is a talisman, with a value that exists outside of the world of currency and cost. Quality ceramics are made to last (and Léon and George’s pots are no exception). The process of creating ceramics is deeply connected with the earth— after all, at their essence, they are clay. So sustainable manufacturing practices are paramount for a valuable ceramic pot: a luxury, but also a necessity. 

We’re design enthusiasts here at Léon and George, and the meeting of function with form is a constant obsession for us. So we hope you’ll take a look at our collection of hand-glazed, hand-finished ceramics, crafted in our proprietary lightweight and waterproof stoneware.


IMG_0689.jpg

Indoor plants, potted & delivered

Premium plants paired with stylish ceramics, plus lifetime plant care support. Order online at leonandgeorge.com

Behind The Design: Nouvelle Ceramics
Nouvelle-trio-hero-3.jpg

Where classic meets modern you’ll find the newest member in our family of premium ceramic planters: the Nouvelle.

Light, playful, and feminine, the Nouvelle ceramic is a fresh update on the classic bell planter shape first popularized in the 1960s. When we explored the idea of a bell-shaped planter, we looked to that decade, of course, for inspiration.

nouvelle grid.jpg

What came to mind was both vintage and modern, playful but chic, and something of the je ne sais quoi style of 1960s Paris, a city where much of our roots lie.

But the initial sketches of Nouvelle began to tell a different story: her delicate rounded curves transported us outside the grids, chaos, and confines of urban life, and into the peaceful surroundings of southern France during that same time…

unknownsource.jpg

From impromptu road trips to Saint-Tropez to sun-soaked weekend retreats in the countryside, Nouvelle was born out of the relaxed aesthetic of 1960s Mediterranean life.

birds_nest_nouvelle.jpg

Say bonjour to the enchanting and playful Nouvelle, and discover the collection of ceramics now available with all medium plant sets.

Copy of Untitled.jpg
How to Care For and Grow Your Lady Palm
How to care for Lady Palm

Unique and dramatic, the Lady Palm is a head-turning statement plant that brings a touch of tropical vibes to any space she graces. Suitable for many conditions and requiring little upkeep or maintenance, this slow growing beauty is a great choice for all types of plant parents. Read on to learn how to care for the Lady Palm and keep her glowing over time.

How much light does the Lady Palm need?

The Lady Palm prefers bright indirect light, but also does well in medium levels of light. She can easily adapt to low or artificial light but will grow very slowly in these conditions.

How to water your lady Palm

Regular watering is virtually the only maintenance required for Lady Palms. Water your Lady Palm once a week or just enough to keep the soil evenly moist but not soggy. While the Lady Palm prefers a humid environment, she will withstand drought relatively well.

How fast does a Lady Palm grow?

The Lady Palm is a slow grower, and takes many years to reach taller heights. All new growth will fan out from a clump of woody stems at the base. Fertilize your Lady Palm once or twice a month in the spring and summer, always using half the recommended dose for indoor plants.

Common problems with the Lady Palm

Brown tips

Brown tips in the Lady Palm are often the result of conditions being too dry. This could be the humidity levels in the plant’s environment, or it could be an issue with watering. Check the soil — if it feels very dry, try watering more frequently to ensure it stays evenly moist. Mist your plant regularly or use a humidifier to increase humidity in the plant’s environment.

Yellow leaves

It is not uncommon to see yellow leaves on the Lady Palm, especially when it receives very little light. Keep in mind that yellow leaves are not always a sign of overall plant health, and it may just be their time to go. Yellow leaves may also indicate a lack in nutrients (fertilizer). As a slow grower, the Lady Palm needs little fertilizer, but it is still recommended to fertilizer 1-2 times per month in the spring and summer.

How to care for Lady Palm rhapis excelsa

How to maintain a beautiful and healthy Lady Palm

The Lady Palm requires little maintenance to keep it glowing over time. Read up on simple care tips to maintain its freshness, beauty, and overall growth.

  • Pruning - As mentioned above, yellow leaves will commonly appear towards the bottom of this plant, especially if it receives little natural light. Remove these leaves regularly: doing so will give your plant more energy for new growth!

  • Cleaning - The leaves of your Lady Palm will collect dust build up over time. To ensure it soaks in as much light as possible, regularly clean the leaves with a damp cloth and even better, a mild soap, which acts as a natural pest repellant.

How to grow and repot the Lady Palm

  • Growing - Lady Palms are slow growers— and this is part of what makes them so special! During spring and summer, fertilize once a month, and use half the dose recommended by regular indoor plant foods.

  • Repotting - The Lady Palm will need repotting every three to four years, but you do not necessarily need to increase the pot size. The main benefit of repotting is to give your plant fresh nutrients in the soil. Here’s how to repot your Lady Palm:

    • Remove the plant from its plastic nursery pot and shake off as much soil as you can from the clump of roots. “Tease” the root ball by gently pressing it to loosen compacted soil in the root system. Fill the plastic nursery pot about halfway with fresh indoor potting soil (you may use the same one as before, or size up if you’d like your plant to grow larger) and place the root ball inside. Surround with more soil, filling to the top and pressing down on the soil with your hands. Gently water the soil thoroughly. You’re done! Be sure to keep the soil just moist to the touch for the first several weeks to avoid any shock the plant may experience from repotting.


isaac-leon-and-george-9-3-19-3x2- (1).jpg

Indoor plants, potted & Delivered

Premium plants paired with stylish ceramics, plus lifetime plant care support. Order online at leonandgeorge.com

The Best #LeonAndGeorge Moments Of March
modernhousevibes.jpg

Spring is here and with it the urge to open the windows, let the fresh air in, and roll up our sleeves for a bit of spring cleaning. Of course there’s nothing quite as fresh as a living, breathing, and air cleaning plant! See how our customers are styling their homes and freshening up their spaces with their favorite #LéonAndGeorge plant sets this spring!

Who said spring had to be bright florals? A gorgeously moody celebrity makeover for @caitylotz, featuring both the Rubber Tree and Red Congo.

@brittaneyelise

See on Instagram

If this isn’t t he cutest photo of our Monstera ever taken, we don’t know what is.

@poppyonperry

See on Instagram→

Her caption states it perfectly: wishing spring into existence with the Zanzibar Gem.

@rebekah_bailey

See on Instagram

Acing the accent game with an adorable Pilea Peperomiodes, the perfect little dose of bright spring vibes.

@modernhousevibes

See on Instagram→

There’s never a bad time for a home office makeover, especially with an extra tall Snake Plant serving as the perfect anchor for this minimalist space.

See on Instagram→


Where Are The Splits On My Monstera?
Monstera no holes

Monsteras With No Splits: What Gives?

This stylish and iconic plant from the art deco era has made a comeback in a big way and is more popular than ever. Though extremely beautiful, it can be picky and quickly expresses any neglect it might encounter.

One of the most common questions we get with this plant is around the splits in its leaves: what causes them, and why do they sometimes not appear? Rest assured that there’s absolutely nothing wrong with a Monstera with no splits, and know that most likely your plant does not have splits either because it is too young or because it does not get enough light. But let’s dig a little deeper to learn more.

Why Do Monsteras Have Splits?

The splits in the leaves of the Monstera Deliciosa are a naturally occurring feature called fenestration. There are many different theories around what causes fenestration but the most likely one is that the plant creates these holes in the leaves to allow more light to pass through to the lower leaves on the plant.

Why Won’t My Plant Produce Holey Leaves?

Have you ever seen a small or young Monstera? Most likely most of its leaves did not have holes on them. You may have even not recognized this plant as a Monstera! Monsteras grow leaves with more holes as they mature, so it’s perfectly normal for a young plant to not have any.

What about those enormous leaves with many holes? To accomplish this feat, your plant will need plenty of bright indirect light. Often when a Monstera is showing little to no holes, it’s because it’s not getting enough light. Other signs that your plant might need a little more light is if it looks leggy and has lost its “bushy” look, or if it’s wilting or showing signs of malnourishment.

Ready to take a deeper dive into caring for and growing your Monstera Deliciosa? Check out our complete care guide with repotting, pruning, and more, or have a quick read through the 10 commandments of Monstera care!


Monstera Deliciosa

A fabulous statement plant with sculptural, swiss-cheese foliage and a low-maintenance disposition! The Monstera Deliciosa is an ideal easy-care plant for a joyful, textural space.

Overwatering vs. Underwatering (and how to treat both)
Overwatering vs. underwatering

How to tell the difference between an overwatered and underwatered plant

Improper watering is the leading killer of houseplants. And if you have a variety of plants in your indoor jungle, understanding what watering techniques work for each plant can be a real challenge - especially since symptoms of overwatering and underwatering can look very similar. Here are some general things to watch out for to determine if your watering needs adjustments.

Overwatering vs underwatering

Signs of Overwatering:

Browning edges can indicate too much water. A plant pushes water through to the edge of its leaves, and if given in excess, this can cause veins at the edges to burst, which leads to browning.   
Wilting can go both ways, plants wilt when they’re thirsty and when they’re overwatered. If you notice wilting, check the moisture of the soil.

Pests are another sign of overwatering as many insects thrive in damp places. Check for pooling water underneath your plant.

How to treat overwatered plants

Severely overwatered plants generally require a soil change. Plants that have been gently overwatered may dry out in the right conditions (think warm and bright space!) but if you at all suspect root rot, then head here and follow these simple instructions for changing your plants soil (and treating root rot, if necessary).

Overwatering vs underwatering

Signs of Underwatering:

Drooping leaves that look completely lifeless can be a sign of underwatering. 

Soil pulling away from the outsides of the pot is another indicator that your plant may be underwatered. If you notice this happening, try shortening the length of time between waterings.

Drying out too quickly could mean that your plant may need to be repotted. If your plants’ pot is too small to support the amount of water it needs to thrive, this can inhibit future growth and be detrimental to your plant in the long run. Consider repotting your plant after the first year of ownership.

To keep things simple, water your plant the same amount each week - about 2 cups for plants 2-3ft tall and 3 cups for plants 3-6ft tall.

Keep plants happy and healthy by observing and listening to what it is they’re trying to tell you. And remember, the amount of water your plants need will change depending on the season and the conditions in their environment.

How to treat underwatered plants

If your plant is severely underwatered, the best the you can do is practice a little “bottom watering”. Bottom watering is allowing the plants to drink from the bottom up, as much as they want, for up to 24 hours. In addition to this, you may also water over the soil. Above all, you want to make sure the plant has plenty of time to drink, as a regular watering for underwatered plants often results in the water quickly running through dry soil, not allowing the roots time to drink up.

Here is a simple guide to bottom watering. If you think your plant is dead or almost dead, rest assured that it most likely will be easily revived!


Indoor plants, potted and delivered

Premium plants paired with stylish ceramics, plus lifetime plant care support. Order online at leonandgeorge.com