Posts in Plant Care
Can Air Conditioning Damage Houseplants?
N’Joy Pothos

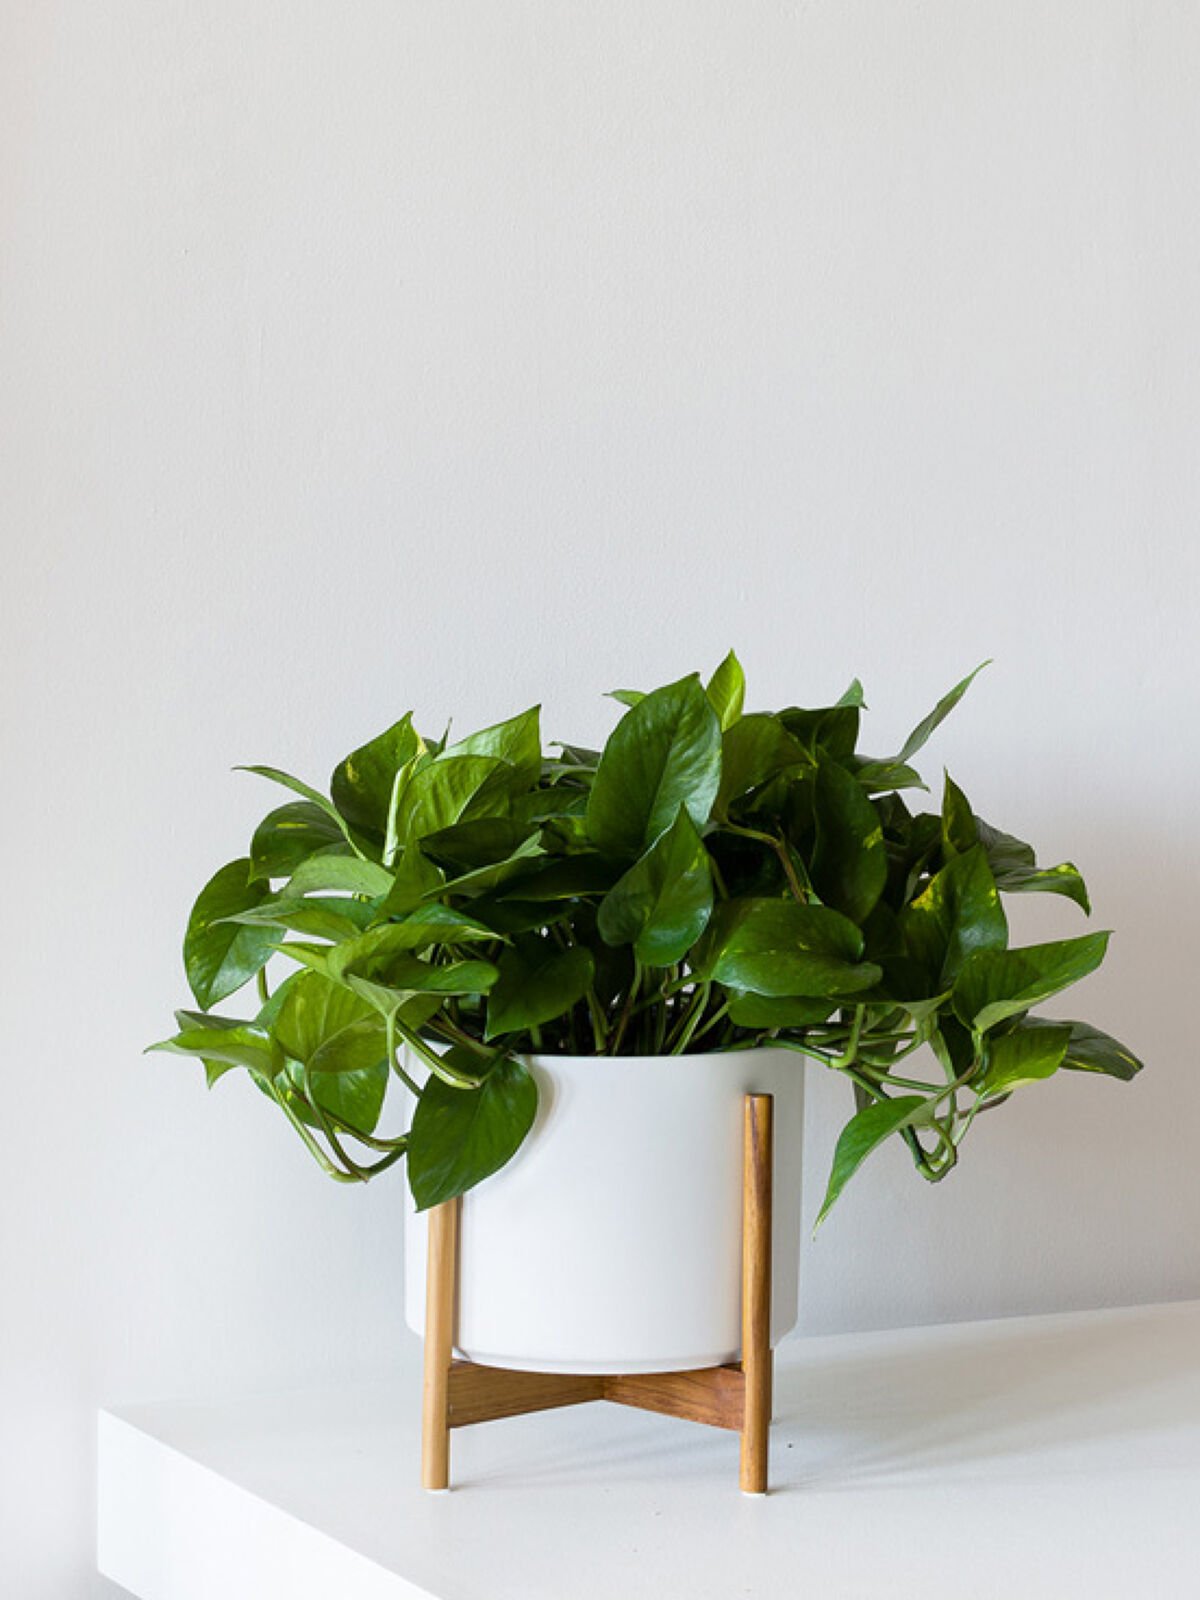
The N’Joy Pothos enjoying a refreshing summer drink!

While ACs so pleasantly cool down our indoor spaces, they also remove warmth and humidity that our plants need and crave. Most indoor plants prefer temperatures between 65-75ºF, any extremes above or below can affect your plant's happiness and health. In addition to balmy temperatures, many common houseplants hail from tropical regions where humidity is not lacking, and unfortunately, air conditioning is the nemesis of good humidity! Follow these easy steps to keep your plants happy and healthy all summer long!

  • Air drafts - check for chilly air blowing directly on your plant. Consider temporarily moving your plant to a new spot or another room to protect it from the drastic changes in temperature.

  • Humidity - offset the dry air created by air conditioners and bring some humidity back to your plant by regularly misting its leaves when the air feels dry.

  • Watering - dry air also causes your plants to be thirsty and drink more water. Check the soil more frequently for potential changes in its watering schedule.

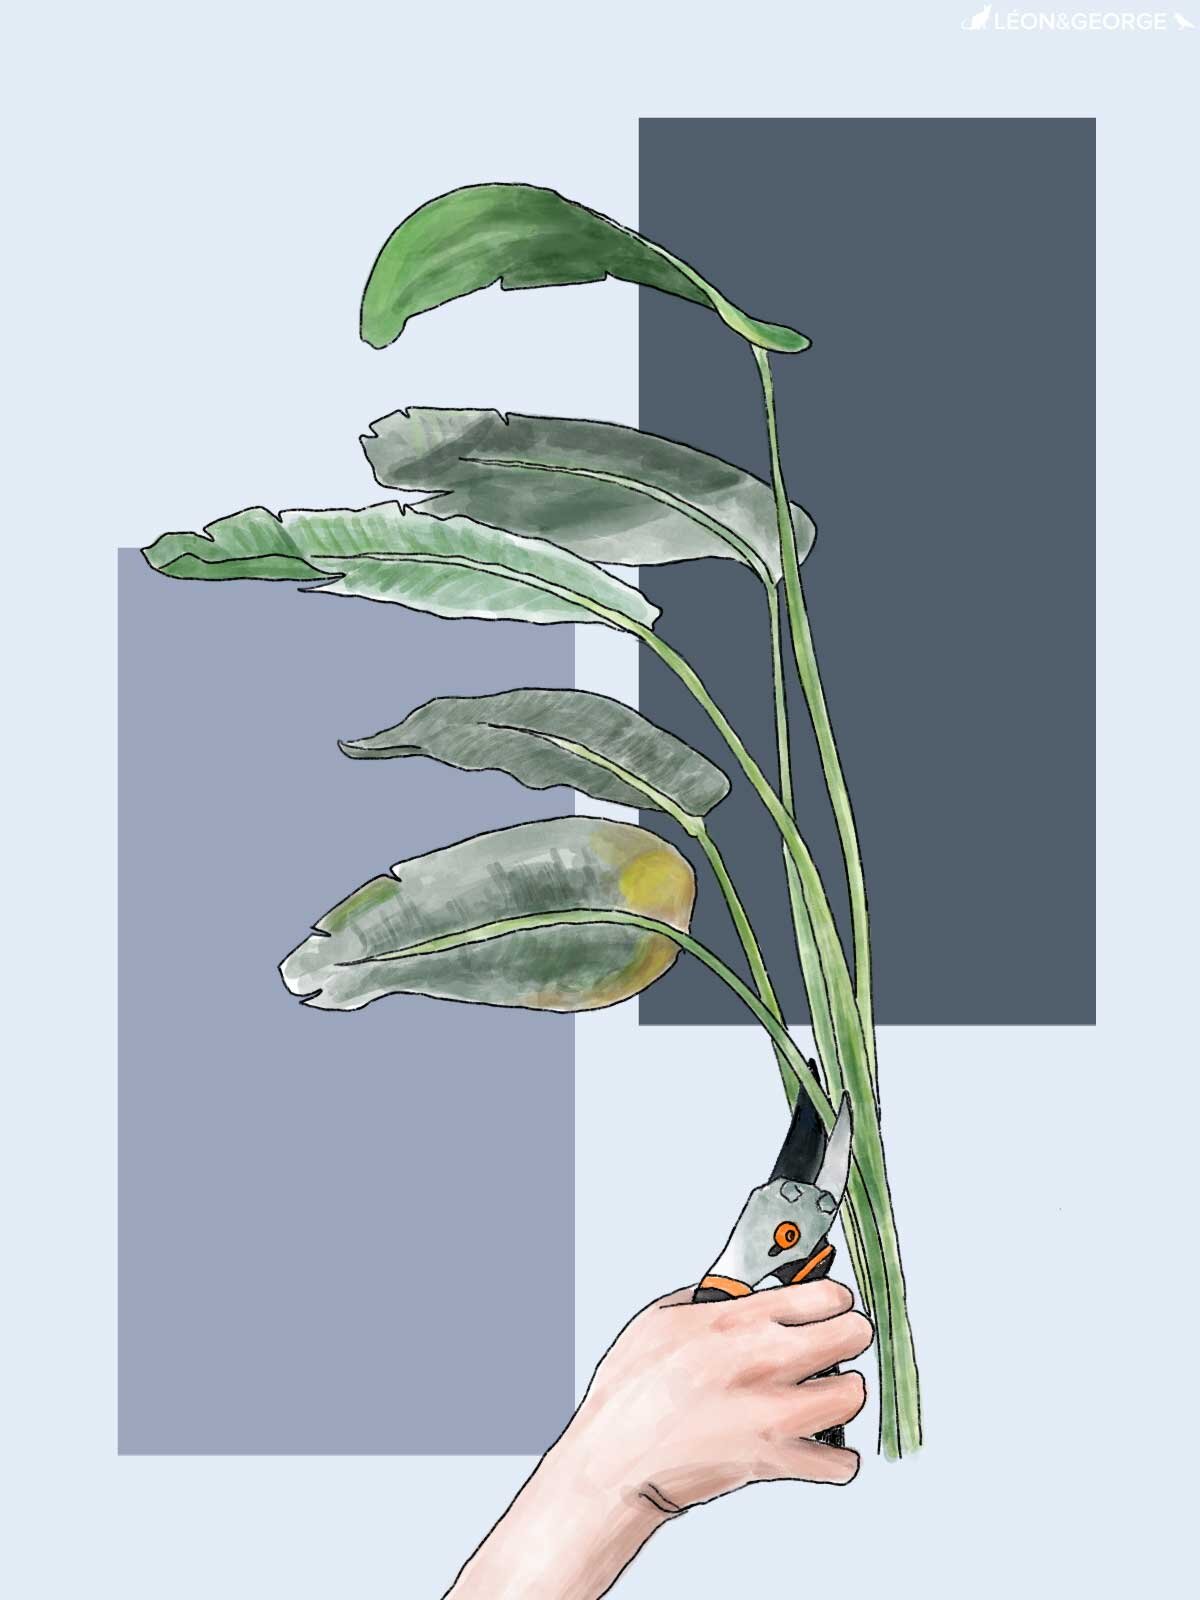
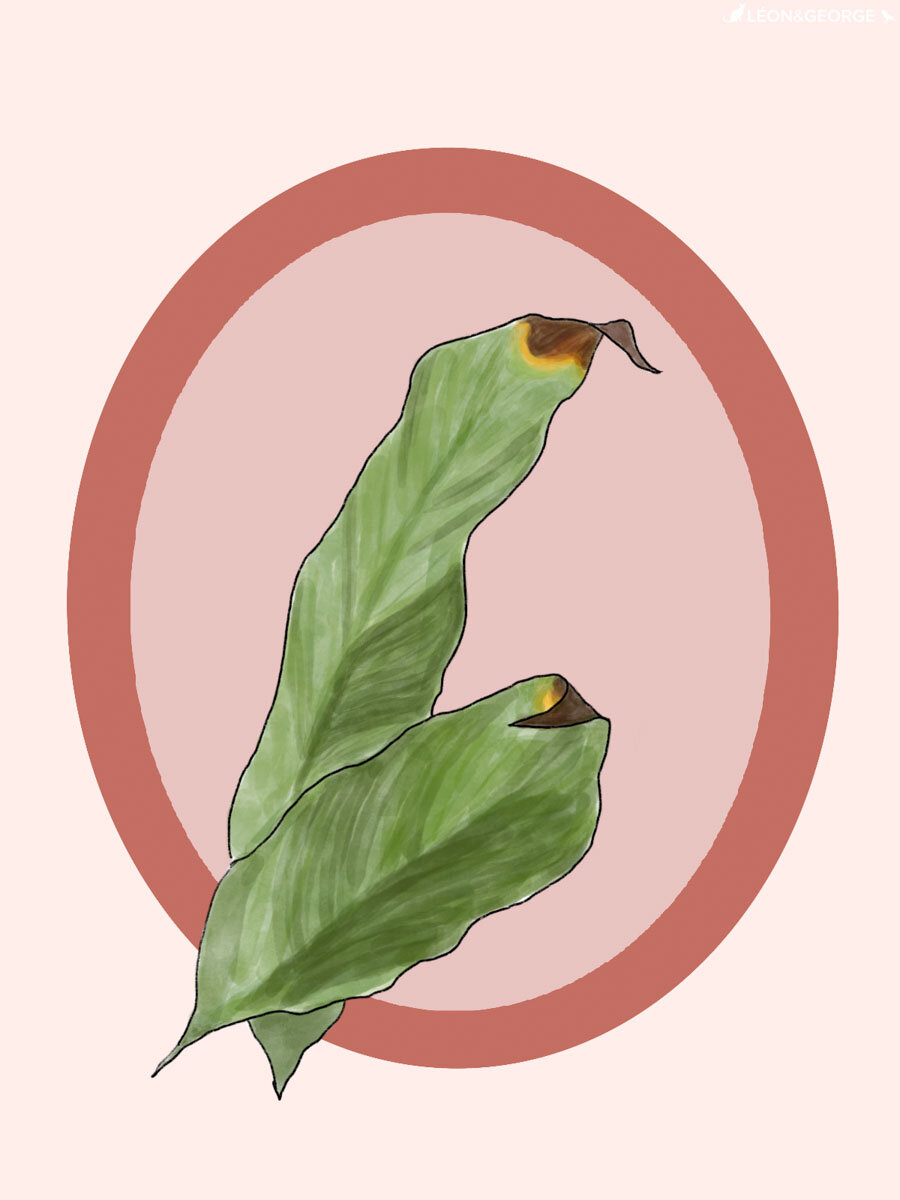
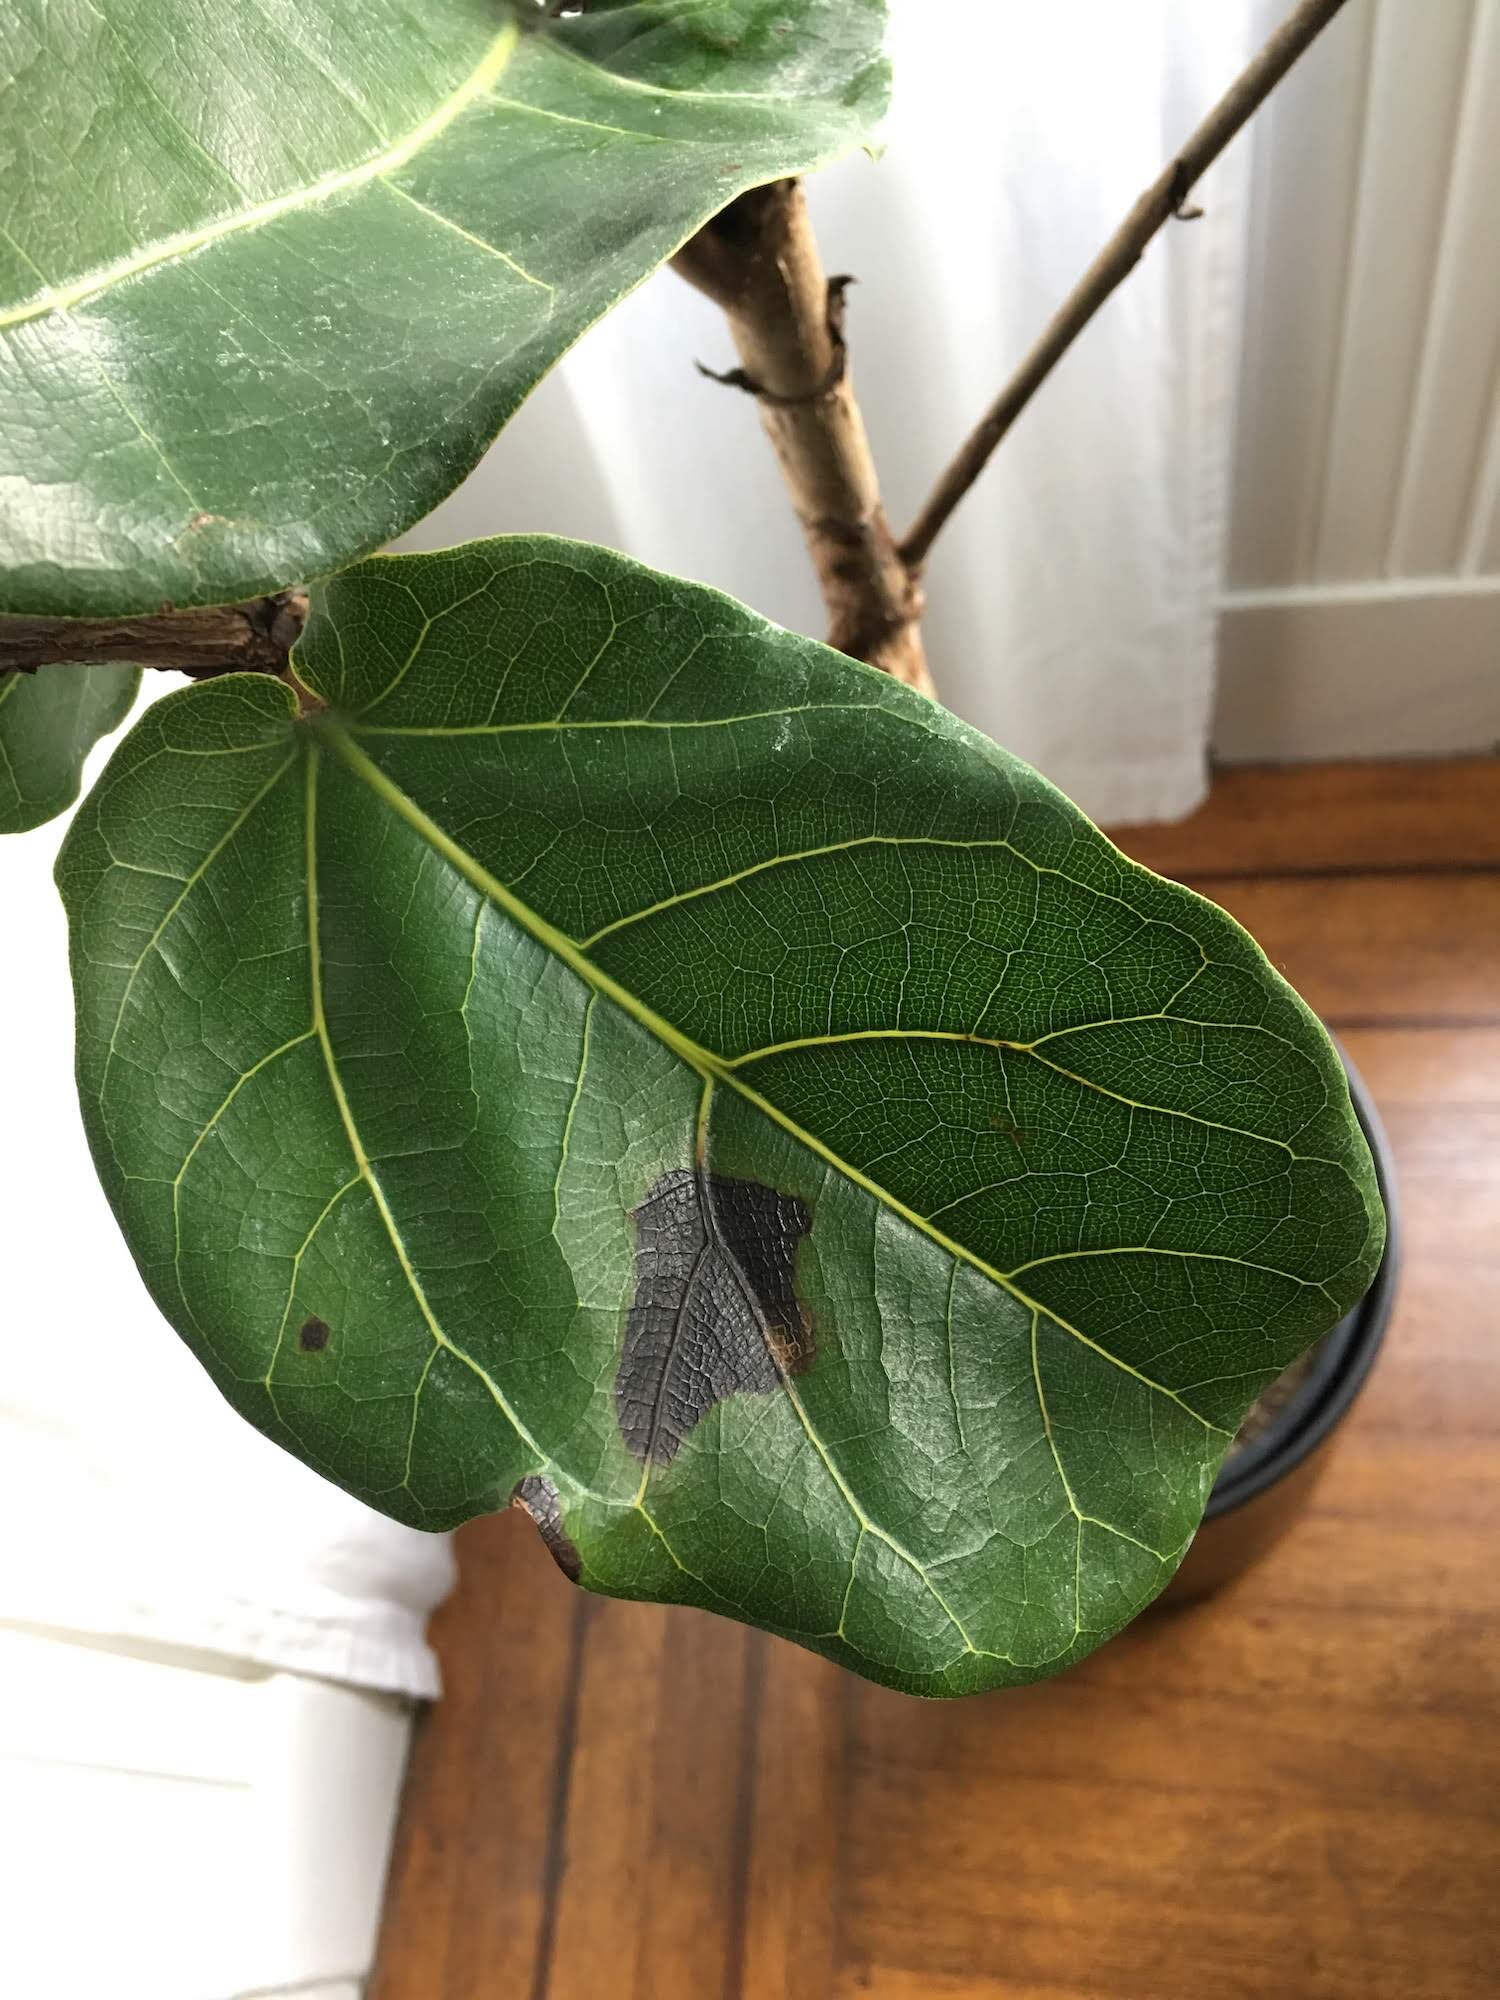
Look out for fading or wilting leaves as this may be a sign of a plant's unhappiness with its conditions. You can safely remove these leaves by clipping them close to the root, and follow the steps above to re-balance its comfort. Seeing other signs of the summer blues? Check out our full post on what to look out for when temps start to rise.


The Pothos Collection

From the Cascading Pothos to the N’Joy Pothos, discover our full collection of lush and trailing Pothos.

How to get rid of fungus gnats
Yellow sticky traps, photo credit: @j.l.perrone

Yellow sticky traps, photo credit: @j.l.perrone

Having some pesty problems around your plants? Fungus gnats are common pests of indoor plants, and though they are not immediately harmful to your plants (or you— they don’t bite), these flying bugs can be annoying and are generally an indication of overwatering.

There are two lifecycles to cover— adult gnats flying around and larvae finding home in the soil. While gnats flying around your plant or home can be annoying, the latter can cause problems and damage your plant’s roots. Here are different methods to control both stages and get rid of gnats once and for all.

  • Dry out soil - Gnats and their larvae need moisture to survive. Try drying out the soil completely before watering again. 

  • Homemade dish soap spray - combine 1 tablespoon of dish soap with a quart of water. Test the spray on one leaf before applying to the rest. 

  • Potato slices - Cut up 1 inch cubes of potatoes and bury them just below the surface. Wait 4-8 hours as it attracts the larvae, then dispose of the slices.

  • Neem oil - Neem oil is an all-natural pest solution that effectively treats common infestations. Our Super Neem Oil is an ideal blend formulated with lemon-eucalyptus essential oil for extra protection and a delightful aroma.

  • Sticky traps - As pictured above, not the cutest plant decor in the world, but pretty effective if you’ve got an infestation on hand.

  • The strong stuff - if gnats become a recurring issue, find a solution with Bacillus thuringiensis subspecies israelensis or Bti, which you can easily find on Amazon


Indoor plants, potted & delivered

Premium plants paired with stylish ceramics, plus lifetime access to 24/7 Plant Doctor support. Order online at leonandgeorge.com

Sunburn on Plants: What It Looks Like, & How To Avoid It
Photo by @renoplantmom

Photo by @renoplantmom

In most parts of the country, summer means one thing: More sun! While we're typically out playing in it, our plants are sometimes burning in it. With the sun being at its closest to earth during the summer months, be sure to take notice of how your plants are reacting. Here are a few things to know about sunburn with houseplants.

What Sunburn Looks Like on Plants

Look out for white spots or dry brown splotches in random areas of a leaf. This is a clear indicator of sunburn. Sadly, the leaf won't repair itself but you can trim the areas or the entire leaf off, and there’s no reason why your plant should continue suffering or not recover from its sunburn.

Avoiding Sunburn on Plants

While you may consider moving your plants entirely during the summer months so that they aren’t in areas that are too sunny, you may just move them here and there or invest in shades that slightly filter the sun. On long sunny days in the midst of summer, particularly for plants placed in south or west facing windows, move your plants a few feet away from their normal sunny perches or draw the shades to give them a chance to recover and cool.

Read up on all our summer care tips for plants to ensure your greenery has their best season yet!

fiddle-stand.jpg

FIDDLE LEAF FIG TREE

A lush and sculptural plant with elegant violin-shaped leaves.

Fiddle Leaf Figs and Root Rot: The Only Corrective Guide You'll Ever Need
How to diagnose and treat root rot in fiddle leaf figs

Root rot is common issue with indoor plants, and can be a very serious problem with the popular Fiddle Leaf Fig. Though this plant is prone to browning and dropping leaves, if root rot goes untreated it can lead to the quick demise of your plant. So what is root rot? In this article we’ll explain what causes root rot, how to treat it, and what to do to prevent future cases!

What causes root rot?

How to diagnose root rot

How to treat root rot on Fiddle Leaf Fig Trees

What Causes Root Rot?

As the name implies, root rot is caused by an accumulation of moisture or humidity in the plant’s soil due to overwatering. Like most indoor plants, Fiddle Leaf Figs like to dry out a bit in between waterings, and by watering them too frequently or too much, they may develop a nasty rot that will first infect the roots below the soil and later begin to show up top by browning or dropping leaves. Root rot may also be caused by a lack of drainage in the pot, or a combination of less than ideal or no drainage and overwatering.

Fiddle Leaf Fig Fertilizer

Nourish your plants with this specially-formulated organic liquid plant food. Our Boost Vitaminé is made with potent nutrients from nature to help your plants grow and thrive all year long.

$24

How to Diagnose Root Root in a Fiddle Leaf Fig

Root rot can be difficult to diagnose by looking plainly at a potted plant. Even a Fiddle that appears to be relatively dry on the surface of its soil may be in the processing of rooting down below. The only way to truly know is to see the roots below the surface. If you are noticing signs of distress like dropping or browning leaves on your plant, you may want to remove the plant from its pot and have a look.

Here are a few clear signs your Fiddle Leaf Fig has root rot:

  1. Wet, soggy, or mushy brown roots

  2. Dripping, soaked, or waterlogged soil and roots

  3. An unpleasant smell in the soil or around the roots

The beginning signs of root rot: the roots on the left are healthy and strong, whereas the roots on the right are soggy and waterlogged.

The beginning signs of root rot: the roots on the left are healthy and strong, whereas the roots on the right are soggy and waterlogged.

Once a section of the roots begins to rot, this can spread through the rest of the root system and begin to travel up to the leaves of the plant.

How to Save Your Fiddle Leaf Fig from Root Rot

Root rot in Fiddle Leaf Figs does not necessarily mean certain death, though catching it quickly is important if you want to save the plant. At the first sign of distress, remove your plant from its pot and carefully inspect the roots. Is there accumulated moisture around the base of the plants? Do the roots feel mushy or are they turning dark brown?

If so, act immediately by following these steps and repotting your plant:

  1. Rinse all the roots throughly with water. Once they are clean, remove any that are damaged with a pair of clean scissors or pruning shears.

  2. With a new container with good drainage, repot your plant with fresh, fast-draining soil. You may consider adding some gravel or a foam block to the bottom of your container to improve the drainage and help keep your plant dry.

  3. Place your Fiddle in bright, indirect light (these plants are picky about this!) and water once. Do not water again until you’re positive the roots have dried out. This may be anywhere from one to two weeks or more depending on the size of the plant and the temperature it lives in. Erring on the side of underwatering is usually best!

Repot your fiddle leaf fig with fresh potting soil in the well-draining container. Then, water once and make sure the excess water is draining out of the bottom of the container. After that, wait. Do not water again until you’re sure the roots have had a chance to dry out. You can also use a moisture meter to check the bottom of your plant.

Your plant may still lose a few leaves at first, so be patient and wait for the plant to stabilize. You may remove the heavily damaged leaves, and trim some of the slightly damaged ones to remove the brown edges. Make sure not to remove too much of the plant (a good general rule is no more than 30%), as this may throw the plant into further shock. Whatever the case, with a bit of water, light, and love, your Fiddle has a good chance of recovering!

This post was adapted from the Fiddle Leaf Fig Plant Resource by expert Claire Akin. Head to their website to learn more about caring for the Fiddle Leaf Fig.


1 TO 1 VIDEO CALL WITH AN EXPERT

Yellow leaves? Worried about watering or struggling with incorrect lighting? Book a call and get truly personalized support for all your plant-related needs.

How to Care For and Grow Your Monstera Deliciosa

Monstera Deliciosa

AKA philodendron split-leaf

This stylish and iconic plant from the art deco era has made a comeback in a big way and is more popular than ever. Learn the basics of Monstera plant care including light requirements, watering frequency, and how to troubleshoot common problems you may encounter along the way.

And if you’re looking to dive even deeper, take note of the 10 commandments of Monstera care!

  1. Lighting, watering, and growth

  2. Common problems

  3. Maintenance

  4. Propogating

What type of light do Monsteras need?

Monsteras prefer bright indirect light, though they can adjust to medium levels of light. Keep them out of harsh direct sunlight, as too much of it can scorch their leaves.

How to water your Monstera

Let your Monstera dry out between waterings. Water thoroughly when topsoil is dry, usually once a week. Avoid overwatering, and note that your watering schedule may be less frequent during winter months.

How fast do Monsteras grow?

In prime conditions, the Monstera is an incredibly fast grower and can grow up to 10 feet tall indoors. Fertilize your Monstera 1-2 times per month in the spring and summer with indoor plant food, or foliar feed year round.

Common problems with Monsteras


How to maintain a beautiful and healthy Monstera Deliciosa

How to stake a monstera

Take care of your Monstera and it will take care of you! Below are simple tips to continue caring for your Monstera over time.

Pruning Your Monstera

Remove dry or dead leaves all year round, but save any major pruning for the spring and summer months. When pruning your Monstera, use sharp, clean shears and cut any excessive growth at the base of the stem.

Cleaning

Take each leaf between two soft tissue cloths and wipe off the top to reveal a healthy shine (also helps the plant soak in more light!).

How to Repot a Monstera

Houseplants grow much slower than they would in the wild. Depending on the size of your plant and the density of the roots, this is nice to do every 2-3 years to provide fresh nutrients and encourage new growth.

  • When to repot - Monsteras are known for their aerial roots, and it’s not uncommon to see them outside of the soil. However, the plant will show you it’s ready for a bigger pot when the time comes, as the larger stems, and their roots, will literally begin to climb out of the pot.

  • Pot sizing - if you want your plant to grow taller, find a nursery pot that’s 2” in diameter larger than the current pot. If you want your plant to stay the same height, you can reuse the same pot and simply change the soil.

  • Get your hands dirty - spread out newspaper on the floor, remove the plant from the pot and shake off as much of the old soil as possible so that you have clean roots. Place the plant in the center of the pot, add new soil and pat down firmly. Water the soil thoroughly and place the plant in an area with bright indirect light. Your plant will take 2-4 weeks to settle from the shock and adjust to its new home.

    Staking Monstera

    Some Monstera owners like to stake their plant not only for aesthetic purposes but also to support the plant and help it grow more vertically. You can do this by simply inserting a moss totem and attaching the stems of the plant to it with prongs. See our full guide on how to stake the Monstera here.


How to propagate a Monstera Deliciosa

Whether you want to recycle your Monstera cuttings or you simply want to create a new plant, know that the Monstera, thanks to its aerial roots, is one of the easiest plants to propagat. Though there are many ways to do this, water propagation is generally the easiest way to go about it. Follow these instructions to propagate your Monstera Deliciosa:

  • Select a stem to propagate - Using sharp, clean scissors or shears, cut an inch or two below an aerial root. You don’t have to propagate with an aerial root, but this is a guaranteed way of propagation success!

  • Place in water - Find a clear glass and fill with water. Make sure only the stem is submerged, and no leaves are sitting in the water.

  • Place in a bright area and wait! - Avoid any direct sun. You may need to change the water out every few days to keep it fresh. It usually takes just a few days for the root to start growing.

  • Transfer to soil - After a week or so, transfer to indoor potting soil. A small pot is best — no larger than 6” in diameter.

  • Keep hydrated - During the first few weeks, or until your plant feels firmly rooted in its soil, regularly water and drain your Monstera. The soil should be just barely moist to the touch at all times.


monstera.jpg

Indoor plants, potted & delivered

Premium plants paired with stylish pots, plus lifetime plant care support. Order online at leonandgeorge.com

How to Care For and Grow Your Bird of Paradise

The Bird of Paradise

AKA strelitzia nicolai

With enormous glossy leaves and lush jungle vibes, the Bird of Paradise (strelitzia nicolai) is a true head-turner when brought indoors. Named after its colorful flower which resembles a bird in flight, this stylish yet hardy plant is perfect for plant novices and experts alike. Read on for simple tips on how to care for your plant and enjoy years and years of growth.

  1. Light, watering, and growth

  2. Common problems with Birds of Paradise

  3. Maintenance

  4. Repotting your Bird of Paradise

  5. How to propagate a Bird of Paradise

What type of light does the Bird of Paradise need?

This plant prefers bright indirect light, though unlike most indoor plants, it can also handle fair amounts of direct sunlight. Beware, though, as prolonged periods of harsh direct sun (think summer afternoon sun) will burn the leaves unless the plant is slowly acclimated to such conditions.

How to water the Bird of Paradise

Water thoroughly when topsoil is dry, usually once a week. Avoid overwatering, and note that your watering schedule may be less frequent during winter months. To increase humidity, mist regularly or use a humidifier.

How fast does the Bird of Paradise grow?

In prime conditions, this plant is a fast grower and can grow up to 10 feet tall indoors! As these are such fast growers, fertilize once every two weeks in spring and summer, or foliar feed year round.

Shop the Bird of Paradise

Large, glossy leaves and a laidback attitude make this lush plant perfect for brown thumbs and green thumbs alike.

Common problems with Birds of Paradise

Leaves splitting

A lot of people worry that the splits in the leaves of the Bird of Paradise are a sign of something wrong, but the truth is that split leaves in this plant are completely normal. As part of nature's design, the splits allow wind to pass through the leaves without bending, breaking, or uprooting the top heavy plant. While splitting may be reduced by keeping the plant indoors, it is still common and completely normal for this to occur.

Brown edges - underwatering

If you see crispy, brown edges, it could be that it’s underwatered or the environment is too dry. This plant likes a lot of humidity and are generally pretty thirsty plants — do not place this plant near air vents or heaters. Make sure you are watering your plant regularly, and also add misting to your routine to boost humidity levels for the plant’s foliage (you can mist every day, several times a day, or just a couple times a week!).

Yellow leaves - overwatering

If you see yellowing wilted leaves, it could be that your plant is overwatered. Check the roots to make sure there is no root rot. If the roots are damaged, you will need to repot your plant (see below). If the roots are fine, simply let the plant dry out before watering again.

Curling leaves

If the leaves on your plant are curling inward, the cause is most likely also underwatering. To let your plant replenish its moisture, give it a good shower. Remove the plant from its decorative pot and place in a shower, bathtub, or outside. Give it a thorough watering, allowing it to drain all the excess out before putting back in the pot. Depending on how dry the plant is, you may also allow it to sit in water for an hour or two.


How to maintain a beautiful and healthy Bird of Paradise

Take care of your Bird of Paradise and it will take care of you! Below are simple tips to continue caring for your plant over time.

Pruning your Bird of Paradise

This plant does not mind an occasional haircut. With clean shears, cut off older or less attractive stalks at the base. Your plant will have more energy for new growth!

Cleaning

Big leaves means more dust. Take each leaf between two soft tissue cloths and wipe off the top to reveal a healthy shine (also helps the plant soak in more light!).

Trimming & reshaping

Have some leaves that are perfectly healthy but have a few cosmetic damages? Simply trim the leaf to imitate its natural shape. You also may notice your Bird of Paradise’s leaves occasionally split. This is completely natural and not much you can do about it. Obviously, the more this plant is touched, bumped into, moved, etc, the more the leaves will split.

How to repot a Bird of Paradise

Houseplants grow much slower than they would in the wild. Depending on the size of your plant and the density of the roots, this is nice to do every 2-3 years to provide fresh nutrients and encourage new growth. Keep in mind, though, that most plants like to have their roots tightly compacted.

When to repot - if the roots start to become visible outside the soil, it is time to consider repotting your plant.

Pot sizing - if you want your plant to grow taller, find a nursery pot that’s 2” in diameter larger than the current pot. If you want your plant to stay the same height, you can reuse the same pot and simply change the soil.

Get your hands dirty - spread out newspaper on the floor, remove the plant from the pot and shake off as much of the old soil as possible so that you have clean roots. Place the plant in the center of the pot, add new soil and pat down firmly. Water the soil thoroughly and place the plant in an area with bright indirect light. Your plant will take 2-4 weeks to settle from the shock and adjust to its new home.

How to propagate a Bird of Paradise

Propagating a Bird of Paradise is best done through division. That said, because Birds of Paradise like to have their roots tightly packed, it is best to only propagate from a plant that has a lot to spare or has outgrown its pot.

  • Spread a newspaper on the floor and remove the plant from its pot - You should see a giant mass of roots!

  • Determine which pieces of the plant you will divide - Carefully begin to separate or untangle the roots. If you need to cut, use clean shears.

  • Repot in fresh soil - Once you have your divided pieces, repot in fresh soil, pack down tightly, and water thoroughly. You’re done!

Illustrations by our talented plant stylist, Kailie Barnes.


birddarkstand.jpeg

Bird of Paradise

With large, elegant and shining leaves, the Bird of Paradise is a popular indoor plant for creating an instant jungle atmosphere.

How to Care For and Grow Your Peace Lily

The Peace Lily

AKA spathiphyllum

Known for its air-purifying qualities and adaptability, the Peace Lily is a popular indoor plant for homes and offices alike. The common name of this plant, which refers to the flower-like spathes that resemble a white flag of surrender, are also what make this indoor plant unique. Here’s everything you need to know to keep Peace Lily plants healthy and growing.

  1. Light, watering, and growth

  2. Common problems

  3. Maintenance

  4. Repotting

  5. Propagating

What type of light does the Peace Lily need?

This plant prefers bright indirect light, but can adjust to medium to low light conditions over time. Avoid harsh direct sunlight that may burn your plant’s leaves.

How to water your Peace Lily

Water once or twice a week to keep soil evenly moist but never soggy. Mist regularly to boost humidity.

How fast does the Peace Lily grow?

Peace Lilies are generally slow growers, though can reach up to three feet in height. Fertilize your Peace Lily once a month in the spring and summer with indoor plant food, or foliar feed year round.

Common problems with the Peace Lily

Drooping leaves - underwatering

  • Symptom - leaves or entire plant heavily droops

  • Cause - underwatered or prolonged dry period

  • Remedy - remove the plant from its decorative pot and give a good shower in the sink, allowing it to sit in a dish of water for a few hours before draining and returning to pot

Brown tips - overwatered, air too dry, or too much fertilizer

  • Symptom - tips turning brown or drying out

  • Cause - if you water your plant too much, it may become too soggy or waterlogged, causing brown tips. However, Peace Lilies love humid environments and if the air is too dry, this may cause brown tips as well. Finally, it’s possible you’ve given your plant too much fertilizer.

  • Remedy - if you’ve overwatered, let your plant dry out a bit before watering again. Make sure the plant is not near any air vents or heaters, and mist regularly to boost moisture. if you think you’ve overfertilized your plant, at the next time of watering give it a good shower (like above) to rinse out as much fertilizer from the soil as possible


Not flowering - too little light or too much fertilizer

  • Symptom - the plant ceases to flower

  • Cause - Peace Lilies can be a bit of a mystery when it comes to flowering. Sometimes they stop flowering even though they are in prime care conditions. One reason is that the plant is not getting enough light (they need plenty of bright, indirect light to flower), or it’s overfertilized

  • Remedy - try moving it to a spot with better light conditions. If it’s already in bright indirect light, be patient! Sometimes it takes years for Peace Lilies to flower again.


How to maintain a beautiful and healthy Peace Lily

Take care of your Peace Lily and it will take care of you! Below are simple tips to continue caring for and growing your Peace Lily over time.

Pruning your Peace lily

Remove unattractive or old leaves from the base of the plant with a clean blade. Never remove more than 30% of the plant at a time.

Trimming Peace Lilies

If there is just a small portion of a leaf that was damaged such as the edges, trim off any discoloration or blemishes by following the natural lines and shape of the leaf.

Keeping Your Peace Lily clean

regularly remove dust or pollen to ensure your plant can soak in as much light as possible. Use a damp cloth and gently wipe the leaf clean while supporting the under side with your other hand.


How to grow and repot the Peace Lily

  • Growing - Peace Lilies can be slow growers. During spring and summer, use a diluted fertilizer once a month to give your plant a vitamin boost.

  • Repotting - L&G Peace Lilies come in 6” grow pots and only need to be repotted every few years if you notice the roots outgrowing the pot, or to refresh the soil and give it new nutrients. If you’d like your plant to grow larger, find a new grow pot that is 2” larger than its current pot. If you’re happy with the current size, you can reuse the same pot and simply change the soil.

    • Getting your hands dirty with or without a yard - spread out newspaper on the floor, remove the plant from the pot and shake off as much of the old soil as possible so that you have clean roots. At the bottom of the grow pot, and a layer of soil, then place the plant in the center of the pot and cover with new soil. Pat down firmly and water thoroughly. Place the plant in an area with bright indirect light. Your plant will take 2-4 weeks to settle from the shock and adjust to its new home.

How to propagate the Peace Lily

Propagating a Peace Lily plant is best done through division and during spring or summer.

  • Divide the roots - remove the plant from its container and determine which area you will divide to create new plants. Make sure there are leaves attached to each clump of roots you divide. Carefully untangle the roots and pull apart with your hands or cut through with a clean sharp knife.

  • Place in fresh soil - Place the new divisions in fresh soil, press soil firmly and water thoroughly.

  • Stabilize - Keep freshly repotted plants in a warm area with bright indirect light, and for Magenta Triostars the soil should be kept moist thought not drenched.

Illustrations by our talented plant stylist, Kailie Barnes.


peacelily.jpg

Indoor plants, potted & delivered

Premium plants paired with stylish ceramics, plus lifetime plant care support. Order online at leonandgeorge.com

The Most Likely Causes Behind Your Dying Plant
A Fiddle Leaf Fig with brown spots and leaves falling left and right. Can it be saved?!

A Fiddle Leaf Fig with brown spots and leaves falling left and right. Can it be saved?!

So you’re dealing with a dying plant

We’ve all been there. Your plant is dying, it’s possibly not the first time, and you are distressed as to why this keeps happening.

Finding the root cause of why our plants die is crucial to becoming a better plant parent, and one who doesn’t make the same mistake twice! Learn about the factors that can cause an indoor plant to go south, and how to save dying plants in the future.

Common causes for dying plants

Let’s be real. There are dozens of different reasons your plant could be dying, but 99% of them fall into just a few categories. Let’s narrow them down:

  • Water. The number one way indoor plants die is by overwatering. While you may love your plant so much and feel inclined to shower it (literally) with love and water, know that most plants need to dry out a bit between waterings in order to thrive. Because overwatering is a quick way to kill your plant, it is always best to err on the side of underwatering, as unlike its opposite, it is pretty difficult to actually kill a plant by simply not watering it. The plant may not look happy, but most will hang on for quite a while with a bit of drought.

  • Light. This may seem obvious, but certain plants need a certain amount of light. If your plant isn’t getting the light it needs, it may lead to other problems like over watering (see above!) or a higher risk of getting pests (see below!). Be realistic when choosing the right plants for your space, and if you suspect your plant is unhappy due to its light conditions, move it to another space.

  • Pests. Pests like spider mites, mealy bugs, or scale can be a real pain when it comes to indoor plants, especially because we may not notice them until it’s too late. Keep a close eye for the following pests:

    • Mealy bugs. They make white cotton-like masses usually on the underside of leaves.

    • Spider mites. Too small for the naked eye to see, these pests will leave thin silky webs around your plants foliage and stems.

    • Scale. These may not look like they’re moving, but you will see them all the same as brown, hard-shelled insects that suck the nutrients from your plant’s leaves.

  • Nutrient deficiency. Though this is the least likely cause of plants dying or starting to die, it can lead to a sad looking plant over time. If your plant has not been repotted in many years, and/or if you do not fertilize regularly, your plant may have a nutrient deficiency. Consider repotting your plant to give it fresh soil (from which it gets lots of nutrients!) or incorporate a regular feeding routine with a gentle fertilizer like Boost Vitaminé.

How to save a dying plant

If you’ve found the cause of your dying plant, there may still be time to fix it.

  • Overwatering. Plants that have been severely overwatered may be suffering from root rot, and the only way to save a plant from root rot is repotting. Remove your plant from its pot, remove all the mushy, black roots, and wash the remaining healthy roots thoroughly with water. You may need to repot your plant in a smaller pot if there are not many roots left. Read our full guide on how to treat root rot here. You may also decide to cut off the healthy stems and propagate, using rooting hormone to encourage the growth of a new plant.

  • Pests. There are several solutions to saving a dying plant plagued with pests, but they may vary depending on what you’re treating for. Spider mites and their larvae can be washed away with a steady stream of water, and scale can be removed (painstakingly, one by one!) with alcohol and a q-tip. Very serious infestations may require insecticidal soap. As always, prevention is the best way to avoid pests, and we recommend using neem oil to keep the bugs at bay!

Becomming a successful plant parent

Successfully growing your indoor plants is all about keeping staying in tune with your plant and its needs. That means regularly checking on them (beyond simply watering!), learning as you go, and catching any issues or missteps before they become a serious problem. Rest assured that even the greenest of thumbs has killed a plant or two in their lives, and that by no means should you ever give up! Now go forth and keep those plants alive and thriving!


fiddle-bush-white-stand-nude-leather-chair.jpg

Indoor plants, potted & delivered

Premium plants paired with stylish ceramics, plus lifetime plant care support. Order online at leonandgeorge.com

Calatheas and their curling leaves
Calathea Medallion Plant Care

Let's be real here. The Calathea is a difficult one in terms of care. It needs constant humidity and warmth. Here are the most common issues you'll experience with plants in the maranta and prayer plant families.

What causes Calatheas’ leaves to curl?

Calatheas are humidity-loving, tropical plants. In fact, while this plant is generally easy to care for, it often requires multiple waterings a week (or more in the summer!) to give it the proper moisture that it craves. In most cases, Calatheas’ leaves curl when their soil is excessively dry, though there could be a few other minor reasons that are causing your plant’s leaves to curl.

How to fix curling leaves on a Calathea

Easy! Give it a good drink of water—but from the bottom up. Soak your plant in water by placing it in a deep dish, bowl, sink or bathtub with a few inches of water. You may leave it soaking anywhere from a few hours to 24 hours. After a day or so, you will see how the leaves magically unfurl!

This method of deep watering is called “bottom watering” and Calatheas aren’t the only plants who love it! Learn more about the benefits of bottom watering here.

Water Quality

If you’ve thoroughly soaked your Calathea but it’s still showing signs of curling leaves, consider using filtered water. Tap water often contains salts, chlorine, minerals, and fluoride, which can accumulate in the soil and lead to leaf tip burning, browning, and curling. To address this, try using filtered water or letting your tap water sit in an open container or sink overnight to reduce chlorine content.

Temperature & Humidity

Since the Calathea is a tropical plant, it thrives in high humidity. If your environment lacks humidity, you can increase it by misting the leaves regularly, using a pebble tray, or placing a humidifier nearby.

Temperature is also essential for your Calathea's well-being. Ensure that it is not placed in a drafty area or exposed to heating and cooling vents. Cold temperatures or excessive dryness from constant warm airflow can also cause the leaves to curl.

Other problems with Calatheas

Calatheas can show a few different signs of distress:

Brown Edges

Brown edges appear when the air is too dry for your plant. Add misting to your watering routine or keep it on a bed of rocks and shallow water to add humidity. You can also trim the leaves, either removing the entire leaf at the stem’s base, or trimming the leaf itself, following the natural shape to get the plant and/or its leaves looking sharp again!

Droopy Leaves

Tour plant is getting too much water. Allow the soil to air out or change the soil completely to decrease chances of root rot. 

Ready for more? Read our full guide on Calathea care, including tips for propagation, repotting, and more.


Calathea Medallion

A stunning prayer plant with a deep color palette of leaves painted by nature.

The 10 Commandments of Orchid Care

The orchid's beauty is found in its simple and graceful charm, and of course, unmistakable vibrant flowers.

  1. Lighting Requirements for Orchids

  2. Ideal Humidity Levels for Orchids

  3. Orchid Temperature Preferences

  4. Fertilizing Orchids

  5. Watering Requirements for Orchids

  6. Trimming and Pruning Your Orchid

  7. Pest Prevention

  8. Repotting Considerations for Orchids

With their exotic allure and delicate blooms, Orchids have captured the hearts of plant enthusiasts and novices around the world. Despite their reputation, many Orchid varieties can actually be very low-maintenance and highly adaptable to different environments. 

To ensure your Orchid flourishes and graces your space with its captivating beauty for years to come, follow our 10 simple commandments of general Orchid care, but don’t forget: Orchids are one of the most diverse plant families in the world, so make sure to look into your specific variety and any notable care requirements it may have!

Don’t Overlook the Lighting

Adequate lighting is vital for the well-being of an orchid, as it fuels the plant's growth, influences its blooming cycle, and ensures its overall health and vitality.

Generally speaking, Orchids are light-loving plants but prefer indirect light to avoid scorching their leaves. There are many different types of Orchids and it’s best to know the exact variety of yours and follow light requirements accordingly, as some Orchids are pickier in this regard. As a general rule of thumb, place them near a window with filtered sunlight or use sheer curtains to create a diffused light environment, and avoid direct exposure to intense midday sun, as it can damage the leaves. While some Orchids can easily adapt to medium and even low light conditions such as offices or retail settings, make sure your variety is suitable to this type of environment before placing it there!

Create a Humid Haven 

Most orchids originate from tropical regions and thrive with humid conditions. In fact, even Orchids that have adapted to live in the desert prefer some humidity. Mist your orchids regularly, especially during dry seasons or in air-conditioned environments. Alternatively, you can place them on a humidity tray filled with water or use a humidifier to maintain adequate moisture levels.

Keep Things Cozy

Like many tropical plants, Orchids can be sensitive to temperature fluctuations. Keep them away from drafts and air vents, and avoid sudden temperature changes. Most orchids prefer temperatures between 60-80 degrees Fahrenheit (16-27 degrees Celsius) during the day, with a slight drop at night. They can handle extreme heat or cold if periods in these conditions are brief.

Do not Forget to Feed Your Orchid!

Orchids have unique nutritional needs, and do best when fertilized regularly throughout the year. Though it depends on the exact brand of fertilizer you’re using, fertilizing twice a month during peak growing season (spring and summer) and once a month during fall and winter is advised. 

If you’re looking for a good fertilizer for your Orchid, we recommend this Orchid food by Houseplant Resource Center, a comfortable spray that is specifically formulated for Orchids.

Water Your Orchid Wisely

Orchids like a fine balance between moisture and dryness. Depending on the environment your plant lives in, it may need watering more or less frequently. We recommend starting once a week, giving your Orchid a thorough watering, and checking the soil to see if it’s still moist before watering again. 

About 70% of Orchids are epiphytes, which means they grow on other plants rather than in soil. That’s why it is crucial to ensure your Orchid has proper drainage, and to never let it soak in water for various days. 

Easy Care Flowering Plants by Léon & George

Beautifully potted flowering plants for indoors, paired with high-quality ceramic planters. Lifetime Plant Doctor access included.

Trim and Prune with Care

Pruning is an essential aspect of orchid care, but generally speaking, it’s best to take a delicate approach and never prune away too much of your orchid at one time. 

Remove any dead, yellowing, or damaged leaves and spent flower spikes using clean, sterilized tools to prevent the spread of diseases. Pruning encourages new growth and helps maintain the overall health and appearance of your orchid.

Are you ready to prune your orchid? Read this full guide which explains how to prune different types of orchids.

Keep an Eye Out for Pests

Orchids are susceptible to various pests, such as aphids, scale insects, and mealybugs. Regularly inspect your orchids for signs of infestation, including sticky residue, webbing, or distorted leaves. Treat any pest problems promptly– we suggested using Super Neem Oil to naturally treat an orchid with pests. Additionally, be vigilant for signs of diseases like fungal or bacterial infections and take necessary action to prevent their spread.

Remember that keeping your plant clean is the pest form of prevention! Use L’Original black olive soap, specifically designed to clean plants, to regularly wipe away dust and other build up on your orchid.

Repot Your Orchid Only When Necessary

Orchids require occasional repotting to ensure healthy root growth and provide fresh growing medium. Repot your orchids when you notice overcrowded or deteriorating roots, or every 1-2 years as a general rule. Use a well-draining orchid potting mix and provide adequate support for your plant.

Pro tip: Many orchids are sold in small plastic containers that do not have drainage. If you purchase an orchid in one of these pots or containers, be sure to immediately pot it into something with proper drainage, as this is key to keeping your orchid happy and healthy over time. 

Introduce Companions to Your Orchid

Consider grouping your orchids with other plants that have similar light and humidity requirements. This creates a microclimate that enhances moisture levels and helps maintain stable conditions. Orchids also benefit from the increased humidity created by neighboring plants.

Be Patient with Your Orchid!

Growing orchids can be a rewarding yet challenging endeavor, and even more so getting them to flower multiple times throughout the year. Each orchid variety has unique care requirements, and it may take time and experimentation to find the perfect balance. Be patient, observe your plants closely, and adjust your care routine accordingly. Remember, the journey of caring for orchids is as beautiful as the flowers themselves!

Photos by @gaellemarcel and @nosova


Designed to Thrive

Premium plants, potted and delivered, plus lifetime access to 24/7 Plant Doctor support.

(if the article is about a specific plant we sell, change this block content/link to that specific product)

Planning On Fertilizing Your Fiddle Leaf Fig? Read This First!
The best fertilizer for fiddle leaf fig trees
  1. How Should You Fertilize a Fiddle Leaf Fig Plant?

  2. What N-P-K ratio does a Fiddle Leaf Fig need?

  3. Which Fertilizer is Best for a Fiddle Leaf Fig?

Fiddle Leaf Figs are beloved for their large sculptural leaves. But these viola-shaped beauties take a lot of energy for your plant to produce! Many owners find that when they bring their Fiddle Leaf Figs home the leaves that they produce outside the nursery aren’t as full. This can be due to not receiving the right light or water, but it is most likely due to not being fertilized.

Your home can never perfectly rival the natural environment of these plants, but you can still come close! In the wild these plants are able to grow to a staggering 40 feet tall because of the abundance of nutrients found in their soil. While we can’t hope for such statuesque houseplants we can strive towards keeping them as healthy as possible. By using the right fertilizer you give your plant the nutrients it needs to reach new heights and grow healthy leaves.

Natural Plant Food

Nourish your plants with this specially-formulated organic liquid plant food. Our Boost Vitaminé is made with potent nutrients from nature to help your plants grow and thrive all year long, and is great for Fiddle Leaf Figs.

$24

How Should You Fertilize a Fiddle Leaf Fig Plant?

You want to fertilize plants when they are in their growing season, which is spring and summer. During this time your plants are growing new leaves and need all the help they can get! So in the spring and summer you want to add liquid fertilizer to your watering routine every other week. Liquid fertilizer is the easiest to use and generally the safest for your plant. But you always want to follow the instructions on the package when diluting it into water so that you don’t accidentally use too much! If you aren’t careful you can give your plant fertilizer burn.

When it is fall you want to taper off fertilizing your Fiddle Leaf Fig to every three or four weeks. This is so your plant can get ready for its dormant stage in winter.

What NPK Ratio Does a Fiddle Leaf Fig Plant Need?

Fertilizer Terminology can be confusing if you’ve never encountered it before. NPK stand for nitrogen, phosphorus, and potassium. Every plant needs a different blend of these nutrients, which is why you can find plant specific fertilizers.

Fiddle Leaf Figs prefer fertilizers with an NPK ratio of 3-1-2. This is because they have the high-nitrogen content that these plants crave.

Which Fertilizer is Best for a Fiddle Leaf Fig?

So now that you know how and when to fertilize you’re probably wondering which fertilizer you should get. You’ll find plenty of fertilizers with an NPK ratio of 3-1-2 that will work just fine. However, Fiddle Leaf Fig Plant Food is formulated specifically for these plants and provides instructions on best care.

This post was adapted from the Fiddle Leaf Fig Plant Resource by expert Claire Akin. Head to their website to learn more about caring for the Fiddle Leaf Fig.


IMG_0689.JPG

Indoor plants, potted & delivered

Premium plants paired with stylish ceramics, plus lifetime plant care support. Order online at leonandgeorge.com

5 Essential Summer Plant Care Tips

Did you know your summer plant care routine can be vastly different than in the winter?

Many plants enter major growth phases during the the long, sunny days of summer, but it isn’t always a breeze. Heat waves, harsh sunlight, and excessive air conditioning are just a few things that most houseplants dislike, and making some seasonable adjustments may be necessary to keep them happy and thriving. Read on for a few simple summer care tips for your indoor plants.

  1. Light considerations in the summer

  2. Summer fertilizing

  3. Watering in the summer

  4. Using air-conditioning with plants

  5. Bringing plants outdoors

  6. Other considerations

  1. Consider Light and Avoid Sunburn

Some plants that are perfectly happy in their usual spot may not be as happy during the summer. Strong afternoon sun, for example, can be incredibly harsh for many houseplants, and moving them to a shadier area may drastically improve their appearance. Notice droopy, curling, or burned leaves? It may be time to find them a new spot!

2. Make Sure to Fertilize!

Plants need extra nutrients during the summer to keep up with all the new growth! During spring and summer, make sure you regularly for optimal health and growth. Use an indoor fertilizer like Boost Vitaminé once every two weeks or once a month and watch your plant flourish.

3. Watering Your Plants in the Summer

Just like us, plants need more fluid during the summer. Make sure to check in with your plants and adjust your watering schedule as needed. Plants like calatheas or ferns dry out much faster when it’s warm out, so you may need to water more often than you normally do during other times of the year. Similarly, add regular misting to your plant care routine to boost humidity levels on your plants foliage. Even better if you add a foliar feed to the mix!

Extra tip: Deep water! If your plants are extra thirsty, consider giving them a good shower. Take them outside or put them in the bathtub or shower and let the water run. You may even leave your plant for a few hours in water for the roots to drink before draining and returning to its home.

4. Air Conditioning Effects on Houseplants

Many indoor plants thrive with a decent amount of humidity and things like dry summers, heat waves, or air conditioning may reduce the amount of humidity in your home. Make sure your plant is not in the direct path of any air vents, and mist your plants regularly. If things are really dry, you may consider using a humidifier.

5. Bringing Your Plants Outdoors

Seasoned green thumbs love bringing their plants outside in the summer, and yours may benefit from this treatment, too. If you decide to try it out, make sure the shift is gradual (ie don’t put a plant that’s normally in low light in a super bright spot) and as always, avoid direct sunlight. Also be aware of other environmental factors: the temperatures should never drop below 65 degrees Fahrenheit, avoid excessive rainfall and wind, and keep a close eye on pests.

Other Summer Plant Care Considerations

A few other things to keep in mind during the summer:

  • Your plant is growing during this season so it is important to rotate the side receiving the most light. This allows its foliage to grow full and even.

  • Going out of town? No worries. Plan to water your plants deeply just before leaving — they will be okay for a week or two like this. Going for longer? Read more tips on prepping plants for vacation here.


blogsnake.jpg

Indoor plants, potted & delivered.

Premium plants paired with stylish ceramics, plus lifetime plant care support. Order online at leonandgeorge.com