Posts tagged houseplant
Boudoir Benefits: 5 Reasons To Put A Snake Plant In Your Bedroom
The benefits of the Snake Plant are many, making it the perfect plant for indoors and bedrooms.

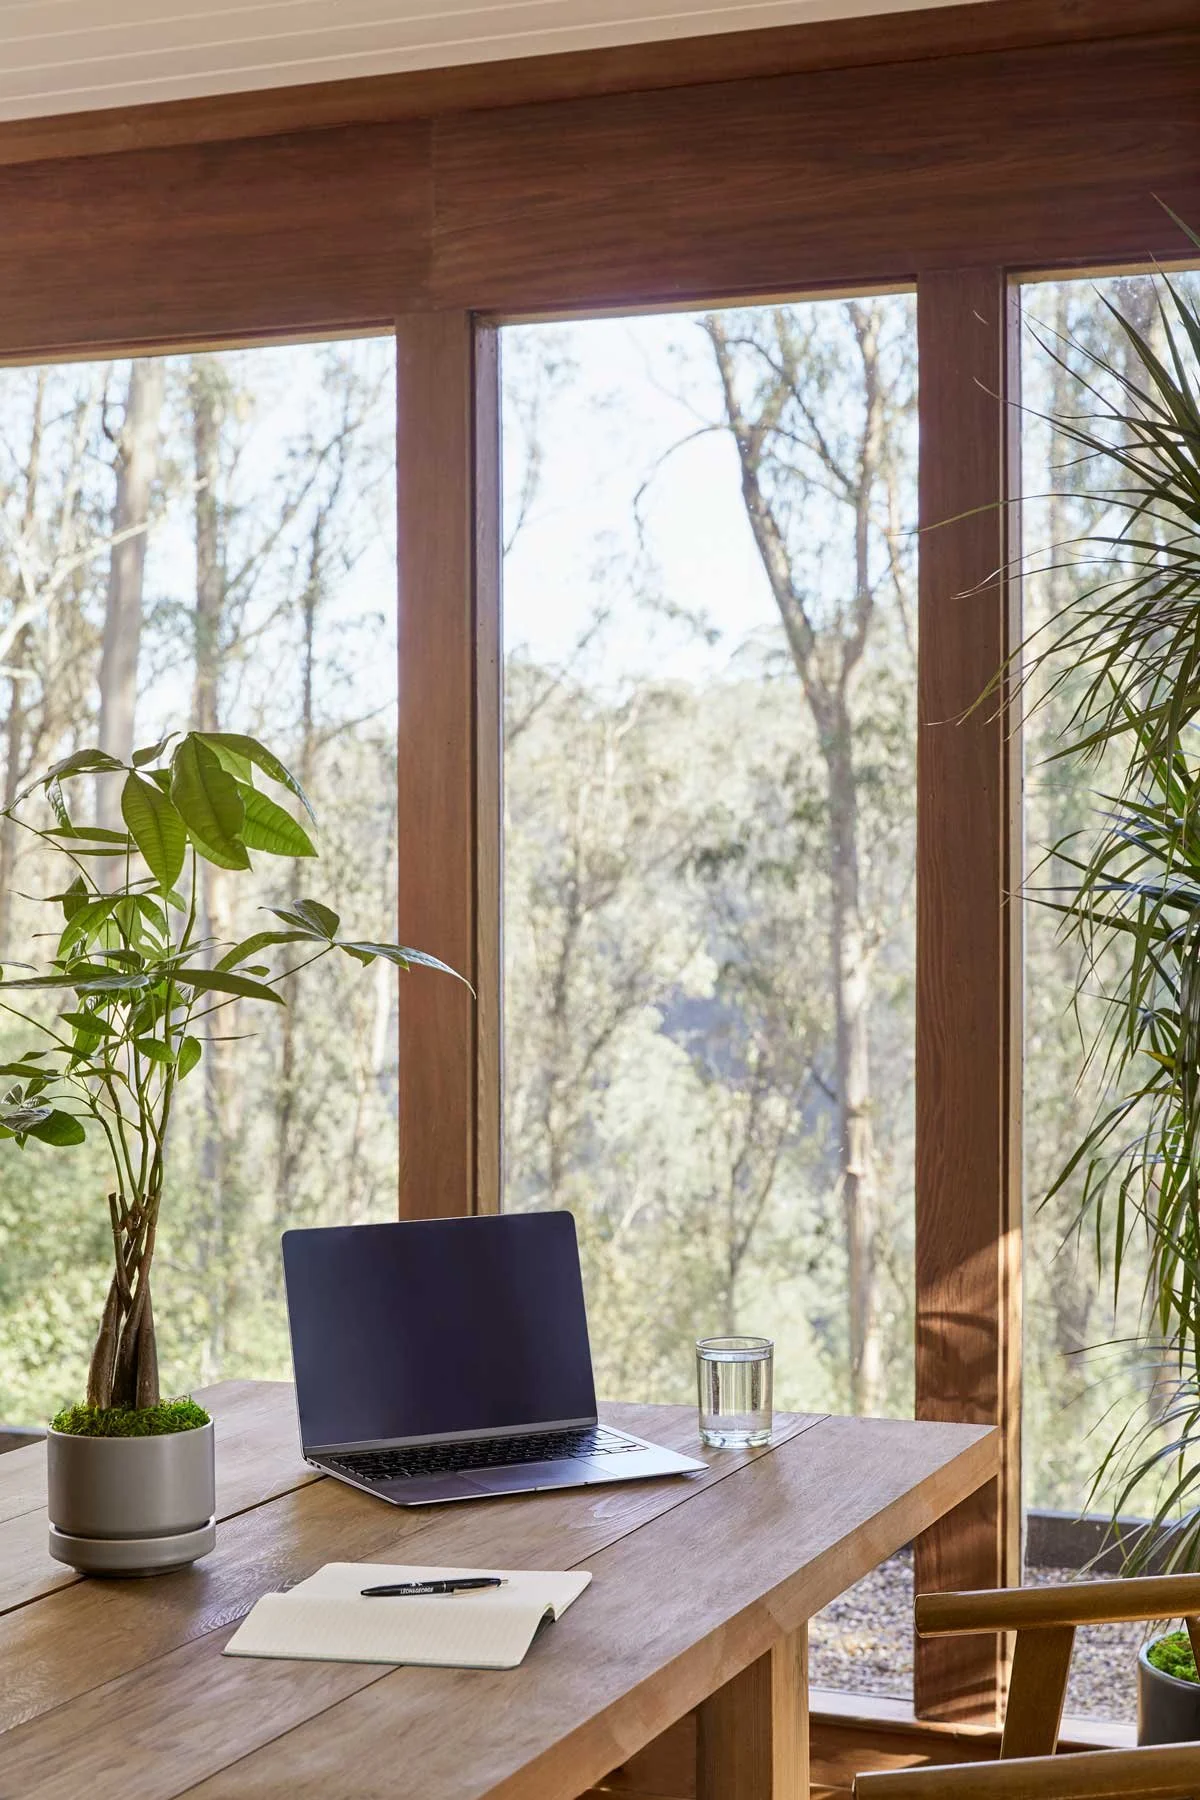
Elevate your space with the ultimate easy-care houseplant! Snake Plants are the best air purifiers in the world of horticulture.

Owning house plants has a long list of benefits, but are some more powerful than others? The Snake Plant (scientific name sansevieria and also known as Mother-in-law’s Tongue) is not just popular for its unique, variegated, and striking appearance. It is actually widely considered one of the most beneficial indoor plants for a number of different reasons! What’s more? It has even a couple extra benefits when placed in a space of rest and relaxation.

The Many Benefits of the Snake Plant

Looking to get better sleep? There’s arguably no better option for the bedroom than the Snake Plant, a plant that beyond boasting many benefits, requires little to no care to enjoy its beauty. Keep reading to learn about the benefits of having a Snake Plant in the bedroom!

1. It’s A Fantastic Oxygen-Producing Plant

All plants produce oxygen, but according to Nasa’s Clean Air Study, some are even better at it than others. The Snake Plant is considered to be one of the best plants with the highest oxygen producing qualities and air purifiers, along with others like the Rubber Plant and the Cascading Pothos. Studies show that higher oxygen levels promote deeper sleep, but that’s not all…

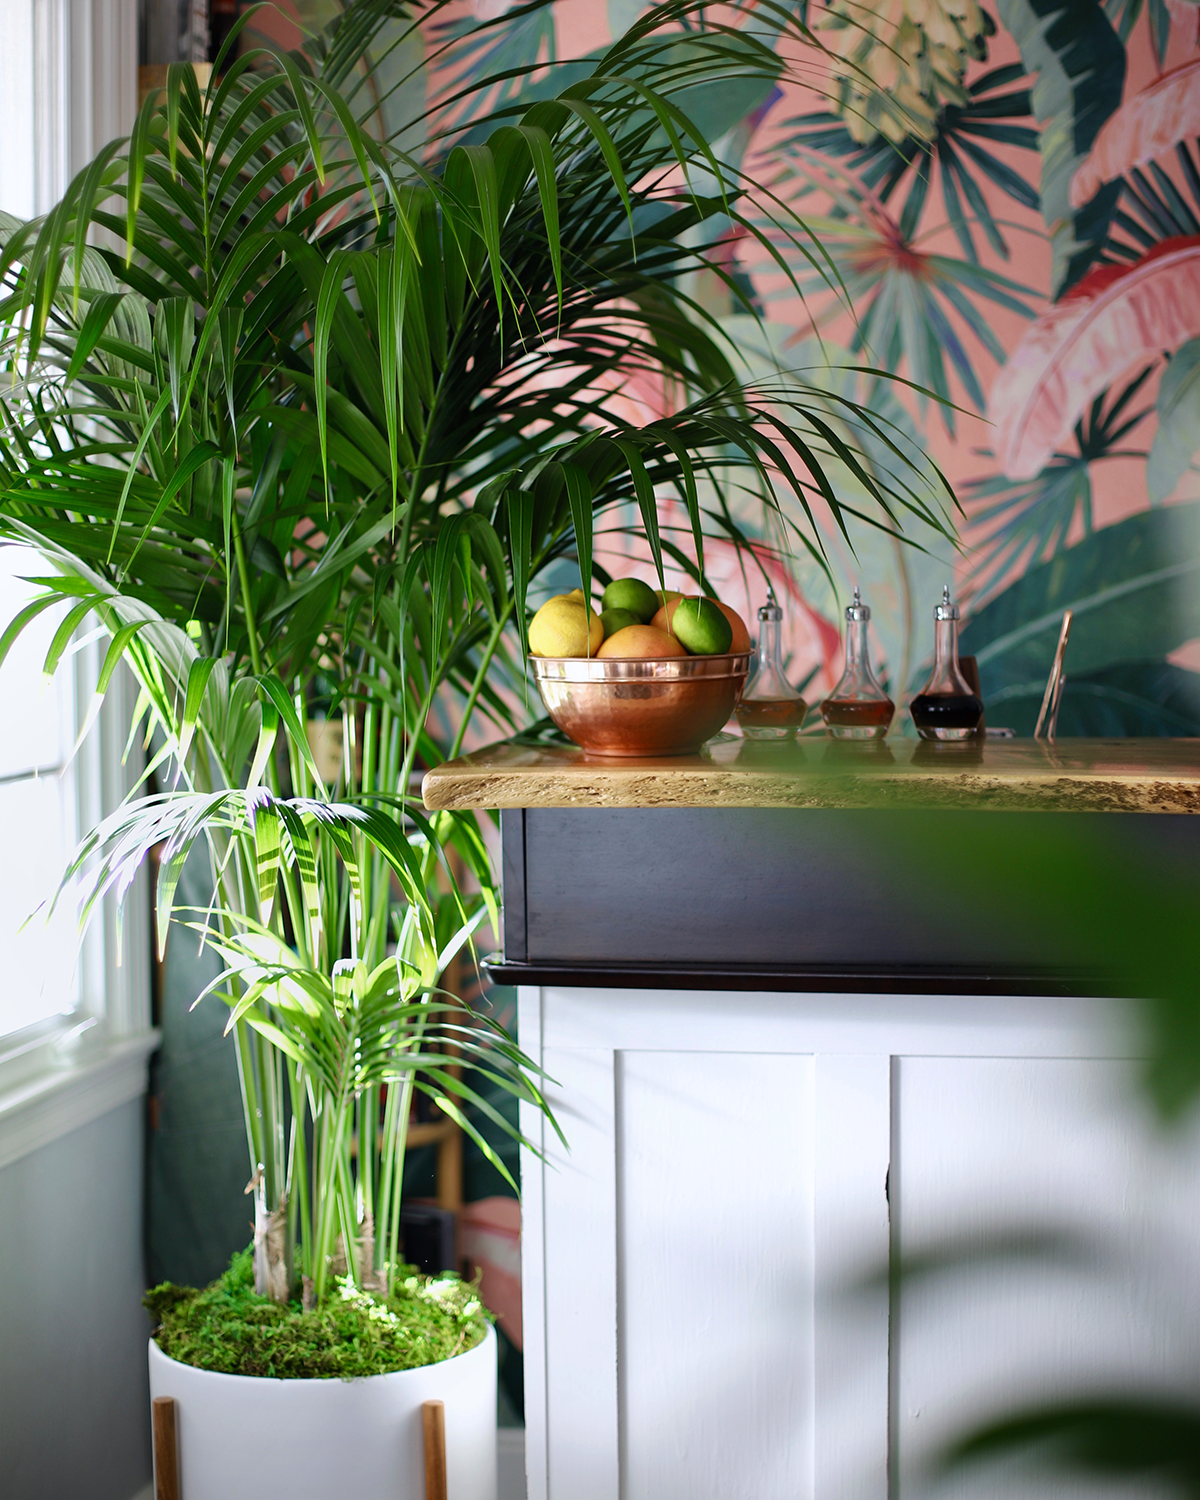
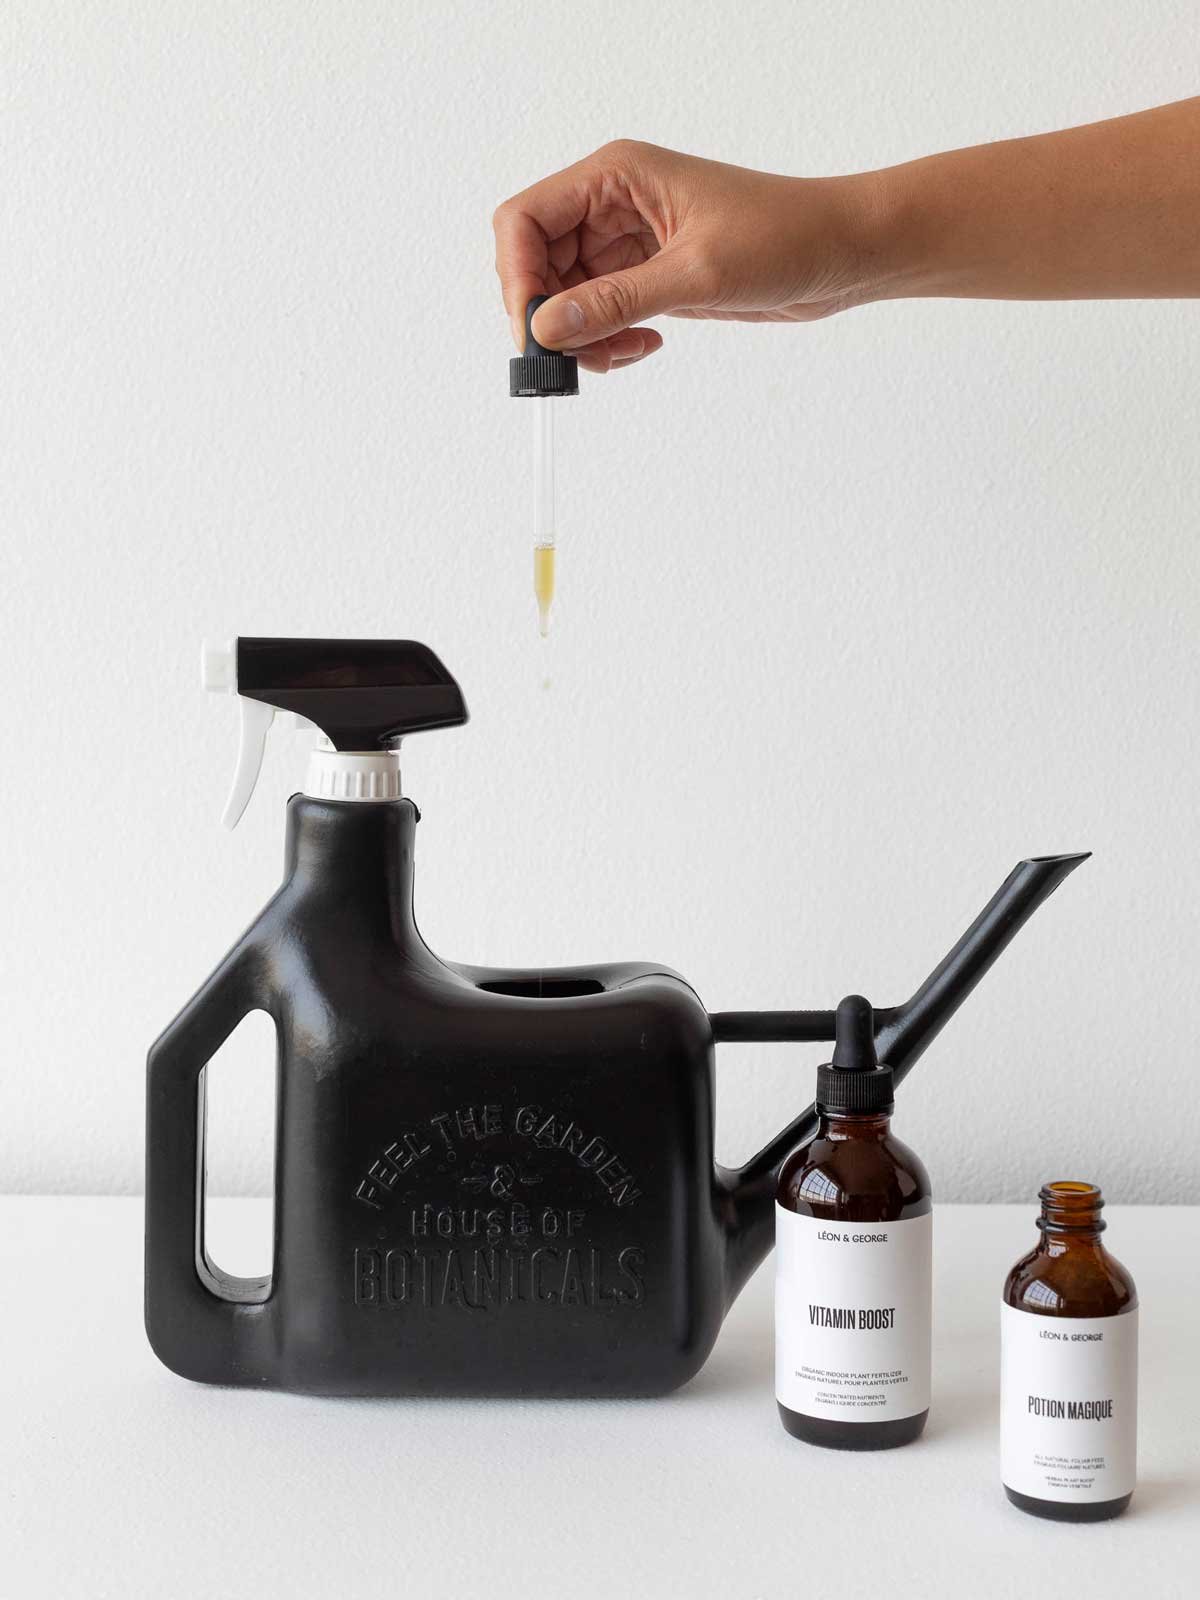
L’ALCHIMIE BOTANIQUE

Natural plant care essentials and fertilizer to enhance your plant’s foliage, and your everyday routine.

2. It Even Produces Oxygen At Night

Contrary to popular belief, plants don’t produce oxygen 24/7. In fact, most plants only produce oxygen with daylight through the process of photosynthesis. At night, on the other hand, these plants take in oxygen and release carbon dioxide, a process called respiration. However, the Snake Plant is one of the lucky few that continues to produce oxygen at night, making it the ideal plant to place in your bedroom for better sleep and to help you breathe.

3. They Filter Out Harmful Pollutants

Studies have shown that indoor air quality and indoor air pollution is often even worse than what we find in densely populated cities. The same Nasa Clean Air Study mentioned above also found that Snake Plants work double time removing harmful toxins and gases like benzene, formaldehyde, xylene, and odor from our indoor environments. These harmful air pollutants can be found in regular household objects like carpeting, furniture polish, and cleaning supplies.

4. Effective Against Allergies

Plants with such powerful room air purifying and oxygen-producing qualities will of course help to combat allergies, as they remove harmful pollutants and volatile airborne chemicals that can aggravate allergies, and in some cases even make you sick. Combine this with oxygen-producing powers and you have easier breathing both day and night.

5. Low-Light Thriving and Easy To Care For

Like to keep your bedroom on the dimmer side? The Snake Plant can is easy-to-grow and can survive and thrive in almost any lighting scenario, from bright direct rays of sunlight to areas with almost no natural light. It also requires very little water, humdity, can be watered sparingly with little to no upkeep, the Snake Plant will help maintain a calming and beautiful bedroom space with excellent purification— the way it should be!

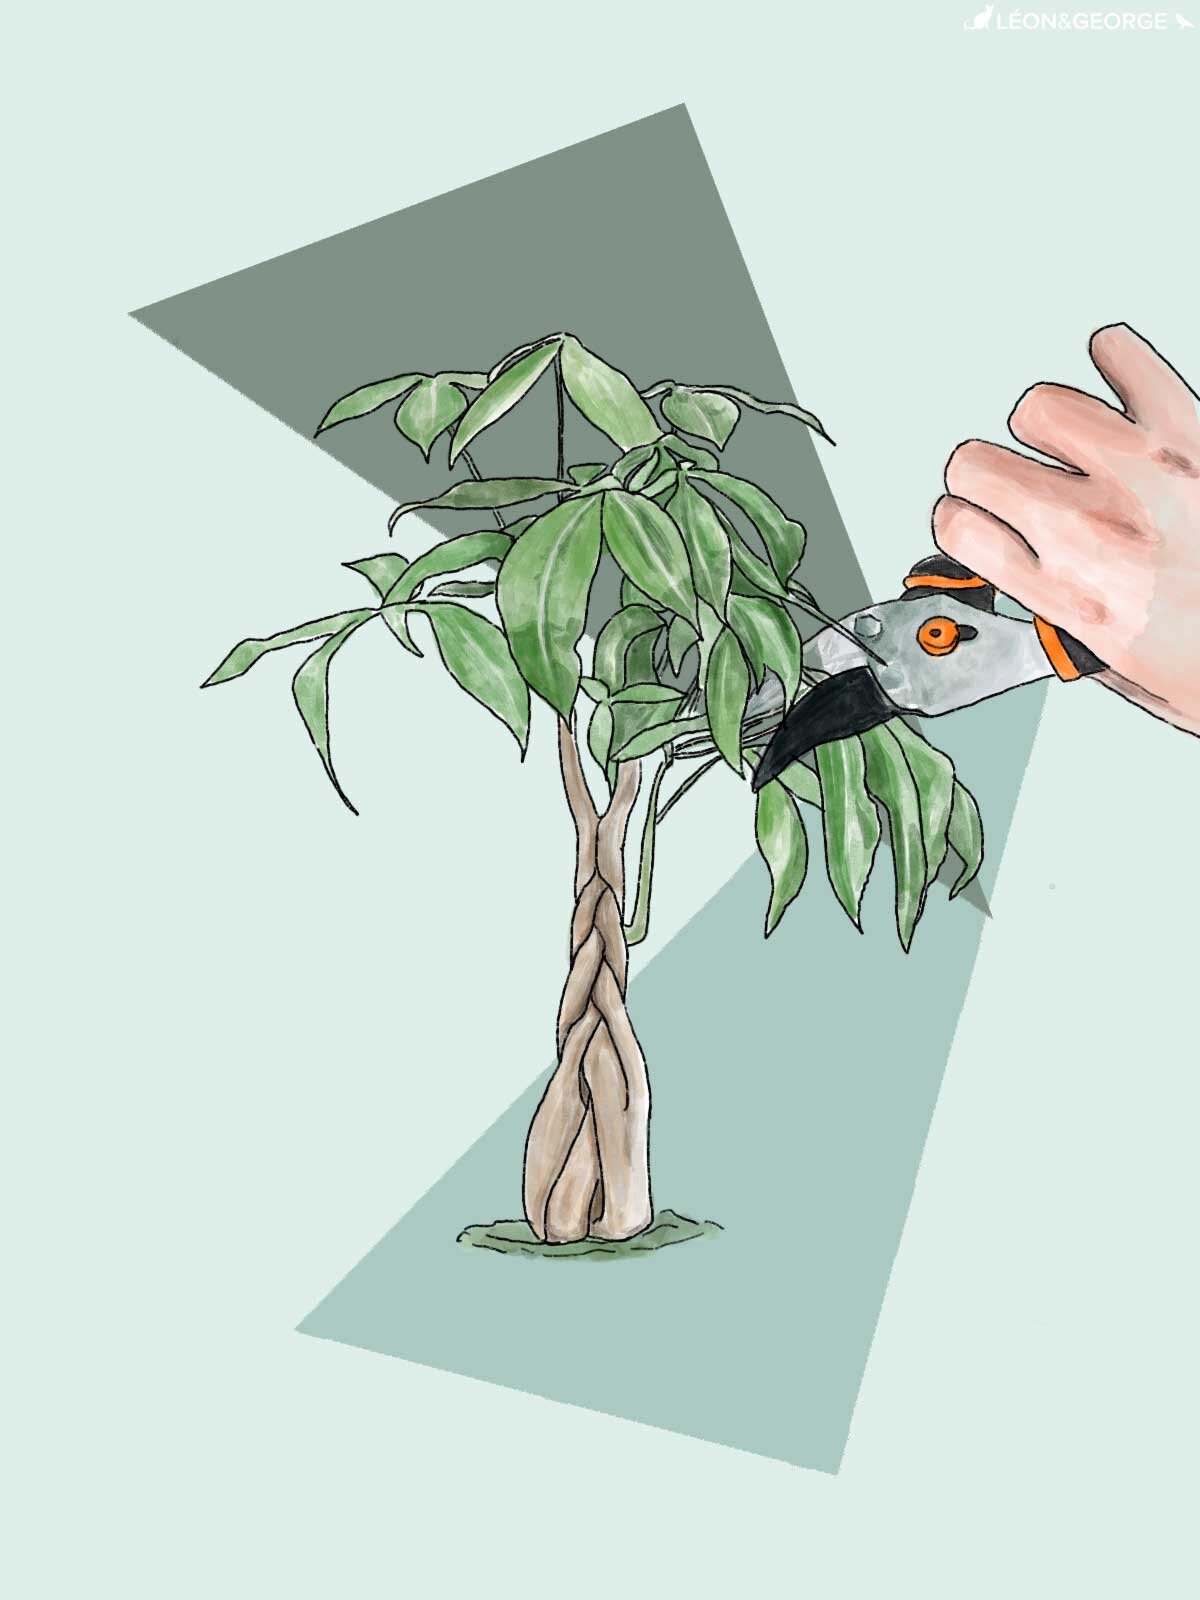
Ready to add a Snake Plant to your life? Find the perfect size and pair it with your favorite pot color and style and get ready for a cleaner, most beautiful bedroom space! Found the perfect Snake Plant? Learn how to care for and how to grow it with our articles The 10 Commandments Of Snake Plant Care and How To Care For And Grow Your Snake Plant.

At Léon and George, we're on a mission to bring the beauty of nature and indoor gardening into your daily life. Our hand-selected, California-grown plants such as the Fiddle Leaf Fig Tree, Ficus Audrey, and Bird of Paradise are carefully chosen for their quality, health, and beauty. We believe in simplicity, fairness, and sustainability, sourcing our plants from trusted local growers who share our values. When you bring a Léon and George plant into your home, you're not just getting greenery – you're getting a piece of nature treated with our all-natural products and staged for optimal growth. We're here to make plant ownership accessible and enjoyable for everyone, fostering a connection between people and the natural world.


fiddle-bush-white-stand-nude-leather-chair.jpg

Indoor plants, potted & delivered

Premium plants paired with stylish pots and ceramics, plus lifetime plant care support. Order online at leonandgeorge.com

Best Fertilizer for Indoor Palms

Embrace the timeless elegance of the Kentia Palm, a symbol of tropical grace and sophistication.

With their graceful fronds and tropical allure, indoor palms are cherished for their ability to transform any indoor space into a lush oasis. Whether adorning living rooms, offices, or lobbies, these botanical beauties exude elegance and tranquility. While indoor palms like the Kentia Palm and Lady Palm are renowned for their adaptability and low-maintenance nature, providing them with the right nutrients can significantly enhance their growth and vitality. Read on to discover the best fertilizer for indoor palms and how to effectively fertilize these iconic plants for optimal health and beauty.

Understanding the NPK Ratio

The Best Plant Food for Indoor Palms

Can Fertilizing My Indoor Palm Help It Thrive?

When to Fertilize Your Indoor Palm

Understanding the NPK Ratio

Indoor palms are slow growers and, like other plants, have specific nutrient requirements essential for their growth and well-being. When choosing a fertilizer for indoor palms, it's crucial to consider the NPK ratio, which represents the proportion of nitrogen (N), phosphorus (P), and potassium (K) in the fertilizer formulation. For indoor palms, a balanced, all-purpose liquid fertilizer with an NPK ratio of 10-10-10 or similar is recommended. This balanced blend ensures that your indoor palms receive the essential nutrients necessary for robust growth and vibrant foliage.

The Best Plant Food for Indoor Palms

While various fertilizers can effectively nourish indoor palms, opting for a high-quality, all-natural liquid plant food is ideal for promoting optimal growth and vitality. Our Boost Vitaminé is specifically formulated to meet the unique nutritional needs of indoor palms, providing them with the essential nutrients they need to thrive. Enriched with natural ingredients, Boost Vitaminé promotes healthy root development, lush foliage, and overall plant vigor, ensuring your indoor palms remain vibrant and flourishing.

Can Fertilizing My Indoor Palm Help It Thrive?

While indoor palms may not bloom like their outdoor counterparts, proper fertilization can significantly enhance their overall health and appearance. By providing your indoor palms with the right nutrients at the appropriate times, you can stimulate robust growth, vibrant foliage, and a thriving, verdant presence in your indoor space.

Elevate your indoor palms with Boost Vitaminé Plant Food – the ultimate nourishment for vibrant growth and lush foliage!

When to Fertilize Your Indoor Palm

Timing is key when it comes to fertilizing palms to ensure optimal growth and vitality. During the active growing season, typically from spring to summer, incorporate a balanced liquid fertilizer into your watering routine every two to four weeks. This regular feeding schedule provides your indoor palms with the necessary nutrients to support healthy growth and vibrant foliage. As fall and winter approach and your palms begin to receive less light throughout the day, reduce fertilization to once every two months to prevent overfeeding and maintain overall plant health.

At Léon and George, we're on a mission to bring the beauty of nature into your daily life. Our hand-selected, California-grown plants such as the Fiddle Leaf Fig Tree, Ficus Audrey, and Bird of Paradise are carefully chosen for their quality, health, and beauty. We believe in simplicity, fairness, and sustainability, sourcing our plants from trusted local growers who share our values. When you bring a Léon and George plant into your home, you're not just getting greenery – you're getting a piece of nature treated with our all-natural products and staged for optimal growth. We're here to make plant ownership accessible and enjoyable for everyone, fostering a connection between people and the natural world.


indoor plants

Designed to Thrive

Premium plants, potted and delivered, plus lifetime access to 24/7 Plant Doctor support.

The Best Fertilizer For Dracaenas

The Dracaena Lisa adds a touch of elegance to any space, showcased here in a Coral Mid-Century Pot atop a Light Wood stand.

With their striking upright leaves and air-purifying qualities, Dracaenas are a sought-after choice for both seasoned indoor gardeners and newcomers to plant care alike. Originating primarily from tropical regions of Africa and Asia, Dracaenas boast resilience and adaptability, making them ideal companions for indoor environments. While these low-maintenance beauties can thrive on minimal care, providing them with the right nutrients can elevate their growth and vitality. Read on to discover the best fertilizer for all varieties of Dracaenas and how to effectively fertilize these beloved houseplants.

Understanding the NPK Ratio

The Best Plant Food for Dracaenas

Can Fertilizing My Dracaena Enhance Growth?

When to Fertilize Your Dracaena

Understanding the NPK Ratio

Booste Vitaminé plant food: the secret for thriving plants.

When it comes to fertilizers, deciphering the NPK ratio is crucial. The NPK ratio represents the proportion of nitrogen (N), phosphorus (P), and potassium (K) in the fertilizer formulation. Different plants have distinct nutrient requirements, so selecting a fertilizer tailored to your Dracaena's needs is essential for optimal growth and health.

For Dracaenas, a balanced, all-purpose liquid fertilizer with an NPK ratio of 10-10-10 or similar is recommended. This balanced blend ensures that your Dracaena receives essential nutrients necessary for robust growth and overall well-being.

The Best Plant Food for Dracaenas

While there are various fertilizers on the market suitable for nourishing Dracaenas, consider opting for a high-quality, all-natural liquid plant food that is gentle yet effective. Our Boost Vitaminé is a premium plant food crafted to promote growth, strengthen roots, and enhance overall plant vigor. Formulated with natural ingredients, Boost Vitaminé provides Dracaenas with the nutrients they need to flourish, offering a convenient solution for your plant care routine.

Can Fertilizing My Dracaena Enhance Growth?

Dracaenas are prized for their unique foliage and air-purifying properties, but they are not necessarily fast growing plants. While Dracaenas can occasionally produce fragrant flowers, particularly when grown outdoors in optimal conditions, indoor specimens typically do not bloom. Regularly fertilizing your Dracaena will help it maintain steady growth, but again, these are not super fast growing plants.

By selecting the right fertilizer and adhering to a simple feeding regimen, you can ensure your Dracaena thrives and maintains its beauty. Dracaenas are resilient and forgiving plants, making them suitable for beginners and experienced gardeners alike.

When to Fertilize Your Dracaena

Timing plays a crucial role in fertilizing Dracaenas. These plants exhibit active growth during the spring and summer months, making this period ideal for providing them with nutrients. Incorporate a balanced liquid fertilizer into your watering routine every four to six weeks during the growing season to ensure your Dracaena receives adequate nourishment.

As fall approaches and your Dracaena enters a phase of slower growth, reduce fertilization to once every two months. During the dormant season, Dracaenas require fewer nutrients, and excessive fertilization can negatively impact their health.

By understanding the unique nutritional needs of Dracaenas and selecting the appropriate fertilizer, you embark on a journey of fostering growth, strength, and resilience in your beloved houseplants. With each carefully measured dose of plant food, you nourish not only the roots and leaves but also the spirit of your Dracaena.

Discover our curated selection of Dracaenas that will add a touch of elegance and vitality to your indoor space here.


At Léon and George, we're on a mission to bring the beauty of nature into your daily life. Our hand-selected, California-grown plants such as the Fiddle Leaf Fig Tree, Ficus Audrey, and Bird of Paradise are carefully chosen for their quality, health, and beauty. We believe in simplicity, fairness, and sustainability, sourcing our plants from trusted local growers who share our values. When you bring a Léon and George plant into your home, you're not just getting greenery – you're getting a piece of nature treated with our all-natural products and staged for optimal growth. We're here to make plant ownership accessible and enjoyable for everyone, fostering a connection between people and the natural world.


Designed to Thrive

Premium plants, potted and delivered, plus lifetime access to 24/7 Plant Doctor support.

Fact vs Fiction: Do Houseplants Attract Insects?
do houseplants attract insects

Keep your indoor jungle pest-free for a happy, healthy green space!

One of the number one reasons people don't get involved with indoor plants? Fear of pests. While plants enhance the beauty of your home and have a profound impact on your mental and physical well-being, a common worry among many is the possibility of indoor plants attracting pests and how it may affect your plant growth. While it's a valid concern, it's important to separate fact from fiction when it comes to this topic. Let's explore whether houseplants truly attract insects and how to manage any potential issues.

Do Houseplants Attract Insects?

Proper Care Reduces the Risk

Do all Houseplants Attract Insects Equally?

How To Manage Pests

Do houseplants attract insects?

The short answer is yes, they can. Just as plants in outdoor gardens can attract insects, indoor plants are also susceptible to pest infestations. However, the degree to which houseplants attract insects depends on various factors, including the type of plant, its health, and the conditions in your home. Some plants are naturally more resistant to pests (for example, Olive Trees are naturally pest resistant!) while others may be more prone to attracting them, especially if they are stressed or not properly cared for.

Proper Care Reduces the Risk

One of the most effective ways to minimize the risk of insect infestations and damages to your plant’s stems and foliage is by providing proper care for your houseplants. Healthy, well-maintained plants are more resilient against pests. Ensure your plants receive adequate sunlight, water, and nutrients. Avoid overwatering, which can create conditions like root rot conducive to pest breeding, and regularly inspect your plants for signs of pest activity.

Do all Houseplants Attract Insects Equally?

Say goodbye to pesky pests with Neem Oil!

Not all houseplants attract insects to the same extent. Some plants, such as succulents, spider plants, Olive Trees and bamboo, are less attractive to pests compared to others. Additionally, certain factors, such as the plant's scent or the presence of flowers, may influence its attractiveness to insects. Sometimes, immature plants can be more prone to pests. By selecting plant varieties known for their pest resistance and strategically placing them in your home, you can help mitigate the risk of insect infestations. Here are a few plants that are pest resistant:

How To Manage Pests

Despite your best efforts, you may still encounter pests on your houseplants. If you notice signs of infestation, such as visible insects, sticky residue on leaves, or wilting foliage, it's essential to take action promptly. Begin by isolating the affected plant to prevent the pests from spreading to other plants. Then, depending on the severity of the infestation, you can employ various control methods and learn how to get rid of pests such as:

  • Manual Removal: Pick off insects by hand or prune affected parts of the plant.

  • Natural Remedies: Use natural insecticides and pesticides like soaps or horticulture oil, such as neem oil, to treat infested plants.

  • Environment: Adjust environmental conditions, such as humidity levels and air circulation, to discourage pest activity.

Check out our full blog post on common indoor plant pests to learn more about pests such as Mites, Thrips, Aphids, and Fungas Gnats.

At Léon and George, we're on a mission to bring the beauty of nature into your daily life. Our hand-selected, California-grown tropical plants such as the Fiddle Leaf Fig Tree, Ficus Audrey, and Bird of Paradise are carefully chosen for their quality, health, and beauty. We believe in simplicity, fairness, and sustainability, sourcing our plants from trusted local growers who share our values. When you bring a Léon and George plant into your home, you're not just getting greenery – you're getting a piece of nature treated with our all-natural products and staged for optimal growth. We're here to make plant ownership accessible and enjoyable for everyone, fostering a connection between people and the natural world.


Designed to Thrive

Premium plants, potted and delivered, plus lifetime access to 24/7 Plant Doctor support.

Fact vs Fiction: Can I Use a Grow Light in Any Lamp?
dracaena Lisa

Dracaena Lisa living its best life in a Coral Mid-Century Ceramic – adding a pop of color to your daily green vibes!

Does your plant need additional light than what’s available in your home? You may be considering a grow light. One of the most common questions our customers ask is if a regular lamp will suffice as a grow light, or if they can put a special grow light bulb into one of their lamps.

What are grow lights?

Grow lights are specifically designed for plant growth. They emit light tailored to the needs of plants during different growth stages. Unlike regular bulbs, they provide the right spectrum and intensity required for robust plant development.

Can any lamp accommodate a grow light bulb?

Not any lamp can accommodate a grow light effectively. While it might fit physically, the lamp must have the proper wattage capacity and socket type in order for the grow light to work effectively.

A simple solution to supplementing your plant’s light

The simplest solution to supplementing your plant’s light exposure with a regular lamp is to purchase a “natural daylight” bulb, sold in most hardware stores. This type of lightbulb provides light closer to the natural spectrum of the sun—it is in fact designed to cheer us humans up during dreary winter days! The light should be close to your plant’s foliage, and not overly filtered by a large shade.


houseplants delivered

Designed to Thrive

Premium plants, potted and delivered, plus lifetime access to 24/7 Plant Doctor support.

The Best Fertilizer For Monsteras

Transform your space with a touch of the tropics – Monstera Deliciosa style!

With their distinctive split leaves and impressive size, the Monstera Deliciosa or “swiss cheese plant” is a popular choice for those looking to add a lushly fun and funky plant to their home. To ensure these botanical beauties thrive and display their iconic split-leaf foliage, providing them with the right nutrients is crucial. Just like any other living organism, Monsteras require proper nourishment to grow healthy and robust over time.

Monsteras, scientifically known as Monstera Deliciosa, originate from the tropical rainforests of Central America. Recreating their natural habitat conditions might be a challenge, but with the right care, including suitable fertilization, you can help your Monstera reach its full potential.

  1. When to Fertilize Your Monstera

  2. What NPK Ratio Does the Monstera Need?

  3. The Best Plant Food for Monsteras

  4. Fertilizing Tips for Monsteras

When to Fertilize Your Monstera

Timing is key when it comes to fertilizing Monsteras. The growing season for these plants typically aligns with the warmer months, spring and summer, when they undergo active growth. It’s best to fertilize during this time, as your plant will most likely be actively growing. Incorporating a well-balanced liquid fertilizer into your watering routine every two to four weeks can significantly contribute to the overall health of your Monstera.

As fall approaches and your Monstera experiences a natural slowdown in growth, adjust your fertilization routine accordingly. Reduce the frequency to four every eight weeks or so, depending on the strength of your fertilizer. In winter, you might even consider suspending fertilization until the following spring when the plant resumes active growth. If it’s the dead of winter and your plant is growing, though, feel free to fertilize!

What NPK Ratio Does the Monstera Need?

Understanding the NPK ratio (Nitrogen, Phosphorus, Potassium) is fundamental when selecting the right fertilizer. For Monsteras, a balanced fertilizer with an NPK ratio of 1-1-1 or 2-1-1 is generally suitable. Nitrogen (N) is essential for promoting lush, green foliage and overall plant vigor. Phosphorus (P) encourages root development, and potassium (K) supports overall plant health.

The Best Plant Food for Monsteras

Choosing the best plant food for your Monstera involves considering its specific nutritional needs. While there are various fertilizers on the market, finding one with the right balance is key. A well-rounded, all-purpose liquid fertilizer, such as our Boost Vitaminé, is an excellent choice. It provides the essential nutrients your Monstera needs for robust growth and healthy foliage, and is gentle enough to use all year round.

monstera fertilizer

Nourish your Monstera with our Boost Vitaminé, the perfect plant multivitamin.

Fertilizing Tips for Monsteras

  1. Dilute Fertilizer: Follow the instructions on your chosen fertilizer carefully, and always dilute it as recommended. Over-fertilizing can lead to nutrient burn and negatively impact your Monstera's health.

  2. Watering Routine: Water your Monstera thoroughly before applying fertilizer. This helps prevent any potential root damage caused by applying fertilizer to dry soil.

  3. Consideration for Soil Conditions: Monsteras prefer well-draining soil. Ensure your soil allows excess water to escape, preventing waterlogged conditions that might hinder nutrient absorption.

  4. Observation is Key: Pay attention to your Monstera's response to fertilization. If you notice any signs of stress, such as browning leaf edges, adjust your fertilization routine accordingly.

Providing the right nutrients through proper fertilization is crucial for the health and vitality of your Monstera. By understanding its growing seasons, selecting a balanced fertilizer with the appropriate NPK ratio, and following a consistent and careful fertilization routine, you can ensure your Monstera thrives.


monstera deliciosa black mid century ceramic

Designed to Thrive

Premium plants, potted and delivered, plus lifetime access to 24/7 Plant Doctor support. Order online at leonandgeorge.com

What You Need to Know Before You Decorate Your Bathroom With Plants

Elevate your bathroom oasis with the natural beauty of living greenery. Shop online at Léon & George

Decorating your bathroom with plants is a fantastic way to bring a touch of nature into a space you use every day! However, it's essential to choose plants that can thrive in the unique conditions of a bathroom environment. In this article, we'll explore what you need to know before decorating your bathroom with plants, including the best plant options, lighting considerations, and tips for maintaining a healthy and stylish green space reminiscent of a tropical oasis!

  1. Lighting Considerations

  2. Bathroom Humidity

  3. Finding Mold on your Plants in the Bathroom

  4. Maintaining Your Bathroom Greenery

  5. Creating a Stylish Bathroom Oasis

Lighting Considerations

Before adding plants to your bathroom, assess the lighting conditions. Many bathrooms have limited natural light, so it's crucial to choose plants that can thrive in low or indirect light. Consider the following tips:

  • Place Plants Near Windows: If your bathroom has a window, position your plants near it to maximize exposure to natural light.

  • Choose Low-Light Tolerant Plants: Opt for plants that can thrive in low-light conditions, such as ZZ plants, Snake Plants and Ferns. These varieties can adapt to the subdued lighting often found in bathrooms.

  • Use Grow Lights: If natural light is insufficient, consider supplementing it with artificial grow lights. LED grow lights are energy-efficient and can provide the necessary light for your bathroom plants to flourish.

Bathroom Humidity

The bathroom tends to be a relatively humid space, so consider investing in plants that enjoy this type of atmosphere. Luckily many popular houseplants hail from tropical environments that are naturally humid, so rest assured there is plenty to choose from! Here are some popular humidity-loving plants that would do well in the bathroom:

Looking for ever more ideas? Check out our full list of best plants for the bathroom.

bathroom cascading pothos

Transform your bathroom vanity with Cascading Pothos – the perfect touch of green.

Finding Mold on your Plants in the Bathroom

Because of the humid conditions in a bathroom, it is not uncommon to find light growth on the soil of your plants. This is almost never harmful, and can sometimes even be beneficial for the health of your plant! If you don’t like the way it looks, feel free to scrape it off and even consider sprinkling the soil with cinnamon to avoid it coming back.

Maintaining Your Bathroom Greenery

To ensure your bathroom plants remain healthy and vibrant, follow these maintenance tips:

  • Watering: Be mindful of your plant's water requirements. While ferns prefer consistently moist soil, succulents like Zanzibar Gems prefer to dry out between watering. Adjust your watering routine based on the specific needs of each plant, and note that many plants will require a lot less frequent watering when living in the humid conditions of the bathroom.

  • Pruning and Grooming: Regularly remove yellow or dead leaves to encourage new growth and keep your bathroom oasis looking fresh. Prune your plants as needed to maintain their shape and size.

  • Rotate Plants: To ensure even growth, periodically rotate your plants. This helps prevent uneven growth and promotes healthier, more balanced plants.

Creating a Stylish Bathroom Oasis

Now that you know what to consider before decorating your bathroom with plants, it's time to transform your space into a stylish and green oasis. By choosing the right plants, optimizing lighting, and implementing proper maintenance, you can enjoy the beauty of nature in one of the most intimate spaces in your home. Explore different plant varieties, experiment with arrangements, and turn your bathroom into a refreshing haven with the power of greenery!


plants for bathroom

Designed to Thrive

Premium plants, potted and delivered, plus lifetime access to 24/7 Plant Doctor support.

Fact or Fiction: Will Olive Trees Grow Indoors?

The Olive Tree paired with the Black Mid-Century Ceramic pot and Light Wood Stand – the perfect addition to any space. But can it survive indoors like other houseplants?

The allure of cultivating an Olive Tree indoors is undeniable. The silvery-green leaves and the potential of growing fruit evoke the charm of the Mediterranean right in your very own living space for any gardening lover. But is growing an Olive Tree indoors a feasible endeavor? In this post, we unravel the truth about growing potted Olive Trees indoors.

  1. Can Olive Trees be Placed Indoors?

  2. Lighting Requirements

  3. Temperature and Humidity

  4. Watering

  5. Pest Prevention

  6. Moving Olive Trees Outdoors for the Summer

  7. Alternative Plants with Olive Tree Vibes

Can Olive Trees be Placed Indoors?

Native to the sun-soaked Mediterranean region, Olive Trees have a penchant for abundant sunlight. Ideally, they thrive outdoors, basking in at least six hours of direct sunlight daily. However, with thoughtful care, it's possible to bring the essence of an Olive Tree indoors.

Lighting Requirements

Keeping your Olive Tree indoors demands a strategic approach to lighting. These trees require ample sunlight, and an unobstructed south-facing window with high light is optimal for their growth. To ensure equal light exposure, rotate the plant bi-weekly and refrain from placing in low-light areas. In cases of insufficient natural full sun, supplement with a grow light for 6-8 hours daily, especially if outdoor relocation isn't feasible.

Unlock the full beauty of your Olive Tree by placing it near a sunlit South-facing window – the tree should receive at least six hours of sunlight a day.

Temperature and Humidity

Regarding temperature and humidity, Olive trees prefer a room temperature between 65 and 80 degrees Fahrenheit. They can tolerate dry air, but it's essential to keep them away from heat vents to prevent too much drying out. Occasional misting or placing near a humidifier can mimic the higher humidity levels these trees enjoy in their native Mediterranean climate.

Watering

Watering is a crucial aspect of indoor olive tree care. The soil and root-system should never fully dry out, but should not remain damp for long periods of time which may lead to root-rot. Watering is required when the top two inches is dry. During winter dormancy, reduce watering, but a dry soil surface signals the need for hydration. Olive Trees prefer high humidity, and misting your Olive Tree regularly can help introduce more humidity to indoor air.

Pest Prevention

In the realm of indoor gardening, proper pest prevention is paramount for the well-being of olive trees growing in planters. Olive trees are particularly susceptible to pests like aphids, spider mites, and mealybugs, which can compromise the health of your growing plants. Employing effective measures such as neem oil, a natural insect deterrent, becomes crucial for maintaining optimal conditions in the potting soils and ensuring a thriving indoor olive tree while safeguarding against potential pests in your planter.

Alternative Plants with Olive Tree Vibes

While the Olive Tree has a distinct charm, several alternative plants can grace your indoor space with a similar aesthetic that can thrive better in such conditions. Consider these alternatives:

  1. Bird of Paradise: With large, banana-like leaves, it brings a tropical touch to any space and is popular amongst other house plants.

  2. False Aralia: Elegant, finely-cut foliage for a sophisticated look.

  3. Fishtail Palm: Mimics the feathery appearance, adding a touch of the exotic.

  4. Schefflera Tree: Known for its lush, umbrella-like foliage and is easy-care.

While Olive Trees may not be the easiest indoor companions, with the right care and adjustments, you can infuse your living space with their distinct charm. However, for those seeking alternatives, there are several plants that capture the essence of an Olive Tree without the specific demands. Whether you opt for the Mediterranean allure of the Olive Tree and the potential for edible fruit or explore alternatives, each plant brings its unique green symphony to your space!

At Léon and George, we're on a mission to bring the beauty of nature into your daily life. Our hand-selected, California-grown house plants carefully chosen for their quality, health, and beauty. We believe in simplicity, fairness, and sustainability, sourcing our potted plants from trusted local growers who share our values. When you bring a Léon and George plant into your home, you're not just getting greenery – you're getting a piece of nature treated with our all-natural products and staged for easy, optimal growth. We're here to make plant ownership accessible and enjoyable for everyone, fostering a connection between people and the natural world.


The Olive Tree Collection

Premium Olive Trees, potted and delivered, plus lifetime access to 24/7 Plant Doctor support. Order online at leonandgeorge.com

The First Six Months With Your Black Olive Tree: What To Expect

The Black Olive Tree is an indoor plant that thrives in bright light, making it an enchanting addition to any space topped with preserved forest moss for a touch of natural elegance.

With its delicate clusters of dark green, glossy leaves and enduring, one-of-a-kind charm, the Black Olive Tree, also known as Bucida Buceras or Shady Lady Olive Tree, is a striking addition to any space. Native to tropical regions, this tree-like beauty is often mistaken for other varieties like its outdoor-loving cousin, the Olive Tree, but it doesn't bear edible fruit and in reality is not an olive tree at all. Nonetheless, its airy, Mediterranean appearance has earned it the common name of Black Olive Tree, and if you’ve welcomed one of these treasures into your indoor plants collection or are considering it, prepare for a rewarding journey as you guide this elegant plant through its initial adaptation phase into its new home. Let’s learn how to grow and bloom your new Black Olive Tree!

The Early Days: Understanding Changes

When you first introduce your new Black Olive Tree to your home, don't be surprised or alarmed if it undergoes a period of adjustment or grows slow as it adjusts to new climates. Many houseplants react to new environments by dropping leaves, and the Black Olive Tree is no exception. This particular variety of plant is incredibly sensitive to shifts in light, humidity, and temperature, and it is not uncommon for some or even all of the foliage to dry up initially and fall off.

IMPORTANT! This does not mean your plant is dead. It is simply responding to the change in its environment, and this behavior is very common for the Black Olive Tree. Keep reading to see how you can best support your plant as it bounces back and begins to grow new leaves.

Leaves on the Black Olive Tree will begin to dry up and fall in the initial adjustment phase after moving your plant.

Patience While Shedding

The key to helping your Black Olive Tree adapt successfully is patience. Let your tree shed its leaves—there is nothing to be done while it goes through this phase besides regularly sweeping up the dry leaves from the floor. It can take anywhere from 1-4 weeks for your plant to lose all its leaves. If you’d like to reduce the amount of sweeping, once a week give your tree a gentle shake so that any leaves that are ready to go may fall all at once.

Providing the Right Conditions

To support your Black Olive Tree during this adjustment phase, ensure you provide the ideal conditions:

  1. Light: These trees thrive in plenty of bright indirect light and full sun, and also like some direct sunlight, so ensure they are planted in its pot near a sunny window with at least a few hours of direct sunlight year-round and refrain from placing in low-light areas.

  2. Watering: The Black Olive Tree can be particularly thirsty while its going through the adjustment phase. Ensure it is watered thoroughly every few days, or at a minimum once a week, and prevent drought or letting your plant dry-out.

  3. Preventing overwatering is crucial for Black Olive Trees, as excessive dampness can lead to root rot, affecting the root-ball and jeopardizing the health of the entire plant. To maintain the ideal balance for growing plants, it's essential to keep the soil moist but not waterlogged, ensuring the well-being of both foliage and root systems.

  4. Proper Drainage: Ensuring proper drainage in the potting soil is crucial for the well-being of black olive trees, as these easy-care plants are highly tolerant but require well-draining conditions. It is essential to avoid waterlogging and maintain a slightly damp environment when watering, promoting optimal growth for these resilient and adaptable trees.

  5. Temperature: Keep your Black Olive Tree away from drafts and sudden temperature fluctuations, as these can stress the plant further.

  6. Fertilizing: Hold off on feeding your plant during the initial adjustment period. Once you notice new growth emerging you can begin to fertilize, introduce a mild plant food to support its development during the growing season.

  7. Pests: In the care of Black Olive Trees, especially those in, maintaining a green thumb involves vigilant pest prevention. These trees may be susceptible to common pests like aphids and spider mites, so regular inspections and appropriate insect control measures are essential to ensure their overall health and vitality.

  8. Humidity: Black Olive Trees, thriving in humid conditions, tolerate soil moistness and benefit from a regular mist to prevent wilting. To maintain their optimal health, consider incorporating a mister into your care routine to provide the necessary humidity for these resilient trees.

In general, try to provide adequate light and water, and do not do anything else as your plant adapts. Patience is key!

Getting Past the Adjustment Phase

Between 6-12 weeks, you'll likely witness a remarkable transformation in your Black Olive Tree and notice that it is fairly easy-to-grow. New leaves will emerge, demonstrating the tree's adaptability and resilience. As you begin to see new buds and fast-growth forming, rest assured that your tree will become fuller and more beautiful in no time, enriching your space with its timeless elegance.

Despite swiftly losing many if not all their leaves as they adjust to their new space, your Black Olive Tree will astound you with how rapidly it begins to fill out again with new growth.

You've Got This!

While the Black Olive Tree might demand a bit more attention than other plants and low maintenance plants during its initial phase, the rewards are immeasurable. With patience and proper care, you'll have the pleasure of enjoying your new Black Olive Tree for years to come. As you observe its journey of renewal and growth over the first six months, you'll gain a deeper appreciation for nature's wonders and your Black Olive Tree's incredible resilience. Embrace the gardening adventure, and soon you'll have a thriving, magnificent tree!


black olive tree

Designed to Thrive

Premium Black Olive Trees, potted and delivered, plus lifetime access to 24/7 Plant Doctor support.

The Ten Commandments of Braided Money Tree Care
braided money tree sizes

Triple the prosperity! Our Braided Money Trees are available in small, medium, and large sizes.

Are you ready to care for your very own Braided Money Tree? With its striking braided trunk and lush green foliage, the Braided Money Tree is a captivating plant that brings an aura of prosperity and positive energy to any space. They even say it brings good luck, but of course,  we imagine those luck-bearing properties are at their strongest when the plant is thriving!

Bring a wealth of good fortune to your home or office with the Braided Money Tree, and adhere to these Ten Commandments so that you and your plant will flourish for years to come!

Provide abundant light (if you want it to grow!) 

braided money tree light

Braided Money Trees thrive in moderate to bright indirect light.

The Braided Money Tree can be a very fast grower, and will do so in bright, indirect light. Place your plant near a window where it can bask in ample indirect light if you’d like to see it flourish and grow bigger over time. Note that the Braided Money Tree can adapt to medium levels of light, but it will grow more slowly. 

And whatever you do, keep it out of harsh direct sunlight! The Braided Money Tree is a houseplant, not a beach bum, and will quickly burn if left to roast in the sun.

Maintain plenty of humidity 

The Braided Money Tree is no diva, but it does hail from humid environments and as such appreciates a moist atmosphere. Increase humidity levels by regularly misting its leaves or placing a tray of water and pebbles near the plant or a humidifier. This will help recreate its natural habitat.

braided money tree

Elevate your space with lush charm! Braided Money Tees bring a touch of vibrant greenery to any environment.

Keep things cozy

The Braided Money Tree prefers a temperature range between 65°F and 80°F (18°C to 27°C). Shield it from extreme temperature fluctuations and drafts, which can stress the plant. If you’re cold, your plant is probably cold too!

And keep it away from heaters and AC units

A quick path to unattractiveness for most indoor houseplants is placing them right next to air vents. Likewise with the Braided Money Tree– avoid placing it near vents, air conditioners, or heating units, as they can cause dry air and disrupt the plant's health. Optimal conditions include a moderate and consistent temperature throughout the year.

Fertilize with care

Feed your Braided Money Tree with a balanced, water-soluble fertilizer during the growing season (spring and summer). Consider using Boost Vitamine, an all natural plant food that is ideal for Braided Money Trees and other indoor specimens. Follow the instructions and take care not to overdo it! Over-fertilizing can lead to “fertilizer burn” on your plant’s foliage.

Water judiciously

While the Braided Money Tree appreciates regular watering, it dislikes “wet feet” or waterlogged soil. Allow the top inch (2.5 cm) of soil to dry out before watering again. Ensure proper drainage by using a well-draining potting mix and a pot with drainage holes.

money tree prune

Braided Money Trees flourish with occasional trimming, shaping your wealth and growth.

Prune with purpose 

Pruning is essential to maintain the shape and health of your Braided Money Tree, as well as to promote new growth. Trim away any dead or yellowing leaves, as well as leggy growth, to encourage a fuller and more balanced appearance. Use clean and sharp pruning tools to minimize the risk of disease. As always with pruning, never remove more than 30% of the leaves at a time. 

Be vigilant against pests

Plants don’t attract pests, but they can be an attractive home for pests if not cared for properly. Regularly inspect your Braided Money Tree for signs of infestation, such as webbing, tiny crawling insects, or sticky residue. Keep your plant clean with soap specially formulated for indoor plants, and treat any pest issues promptly with organic insecticidal soaps or other appropriate natural remedies like Neem Oil.

Repot wisely

When your Braided Money Tree outgrows its current pot, transfer it to a slightly larger container with fresh, well-draining soil. Repotting every two to three years, preferably in spring, allows the roots to have adequate space for growth and prevents the plant from becoming root-bound. Read our full guide on how to repot your plant.

Embrace plant companions

Consider grouping your Braided Money Tree with other compatible houseplants. Plants in proximity create a microclimate of increased humidity and can benefit each other. Just ensure their light and watering requirements align, and they will thrive together.

parlor palm braided money tree

Pair a Braided Money Tree with a Parlor Palm to create a stunning botanical oasis.

Ready to take on the luck-bearing Braided Money Tree? Follow these ten commandments and we guarantee you will have a lush, flourishing Money Tree in no time!


braided money tree

Designed to Thrive

Premium plants, potted and delivered, plus lifetime access to 24/7 Plant Doctor support. Order online at leonandgeorge.com

What To Know Before You Fertilize Your Plants

Fertilizing your plants is like giving them a nutrient-packed smoothie – it's the secret recipe for their vibrant and blooming success!

Like all living creatures, plants have certain needs in order to live their best lives: they require light, water, and nutrients to thrive. While most of the nutrients come from the soil, potted plants can experience nutrient depletion over time. This is where fertilizer steps in, and is an important part of keeping your plant “well-fed” over time. But before you dive into feeding your leafy companions, there are a few important things you should know about fertilizers.

  1. When to Fertilize

  2. What Type of Fertilizer to Use

  3. Types of Fertilizers

  4. Recommended Fertilizers for Indoor Plants

  5. How to Fertilize Indoor Plants

When to Fertilize

Timing is everything when it comes to fertilizing your plants. In general, you should fertilize during the growing season, which usually spans spring and summer. During these months, increased warmth and light stimulate plant growth that might slow down in the colder, darker winter. Feeding your plants with nutrients at the right time helps boost their growth. 

When it comes to indoor houseplants, you might also fertilize in the fall and winter, particularly if the plant is putting out new growth. Feeding it lightly during this time will support that new growth!

Read more about the best time to fertilize your plants!

What Type of Fertilizer to Use

Fertilizers typically contain three primary nutrients: nitrogen, phosphorus, and potassium, often abbreviated as NPK. These nutrients are represented by numbers on the fertilizer's packaging, such as 10-20-15 or 15-15-15, and they correspond to the percentages of N-P-K in the fertilizer. A balanced, all-purpose fertilizer usually has them in equal proportions. However, there are specialized fertilizers for specific plants, like orchids or roses, which may have different NPK ratios and additional micronutrients tailored to the plants' needs. The fertilizer's label should provide all the necessary information about its intended use. Also check out the best fertilizer for popular plants like the Bird of Paradise, Snake Plant and Fiddle Leaf Fig!

Types of Fertilizers

Liquid Fertilizer: This water-soluble fertilizer is added directly to your watering can every two weeks. Be sure to follow the label instructions carefully for accurate measurements, as overdoing it can harm your plant's leaves. The benefits of liquid fertilizer include precise control over nutrient delivery and the ability to observe your plant's reaction and adjust future feedings accordingly.

Slow Release: At the start of the growing season, incorporate slow-release fertilizer directly into your plant's soil. These fertilizers release nutrients gradually over 2-3 months, reducing the need for frequent feeding. It's particularly handy if you're planning a vacation, as your plants will receive the nourishment they need in your absence.

Recommended Fertilizers for Indoor Plants

While any indoor plant food will suffice, here are some recommended products to consider:

Boost Vitaminé Natural Plant Food: This natural plant food, with only four ingredients, is suitable for use with any indoor plant. What makes it stand out is its gentle formula, making it safe to use sparingly even in winter.

Potion Magique Foliar Feed: Ever tried foliar feeding? It might not be as effective for promoting new growth, but it increases nutrient intake through the plant's leaves. Potion Magique is a potent, all-natural foliar feed that you can incorporate into your misting routine. Plus, it smells divine!

Boost Vitaminé Natural Plant Food: The four-ingredient wonder that's gentle enough for your indoor plants, even when the winter chill sets in!

How to Fertilize Indoor Plants

Always follow the guidelines provided with your chosen fertilizer. Some come in liquid form to mix with your watering, while others are solid and can be placed in the soil or sprinkled on top. As a general rule, fertilize your plants 1-2 times per month in spring and summer. Reduce to once a month or cease fertilizing during the winter, depending on the strength of your plant food.

Remember, it's entirely possible to over-fertilize your plant, leading to "burning" or yellowing/browning of the leaf tips. Also, be aware that new commercial potting mixes often contain fertilizer, so you should wait about a month before fertilizing a newly potted plant.

Now that you're equipped with these fertilizer fundamentals, go ahead and nurture your hungry plants to ensure they flourish and thrive. Happy feeding!


Designed to Thrive

Premium plants, potted and delivered, plus lifetime access to 24/7 Plant Doctor support. Order online at leonandgeorge.com

How To Care For and Grow your Jade Cactus AKA Euphorbia Ingens

The Jade Cactus, scientifically known as Euphorbia Ingens and also commonly referred to as the Candelabra Cactus or Candelabra Tree, is a stunning and low-maintenance succulent that adds a touch of desert elegance to any indoor space. With its robust columnar structure and deep green coloring, the Jade Cactus is a popular choice amongst interior designers and design enthusiasts alike. Read up on the basics of how to care for the Euphorbia Ingens, from water and light requirements to propagation and everything in between.

Light requirements

The Euphorbia Ingens has flexible light preferences, making it a versatile choice for various lighting conditions. While bright indirect light and even some direct sunlight is ideal, they can also adapt to medium levels of light, though less light will significantly slow their growth rate. Place your Euphorbia Ingens near a south-facing or west-facing window for optimal light conditions, or even outdoors in a semi-shaded area (too much direct sunlight may scorch your cactus!).

Choosing the best soil

Choose a well-draining cactus or succulent potting mix for your Euphorbia. This blend typically consists of sand, potting soil, and perlite or pumice. The mix allows for plenty of drainage and prevents moisture-related issues such as root rot

Watering - less is more

Euphorbias are drought-resistant and the Euphorbia Ingens is no exception: it is essential to allow it to dry out between waterings. Water the plant infrequently and sparingly, allowing the top inch of soil to become dry before the next watering. Depending on placement and time of year, your plant may only need watering once per month! Overwatering can lead to root rot, so exercise caution and prioritize a well-draining pot and soil mix.

Temperature and humidity 

Euphorbia Ingens thrive in average household temperatures between 65 to 75 degrees Fahrenheit. They can tolerate cooler temperatures down to 55 degrees Fahrenheit, but avoid prolonged exposure to temperatures below 50 degrees Fahrenheit. Maintain consistent temperatures to prevent stress and maintain your Euphorbia’s health for years to come!

The perfect fertilizing routine

Feed your Euphorbia during its growing season (spring and summer) with a controlled-release succulent fertilizer or a diluted, balanced liquid fertilizer. Use a 10-10-10 fertilizer for mature plants and a low-nitrogen fertilizer for young ones. Avoid overfeeding, as succulents prefer light feeding.

Propagating

Propagating the Euphorbia Ingens is an exciting project and a great way to grow your collection! You can propagate by taking a cutting from your plant–the easiest way to do this is to remove one of the “arms” from the cactus. Allow it to dry for at least 24 hours before placing in well-draining succulent or cactus mix, and lightly wet the soil with water. Place in a warm, dry area–you have a new plant that should begin to start growing within just a few weeks!

Potting and repotting

Select a pot that accommodates your Euphorbia Ingens’ root system. While they have small roots, avoid oversized pots that may retain excess moisture. Repot every 2-3 years for smaller plants and 4-5 years for larger ones.

Common problems

Monitor your Euphorbia for potential issues such as wrinkled leaves (sign of underwatering), all-over yellowing (indicates overwatering), and leaf loss (oftentimes not enough light). If your Euphorbia faces decline, diagnose the problem first and adjust your care routine accordingly. Combat pests like mealybugs, spider mites, and scale using gentle methods like wiping with rubbing alcohol-soaked cotton balls and neem oil.

The Jade Cactus is a captivating and easy-to-care-for succulent that adds a touch of desert charm to indoor spaces. With its striking appearance and low-maintenance requirements, it's a popular choice among plant enthusiasts. By providing the right light, well-draining soil, and careful watering, you can ensure the Euphorbia Ingens thrives and remains a stunning addition to your home.


Designed to Thrive

Premium plants, potted and delivered, plus lifetime access to 24/7 Plant Doctor support.

(if the article is about a specific plant we sell, change this block content/link to that specific product)