Why Are My Philodendron's Leaves Turning Yellow?

Why are my Philodendron’s leaves turning yellow?

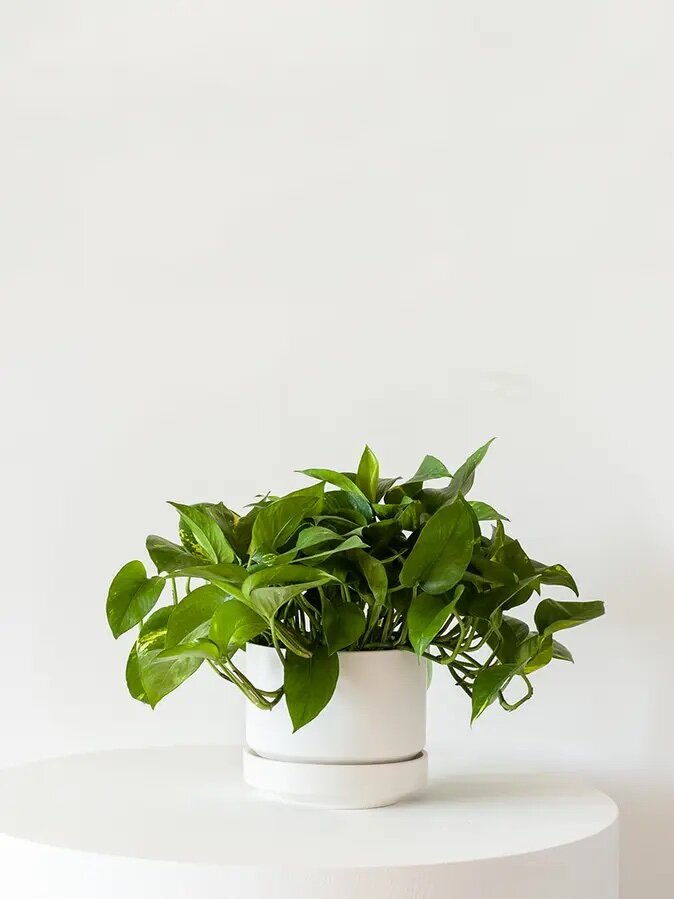
Philodendrons are so charming and vibrant. They often have variegated foliage and can grow in gorgeously long cascades, and they’re a beloved low-maintenance houseplant variety. But even with their easy-going temperament, they can exhibit yellowing foliage which can be troubling (in truth, all plants can!). Read on to learn why your Philodendron’s foliage may be yellowing, and for our quick tips to get it back on track!

Aging

You’ll find that most plants will exhibit some yellowing foliage from time to time. It happens when they shed old growth to concentrate on pushing out new leaves, and sometimes particularly young new leaves simply don’t thrive. This isn’t the result of a systemic health issue, just normal plant behavior. If your Philodendron is receiving appropriate care, appears healthy overall, but is showing some yellow leaves, they can just be pulled off gently or trimmed off using clean, sharp scissors or shears.

Overwatering

Philodendrons can be overwatered, and yellowing foliage is one of the most common signs of this issue. These plants should only be watered whenever their top two inches of soil are dry to the touch, rather than based on a timetable. To check your plant’s moisture, lift up a portion of its decorative moss and stick your finger two inches down into its soil. If the soil is dry, it’s time to water the plant. But if it is still moist, hold off! 

Incorrect Light

We all know that we need to drink more water when we’re out in the sun all day, and the same goes for our plants. The more light that your Philodendron receives, the faster it will use up the water in its soil. So check its moisture levels frequently, and adjust as necessary during the sunnier, warmer months of the year.

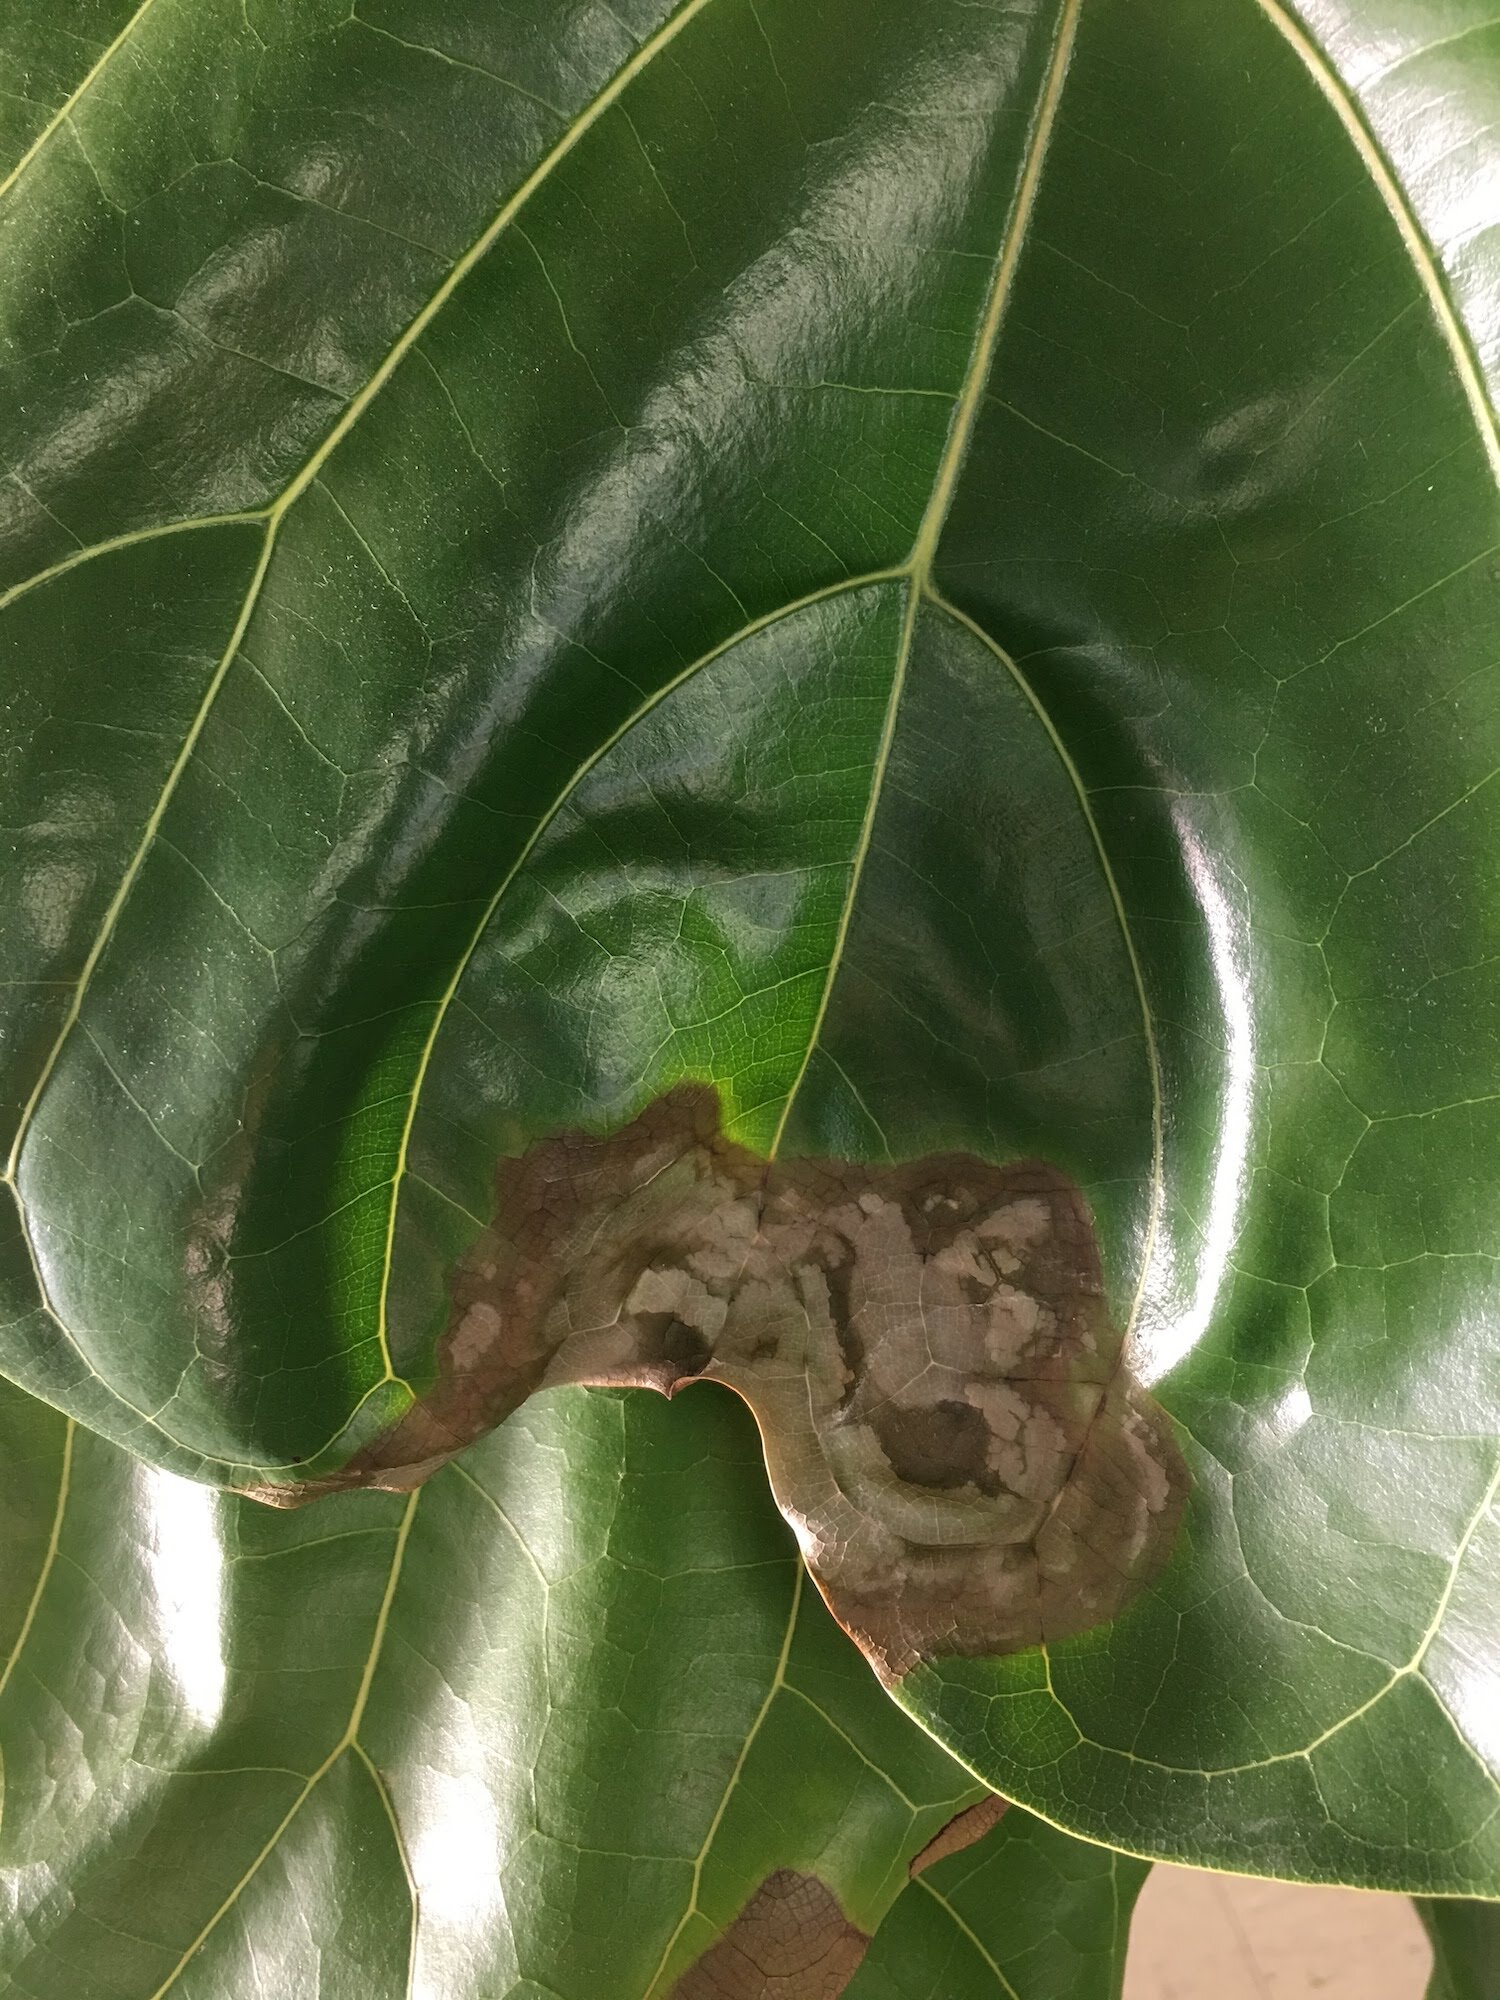
If your Philodendron is receiving too much light, this will affect its overall health and foliage. Remember that Philodendrons cannot tolerate direct, bright sunlight, as it will sunburn their leaves, a symptom which will exhibit itself as discoloration and sometimes, as yellowing.

A Lack of Humidity

In especially dry climates, Philodendrons can suffer from a lack of humidity. If your home is regularly dry, or an air conditioner or heater is often on, it is helpful to boost your Philodendron’s humidity by misting it a few times a week. 

More Support!

Yellowing foliage can be a completely normal aspect of all living plants, but if you are concerned that your plant is receiving all appropriate care and continues to display foliage issues, you can always contact our Plant Doctor service via your Léon & George account. Our Plant Doctors are here to help! 
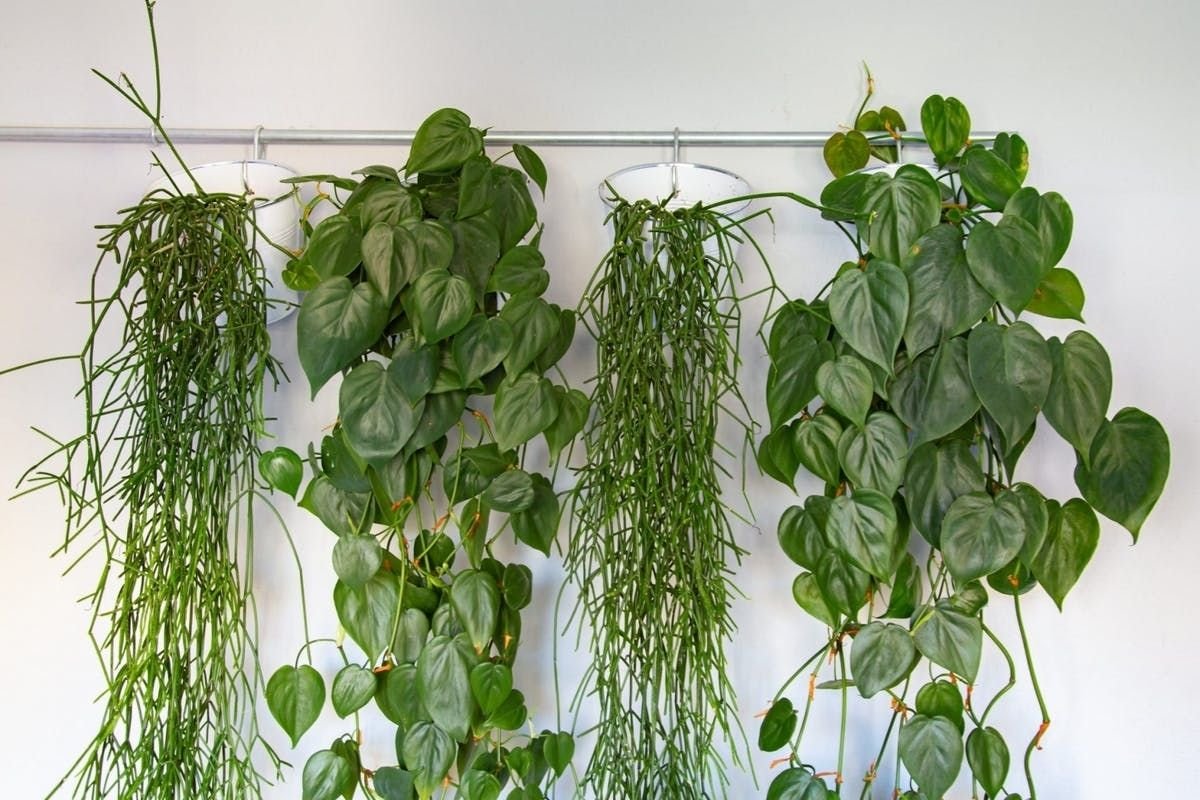

Screen Shot 2021-07-07 at 1.55.33 PM.png

Philodendron Brasil

With jewel-tone variegated foliage and gentle tendrils, the Philodendron Brasil is a lush, easy-care houseplant with a tropical aesthetic.

5 Easy Steps To Propagating Pothos

How to propagate the Pothos with cuttings: cut just below the node!

When it comes to propagation, Pothos is the way to go. There is no plant quite as simple to propagate as the Pothos, and given the lushness of this particular plant, you can literally make dozens of new Pothos from one in just a few simple steps!

Looking for Pothos plant care? Check out our full care guide, or read up on everything you should know before buying a Pothos.

How to propagate Pothos plants

Pothos propagation is incredibly simple:

Step one: Select a stem with a leaf and locate the node. The node is like a joint: it is where new stems erupt, and often appears just below the stem of a leaf.

Step two: Using a clean blade, cut just below the node. You can also include a few different nodes in one cutting!

Step three: Place the stem and its node in a glass or jar with water. Make sure only the stem and node are submerged — do not submerge any leaves as they will rot.

Step four: Place in an area with bright, indirect light and wait. You may like to change the water every few days to keep it fresh. After a week or two, you should see roots begin to sprout.

Pro tip: your cutting can “live” like this for ages as a beautiful and minimal piece of decor! Feel free to stop here or go on to step 5 if you’d like to grow a full new plant.

Step five: Once the roots are visible, carefully place them in a small pot with fresh indoor potting soil and gently press down. Keep the soil just moist to the touch, ideally by misting it heavily, for the first few weeks until the plant has taken root.

Good luck, happy propagating, and show us your new plant babies by tagging us @leonandgeorge on Instagram!


cascading pothos

A lush and incredibly forgiving easy-care houseplant, the Cascading Pothos is the perfect plant for beginners and seasoned green thumbs alike.

The Ultimate Guide To Watering Your Calathea
The ten commandments of Calathea care

It’s normal to feel nervous when you first implement your new plant’s watering routine, and this can be especially true with the beautiful Calathea. The last thing anyone wants to do is cause this enchanting plant undue stress! 

But breathe a sigh of relief, because our Ultimate Guide is exactly the resource you need to take the mystery out of the ever-mysterious Calathea’s care routine!

How to water your Calathea

Learn to Test the Soil by Touch 

We know that the beautiful bed of moss that blankets your Calathea’s soil looks perfect the way it is- but don’t be afraid to lift it up! (You can pat it right back down after, and it will still look gorgeous.) 

Using your finger to test the dryness of the top one to two inches of soil is a great way to determine the watering needs of your Calathea. In any environment, conditions are changeable: Winter turns to Spring; heaters are cranked then turned off entirely as seasons change. All of these things affect the watering needs of your plants, so going by touch can be preferable to simply following “Once a week”-style guidance.

You will learn to trust yourself as a plant parent, and cultivate your green thumb, by getting down and dirty with your plant. 

Once or twice a week, probe your Calathea’s soil with your finger. If the top inch of soil feels like it is getting dry, go ahead and water your Calathea. 

The Many Marvels of Misting 

There’s so much to love about misting- and not only for those of us who can’t get enough of cute accessories

Calatheas are native to humid jungles, so they love a good misting, and appreciate being misted every few days.

Consider using lukewarm water when misting, or even leaving a bowl of water out overnight before misting your plants with it. Allowing the water to rest will cause its harsh minerals to evaporate. 

Another benefit of misting is that it gives you a way of interacting with your plant, without the risk of overwatering it- which is by far the most common plant parent mistake and can result in serious health issues for your plant, including the dreaded brown leaves that too often occur.

Potion Magique

An all-natural formula to add to your misting routine, providing extra nutrition and pest control for your plants through their foliage.

$28

Bottoms Up! 

We all know that plants use their roots to drink, but did you know that those roots can function as straws, sucking up just the right amount of water to perk your Calathea up?

You can hydrate your Calathea by allowing it to soak. Remove your Calathea from its ceramic pot, but keep it in its plastic nursery planter. 

Then, place your Calathea in a bowl or sink filled with three to four inches of lukewarm water. Let the Calathea soak for about 45 minutes before testing its soil by touch. (By now, you know exactly what to look for!)

If the soil feels moist, your plant is good to go! Allow it to drain entirely before replacing it in its ceramic pot.

Overwatered? Give it a rest! 

Overwatering any plant can feel heartbreaking. But there are solutions, although recovery will take time. Here are two options for rehabbing your overwatered Calathea: 

  • The True Beginner Method

Take your Calathea out of its ceramic pot, but leave it in its plastic nursery planter. If any water has collected in the ceramic pot, dump it now! Move your plant to a warm spot with medium to bright indirect light, and allow it to dry until moist before returning it to its ceramic pot. 

  • The Practiced Plant Parent Method 

Lay out newspapers in a spot that receives medium to bright indirect light. Once you have those set out, remove your Calathea from both its ceramic pot and its plastic nursery pot. Allow it to rest on the newspapers, roots and all! 

The newspapers will likely soak, so replace them as they fully saturate, until your Calathea stops draining excess water. Then return your Calathea to its plastic nursery pot, and allow it to dry until moist before returning it to its ceramic pot. 

And there you have it! If you’re a Calathea lover (and who isn’t!) these steps will serve you well. So go ahead- add a Calathea to your growing plant family with confidence! 

Ready for more? Read our full guide on Calathea care, including tips for propagation, repotting, and more.


isaac-leon-and-george-09-2019-0546 (1).jpg

Indoor plants, potted & delivered

Premium plants paired with stylish ceramics, plus lifetime plant care support. Order online at leonandgeorge.com

What You Need To Know Before You Buy A Pothos

When it comes to houseplants, it doesn’t get any more classic than the Cascading Pothos, also known as Devil’s Ivy, Golden Pothos, Money Plant, and (erroneously) philodendron. This trailing plant is by far one of the easiest to care for and is a great option for beginners. If you’re eyeing one of these no-fuss beauties, read up on it first so you can be sure it’s the right fit!

The Pothos Plant: What Makes It So Easy To Care For?

The Pothos (epipremnum aureum) is known for its hardiness and ease of care. That’s because unlike other houseplants, it can survive and thrive in a wide variety of conditions. From bright light to low light, high humidity to extremely dry air, the Pothos is not a picky plant.

How fast does the Pothos grow?

Pothos are fast growers through and through. With proper care, this plant can grow up to a foot each month during the spring and summer. Of course, Pothos plants are great for low light spaces, and as with any plant, it will grow more slowly in low light.

What kind of light do pothos require?

Pothos are very flexible in terms of light. Anything from low light to bright light will do. Avoid direct sunlight with this plant as its leaves may burn.

It’s important not to overwater your Pothos

Pothos like to have their roots dry out in between waterings. As such, always check the soil before watering and don’t water unless it feels dry.

In fact, the Pothos is a great plant for beginners because it communicates when it’s thirsty: when Pothos start to droop, that’s when you know you need to water.

Pothos are great air purifiers

Looking for an excellent air-purifying plant? Look no further. In a NASA clean air study, the Pothos showed effectiveness in clearing the air of common toxins like benzene, formaldehyde, toluene, carbon monoxide and xylene. While it’s true that one Pothos in a large living room may not make a big dent, anything helps!

Propagating Pothos is SO easy!

Pothos plants are by far some of the easiest out there to propagate. If you are not familiar with propagation, it is essentially making multiple new plants from one! How to propagate a Pothos? Simply snip a stem below the node and place in water. Once roots have sprouted, you can plant in potting soil and watch it grow! Not sure what a node is? Read our full guide on propagation here.

are pothos plants safe for pets?

Unfortunately the Pothos plant is mildly toxic for cats and dogs. That said, given its trailing nature, you can easily place it out of reach of curious pets and thus enjoy its beauty alongside your furry companions.

How many pothos varieties are there?

The short answer: so many! Some of the most popular Pothos varieties include the Golden Pothos, Cascading Pothos, Neon Pothos, N’Joy Pothos, Satin Pothos, Marble Queen Pothos and Jade Pothos. All Pothos varieties are easy to care for and great for beginners.

EXPLORE THE BEAUTIFUL CASCADING POTHOS

A lush and trailing houseplant, perfect for beginners and seasoned plant parents alike!

The Do's and Don'ts of Repotting Plants

Repotting plants is a simple task, but there are a few tips and tricks to maximize the benefits of this plant care routine. Here are our Plant Doctor’s top ten Do’s and Don’ts when it comes to repotting your plants!

Don’t Size Down (Usually)

In most cases, you will either keep the same size or size up when repotting. There is no benefit to repotting in a smaller pot unless you are propagating and separating the plant into two or more new ones, or you are repotting a plant that has had root rot and as a consequence has very few healthy roots left.

Don’t Repot Into A Huge Container

A big part of repotting is giving plants more room to grow. That said, you don’t want to give them too much room. Why’s that? Most plants like to have their roots very snugly packed. A pot that’s too big may lead to poor root health and a sad looking plant overall.

DON’T Leave Any Air In The Soil

Make sure that your plant’s new soil is well-packed when repotting. This not only adds stability to the plant, but also ensures their soil is as nutrient-dense as possible!

DON’T Fertilize right after repotting

Moving can be stressful! Let your plant acclimate for at least a week or two after repotting before introducing any plant food.

DO Repot in the spring or summer

The best time to repot is when your plant is in active growing phase, or during the spring and summer. This is when your plant is at its strongest, and will bounce back from any stress more easily.

DO Repot in the Same or Slightly Bigger Container

Repotting doesn’t always mean giving your plant a bigger pot. Sometimes you’ll repot just to provide your plant with fresh new soil. That said, if you do decide to size up, use a pot that’s only slightly bigger in diameter — 2 inches is great — so that your plant still enjoys a snug home.

Do Consider Separating If Necessary

Sometimes plants will be too big for their own good. If sizing up is not an option, you may consider separating your plant into two or more plants (this is a method of propagation).

Do Use Fresh Potting Soil

When it comes to soil, it’s best not to recycle. Fresh, unused potting soil will have plenty of nutrients that your plant craves.

Do Water Thoroughly After Repotting

Give your plant one big drink once it’s settled in its new home, and get ready to watch it flourish!

Ready to get repotting? Our Deluxe Repotting Kit is a complete set of everything you need (and nothing you don’t) to repot large and XL Léon & George plants.


Indoor plants, potted & delivered.

Premium plants paired with stylish ceramics. Order online at leonandgeorge.com

Are You Starving Your Fiddle Leaf Fig?
closeupFLFJPG.JPG

Fertilizer is an important tool for potted plants, and with their large, dense foliage and tendency for fast growth, Fiddle Leaf Figs are no exception! One common mistake plant parents make is rarely or never fertilizing, which can result in slow or stunted growth and poor overall health. So how often should you fertilize, and with what? Here we’ll answer a few common questions when it comes to fertilizing your Fiddle Leaf Fig!

How Often Should You Fertilize a Fiddle Leaf Fig?

Unlike their counterparts in the wild which live in the ground and are constantly replenished with nutrients, our potted plants depend a great deal on the extra nutrients we feed them in their soil. While potting soil contains plenty of nutrients itself, if it’s been over a year since you last repotted or fertilized, it’s very possible your plant’s nutrient level is severely depleted. Fertilizing your plant every 2-4 weeks in the spring and summer is good practice to keep it looking vibrant and healthy!

How Should You Fertilize a Fiddle Leaf Fig Plant?

There are a few different ways to fertilize a Fiddle Leaf Fig. No matter how you fertilize, one thing to be careful with is overdoing it, as this can lead to leaf scorch or fertilizer burn in any indoor plant—not just Fiddles! Also keep in mind that fertilizing is not necessary during the winter, as this is when plants typically slow down their growth and have less need for extra nutrients.

Here are a few different ways to fertilize your Fiddle Leaf Fig:

  • With liquid fertilizer, which is usually diluted in water and simply watered over the soil.

  • With dry fertilizer, usually by sprinkling over the top of the soil and then watering.

  • Foliar feeding, or misting the plant with something like Plant Elixir.

Natural Plant Food

Nourish your plants with this specially-formulated organic liquid plant food. Our Boost Vitaminé is made with potent nutrients from nature to help your plants grow and thrive all year long.

What is the Best Fertilizer for a Fiddle Leaf Fig Plant?

Plant fertilizers have a specific N-P-K ratio, which represents the amount of nitrogen, phosphorous, and potassium in the solution. Indoor plant food is formulated specifically for, you guessed it, indoor plants! But we can get even more specific than that with an N-P-K ratio designed specifically for the needs of the Fiddle Lead Fig. According to the Fiddle Leaf Fig expert, Claire Akin, this ratio is 3-1-2.

Fiddle Leaf Fig Plant Food is a great choice for fertilizing this specific plant, and is gentle enough to use at each watering. You may also try foliar feeding with something like Modern Colony’s Plant Elixir, which is diluted in water and then sprayed on the leaves, and can be used in tandem with liquid fertilizer.

This post was adapted from the Fiddle Leaf Fig Plant Resource by expert Claire Akin. Head to their website to learn more about caring for the Fiddle Leaf Fig.


L-Snake-White-Stand.jpg

Indoor plants, potted & delivered.

Premium plants paired with stylish ceramics, plus lifetime plant care support. Order online at leonandgeorge.com

A Storied Aesthetic: A Peek Inside Writer Oscar Raymundo’s Plant-Filled Home

Oscar, his partner Denys, and a beautiful Ficus Audrey in their colorful Mission district apartment.

When the pandemic hit in 2020, writer Oscar Raymundo took advantage of a rare dip in San Francisco’s real estate market to upgrade to a bigger, brighter pad. The result? A budding green thumb, of course.

Living in a house full of plants wasn’t always Oscar’s story. Like many San Francisco residents, he and his partner Denys had been hustling to make the most of an increasingly impossible city for over 10 years. Factors like small spaces and limited light left little to be imagined in terms of living greenery.

But also like many San Francisco residents, they took advantage of a truly unprecedented lull in the city’s real estate market during the pandemic to upgrade to a bigger, brighter spot to call home. 

And with both working from home, it couldn’t have come at a better time.

From left to right: a Kentia Palm, Silver Evergreen, and Dracena Lisa + Kentia Palm.

A writer and producer at Instagram, Oscar’s day to day involves everything from crafting content about internet cat personalities to finding creative ways to showcase movers and shakers across different communities.

He and Denys had never expected to be spending so much time at home, reveling in the company of their mischievous cat, Tokyo. After a few months of making their one bedroom apartment work, they realized there was no better time than the present to consider a move. With so many San Francisco residents leaving the city to work remotely elsewhere, the opportunity for an upgrade was ripe.

A sprightly Dragon Tree enjoys Oscar’s attention.

My plant care secret? Have conversations with them.
— Oscar raymundo

Cue in an adorably charming Edwardian walk-up, flooded with light and spacious enough to house not only a home office for each but a guest-room-meets-gym, a dining-meets-meeting room, and a chef’s kitchen that would leave any urbanite envious.

Though Oscar has called the Mission home for over a decade, it wasn’t until moving to this apartment that he really began to nest— and collect houseplants. With all that space and light, how could he not? His collection includes everything from an impressive Ficus Audrey and lush Kentia Palm to small cacti that, as he believes, should keep the curious Tokyo at bay.

He credits his green thumb to his grandmother, who believes the ultimate secret to keeping plants happy is speaking to them. He says, “It’s hard to find things in common with a 90 year old. But the plant thing– we can talk about that. Her secret is to have conversations with them.” And he blames his cat Tokyo for the occasional casualty.

His plants look fabulous, so maybe there’s something to it. As far as the cat is concerned, he hasn’t found a solution yet.

Photos by Margaret Austin

Oscar’s Picks

3 Natural Pesticides for Indoor Plants

Natural pesticides to use at home?

You’ve got options! Whether you’re dealign with mosquitoes, gnats, spiders, you name it: bugs are usually not a welcome visitor to our homes, and especially our houseplants. If you're finding any critters amongst your plants, or if you’d simply like to take preventative measures, here are a few natural remedies: 

  1. Neem Oil

If you aren't familiar, spraying your plant with neem oil, a 100% natural oil derived from the neem tree, is a great way to combat pest infestations once they’ve already appeared. It also works as preventative measure against a wide variety of insects. 

2. Soap and water

Mix a tablespoon of soap in a spray bottle with water and spritz your plants to keep bugs like aphids and spider mites away. We also recommend L’Original, a black olive soil soap spray specifically formulated for plants to keep them clean and pest-free.

3. Herbal spray

essential oils from herbs like rosemary, sage, basil, and lavender can help keep bugs at bay. Simply dilute essential oils in water and spray away. Potion Magique is an herbal foliar feed designed specifically for indoor plants— it not only boosts their nutrient intake, but also keeps pests at bay!


snakeplantcloseup.jpg

Indoor plants, potted & deliverded

Premium plants paired with stylish ceramics, plus lifetime plant care support. Order online at leonandgeorge.com

How The Variegated Monstera Became An Instagram Obsession
The rare and elusive Variegated Monstera. Photo: @lucidmonstera

The rare and elusive Variegated Monstera. Photo: @lucidmonstera

First there was the Fiddle Leaf Fig, a beautifully sculptural plant that became a sensation of the interior design world seemingly overnight. But although the trend has not seemed to wane over the years, there’s a new plant in town that is quickly catching up in popularity. The only difference? It’s next to impossible to find.

The Variegated Monstera: Instagram’s most elusive plant

You may not know its exact name, but odds are it’s caught your eye before. The iconic split leaves of the Monstera Deliciosa are unmistakable, except rather than green, this plant’s foliage is either partially or entirely hypnotic white. It’s a plant commonly referred to as the Variegated Monstera, and though pictures of it populate our Instagram feeds, getting your hands on one is no easy task.

What is the Variegated Monstera?

The Variegated Monstera is a type of Monstera that sports variegation, or genetic makeup that is altered or mutated to produce various colors on the foliage and even stark white leaves. Variegation can come in many different patterns and colors across different plant varieties, but the Variegated Monstera is usually green and white, or all white.

Types of Variegated Monstera

There are at least two different types (or cultivars) of the Variegated Monstera:

  • Thai Constellation - more common as well as easier to care for, the Thai Constellation Monstera produces leaves with small splashes of cream coloring, reminiscent of stars in a galaxy.

  • Albo - less common and more difficult to care for, this plant produces leaves with large white splotches, and in some cases, half or full leaves that are entirely white.

Two different cultivars of the Variegated Monstera: Albo and Thai Constellation. Photos: @foreverplanty (left), @monstera.maven (right)

Two different cultivars of the Variegated Monstera: Albo and Thai Constellation. Photos: @foreverplanty (left), @monstera.maven (right)

Why are Variegated Monsteras so hard to find?

Many plants with white variegation tend to be more delicate than their green counterparts, and the Variegated Monstera is no exception. They produce less chlorophyl, and as such photosynthesize a great deal less. Growing them is not only slow, but also requires a certain level of skill. Combine this with incredibly high demand, and you’ve got a rare plant that is going to be tough to find, and if you do find it, it will cost you!

Rare plant aficionados and growers do an excellent job of growing them from cuttings, and this is usually what we see when we search the hashtag #variegatedmonstera on social media. So beautiful, yet so out of reach! But could you do the same?

Propagating variegated Monsteras

One great way to get your hands on a Variegated Monstera is through propagation. Propagation is the multiplication of plants from one mother plant. If you are able to get a cutting, either by purchasing or through a friend, you can propagate your own plant. Here’s how to propagate the Variegated Monstera (the same method for regular Monstera propagation):

Step 1 - Take a cutting from a plant and be sure the stem has a node. The node is a small junction on the stem that sticks out and is where new stems sprout.

Step 2 - Place in a glass of water and put in a spot with bright indirect light.

Step 3 - Wait anywhere from a few days to a few weeks. You should eventually start to see roots forming.

Step 4 - Place in a small pot with fresh soil, and keep the soil just moist to the touch for the first few weeks until it feels firmly rooted in its pot.

Where can you buy a Variegated Monstera?

A mature (and staked!) Variegated Monstera. Photo: @craigmilran

A mature (and staked!) Variegated Monstera. Photo: @craigmilran

Unless you have a local plant store that specializes in rare plants, your best bet is going to be online. Finding a mature plant will not be easy, though there are many people selling cuttings on Etsy. You’ll need to nurture the plant yourself from a cutting, but perhaps that will make you love it all the more!

At Léon & George, we occasionally are able to get our hands on one or two (which we’ve been known to hold giveaways for!), so make sure to follow us on Instagram to stay in the loop!


snakeplantcloseup.jpg

Indoor plants, potted & delivered

Premium plants paired with stylish ceramics, plus lifetime plant care support. Order online at leonandgeorge.com

What You Need To Know Before You Buy A Perennial

Perennials are a mainstay for outdoor gardens, but there’s no reason to deprive your indoor space of blossoming flowers! And although wrapping your head around perennial flowering plants can seem a little confusing at first, it’s actually easy to nurture these beauties inside and watch them thrive. There are just a few things to know before you shop for a new perennial, so read on: it’s all right here! 

What are perennials? 

A perennial plant is a plant that lives longer than an annual year. It’s a familiar term for outdoor gardeners, who may plant both annuals (plants that only live for one year, then die) and perennials (which live for years and bloom yearly, if not even more frequently than that). The term “perennial” typically refers to flowering plants that produce blooms, and those are the perennial varieties we’ll be discussing here. 

What are the best perennials for indoor spaces?

We think that the best perennial plants to buy for an indoor space are the ones that require the least care! The perennials we offer at Léon & George were curated specifically for their easy care disposition and for the vibrancy of their blossoms- which is typically what people are looking for when they’re shopping for a perennial. Calandivas, or Kalanchoe varieties, are a great option because they are perennial succulents. That means that as long as they get lots of light, and are watered only sparingly, they’ll be happy. We offer both white, or Snowdrop Calandivas, and yellow, or Sunshine Calandivas. Other great options for low-maintenance perennials are Anthuriums, like the King of Hearts and Queen of Spades Anthurium. Their flowers are technically spathes (neither a flower nor a leaf, but rather a sheath that protects the plant’s flower). Spathes maintain their beautiful coloration longer than blossoms. 

What kind of light do indoor perennials require?

Most perennials require ample light in order to induce blooming, and indoor perennials are no exception. Indoor perennials should receive abundant, bright sunlight.  Consult a light guide to determine the level of light that your space receives. Indoor perennials want all the light they can get!

It’s important not to overwater your perennial

Plants use the water that they receive much more slowly indoors than outdoors, because they receive less sunlight in enclosed spaces. It’s crucial not to overwater indoor perennial plants for this reason. They can become waterlogged, which will result in their blossoms and spades getting soggy, darkening and falling off. 

You can use a moisture meter as a supplemental tool to support your watering routine. They’re a great way to keep an eye on moisture levels in between manual checkups, and are easy to read. Simply check the moisture meter’s window: if it is white, the plant is ready for water, and if it is blue, the soil is still moist and does not need watering. 

But overwatered perennials can be rehabilitated

It happens on occasion: despite best efforts, we find that our indoor plants have been overwatered. Luckily, there’s an easy set of steps to rehabilitate overwatered indoor perennials.

First things first: you’ll need to get the perennial away from the “wet.” That means removing it from its pot and dumping out any standing water that may have accumulated.

Secondly, trim off any parts of the plant that appear seriously waterlogged, mushy, or discolored. It can feel dire to perform minor surgery on your flowering plant, but indoor perennials actually love it. Trimming off unhealthy parts of the plant sends it a big signal to push out healthy new growth, and trimming or plucking off old blossoms will encourage the plant to push out new flowers.

Once you have trimmed the perennial of any areas that have lost viability due to overwatering, let the plant dry out. You don’t need to place the plant back in its pot for now- just place it in a spot that receives lots of bright light, but isn’t in the direct patch of scorching rays. The goal is to dry the plant out, not sunburn it. After a couple days of generous light, you should see the plant’s soil dry out entirely. 

At this point, you should have a nice, dry plant on your hands. You can return it to its pot, and after a few days of acclimation, resume your watering routine. This time, with a lighter touch!

Exercise caution when misting your perennial 

This may come as a surprise because, as a general rule, most indoor plants appreciate a nice misting. Indoor plant varieties are often native to humid, tropical climates, and misting helps to imitate the moist biome that they’re accustomed to. But indoor perennial plants are a bit different in this regard. Why? Because of the flowers. 

Flowers and spathes are delicate, and when water sits on the surface of blossoms or spathes for a prolonged amount of time, it can cause discoloration- typically in the form of browning. Because it’s easier to overdo misting rather than to have too light a touch, you can forgo misting altogether as a precaution. Not to worry- your plant can still absolutely thrive. Ample sunlight and appropriate watering are what are really key to their health. 

Will perennial flowers stay fresh forever?

Great question, and we’re glad you asked! The answer here is no: as is the case with so many of nature’s creations, when it comes to perennial flowers, “nothing gold can stay”. But don’t let that put you off: the magic of perennials is that they will blossom and blossom again with appropriate care.

No individual flower is forever: their purpose is to help the plant reproduce through seeds and pollination. But perennial plants can blossom regularly, so you’re not limited to only one bumper crop of blooms from a Calandiva or Anthurium. The key to encouraging your perennial plant to blossom year-round is to pluck or trim its flowers off once they have begun to brown. Again, this signals to the plant that it is time to direct its energy toward growing new flowers.

A note on toxicity in indoor perennials

Indoor perennial plants like Calandivas and Anthuriums are considered to be toxic. We know, we know- it’s frustrating. But it’s simply science at work: a trait that the plant has evolved over time to deter wild animals from snacking on them. Still, it is important to consider toxicity if you live with curious kids or pets. And if toxicity is an absolute no-go, don’t panic: you still have options!

How to select a thriving, gorgeous perennial

There are always a few things to check up on as you shop to make sure you pick the perfect plant specimen for your home. When it comes to flowering perennial plants, you’ll want to look at the plant’s blossoms. A plant that is covered in mature, gorgeous blooms will look gorgeous for a spell- but because its blooms will already be older at the time you buy it, they will also brown sooner. Don’t be afraid to buy a perennial that has lots of buds that have not yet bloomed- they’re on their way! 

Carefully inspect the overall foliage of the perennial, looking especially for signs of overwatering, illness and pests. A healthy perennial plant will have vibrantly colored leaves and foliage, without significant yellowing leaves or discoloration. Additionally, the leaves, stems and trunks of healthy plants will have a firm texture and strong limbs, and will not appear floppy or exhausted. 

Avoid purchasing your perennial from a garden center

Once you’ve decided to buy your new perennial, it’s important to ensure that you purchase one that will thrive for years to come. After all, they’re not annuals!

Our recommendation when shopping is always to opt for a premium grower rather than a lower price tag. Stores like garden centers and home improvement stores often appear to offer low prices and convenience, but we ultimately find that purchasing plants of a sub-par quality results in a higher cost and less convenient experience overall. There are a few reasons for this:  

Garden centers and home improvement stores tend to provide the same kind of care to all of their plants, regardless of the specific needs of the plants’ species. This means that many plants are overwatered during their time at these stores, and are often receiving light that’s inappropriate for their particular requirements. 

Additionally, It is almost impossible to know the plant care routines that these businesses have in place from the outset, but it’s highly common for garden centers to use a one-size-fits-all approach with their plants, and although it saves time for these businesses, treating all plants in the same way is just not conducive to their health. 

Purchasing your new perennial plant from a premium grower will help ensure that it has been kept in appropriate light and watered correctly. There is also the issue of insects to consider. Insects have a habit of hopping from plant to plant, and funguses and viruses tend to spread- so if you cannot guarantee that the business you’re buying your new hanging plant from treats pests and plant diseases both prophylactically and as needed, there is a chance of bringing a pest or disease-ridden plant into your space, where those issues can (and often do!) spread to other plants in their vicinity.

And finally, there is the issue of transport. Plants are resilient and strong, but no living plant loves the experience of transportation or significant environmental shifts. And flowering plants like indoor perennials are more delicate than most: they’re covered in fragile blossoms. 

There are many factors at play when it comes to moving a plant from Point A to Point B: fluctuations in light, the risk of structural and foliage damage, and the risk of stress from temperature changes and forced air from A.Cs. Going to the extra mile to ensure the safe transit of your new perennial will pay dividends over time. By purchasing your plant from a business that offers doorstep delivery, and/or ships using packaging that is custom-engineered for plants, you can simply rest easy and enjoy the confidence of knowing that your plant has been amply protected and well cared for. Then lean back, and enjoy the blooms!

Even the healthiest perennial can experience stress from time to time

Stumbles can happen along the path of any plant parenthood journey. The good news? Every plant purchased from Léon & George comes with lifelong access to our Plant Doctor service: a team of expert horticulturalists, here to offer assessments, tips and adjustments, and to generally support you as you care for your plants. There’s no catch! No fees are required to enjoy this service. Free, lifelong access to the Plant Doctor service is just one of the ways that we work together to support plant owners as we green up the world together.

We’ve compiled a list of common problems that indoor perennials can face, as well as helpful guidance for assessing your plant’s health. Informed and supported plant parents are the key to our success! Click here to learn more about how to care for and grow your new perennial. 

Shop the medium Snowdrop Calandiva with Scandinavian Ceramic Pot from Leon and George

Explore the flowering Snowdrop Calandiva

A gorgeous perennial succulent with abundant, cloud-white blossoms, the Snowdrop Calandiva is the perfect accent for indoor spaces that receive ample, bright sunlight. Easy to care for and incredibly charming, the Snowdrop Calandiva will bloom for years. All it needs is love and light!

What You Need To Know Before You Buy A Rubber Plant

Rubber Plants and trees are among the most gorgeous and eye-catching ornamental plants for indoor or outdoor placement. You’ve likely seen them used to great effect in interior decor as well as landscaping, and have probably noticed that Rubber varieties have exceptionally glossy, luxurious leaves. But you might be surprised to learn that a plant with such a luxurious look is also genuinely easy to care for. It’s true! The Rubber Plant family, or Ficus decora, doesn’t require expert plant knowledge to thrive. There are just a few simple tenets to nurturing a thriving Rubber Plant. So read on, because we’re here to fill you in on everything you need to know before you buy a Rubber Plant or tree. A ficus frenzy awaits!

There are many varieties of Rubber Plants and trees to choose from!

Who doesn’t love options? If you’re looking to buy a Rubber Plant or Rubber Tree, you have plenty of them. Ficus decora plants are available in an array of gorgeous varieties, and they all have rich, colorful foliage and, yes, those emblematic, glossy leaves you love. Our favorite of Rubber Plants and Trees are the ones with deep tone and variegation: the burgundy-tinged classic Rubber Tree and Rubber Plant, the mint and lemon toned Tineke Rubber Plant, and the strawberry hued Pink Rubber Tree and Pink Rubber Plant.

Rubber Plants and trees require medium to bright indirect sunlight

Once you’ve decided to buy your Rubber Plant, it’s time to figure out where you’ll want to put it. Although they’re flexible and can adjust to medium light, it’s a good idea to ensure that your Rubber Plant or Rubber Tree gets as much bright, indirect sunlight as possible. The light that they receive is what causes their beautiful coloration to shine, and providing a Rubber Plant with more light will mean that its hues of burgundy and pink are bright and rich. Rubber Plants kept in darker environments will exhibit less of that rosy coloring that’s so gorgeous. Consult a light guide to ensure that you place your new Rubber Plant or tree in a spot where it’ll thrive. 

Where should I place my Rubber Plant?

Rubber Plants and Rubber Trees are flexible, so you’ll likely have plenty of options to choose from for plant placement. The most important things to keep in mind? Ensuring that your Rubber Plant is in a spot that receives ample, medium to bright indirect light, and protecting it from overwatering. If you like to water all of your plants in one go, it will be best to place your Rubber Plant away from any plants that require large amounts of water, so that you won’t run the risk of giving it an overdose that might be a perfect amount for a different plant species. Pairing plants that have similar watering requirements close together can be a good idea as well, and creating groupings of plants allows them to create a microbiome of moisture and humidity that they enjoy. 

It’s important not to overwater your Rubber Plant or tree

This is true of all plants, but equally true of Rubber Plant and Rubber Tree varieties: they do not like to be overwatered. Rubber Plant varieties require water only when their topsoil (the top two inches of soil) are dry to the touch. Get in the habit of gauging your Rubber Plant’s moisture level by manually checking it every five to seven days. You can simply stick your finger two inches down into the plant’s soil. If that soil is dry, you can water your plant according to its care instructions. If those two inches are moist, hold off on watering until they are dry. You can also use a moisture meter as a supplemental tool to support your watering routine. They’re a great way to keep an eye on moisture levels in between manual checkups, and are easy to read. Simply check the moisture meter’s window: if it is white, the plant is ready for water, and if it is blue, the soil is still moist and does not need watering. 

But overwatered Rubber Plants and trees can be corrected

We know how disappointing it is when, despite your best efforts, you overwater your plant. It can feel like a disaster, but there’s no cause for panic! Overwatered Rubber Plants and trees can be rehabilitated with a few simple steps. 

The first step is to allow the Rubber Plant’s soil to dry out as soon as possible. So when you’ve identified that your Rubber Plant has been overwatered, pull it out of its ceramic pot right away, while keeping it in its plastic nursery pot. Allow the Rubber Plant or tree’s soil in the plastic nursery pot to dry out almost entirely before placing it back in the ceramic, and begin your watering routine anew. Only this time, water it only when its top two inches of soil are entirely dry to the touch. Use a moisture meter for extra support, and don’t be surprised if it reads as “moist” for a longer period of time than you’d expect. Plants living indoors typically need less frequent watering than you’d expect!

A note on toxicity in Rubber Plants and Rubber Trees

Rubber Plants and trees contain toxins in their sap. Although the toxicity of the Ficus decora is considered to be relatively mild, it is something to keep in mind if you share your space with curious pets or kids. If your heart is set on a Rubber Plant but you’re concerned about floor or tabletop placement, you can consider utilizing one as a hanging plant. They look absolutely gorgeous in hanging baskets and macrame! And if their toxicity means that a Rubber Plant or tree is a no-go for your space, don’t panic- you still have plenty of other options!

Rubber Plants and Rubber Trees love to have their leaves cleaned

Rubber Trees are native to humid environments, where moisture in the air does the work to keep those glossy, shiny leaves clean. Plan on misting your Rubber Plant or tree every week or so with either plain water or a mixture of water and a nutrient-rich foliar feed. Allow the plant to enjoy the spritz, then wipe your Rubber Plant’s leaves with a soft cloth to remove any dust. This ensures that their leaves maintain their super-glossy aesthetic, and it helps the plant photosynthesize, which ensures that its foliage maintains vibrant coloration. 

Where to place your Rubber Plant or Rubber Tree

Understanding the amount of light that your space receives will help demystify the decision of where to place your Rubber Plant or Tree. Seeking an air-purifying boost? You can’t go wrong with placing a Rubber Plant or tree in a spot where you love optimal air quality. If you suffer from asthma or allergies, bedroom placement is a great idea. Ficus decora produces more oxygen than almost any other ornamental plant! They’re also renowned for removing up to 60% of mold spores and bacteria from the air. And if you’re looking to get the most bright, vibrant foliage possible from your Rubber Plant, make sure to place it in a room that receives lots of sunlight.

How to select a thriving, gorgeous Rubber Plant or tree

There are always a few things to look out for as you shop in order to ensure that you select the perfect plant for your home. In the case of Rubber Plant varieties, that means that you’ll want  to carefully inspect the plant’s overall foliage. Healthy Rubber Plants in prime condition will exhibit little discoloration on their foliage: they won’t have many leaves that have brown or yellow edges. Additionally, the leaves, stems and trunks of healthy Rubber Plants and trees will have a firm texture and strong limbs, and will not appear floppy or exhausted. Prime Rubber Plant foliage will be abundant and glossy, and will not feel dry to the touch.

Avoid purchasing Rubber Plants or Rubber Trees from a garden center

To ensure a lifetime of great health and a beautiful appearance, it is essential to buy any living plant from a premium grower. A new Rubber Plant or tree means that you’re investing both money and time in acquiring a gorgeous new plant friend, and you should choose the vendor that you purchase your plant from with care. 

Shopping for plants can often mean a little bit of sticker shock, and the prices at garden centers and home improvement stores can be very appealing. But it’s crucial to keep in mind that these companies are able to keep their prices low for a reason, and the quality of the plants that they offer will reflect the low price. 

Garden centers and home improvement stores tend to operate by treating all of their plants the same, even when they have wildly different care requirements- as living plants often do. (They’re unique, after all!)  When garden centers and home improvement stores use a one-size-fits-all approach to caring for their crop of plants, it often results in plants becoming overwatered and receiving incorrect light- both of which are issues that you can easily avoid by buying your new Rubber Plant or tree from a trusted grower.

It’s next to impossible to know for sure how a garden center or home improvement store cares for their plants, but when you purchase from a premium supplier, you have a wealth of information at your fingertips. Premium suppliers are happy to explain the details of how they care for their crops and can speak to the way that they water, the light they provide their plants, and the environments they grow them in. Additionally, premium growers treat plants prophylactically and as needed for pests, funguses and other ailments. This is essential, because insects have a frustrating habit of hopping from plant to plant, and funguses and viruses tend to spread- so if you can’t guarantee that the business you’re buying your new plant from is proactive in preventing these issues, there is a chance of bringing a pest or disease-ridden plant into your space, where it will spread to your other plants. We’ve seen it happen, and it’s a huge headache you’re better off avoiding. 

Another important point to consider is the issue of transit. Rubber Plants are resilient, but all living plants are vulnerable to stress and damage from transportation and significant environmental shifts. Buying a plant from a garden center or home improvement store involves many more factors that you might realize: from fluctuations in light to the risk of structural and foliage damage to the danger of shock from temperature changes and A.Cs. Plan on buying your new Rubber Plant or Rubber Tree from a premium supplier that offers doorstep delivery, and/or ships using packaging that is custom-engineered for plants. We guarantee you’ll be glad that you did! Then lean back, and enjoy the confidence of knowing that your plant has been amply protected for its journey, and well cared for leading up to it. It is worth it to protect your investment.  

Even the healthiest Rubber Plant can experience stress from time to time 

Stumbles can happen along the way with any living plant, even when it receives perfect care. But there’s no need to fret: issues are typically easily revolved with just a few tweaks in your plant care routine. At Léon & George, we offer lifelong access to our Plant Doctor service with every plant purchased. That means that our team of expert horticulturalists is available to provide assessments, tips and adjustments to your plant care routine as needed, and to generally support you as you care for your plants. There’s no catch! No fees are required. Free access to the Plant Doctor service is just one of the ways that we ensure that every plant purchased from us is designed to thrive. 

We’ve compiled a list of common problems that Rubber Plants and trees can face, as well as helpful guidance for assessing your plant’s health. Informed and impassioned plant parents are the key to our success! Click here to learn more about how to care for and grow your new Rubber Plant. 

Rubber Tree Extra Large from Leon and George

Glossy, Luxurious and Colorful: The Rubber Plant Collection from Léon & George

Explore our selection of stunning and low-maintenance Rubber Plants and trees. From the classic, burgundy Rubber Tree to the rosy, charming Rubber Plant, our array of thriving Ficus decora varieties offer every easy care Rubber Plant variety your heart desires!

What You Need To Know Before You Buy A Hanging Plant

Photo courtesy Mod Musings

Incorporating hanging plants in your home decor has so many benefits: living greenery is the ultimate luscious accessory. It’s also scientifically proven to boost your environment by purifying the air, and to soothe stress! But living plants can also take up space that may be in short supply, and that’s when it’s time for hanging plants to shine! There are a few special characteristics that make some plant varieties perfect options for hanging, and we’ll go into those here, along with everything else you need to know before you buy a hanging plant! 

What varieties make perfect hanging plants?  

There are a variety of beautiful options to choose from when you’re ready to select a new hanging plant. Our favorites are plant varieties that grow in luxurious tendrils, like Cascading Pothos, Jade Pothos, Philodendron Brasil and Bird’s Nest Fern. Other popular varieties include the String of Pearls, or Curio rowleyanus, and Staghorn Fern

Shop the medium Cascading Pothos from Leon and George

The Cascading Pothos is a gorgeous option for a stunning hanging plant.

How do you water a hanging plant?

The most convenient way to water your hanging plant will be through a method called bottom watering. Bottom watering is virtually foolproof, because the plant itself decides how much water to soak up, so the risk of overwatering is low- and it also won’t cause water to spill all over your floor, which is a risk if you’re watering your plant in its hanger.

To bottom water your plant, remove the plant from its hanging container, but keep it in its plastic nursery pot, which should have drainage holes in the bottom. Place the plant in a sink, bathtub or tray that has been filled with 1-2 inches of water. Allow your plant to sit in the water for 15 minutes, then take a look at its soil. If it is not yet moist to the touch, give it another 15 minutes. Once it is sufficiently moist, remove the plant from its bath and allow it to sit and drain for ten minutes or so before returning it to its hanging container.

Bottom watering is a great practice to get in the habit of, and it allows the plant to soak up exactly the amount of moisture that it needs. For a helpful tool that will alert you when your plant’s soil is dry and ready for water, consider a moisture meter.

Shop the small Staghorn Fern from Leon and George

Staghorn Ferns are a natural choice for a gorgeous hanging plant, and have luxuriously velvety leaves.

Hanging plants are great for homes with pets!

If you’re familiar with indoor plants, you probably already know that many of them have varying degrees of toxic compounds in their leaves or stems, which can be dangerous when ingested. It’s a bit inconvenient, we know, but it’s just evolution at work: many indoor plants are tropical varieties that evolved to protect themselves from being eaten by animals. This can make it tricky to choose the perfect plant for your home if you share your space with curious pets or kids. But hanging plants offer an amazing workaround! If you assess your space and hang your plant at a height out of reach of mischief, you can enjoy the beauty of an indoor plant that you might otherwise need to pass on due to its toxicity. 

Hanging plants love a good misting 

Most plant varieties that make great hanging plants are native to humid environments and appreciate a moist atmosphere. You can boost the humidity level of your hanging plant by misting it regularly (about two to three times a week) with plain water, or a mixture of water and a nutrient-rich foliar feed. Just be sure to follow the instructions on the bottle when diluting the foliar feed into your watering can. 

What kind of light will a hanging plant need?

The light requirements of your plant will vary by their species, so it is important to get to know the plant you’re buying before you hang it. Many indoor plants are tropical varieties that cannot withstand strong, direct light, which can scorch their leaves. (Essentially, direct light can cause a plant sunburn.) If you’re planning on hanging your new plant directly in a window, it’s important to be extra careful: the air next to windows can get quite hot from the sun’s reflection, and that combination of strong, direct light and heat is not appropriate for all plants.

Remember that your plant is a plant of its species first, and a hanging plant second. Its care will need to be tailored to its specific requirements. 

Philodendron Brasil from Leon and George

Who wouldn’t want a sweet tumble of heart-shaped leaves? The foliage of Philodendron Brasils grows into a waterfall effect over time, making this plant a perfect option for a hanging plant.

What kind of container should you use for a hanging plant?

You have more gorgeous options than ever when choosing a container to house your hanging plant. Why? Because hanging plants are in style, and the market knows it! So whether you are seeking a streamlined, modern cylinder hanger or an earthy macrame style, the perfect container is out there just waiting for you. With that in mind, it’s time to consider the less exciting, but still necessary, aspects of practicality. A good container for a hanging plant will not be extremely heavy, unless you have super-strong ceilings and know your way around mounting hardware and tools! It will also provide an even distribution of support for your plant and its plastic nursery pot, and will not obstruct your plant’s natural growth direction. 

Tips and tricks for hanging plants

There are plenty of ways to incorporate hanging plants in your home, even if you do not have the tools necessary to hang your container directly from your ceiling. Sun-loving plants can be hung from curtain rods, often to great effect! And if your ceilings or walls cannot support heavy weight, air plants are, well, light as air! They’re a wonderful option for a lightweight hanging plant because they do not require soil, which accounts for most of the weight of hanging plants. If you long for the look of hanging plants but are wary of the process of hanging them, trailing plant varieties like Pothos and many Philodendrons are gorgeous on elevated pedestals, and Staghorn Ferns are beautiful when mounted on wooden planks, then hung on walls just like a piece of art. Staghorn Ferns are also lightweight, because they do not require soil. 

Finally, experiment with your foliage! If your hanging plant features tendrils of trailing foliage, they can be secured to grow along walls or to spread out in lush waterfalls. Hanging plants have the potential to be incredibly sculptural, and you can encourage them to grow in specific directions or patterns. 

Where to place your hanging plant

If you already have a spot where you know you want to place your hanging plant, it’s simple: you just need to buy a plant variety that will be happy with the light and temperature that space receives. But if you’re on the other side of the equation: you know what plant you’d like to buy, but not where to hang it, there are a few things to consider. Use a light guide to determine the kind of light your space receives overall, and to identify the ideal area in your home for your new plant.

How to select a thriving, gorgeous hanging plant

There are always a few things to check up on as you shop to make sure you pick the perfect plant specimen for your home. Begin by carefully inspecting the plant’s overall foliage. Healthy plants for hanging will have vibrantly colored leaves and foliage, without significant yellowing leaves or discoloration. Additionally, the leaves, stems and trunks of healthy plants will have a firm texture and strong limbs, and will not appear floppy or exhausted. 

The definition of #hangingplant goals! Photo courtesy The Spruce.

Avoid purchasing your hanging plant from a garden center

It’s not just advisable: it is essential to buy any living plant from a premium grower. Garden centers and home improvement stores often appear to offer low prices and convenience, but we ultimately find that purchasing plants of a sub-par quality results in a higher cost and less convenient experience overall. There are a few reasons for this.  

Garden centers and home improvement stores tend to provide the same kind of care to all of their plants, regardless of the specific needs of the plants’ species. This means that many plants are overwatered during their time at these stores, and are often receiving light that’s inappropriate for their particular requirements. 

It is almost impossible to know the plant care routines that these businesses have in place from the outset, but it’s highly common for garden centers to use a one-size-fits-all approach with their plants, and although it saves time for these businesses, treating all plants in the same way is just not conducive to their health. 

Purchasing your new hanging plant from a premium grower will help ensure that it has been kept in appropriate light and watered correctly. There is also the issue of insects to consider. Insects have a habit of hopping from plant to plant, and funguses and viruses tend to spread- so if you cannot guarantee that the business you’re buying your new hanging plant from treats pests and plant diseases both prophylactically and as needed, there is a chance of bringing a pest or disease-ridden plant into your space, where those issues can (and often do!) spread to other plants in their vicinity. 

And finally, there is the issue of transport. Plants are resilient and strong, but no living plant loves the experience of transportation or significant environmental shifts. And there are so many factors at play when it comes to moving a plant from Point A to Point B: fluctuations in light, the risk of structural and foliage damage, and the risk of stress from temperature changes and forced air from A.Cs. Going to the extra mile to ensure the safe transit of your new hanging plant will pay dividends over time. By purchasing your plant from a business that offers doorstep delivery, and/or ships using packaging that is custom-engineered for plants, you can simply rest easy and enjoy the confidence of knowing that your plant has been amply protected and well cared for. 

Even the healthiest hanging plant can experience stress from time to time

IEven with the best care, stumbles can happen on any plant parenthood journey. The good news? Every plant purchased from Léon & George comes with lifelong access to our Plant Doctor service: a team of expert horticulturalists, here to offer assessments, tips and adjustments, and to generally support you as you care for your plants. There’s no catch! No fees are required to enjoy this service. Free, lifelong access to the Plant Doctor service is just one of the ways that we work together to support plant owners as we green up the world together.

We’ve compiled a list of common problems that common hanging plant varieties can face, as well as helpful guidance for assessing your plant’s health. Informed and supported plant parents are the key to our success! Click here to learn more about how to care for and grow your new hanging plant. 

The Leafy and Lovely Cascading Pothos from Léon & George

Simply the best: gorgeous, low-maintenance, with a cascading waterfall of vibrant foliage. The Cascading Pothos is ideal for hanging. Its easy care disposition and rapid growth meants that this Pothos variety is a gift that will keep on giving. Just give it light, love and a little water!