Treating Scale And Other Tough Leaf Dwelling Bugs
bird-of-paradise-scale.jpg

How to identify scale on houseplants

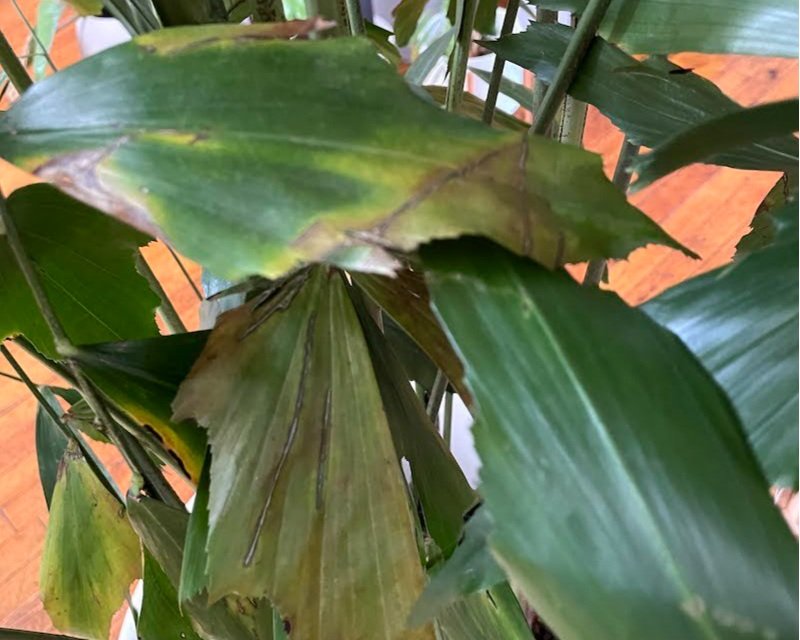
Scale insects are small, immobile, and often hard-shelled bugs that appear on leaves and stems and suck out vital nutrients from your plants (yeah, kinda gross). This can cause your plants to lose color, vigor, and in extreme cases, death.

There are two types of scale—armored (hard scale) and unarmored (soft scale). While scale can vary in color, shape and size, the most common type shows as hard brown bumps (armored) on your plant’s leaves and stems. You may also see scale that is white and soft (or unarmored). Keep in mind that because scale latches on to your plant, you will not see it move at all—and removing it thoroughly when there is an infestation can be quite tricky.

Where does scale come from?

Your plant may get scale from many different places. It could be from another contaminated plant, fresh produce brought home from the farmer’s market, or simply from being simply being outside in the warmer months of the year. It’s often unclear where scale comes from, but also keep in mind that unhealthy or neglected plants can be far more susceptible to pest infestations than their healthier counterparts.

How to treat scale on houseplants

Neem oil is our go-to natural pesticide solution for all types of pests. Not sure what Neem oil is? Neem oil is incredibly effective at eradicating infestations because it attacks pests at all stages of development, from larvae to adult.

That said, a full blown scale infestation (because scale, like most common houseplant pests, can reproduce quickly) will require more work than simply dousing with neem oil. You will need to manually remove each scale, and the best way to do this is with rubbing alcohol:

  • Dab a Q-tip in rubbing alcohol and pick off the scale bugs one by one

  • Moisten a paper towel or cotton ball and thoroughly wipe down the more infested areas

  • Continue to use Neem oil on the leaves, stems and base of the plant

  • Repeat this once a week for 3-5 weeks, or until you're no longer finding scale on your plant

Recovery will take some time, but be optimistic — indoor plants can be surprisingly resilient. Once you've controlled the issue, your plant will thank you with color and life springing back into their foliage!

Not sure what your plant has is scale? Read our full guide on identifying and treating common pests.
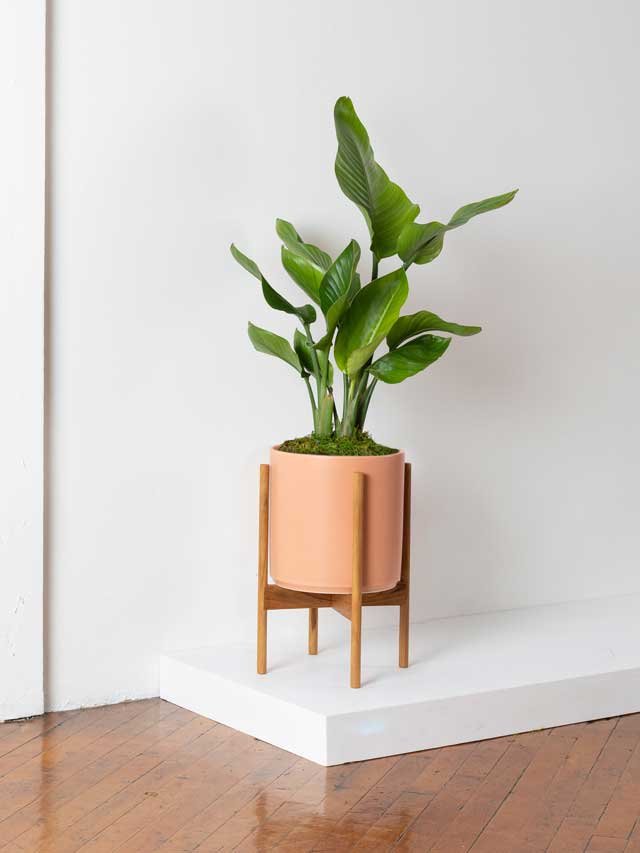

BIRD OF PARADISE

A popular and easy-care indoor plant for creating that instant jungle atmosphere.

Why Are My Fishtail Palm's Leaves Turning Yellow and Brown?

Photo by @jessoliverbaggett for Léon & George

With its distinctive fronds reminiscent of a fish's tail, your Fishtail Palm is undoubtedly a captivating indoor plant addition to your space. However, if you've noticed those elegant leaves starting to turn yellow and brown, it can be a cause for concern. Don't fret just yet—yellow and brown leaves on the Fishtail Palm can be incredibly common, and we’ve got practical solutions to restore your Fishtail Palm to its former glory!

WHAT’S CAUSING Yellow and Brown Leaves ON YOUR FISHTAIL PALM

Yellowing and browning leaves on your Fishtail Palm are usually a sign that something isn't quite right. Several factors can contribute to this issue, and understanding the root cause is the first step towards nursing your palm back to health.

  1. New environment: If your Fishtail Palm is new or has recently been moved, it is very likely that the brown and yellow leaves are simply the result of your plant adapting to its new environment. Unfortunately there is not much you can do in this scenario other than be patient and wait for it to adjust. In the meantime, you may remove some of the damaged fronds, taking care to never remove more than 30% of the plant in one go. Read our full guide on helping your Fishtail Palm adapt to its new home.

  2. Overwatering: One of the most common culprits behind yellow and brown leaves is overwatering. Fishtail Palms prefer moisture-rich conditions, but will not tolerate soggy soil or as they say “wet feet”.

  3. Inadequate Light: Fishtail Palms thrive in bright, indirect light and will also tolerate some direct sunlight. If your palm isn't getting enough light or is exposed to too much harsh direct sunlight, it can stress the plant and lead to leaf damage.

  4. Humidity Levels: The Fishtail Palm loves spaces with high humidity. If the air in your home is too dry, it can cause the leaves to dry out and turn brown.

  5. Temperature Fluctuations: Fishtail Palms are sensitive to temperature changes. Sudden drops in temperature or exposure to drafts can result in leaf discoloration.

  6. Nutrient Deficiency: If you’ve had your Fishtail Palm for some time, consider if your plant may be lacking in essential nutrients, especially nitrogen and magnesium, which can manifest as yellowing leaves. This may be the case if it’s been over two years since you’ve repotted, or if you don’t fertilize regularly. Consider adding fertilizing to your care routine.

Remedies to Revive Your Fishtail Palm

Now that you've identified some potential causes, here are effective remedies to address the issue and bring your Fishtail Palm back to life:

1. Adjust Your Watering Routine:

  • Allow the top inch of the soil to dry out between waterings, and consider using a moisture meter.

  • Ensure your pot has proper drainage to prevent waterlogging.

2. Optimize Lighting:

  • Place your Fishtail Palm in a location with plenty of bright, indirect sunlight.

  • Shield it from harsh direct sun exposure, which can scorch the leaves.

  • Never place your Fishtail Palm in low light areas.

3. Boost Humidity:

  • Group your Fishtail Palm with other plants to increase humidity levels.

  • Use a humidity tray or a room humidifier to maintain moisture around the plant.

4. Temperature Control:

  • Keep your Fishtail Palm away from drafts and maintain a consistent room temperature.

  • Avoid placing it near heaters, air conditioning vents, or cold windows.

5. Fertilize Appropriately:

  • Feed your Fishtail Palm with a balanced, water-soluble fertilizer during the growing season (spring and summer).

  • Follow the recommended dosage on the fertilizer packaging.

6. Pruning and Maintenance:

  • Remove damaged and yellowed leaves with clean, sharp scissors or pruning shears. Watch this video on how to prune the Fishtail Palm. Make sure to never remove more than 30% of your plant at time.

  • Regularly inspect your palm for signs of pests, as they can also contribute to leaf discoloration.

By addressing these factors and providing your Fishtail Palm with the care it needs, you can bring your plant back to its lush former state! While you cannot reverse the yellow and brown leaves, you can slowly remove them and wait for the plant to put out new growth. With patience and proper attention, your Fishtail Palm will once again flourish, gracing your living space with its unique and vibrant foliage.


designed to thrive

Premium plants paired with stylish ceramics, plus lifetime plant care support. Order online at leonandgeorge.com

The First Six Months with Your Fishtail Palm: What to Expect

Photo by @jessoliverbaggett for Léon & George

With its striking appearance, deep green leaves and unique fronds resembling the fins of a fish, the Fishtail Palm is a popular choice for indoor plant enthusiasts. However, welcoming a Fishtail Palm into your home is like inviting a beautiful yet sensitive guest—some knowledge and patience is required as it settles into its new environment! Understanding that this elegant plant can be a bit temperamental during its initial months is key to becoming a successful Fishtail Palm plant parent. If you're considering this option as a houseplant, or have already welcomed it into your space and are experiencing some issues, you're in the right place. Keep reading as we guide you through the journey of nurturing your Fishtail Palm as it adapts to its new environment.

The Early Days: Yellowing, Browning, and Drooping

When you first bring home a Fishtail Palm, don't be alarmed if you notice some of its leaves turning yellow, brown, and/or drooping. This is a common reaction to the change in environment and may be caused by factors like changes in light, humidity, or temperature. Fishtail Palms are hypersensitive to these variations, and they often show their displeasure by exhibiting any or all of these symptoms.

Removing Damaged Foliage: Patience Is Key

The key to successfully acclimating your Fishtail Palm to its new home is patience. It's important not to panic and rush into removing every discolored leaf as this may cause the plant more distress. While it might be tempting to trim away the unsightly foliage, remember that the plant is going through a sensitive period. By allowing it some time, you're giving it a chance to adapt and recover. Week by week, you can remove some of the discolored foliage by trimming them off at the base of the leaf near the stem. Be careful not to remove more than 30% of the plant in one pruning session, as this may lead to even more shock.

Brown leaves on a new Fishtail Palm: not an uncommon sight.

Providing the Right Conditions

To support your Fishtail Palm during its sensitive adjustment phase, make sure you're providing the ideal conditions:

  1. Light: Fishtail Palms prefer bright, indirect light and will also tolerate some direct light. However, avoid exposing them to too much harsh direct sunlight, as this can scorch their leaves, and never place this plant in a low light area. We recommend finding a well-lit spot where the plant receives plenty of filtered light.

  2. Humidity: These palms thrive in spaces with high humidity. If your home has dry air, consider using a humidity tray or a room humidifier in the space where your Fishtail Palm for its ideal moisture levels.

  3. Watering: Keep soil just moist to the touch, usually allowing the top inch or so of the soil to dry out. Water once a week or every 4-10 days depending on how fast your plant is drinking. Note that despite this plant’s preference for moisture, it is relatively drought tolerant so it’s usually best to err on the side of underwatering. Overwatering can lead to root rot, which is a much harder problem to fix!

  4. Temperature: Keep your Fishtail Palm away from drafts and maintain a consistent room temperature. Avoid sudden temperature fluctuations, as these can stress the Fishtail Palm.

  5. Fertilizing: Avoid feeding your plant during the initial adjustment period. However, the minute you begin to see new growth emerge, feed your plant a gentle fertilizer. In the meantime and while you’re waiting for your plant to show signs of new growth, you may consider using a foliar feed which is like a microdose of nutrients for your plant and much more gentle than even the gentlest of soil fertilizers.

The Six-Month Milestone

Anywhere between three and six months after you’ve brought your Fishtail Palm home, you'll likely notice a remarkable transformation in your plant. New fronds will emerge, showcasing the plant's resilience and adaptability. As you progressively remove the damaged and withered fronds and leaves, your Palm will start to have more energy to push out the new growth, looking fuller and healthier than ever before.

You’ve Got This!

In the world of indoor plants, the Fishtail Palm may require a bit more attention during its initial phase, but the rewards are well worth it. With patience and the right care, you can enjoy the beauty and elegance of this striking plant for many years to come. As you witness its journey of recovery and growth over the first six months, you'll develop a deeper appreciation for the wonder of nature and the resilience of your Fishtail Palm—we’re sure of it! Embrace the journey and soon you'll have a flourishing, magnificent Palm that will bring you joy day in and out for years to come.


designed to thrive

Premium plants paired with stylish ceramics, plus lifetime plant care support. Order online at leonandgeorge.com

L&G Travels: Ganna Walska Lotusland

Bio·​phil·​ia /ˌbī-ō-ˈfi-lē-ə  /-ˈfēl-yə : a desire or tendency to commune with nature

Explore the wonders of nature with us in our Léon & George Travels series as we delve into captivating biophilic experiences across the globe.


Nestled amidst the coastal beauty of Santa Barbara, California lies a hidden gem that's nothing short of a horticultural wonderland. Lotusland, a lush and captivating garden estate, beckons plant enthusiasts from around the world to immerse themselves in a verdant, one-of-a-kind oasis of greenery. Whether you have a passion for plants or simply enjoy walking in nature, then Lotusland should be at the top of your must-visit list in Southern California. Check out what’s so special about Lotusland and discover some of your favorite common houseplants—and not so common plants—thriving in the wild!

A Little History behind lotusland

Once the private estate of the eccentric and visionary opera singer Madame Ganna Walska, the enchanting Lotusland located in Montecito, California has evolved into a horticultural masterpiece. Over several decades, Madame Walska's passion for gardening and her fascination with rare and exotic plants led to the creation of the lush, botanical paradise we know today. Her influence on Lotusland's design, along with collaborations with renowned landscape architects, has left an enduring legacy. From its origins as an artistic retreat to its current role as a hub for plant conservation and education, Lotusland's history is a testament to the enduring power of nature and human creativity. Read more about Ganna Walska and her creation of Lotusland here.

Rare & exotic flora at lotusland

Lotusland boasts a jaw-dropping collection of rare and exotic plants, many of which you may have only seen in books or on the screens of your favorite gardening shows. Think enormous variegated Monsteras, one of the largest collections of Cycads (plants dating back to the Jurassic Period!) in the country, and more. The garden's diverse array of species includes cacti, succulents, tropicals, cycads, and palms, all beautifully arranged across its 37 acres.

Garden Inspiration

For houseplant and/or horticulture enthusiasts, Lotusland offers a variety of educational opportunities in garden design, sustibility, conservation and more. Simply visiting Lotusland is an educational experience in and of itself: the gardens are thoughtfully curated, showcasing different plant habitats and microclimates. The estate's mission is to advance our understanding and appreciation of the importance of plants in our lives and in the life of the planet is one we can certainly get behind! By visiting Lotusland, you're not only indulging your love for houseplants but also contributing to the preservation of our planet's botanical treasures.

Common Houseplants, Growing Wild at Lotusland

One of the most fascinating aspects of Lotusland is the opportunity to see common houseplants thriving in their natural habitat. While we often enjoy these plants neatly planted in pots in our homes, it's a whole different experience to witness them flourishing outdoors. Here are some common houseplants you might encounter at Lotusland:

Bird of Paradise (Strelitzia reginae)

The striking Bird of Paradise plant, with its large banana-like leaves and vibrant orange flowers, hails from South Africa. In Lotusland's tropical garden, you can observe these beauties reaching for the sky in a lush, verdant setting.

Ferns (Various species)

Lotusland's fern garden is a testament to the diverse range of fern species that can thrive outdoors. Ferns, often beloved as houseplants for their air-purifying qualities, appear in various shapes, sizes, and shades of green here, like the Bird’s Nest Fern, or enormous aerial Staghorn Ferns.

Euphorbia (Various species)

Euphorbias are succulent houseplants appreciated for their unique forms and resilience. In Lotusland's arid garden, you'll encounter various Euphorbia species, including the impressive Euphorbia Ingens, commonly known as the "Candelabra Tree” or Jade Cactus, or the Euphorbia Ammak, also known as our popular Desert Cactus!

Monstera deliciosa

The Monstera Deliciosa, known for its iconic Swiss cheese-like leaves, is a favorite among indoor plant enthusiasts. In Lotusland, you'll have the chance to see these captivating plants in towering, enormous sizes, climbing and spreading their lush, fenestrated foliage in an environment that mimics their tropical native habitat.

Visit Lotusland

If you find yourself in the beautiful coastal gem of Santa Barbara, don’t think twice about making a visit to Lotusland!

Ganna Walska Lotusland

Cold Spring Rd, Montecito, CA 93108

Plant your visit to Lotusland

Photo credit: Visit Santa Barbara


california plant delivery

The California Jewel Collection

Discover fresh new greenery that celebrates the wonder and warmth of California's quintessential second summer.

How To Care For and Grow your Jade Cactus AKA Euphorbia Ingens

The Jade Cactus, scientifically known as Euphorbia Ingens and also commonly referred to as the Candelabra Cactus or Candelabra Tree, is a stunning and low-maintenance succulent that adds a touch of desert elegance to any indoor space. With its robust columnar structure and deep green coloring, the Jade Cactus is a popular choice amongst interior designers and design enthusiasts alike. Read up on the basics of how to care for the Euphorbia Ingens, from water and light requirements to propagation and everything in between.

Light requirements

The Euphorbia Ingens has flexible light preferences, making it a versatile choice for various lighting conditions. While bright indirect light and even some direct sunlight is ideal, they can also adapt to medium levels of light, though less light will significantly slow their growth rate. Place your Euphorbia Ingens near a south-facing or west-facing window for optimal light conditions, or even outdoors in a semi-shaded area (too much direct sunlight may scorch your cactus!).

Choosing the best soil

Choose a well-draining cactus or succulent potting mix for your Euphorbia. This blend typically consists of sand, potting soil, and perlite or pumice. The mix allows for plenty of drainage and prevents moisture-related issues such as root rot

Watering - less is more

Euphorbias are drought-resistant and the Euphorbia Ingens is no exception: it is essential to allow it to dry out between waterings. Water the plant infrequently and sparingly, allowing the top inch of soil to become dry before the next watering. Depending on placement and time of year, your plant may only need watering once per month! Overwatering can lead to root rot, so exercise caution and prioritize a well-draining pot and soil mix.

Temperature and humidity 

Euphorbia Ingens thrive in average household temperatures between 65 to 75 degrees Fahrenheit. They can tolerate cooler temperatures down to 55 degrees Fahrenheit, but avoid prolonged exposure to temperatures below 50 degrees Fahrenheit. Maintain consistent temperatures to prevent stress and maintain your Euphorbia’s health for years to come!

The perfect fertilizing routine

Feed your Euphorbia during its growing season (spring and summer) with a controlled-release succulent fertilizer or a diluted, balanced liquid fertilizer. Use a 10-10-10 fertilizer for mature plants and a low-nitrogen fertilizer for young ones. Avoid overfeeding, as succulents prefer light feeding.

Propagating

Propagating the Euphorbia Ingens is an exciting project and a great way to grow your collection! You can propagate by taking a cutting from your plant–the easiest way to do this is to remove one of the “arms” from the cactus. Allow it to dry for at least 24 hours before placing in well-draining succulent or cactus mix, and lightly wet the soil with water. Place in a warm, dry area–you have a new plant that should begin to start growing within just a few weeks!

Potting and repotting

Select a pot that accommodates your Euphorbia Ingens’ root system. While they have small roots, avoid oversized pots that may retain excess moisture. Repot every 2-3 years for smaller plants and 4-5 years for larger ones.

Common problems

Monitor your Euphorbia for potential issues such as wrinkled leaves (sign of underwatering), all-over yellowing (indicates overwatering), and leaf loss (oftentimes not enough light). If your Euphorbia faces decline, diagnose the problem first and adjust your care routine accordingly. Combat pests like mealybugs, spider mites, and scale using gentle methods like wiping with rubbing alcohol-soaked cotton balls and neem oil.

The Jade Cactus is a captivating and easy-to-care-for succulent that adds a touch of desert charm to indoor spaces. With its striking appearance and low-maintenance requirements, it's a popular choice among plant enthusiasts. By providing the right light, well-draining soil, and careful watering, you can ensure the Euphorbia Ingens thrives and remains a stunning addition to your home.


Designed to Thrive

Premium plants, potted and delivered, plus lifetime access to 24/7 Plant Doctor support.

(if the article is about a specific plant we sell, change this block content/link to that specific product)

The Absolute Best Plants For A Hallway

Does your hallway need a refresh? Whether it’s an entryway hall or a long corridor between bedrooms, bringing a bit of literal life to your hallway can make a world of a difference. And when it comes to hallways, the secret lies in choosing the right plants; ones that don't take up too much room in an often highly-transited space. From elegant vertical growers to charming tabletop companions, we've curated a list of the best space-saving plants that will breathe life and style into your hallway.

  1. Dracaena Lisa

  2. Dragon Tree

  3. Dracaena Compacta

  4. Snake Plant

  5. Cast Iron Plant

  6. Zanzibar Gem

  7. Pothos

  8. Ficus Audrey Bush

  9. Schefflera Tree

  10. Braided Money Tree

Dracaena Lisa

Looking for a statement plant for your hallway? The Dracaena Lisa is a slender beauty with its striking, tapered leaves. These glossy, dark green wonders add a touch of elegance without crowding your space. The Dracaena is not only space-efficient but also remarkably adaptable to lower light, making it a hallway favorite.

Dragon Tree

The Dragon Tree brings a touch of the tropics to your hallway, and is also an excellent air purifier to boot! With its narrow form and unique foliage, it's the perfect statement plant. It's versatile enough to handle medium to low light conditions, making it an ideal choice for your hallway's ambience.

The Dragon Tree is the perfect hallway plant, with its slender profile and air-purifying qualities, adding elegance and fresh air to your narrow space.

Dracaena Compacta

As the name suggests, the Dracaena Compacta is all about elegance in a small package. Its glossy, dark green leaves create a sense of lushness without taking up too much room. It's an excellent choice for smaller hallways or tabletop arrangements as it comes in a floor plant size as well as a small, tabletop size.

Snake Plant

The Snake Plant is known for its striking vertical growth and no-fuss attitude. Its tall, sturdy leaves rise gracefully, making it a perfect hallway companion. Snake plants are also incredibly low-maintenance, requiring minimal attention and can thrive in low light conditions.

Cast Iron Plant

Another low light favorite, the Cast Iron Plant is a lushly robust, dark green beauty with leaves that are well-suited to low-light environments and minimal care. If you’d like to add more of a jungle feel to your hallway, this is your plant!

cast iron

Transform your hallway into a lush, low-light jungle with the Cast Iron Plant – it's the ultimate leafy companion that can take on the hallway hustle with style and ease!

Zanzibar Gem

The Zanzibar Gem is a resilient and low-maintenance plant that thrives in various lighting conditions, including low light. Its glossy, dark green leaves add a touch of elegance and a lush appearance to your hallway. 

Pothos

The Cascading Pothos is a popular trailing plant that's perfect for creating a lush and cascading console or entryway table centerpiece in your hallway. Its heart-shaped leaves bring vibrancy and a sense of liveliness on a table top or hanging on the wall.

pothos

Elevate your hallway to new heights with a hanging Cascading Pothos – it's the green curtain of good vibes that welcomes you home with a leafy embrace!

Ficus Audrey Bush

The Ficus Audrey Bush, a cousin of the Fiddle Leaf Fig, boasts velvety, sage-green leaves with a unique structure that adds a touch of individuality to your hallway. It thrives in bright, indirect light and can grow tall, adding vertical interest.

Schefflera Tree

The Schefflera Tree is a petite indoor tree that can grow tall and elegant while remaining relatively narrow.  Its umbrella-like leaves come in both the standard and variegated shades, and are a welcome and elegant addition to any entryway hall.

Braided Money Tree

The Money Tree is not only a beautiful plant: it’s also a symbol of good luck and prosperity according to the teachings of feng shui, and when placed in an entryway or hallway, may bring good juju to your home! With its braided trunk and glossy, hand-shaped leaves, it comes in various different sizes as both a floor plant and tabletop decor.

By choosing the right plants, you can turn your hallway into a lush and inviting space that sets a positive tone for your entire home. From slender and elegant floor plants to tabletop wonders, these space-saving plants will breathe life and style into your hallway, creating a warm and welcoming ambiance for all who enter.


Designed to Thrive

Premium plants, potted and delivered, plus lifetime access to 24/7 Plant Doctor support.

Money Trees Leaf and Trunk Health
Money Tree leaf and trunk health

House plants like the tropical Money Tree, known for its lush foliage and impressive canopy, are believed to bring good luck and fortune according to the teachings of Feng Shui. These are easy to grow and typically require simple care, making them a favorite in many greenhouses and homes. However, even these favored plants have their challenges (in addition to not making it rain 💵). Here are the most common ailments and solutions to make your Money Tree blooming:

Leaf Discoloration

Yellow leaves are a sign that your plant needs more light. White spots or browning leaves could mean that your plant is being burnt in direct light. Money Trees prefer bright, indirect light - somewhere near a window but not in the path of direct sun, nestled inside suitable pots. Check out our illustrated light guide for more information on assessing your light, or take a deeper dive into Money Trees and yellow leaves.

Leaf Drop and Wrinkles

The culprit? Temperature fluctuations! Native to the tropics of Central and South America, this gardening favorite thrives in warm and humidity-rich environments, ideally somewhere between 55F to 75F. To mimic its native greenhouse environment, consider adding misting to your routine between waterings. Read our complete guide on Money Trees’ wrinkled leaves.

Trunk Health

Arguably the most impressive part of the tree, the trunk can suffer from root rot due to overwatering and become soft, soggy or wrinkly. The trunk may also dry out if not watered enough (though this usually only happens in extreme cases of underwatering). A general gardening tip for these plants: Money trees like their soil on the drier side with good drainage. Always ensure the soil feels dry before you water again. And don't forget to repot and fertilize periodically, as well as carry out occasional pruning. Be on the lookout for pests, and if you notice any, address them promptly to maintain your plant's health.


The Money Tree Collection

Considered a powerful symbol of good luck and prosperity, The Braided Money Tree has a meticulously-braided trunk under a beautiful canopy of leaves which expand with time. Explore our full collection of Braided Money Trees in various shapes and sizes.

What You Need To Know Before You Repot Your Plant

So you've decided it's time to give your leafy friend a new home. Well, hold onto your gardening gloves because before you get started, there are a few things you should know…

Whether you're a seasoned green thumb or a newbie plant parent, repotting can be a bit like transplanting your plant to a new city. You want to make sure it settles in comfortably and flourishes. So, let's dive into what you need to know before you repot your plant and make this experience a rootin' tootin' good time!

  1. Timing is Everything

  2. The Right Pot is a Game-Changer

  3. Soil Matters

  4. Mind Those Roots

  5. One Size Doesn’t Fit All

  6. Watering Wisdom

  7. Post-Repotting TLC

Timing is Everything

Before you get your hands dirty, consider when to repot your plant. Spring and summer are like the plant equivalent of a beach vacation – the ideal time for relocation. Your plant will have the energy to adapt to its new pot and grow like it's on a tropical getaway. That said, if you have to repot in the fall or even dead of winter, it won’t be the end of the world.

The Right Pot is a Game-Changer

Picking the right pot is crucial. Think of it as finding the perfect-sized shoes for your feet. You want a pot that's just a tad larger than your plant's current one (or, you may decide to repot back into its original pot, simply refreshing the soil). If it's too big, your plant might feel like it's swimming in a sea of soil, and most plants like to have their roots tightly compacted within their soil and pot. Too small, and it's a suffocating shoe that'll cramp its growth.

Soil Matters

Imagine moving to a new city and having to adapt to a different climate. Your plant goes through something similar when you change its soil. Choose a high-quality potting mix that suits your plant's needs. Some like it dry, while others prefer to be constantly moist. Check your plant's preferences and cater to them like a plant concierge!

Mind Those Roots

When you're repotting, don't just yank your plant out like you're trying to win a tug-of-war. Be gentle and tease out those roots. If they've circled the old pot, give them a little massage to encourage them to explore their new territory. If you must, you can trim them, particularly if your plant experienced root rot (in which case, definitely trim them), or if they are too difficult to untangle from their grow pot.

repotting plants

Choosing the right pot size is essential— you can either pot back into the same size planter with fresh soil, or something just slightly larger than its current size.

One Size Doesn't Fit All

Not all plants need repotting at the same frequency. Some are like party animals and want to upgrade their space every year, while others are introverts and can go for years without needing a change. Get to know your plant's personality and repot accordingly. Some signs that your plant is ready for repotting is if the roots are circling the top or bottom of the soil surface, or if your plant generally seems to look a bit sad despite receiving adequate light, water and love.

Watering Wisdom

After repotting, your plant might be a bit stressed, just like you would be after a move. Be mindful of watering – don't drown it in sympathy water. Give it a drink, then let it settle in. Gradually increase the watering as it starts to adapt.

Post-Repotting TLC

Finally, show your plant some love after the big move. Give it some time to adjust to its new surroundings, and maybe even play some soothing tunes (okay, not really, but plants do respond positively to music!).

Remember, repotting is like redecorating your plant's home – it's a chance for a fresh start and a new lease on life. So, embrace the dirt, get your hands a little muddy, and watch your leafy companion thrive in its revamped abode.

With these friendly and funny tips, you're ready to embark on your plant-potting adventure. Happy repotting, and may your plant grow taller and greener than ever before!


repotting kit

Designed to Thrive

Upgrade your gardening game with our Repotting Kit, complete with everything you need for successful repotting, and enjoy the confidence of 24/7 Plant Doctor support.

The 10 Commandments of ZZ Care

Discover the timeless charm of the Zanzibar Gem, a symbol of natural beauty that graces any environment with elegance.

10 Commandments of ZZ Care

With its glossy, dark green leaves and air-purifying qualities, the ZZ plant has captured the hearts of plant lovers worldwide. To ensure your Zanzibar plant thrives and becomes a centerpiece of natural beauty, follow these 10 Commandments of ZZ Care.

Embrace lower light

Welcome your ZZ plant into your home's low-light areas with open arms. This hardy plant excels in low light conditions, making it a perfect fit for corners and rooms with minimal natural light. It also will happily grow (and grow fast!) in bright, indirect light, but avoid direct sunlight, as it can scorch the leaves and hinder growth.

light guide

Embrace the beauty of the no-fuss Zanzibar Gem, thriving gracefully in low light and illuminating even the dimmest corners.

With watering, less is more

Adopt a minimalist approach to watering your ZZ plant. These drought-tolerant wonders prefer to dry out between waterings as they store water in their bulbous roots. Allow the top inch of soil to become dry before giving a moderate drink. We’ll say it once and we’ll say it again: overwatering can lead to root rot, so err on the side of underwatering, especially with this plant!

Use well-draining soil

Plant your ZZ in a well-draining potting mix to ensure proper aeration and prevent waterlogging. Because the Zanzibar Gem is actually a succulent, a mix designed for succulents or cacti is ideal. This helps maintain a healthy root system and prevents moisture-related issues.

A cozy pot size

Choose a pot that provides a snug fit for your ZZ plant's roots. A slightly tight space encourages healthy growth and prevents excessive soil moisture. Repotting every few years into a slightly larger pot is sufficient.

Fertilizer, please!

Feed your ZZ plant with a well balanced fertilizer during the growing season (spring and summer) 1-2 times per month. If you use our natural plant food, you may continue to fertilize your plant but reduce to just one time per month or every other month. Avoid over-fertilizing, as ZZ plants are light feeders. 

fertilizer

Nourish your Zanzibar Gem to new heights of beauty with our specialized fertilizer and watch as your ZZ flourishes for years to come!

Prune lightly

Trim brown or yellowing leaves close to the base to encourage new growth. Pruning promotes a tidy appearance and redirects energy to healthy foliage. Remember, less is more; ZZ plants have a slow growth rate, so don't be too eager with the shears.

Toxicity: handle with care

While ZZ plants are stunning, they contain compounds that can be harmful if ingested. Keep them out of reach of curious pets and children. If nibbled on, they may cause discomfort, so ensure proper placement, out of reach from curious children or pets!

Keep things temperate

Provide gentle air circulation by placing your ZZ plant in a well-ventilated area. Avoid exposing it to strong drafts, which can stress the plant. As with all plants, good airflow prevents pests and promotes overall plant health.

Give your Zanzibar Gem a spa day by gently trimming away any yellow or brown leaves to promote a healthier appearance.

Shine that foliage

The Zanzibar Gem is not an easy plant to clean, but it will love you so much more for regularly doing it! Dust off your ZZ plant's leaves every few months or so to keep them glossy and vibrant. Wipe gently with a damp cloth to remove dust and improve its ability to photosynthesize–bonus points if you use a soap specially crafted to clean plants and naturally repel pests. 

Patience for growth

Patience is key when it comes to caring for plants, and above all with the Zanzibar Gem! ZZ plants are slow growers, so be patient and allow them to thrive at their own pace. With time and care, your plant will reward you with its striking presence and air-purifying prowess!


Designed to Thrive

Elevate your space with our premium plants like the stunning Zanzibar Gem, meticulously potted and expertly delivered.

Get Perky: The Ultimate Droopy Plant Revival Guide
Before and after of Cascading Pothos getting a good watering. This plant is nearly indestructible!

Before and after of Cascading Pothos getting a good watering.

Why is my plant so droopy?

Noticed your plant’s leaves and vines looking extra droopy? Your plant is most likely very thirsty! Plants tend to droop when they’re thirsty due to the way they distribute water from roots to leaves. If the roots aren’t getting enough water, maintaining the ideal water pressure in the rest of the plant becomes very difficult, and the leaves droop or wilt.

While this is a common occurrence in many different plant varities, some of the most notable are Calatheas (who’s leaves will also curl when underwatered), Pothos (pictured above), Fiddle Leaf Figs and Peace Lilies.

How to revive droopy plants

The good news about droopy plants is that they are generally very easy to fix (and much easier to fix than a plant that has been overwatered). Here's how to get it looking perky and happy within hours:

  1. Remove plant from its decorative planter and submerge the bottom of the nursery pot in a bucket filled with 2 inches of water. If your plant is potted directly in a planter with drainage hole, you can skip this step and place your plant with its pot in water.

  2. Leave the plant for a few hours or up to a full day to soak up the water. It will either drink all the water from the bottom-up, or if there’s still water remaining, remove it and let it drain out before returning to its decorative planter.

  3. Within 2 to 24 hours, come back and see your plant lush and full of life!

This method of watering is called bottom watering, and you can read our full guide on how to deeply water here.

Which plants will benefit from this technique?

Literally any thirsty plant! But you will find some are much more showy about it than others. Plants like Fiddle Leaf Figs, Calatheas, Peace Lilies, Rubber Trees, Pothos tend to droop more than others when thirsty, and their rebound will undoubtedly be very dramatic. Try it at home to bring life and lushness back to your thirsty plants!


Cascading Pothos

A popular, attractive, and truly easy-care plant, the Cascading Pothos has smooth and leathery heart-shaped leaves. They adapt easily to all environments and will grow quickly with minimal care, a perfect addition to refine any desk or shelf.

Dear Plant Stylist: "I’m really into the vintage Laurel Canyon meets jungalow vibe. Any recommendations?"
Photo by Lauren Engel for Mid-Century Home

Photo by Lauren Engel for Mid-Century Home, featuring a Fiddle Leaf Fig Tree and Monstera Deliciosa.

In our Dear Plant Stylist series, we share styling and lighting inquiries received by our in-house stylists with our audience. So read on-- you just might find that your plant styling questions are answered below! 

Dear Plant Stylist, 

I’ve bought small plants locally in the past, but I’m ready to invest in some statement plants from Léon & George. I want them to align with my apartment’s style: 1970’s inspired, Laurel Canyon-esque vintage. Any idea what kind of plants Joni Mitchell had?

Best,

K.F.

Dear K.,

I love receiving inquiries like these, because plants can bring so much style to an already beautiful space, and they make incredible focal points. 

The style of your home sounds like a natural match for living greenery. Houseplants reigned supreme in the 1970s, so there’s no way to get this look wrong. Still, there were a few standout varieties that really encapsulate the aesthetic of the ‘70s: Pothos varieties, ferns of all sorts, and cacti are all emblematic of the decade.

In the ‘70s, Pothos and Fern varieties were popular for their ultra-lush foliage. The cascade of leaves displayed by Pothos varieties is stunningly sculptural, reminiscent of intricate macrame or even the eponymous beaded curtain. A pair of Cascading Pothos, situated on staggered levels, is a stunning way to showcase these medium plants. Pothos are tolerant of varied light and require watering about once a week. 

Photo via Apartment Therapy

Photo via Apartment Therapy

Complements like wood stands, macrame hangers and baskets were very popular in the ‘70s, and for good reason. They’re a way of showcasing pieces of exquisite hand-made craftsmanship, and they can elevate your plants for purposes both pragmatic and stylistic. Our wood stands are handmade of sustainable hardwood, and they are compatible with our classic, cylindrical Mid-Century planters. Playing with tones of coral and gray ceramic will be a fun way to inject earthy color into your abode.

I’d be remiss not to mention that a Fiddle Leaf Fig Tree would be a seamless choice for a floor plant in your space. Super-popular in the ‘70s for their romantic, viola shaped foliage, they bring height and fullness with great texture and jewel-bright coloration.

And for vibrant accent plants, ferns are a shoo-in. I think just about everyone had a profusion of verdant ferns in the ‘70s. Just look at this living room, filled with beauties like the Boston Fern, Bird’s Nest Fern and Staghorn Ferns.

Photo via Design Sponge

Photo via Design Sponge, featuring a Bird’s Nest Fern, Fiddle Leaf Fig, and Staghorn Fern.

You can get a sense of the conditions that ferns require just by looking at them. Luscious and bursting with life, they like to be kept consistently moist, and appreciate indirect light and shade. The Bird’s Nest Fern, with its elegant, quill-like foliage, is a perfect gateway plant to the intoxicating world of ferns. And Philodendrons, like the Little Hope, are a seamless complement to ferns, with similar watering and light requirements.

Now in answer to your question regarding Joni: we know for a fact that she had succulent, tillandsia and and cacti at her Laurel Canyon home. So without further ado, I’d like to introduce you to your statement plant: The Desert Cactus. Yes, they are mystical monoliths- but don’t be afraid of this plant, because it is exceptionally easy to care for. Ample bright light is all it needs to thrive, along with an occasional drink. And two desert cacti, flanking a doorway, create the ideal portal to a magical home.

Photo via www.vanityfair.com

Photo via www.vanityfair.com

So excited for you to begin your plant-gathering, K. Every home needs, as Joni Mitchell would say, a “Little Green.” 

And now, a playlist inspired by the vibe!


largeplantcollection.jpg

Easy Care Plants, Delivered

Beautifully potted plants, plus lifetime plant care support. Order online at leonandgeorge.com

The Absolute Best Plants for a Basement Transformation

The Cast Iron Plant is one of the best choices for a basement due to its ability to thrive in low light and humid environments.

Transforming a basement from a dark space into a vibrant and inviting haven can be a rewarding project, and one surprising yet powerful tool in your basement transformation toolkit are plants! Not only do they bring life and vibrancy, but there are also many beautiful varieties that can thrive in low-light conditions, making them the perfect addition to a low light basement. Here are our Plant Stylists’ top picks for plants for the basement.

  1. Cast Iron Plant

  2. Zanzibar Gem

  3. Dracaena Lisa

  4. Silver Evergreen

  5. Parlor Palm

  6. Lady Palm

  7. Jade Pothos

Cast Iron Plant

The Cast Iron Plant (Aspidistra elatior) is a true champion of low-light environments, making it an excellent choice for basements. Its deep green, leathery leaves add a touch of elegance and lushness even in the dimmest corners. The Cast Iron Plant is a low maintenance plant (that can even go ages without watering–especially in low light areas!) and its air-purifying qualities make it a must-have for your basement oasis.

Zanzibar Gem

The Zanzibar Gem (Zamioculcas zamiifolia) is a basement's best friend thanks to the fact that it can thrive in virtually any lighting condition. This plant's glossy, dark green leaves will bring a touch of green to your space and its ability to endure infrequent watering makes it an excellent choice for those new to plant parenting.

Dracaena Lisa

For the perfect statement piece in your basement, the Dracaena Lisa is the perfect addition. With its slender,  dark green foliage, it adds a pop of color and sophistication to your space. Its adaptability to different light levels and minimal care requirements make it a practical and stylish choice for basement decor.

Silver Evergreen

The Silver Evergreen (Aglaonema) boasts striking silver and green foliage that can add a beautiful shimmer to your basement. This bright yet lush variegated plant is easy to care for and can thrive in low-light conditions. Its unique appearance and air-purifying qualities make it ideal to add to your collection of low light plants.

Parlor Palm

Create an oasis in your basement with the Parlor Palm (Chamaedorea elegans). Its delicate fronds and graceful appearance bring a sense of tranquility to any space. This palm thrives in low to medium light and humid conditions, making it a perfect option to brighten up your basement while, too, requiring minimal maintenance!

Lady Palm

The Lady Palm (Rhapis excelsa) is a symbol of elegance and refinement. Its fan-shaped leaves and slow growth make it a perfect fit for corner spaces and makes an excellent statement piece. With its ability to thrive in low light and adapt to various conditions, the Lady Palm will infuse your basement with a touch of sophistication.

Jade Pothos

Cascading greenery is perfect for basement shelves or tabletops, and there’s no better plant to do it than the Jade Pothos (Epipremnum aureum). Its heart-shaped leaves, variegated with shades of green and gold, will trail gracefully from shelves or hanging planters. The Pothos is known for its resilience and adaptability to low-light conditions, making it a fantastic choice to add to your basement oasis.

Ready to bring your basement to life? Shop all low-light plants and get them delivered directly to your door!


Designed to Thrive

Premium plants, potted and delivered, plus lifetime access to 24/7 Plant Doctor support.