Posts in Plant Care
Overwatering vs. Underwatering (and how to treat both)
Overwatering vs. underwatering

How to tell the difference between an overwatered and underwatered plant

Improper watering is the leading killer of houseplants. And if you have a variety of plants in your indoor jungle, understanding what watering techniques work for each plant can be a real challenge - especially since symptoms of overwatering and underwatering can look very similar. Here are some general things to watch out for to determine if your watering needs adjustments.

Overwatering vs underwatering

Signs of Overwatering:

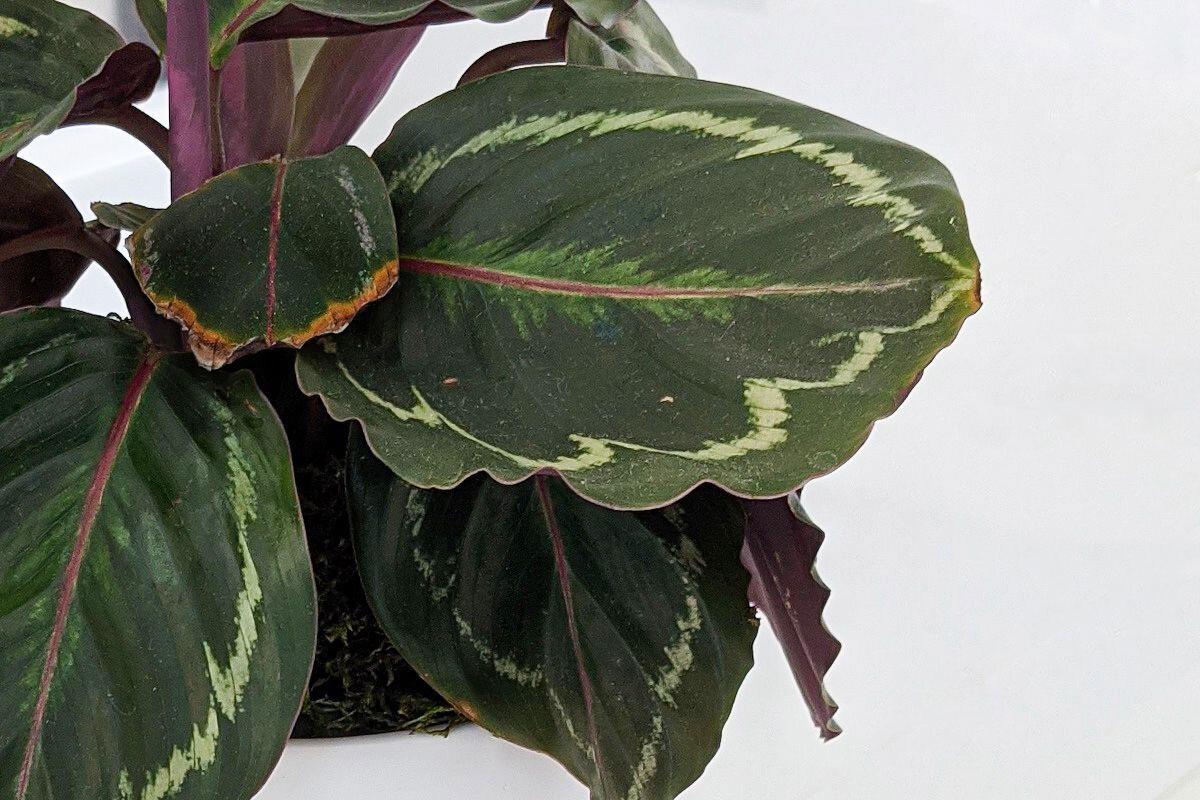
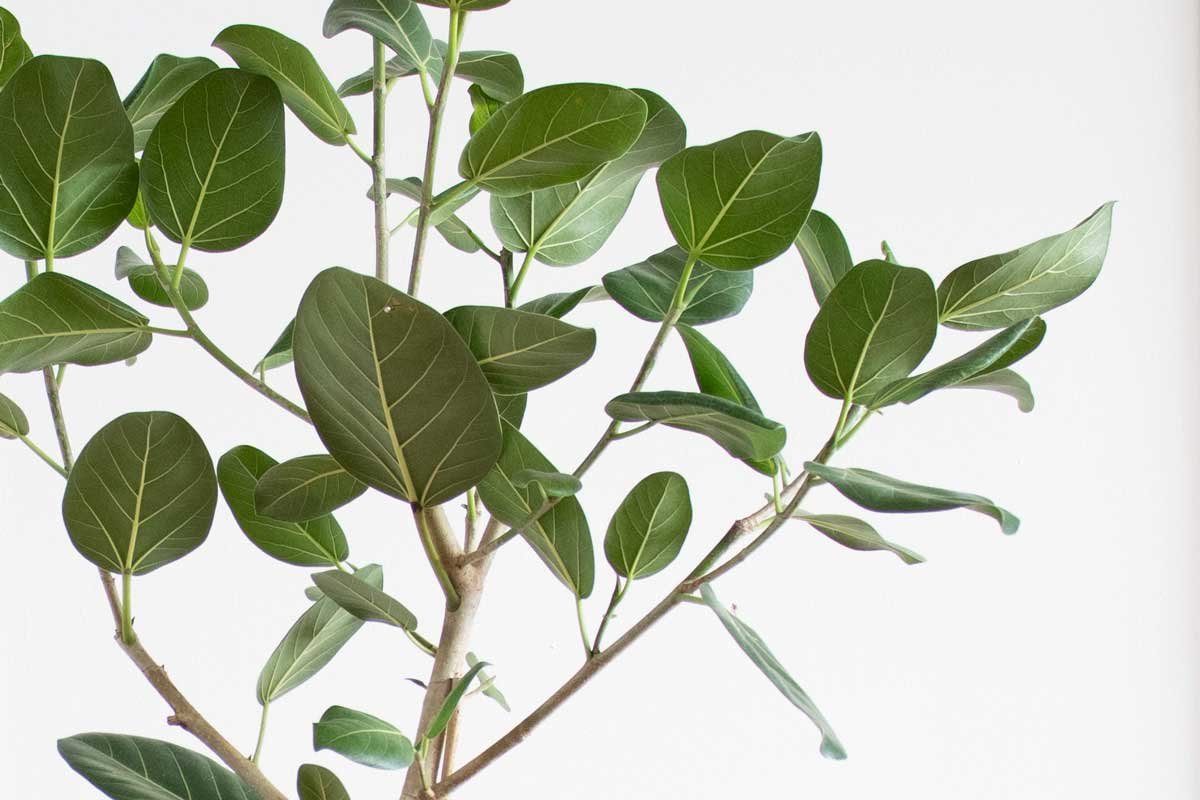
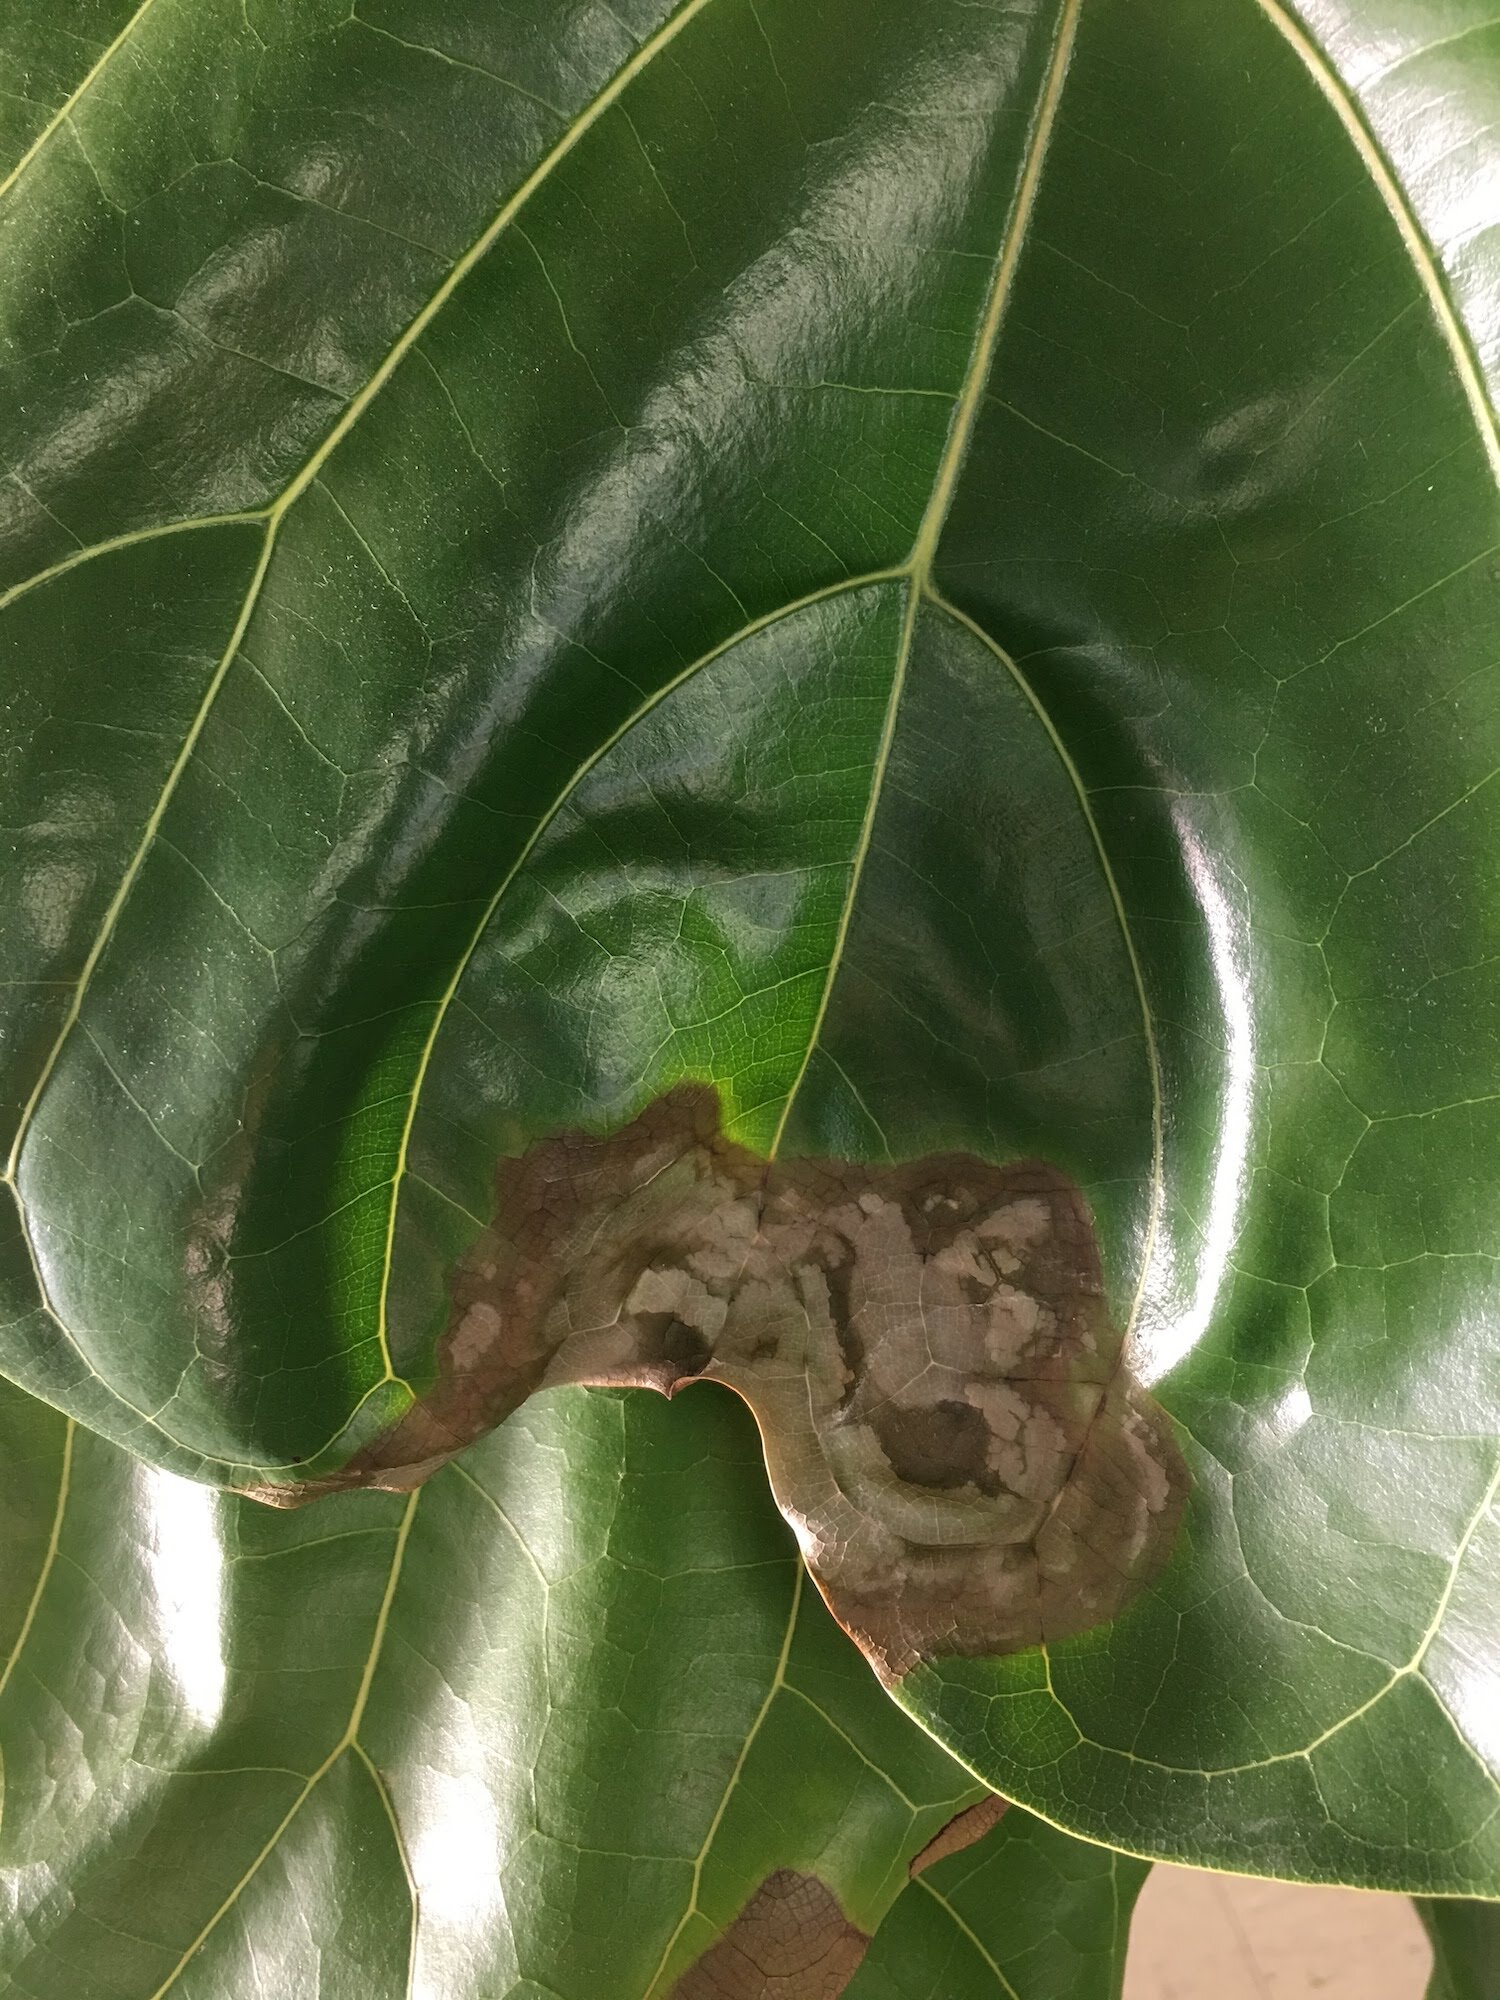
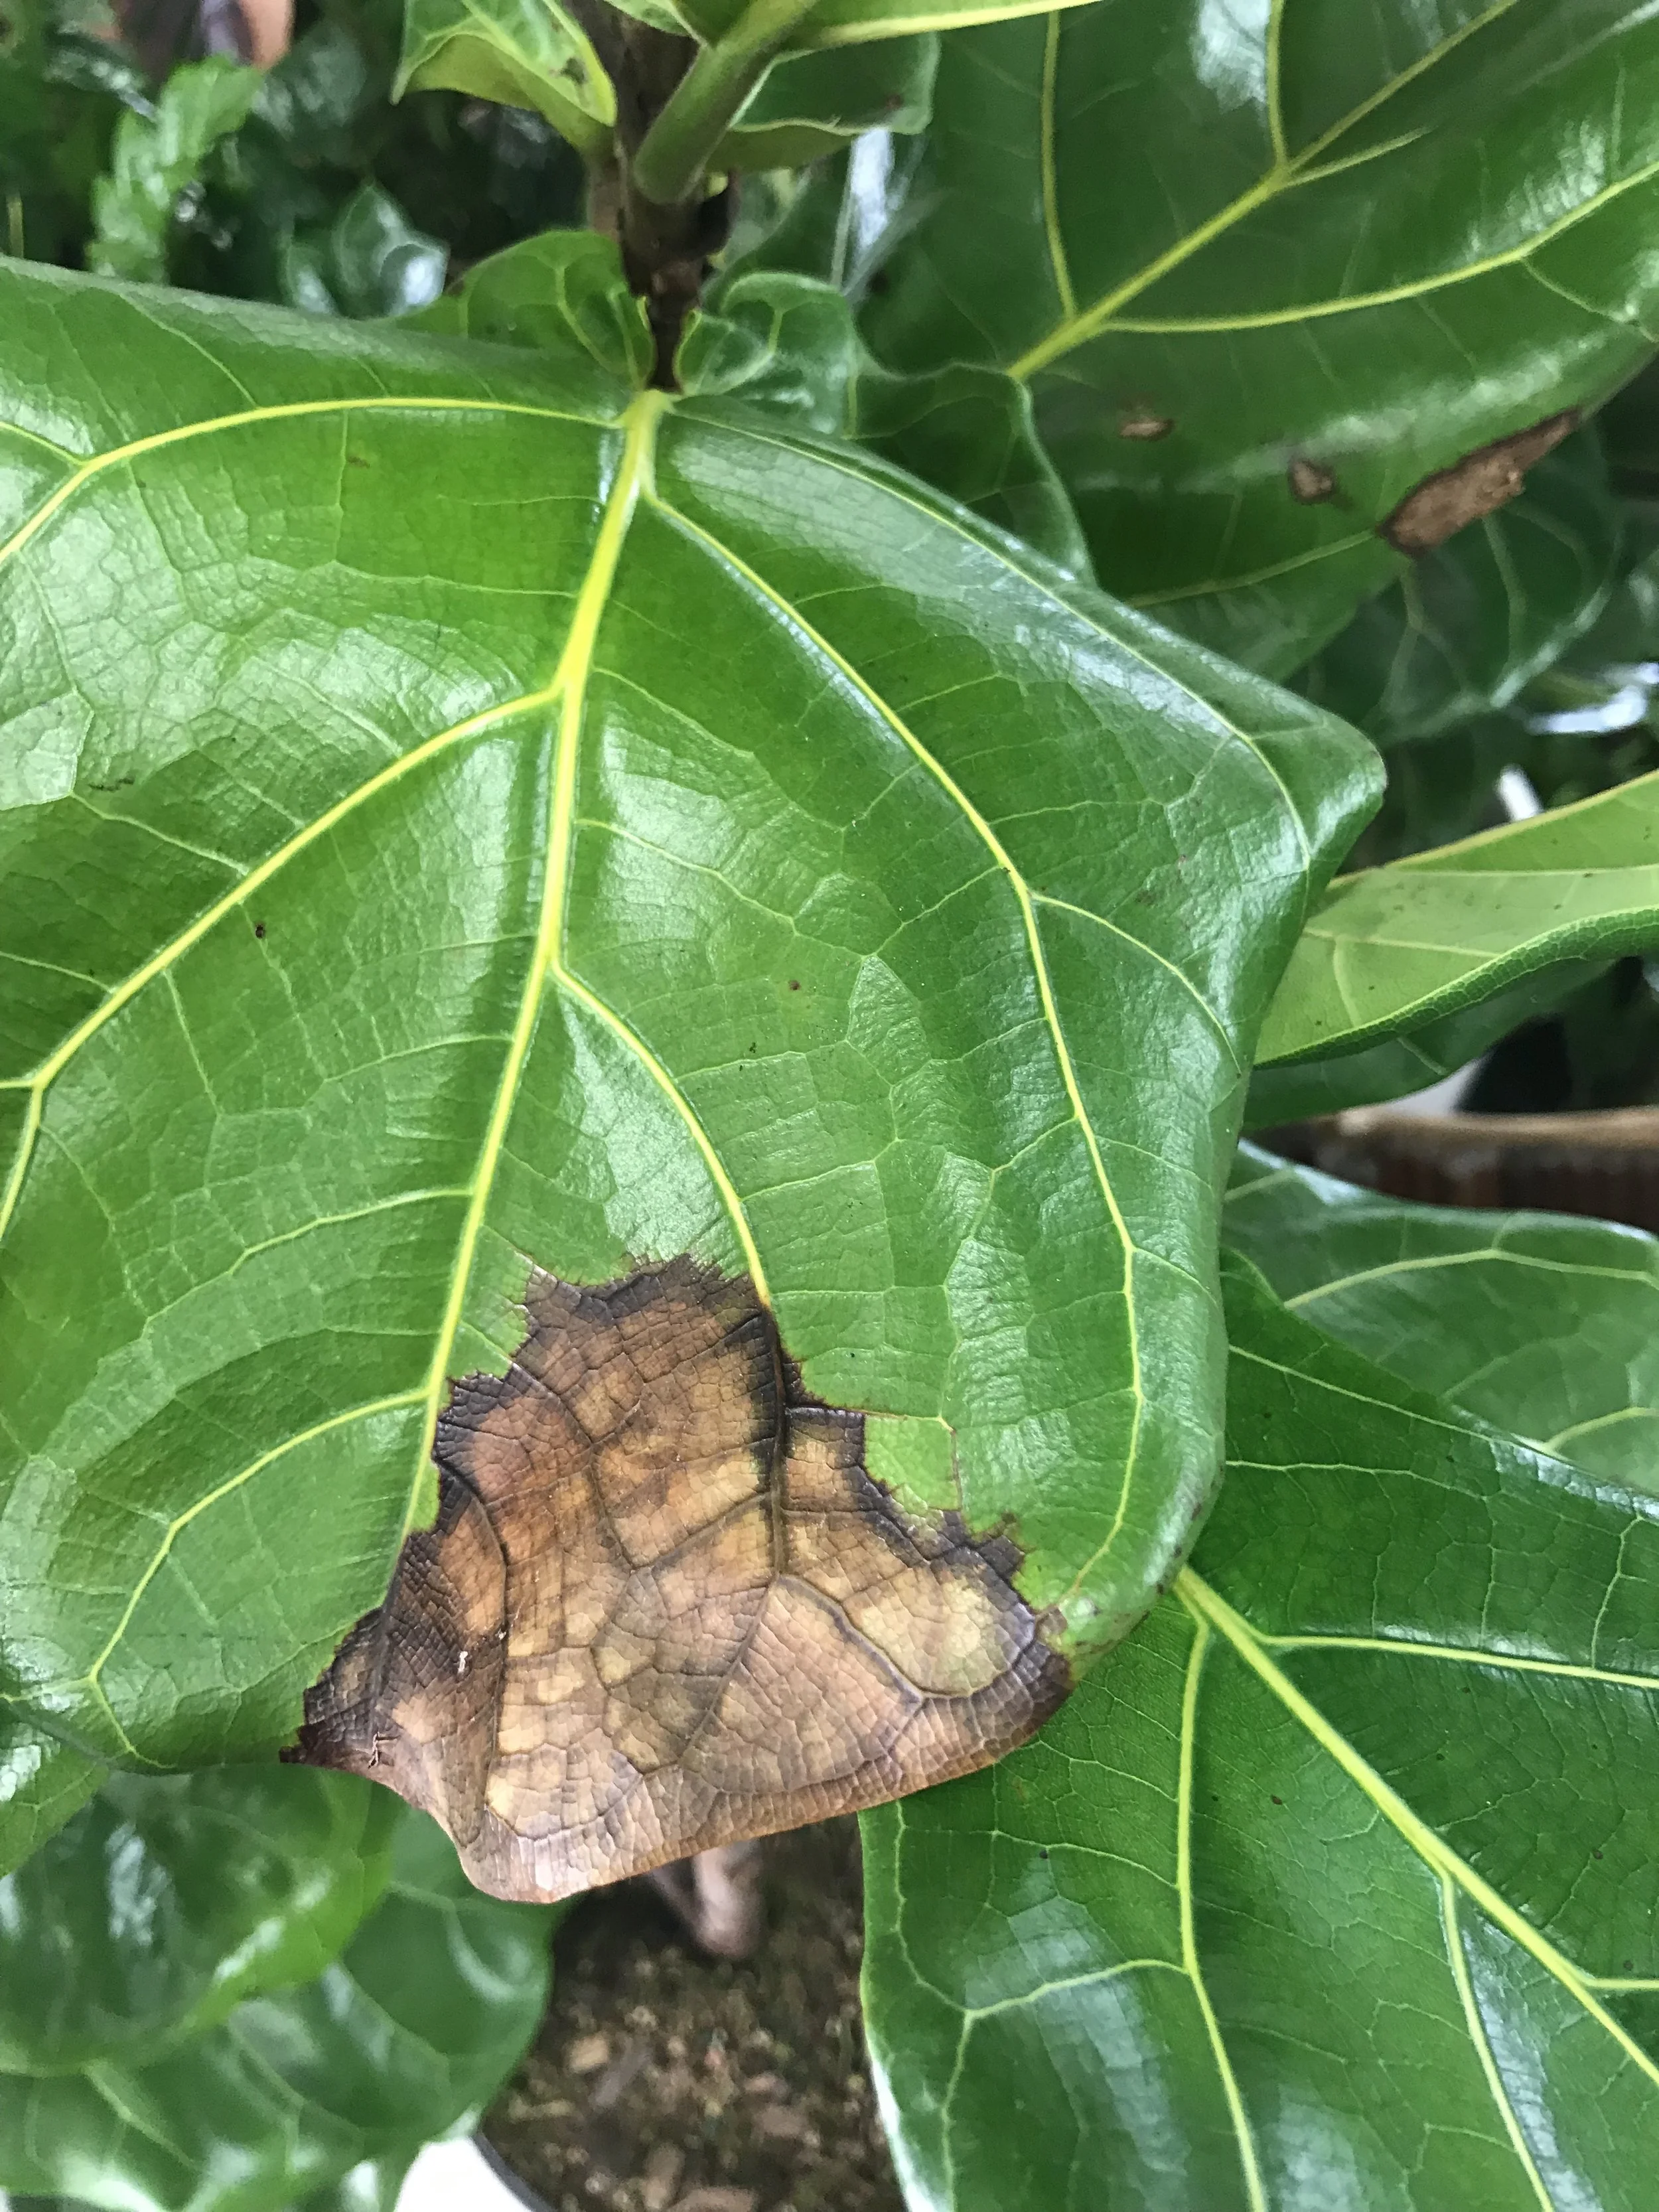
Browning edges can indicate too much water. A plant pushes water through to the edge of its leaves, and if given in excess, this can cause veins at the edges to burst, which leads to browning.   
Wilting can go both ways, plants wilt when they’re thirsty and when they’re overwatered. If you notice wilting, check the moisture of the soil.

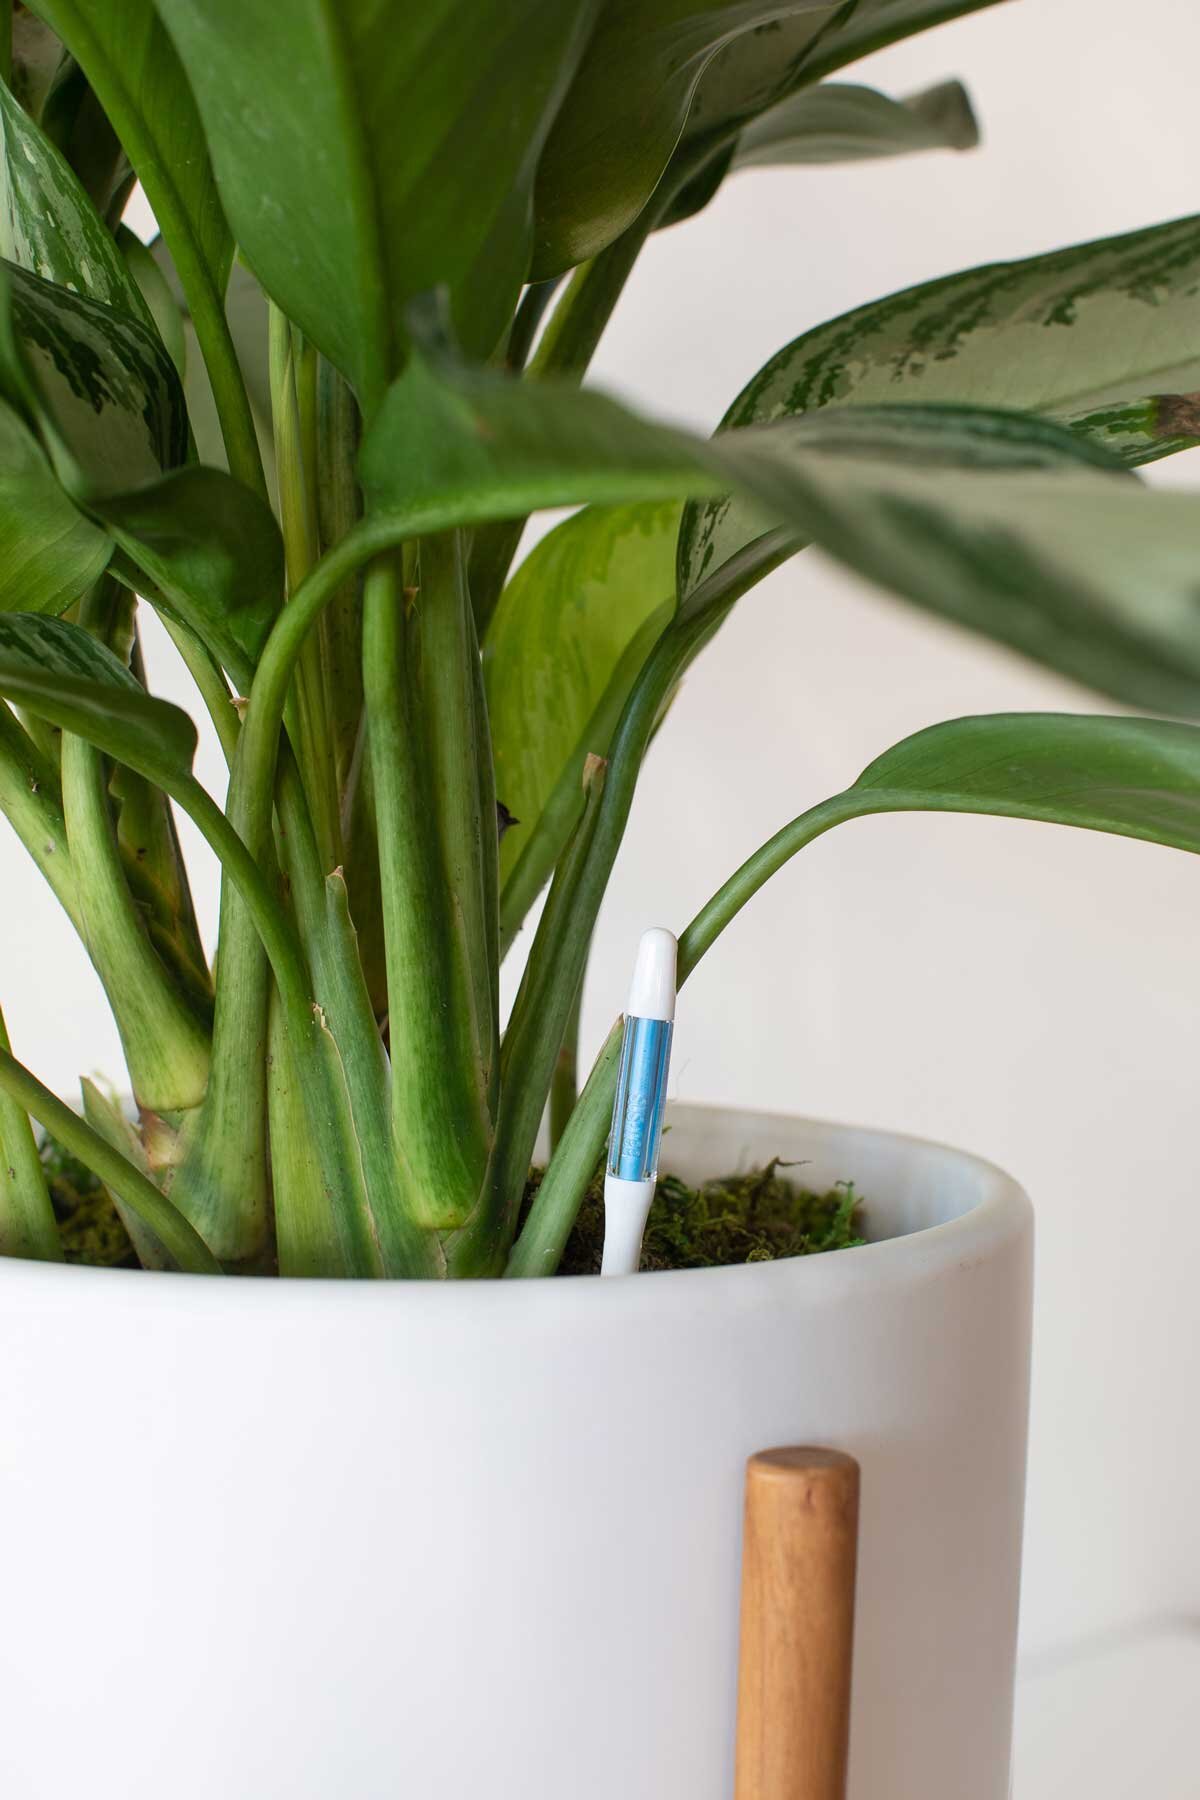
Pests are another sign of overwatering as many insects thrive in damp places. Check for pooling water underneath your plant.

How to treat overwatered plants

Severely overwatered plants generally require a soil change. Plants that have been gently overwatered may dry out in the right conditions (think warm and bright space!) but if you at all suspect root rot, then head here and follow these simple instructions for changing your plants soil (and treating root rot, if necessary).

Overwatering vs underwatering

Signs of Underwatering:

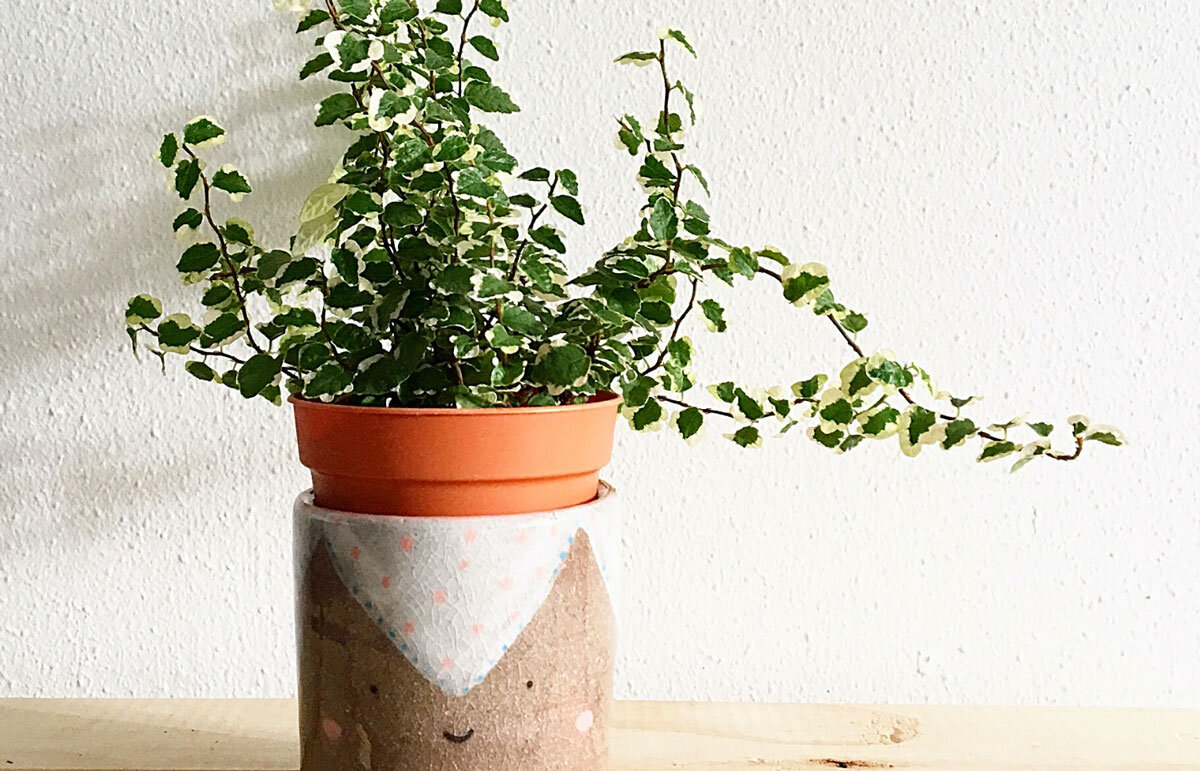
Drooping leaves that look completely lifeless can be a sign of underwatering. 

Soil pulling away from the outsides of the pot is another indicator that your plant may be underwatered. If you notice this happening, try shortening the length of time between waterings.

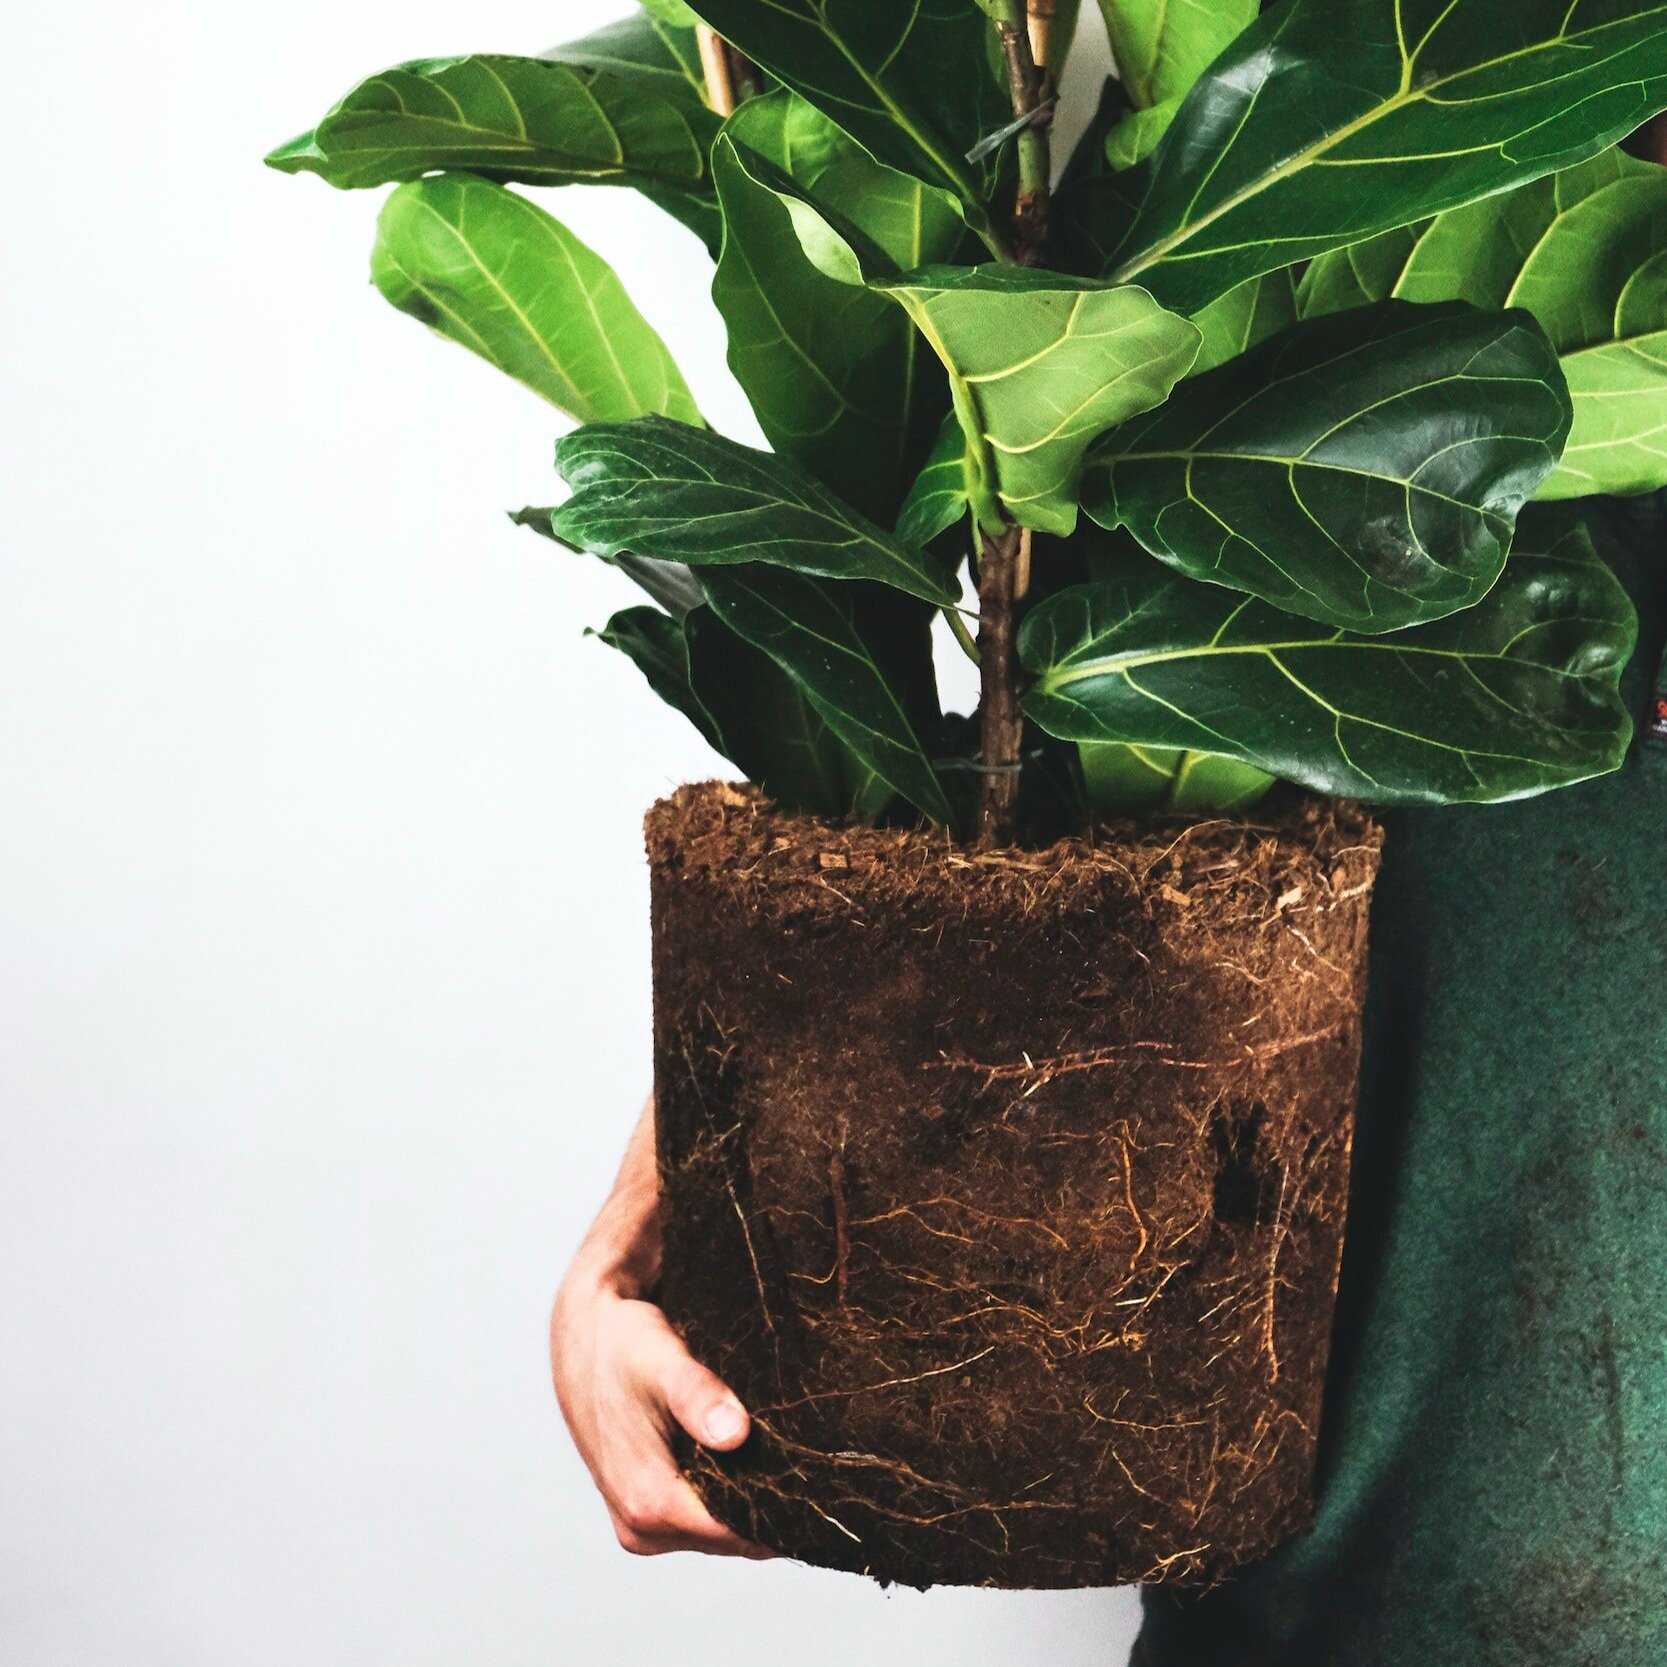
Drying out too quickly could mean that your plant may need to be repotted. If your plants’ pot is too small to support the amount of water it needs to thrive, this can inhibit future growth and be detrimental to your plant in the long run. Consider repotting your plant after the first year of ownership.

To keep things simple, water your plant the same amount each week - about 2 cups for plants 2-3ft tall and 3 cups for plants 3-6ft tall.

Keep plants happy and healthy by observing and listening to what it is they’re trying to tell you. And remember, the amount of water your plants need will change depending on the season and the conditions in their environment.

How to treat underwatered plants

If your plant is severely underwatered, the best the you can do is practice a little “bottom watering”. Bottom watering is allowing the plants to drink from the bottom up, as much as they want, for up to 24 hours. In addition to this, you may also water over the soil. Above all, you want to make sure the plant has plenty of time to drink, as a regular watering for underwatered plants often results in the water quickly running through dry soil, not allowing the roots time to drink up.

Here is a simple guide to bottom watering. If you think your plant is dead or almost dead, rest assured that it most likely will be easily revived!


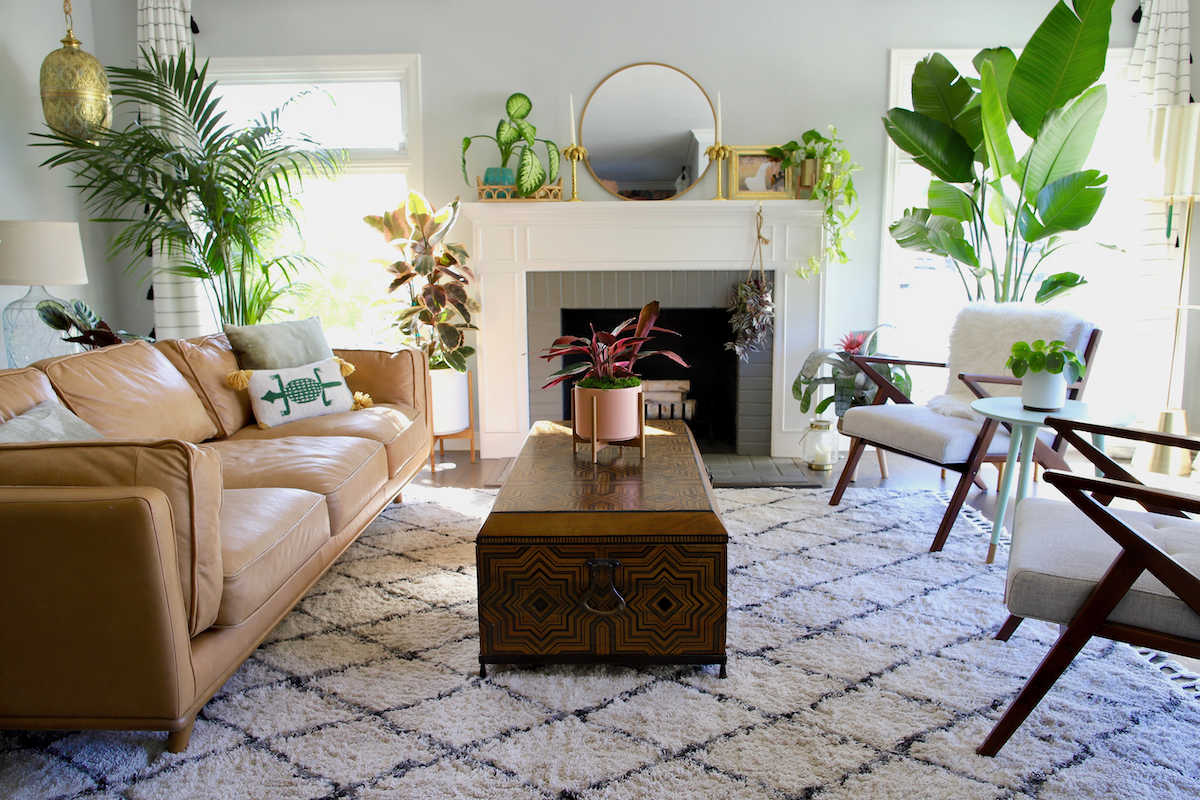
Indoor plants, potted and delivered

Premium plants paired with stylish ceramics, plus lifetime plant care support. Order online at leonandgeorge.com

Help! Why Are My Calathea's Leaf Edges Browning?
The Calathea Rattlesnake after a quick trim.

What causes brown edges on Calathea leaves?

Calatheas have expressive leaves. They engage in a type of circadian rhythmic movement known as nyctinasty: this means that their sensitive leaves move in reaction to the light they receive. In the evening, they turn their leaves up, and during daylight hours, those same leaves are lowered.

As you might imagine, plants with sensory skills like these can also be delicate, with a preference for specific conditions. When it comes to Calatheas, this can mean that if the water, light, soil or food that your plant receives isn’t just right, the plant may respond with something all plant owners dread: browning leaf edges. 

But not to worry! In keeping with our commitment to providing the best resources available for indoor plant owners online, we’ve got solutions! Read on, and let us take the mystery out of Calathea care.

Incorrect Lighting

A Sunburn? Not For Me, Thank You. Never forget that Calatheas need indirect light. They’re no desert darlings, and they must not be placed directly in front of windows or below skylights. Plan on making a home for your Calathea in an area that receives steady, indirect light and plenty of moisture. (Yes, this plant is a perfect bathroom buddy!) 

Water Quality

Calatheas would prefer to receive the quality of water that they get in their native environments (moist rainforests in South America and Southeast Asia). On the off chance that you happen to live in a jungle, this shouldn’t be a problem. But for the rest of us, we have to rely on some more urbane life hacks. 

The hard minerals in your water like chlorine, salt and fluoride can be harsh for indoor plants like Calatheas. If you have a water filtration system, it’s a great idea to use it to filter your water before watering your plant. Another hack is to simply leave your water out to “breathe” in a bowl or the kitchen sink overnight before watering your Calathea with it. This gives the water time for the fluoride to dissipate (evaporate,) which occurs when it meets oxygen. 

Lack of Humidity

Plan on misting your Calathea at least once weekly and consider keeping your plant in a part of your home that receives regular moisture like the bathroom or kitchen. You can also place your Calathea near a humidifier and reap the double-benefits of the humidifier softening your air while your Calathea purifies it! Need a mister? Look no further: this one is beautiful, sustainable and has components for both misting and watering!

Dry Is Good for Humor and Martinis; Not So Good for Calathea Soil

Once again we come back to your lovely Calathea’s homeland: a moist and fertile rainforest, burgeoning with life! Recreate that magic by ensuring that your Calathea’s soil is consistently moist. It’s not as hard as it sounds! Regularly delve one to two inches into your Calathea’s soil with your pointer finger. If the topsoil feels dry, water your plant. If it’s still moist, you can wait. For most indoor environments, this means watering about 1-2 times a week.

Too-cold temperatures

Let’s be clear- your Calathea is a tropical plant, and like a Floridian retiree, she prizes a pleasant climate. Keep her away from drafts, heaters or cooling vents. (The rush and push of air circulating through appliances will only irritate your plant.) 

Expect to see the dreaded curling if your Calathea grows cold or excessively dry. Keep your room temperature between 65-80 degrees consistently, and your Calathea’s leaves will practice their graceful nyctinasty in peace! 

Keeping Your Calathea Happy

Indoor plant care can be tricky. Over or under-watering? Too much sun, or not enough of it? When your Calathea exhibits signs of browning, it’s not always easy to pinpoint the cause.

Remember these simple words of wisdom: 

  • Don’t drown your plant. Overwatering is by far the most common cause of ill health in indoor plants, Calatheas included.

  • No sunburns allowed. No plant wants its leaves to burn, and the tropical Calathea prefers indirect light only.

  • Humidity, humidity.  Make sure that this Queen of the Rainforest is receiving… well, her rain. Misting is a gift to your Calathea, and you may find it surprisingly meditative for you, too! 

In the meantime and while you make adjustments for its comfort, don't be afraid to give it a makeover. Trimming is completely safe and allows your plant to redirect more energy to new growth. Here are a few simple tips as you prepare those scissors:

  • Check that the blades are clean or disinfect them with rubbing alcohol.

  • Trim off whole leaves as close to the root as possible.

  • For leaves with just a bit of brown edges, reshape them by following the leaf's natural lines.

Now get out there and give your plant some love!

Ready for more? Read our full guide on Calathea care, including tips for propagation, repotting, and more.


fiddle-bush-white-stand-nude-leather-chair.jpg

Indoor plants, potted & delivered

Premium plants paired with stylish ceramics, plus lifetime plant care support. Order online at leonandgeorge.com

How To Fit Your Plant To Your Pot
Photo via @5thavenueflowers

Photo via @5thavenueflowers

The latest in plant care tips for keeping your foliage happy and healthy, brought to you by premium plant delivery service Léon & George.

One of the great dilemmas of the modern green thumb is the surprising amount of planters whose dimensions are just off. To the naked eye, they seem like the perfect fit, but when you place the plant inside, the nursery pot gets swallowed by the planter, or worse, sticks out like a sore thumb.

Of course, many may choose to plant directly in the pot, whether it’s ceramic, plastic, terracotta or another material. But planting directly inside the planter may not always be an option, especially if there is no drainage.

How to remedy this issue then? In a nutshell it’s called staging, and we’re excited to share some secrets with you for how to optimally (and attractively!) fit your plant to its pot.

Trimming the nursery pot

In order for your plant to fit its pot, you may need to trim the nursery pot an inch or two, cutting around the edge to remove some of its height. Your plant won’t suffer! Keep in mind that this might require a sharp blade or other tool, as many nursery pots are made with tough plastic that won’t easily be cut through with scissors.

fittingplanttopot.jpg

Fitting the width of your planter

Most nursery pots come in standard sizes of 4”, 6”, 8”, 10”, etc widths. If your planter is wider than your nursery pot, you may like to fit it so that there’s no wiggle room in between. Any material will work for this, but the cleanest and easiest solution is by wrapping the nursery pot with a foam collar, as you would fit a hat to your head!

Elevating your plant inside the pot

No drainage hole? Have a heavy hand with watering? You may like to create some elevation to ensure your plant never sits in water for prolonged periods. Our ceramics are 100% water sealed, too, which means any excess water will simply sit at the bottom of the pot. Many plants like to drink from the bottom up, so if you have a good sense of how much water your plant needs, you may like to place your plant directly on the floor of its planter. If you’re afraid of overwatering, though, use a block of styrofoam or similar material to create elevation.

fittingplanttopot2.jpg

Adding the final touch

To keep things looking neat, add decorative moss, rocks, or similar to the top of the soil. Voilà! You’ve perfectly staged your plant, and guess what? Staging has added benefits for indoor greenery, like increased airflow to the soil, less chance of overwatering, and easy, mess-free swapping out if you decide you want to refresh the planter!

Staging your plant, start to finish. Illustration by @kail_bales

Staging your plant, start to finish. Illustration by @kail_bales


howtoarrangeindoorplants1.jpg

Indoor plants, potted & delivered

Premium plants paired with stylish ceramics, plus lifetime plant care support. Order online at leonandgeorge.com

Philodendron Brasil Care Guide: Everything You Need To Know

PHILODENDRON BRASIL

AKA variegated heartleaf philodendron

The Philodendron Brasil offers a colorful twist on a classic houseplant and is surprisingly easy to care for. With heart-shaped leaves in different shades of green and yellow, this trailing plant earned its name thanks to the close resemblance to the Brazilian flag. Read on to learn everything you need to know about taking care of your Philodendron Brasil from the amount of water it needs, its light requirements, and how to overcome the common issues you might encounter along the way.

What type of light does the Philodendron Brasil need?

While it can survive in low light conditions your Brasil will show its variegation best in medium to bright indirect light. Be careful not to give them too much sun though, placing them in direct sunlight can cause leaf burn.

How to water your Philodendron Brasil

Water about once a week and allow the topsoil to dry out between waterings. Avoid overwatering, and note that your watering schedule may be less frequent during winter months.

Is the Philodendron Brasil a fast grower?

This plant is indeed considered a fast grower. You can either keep you Brasil in a hanging pot and let its leaves trail down or you can train it to grow upwards by using supports. Fertilize your Philodendron Brasil 1-2 times per month in the spring and summer with indoor plant food, or foliar feed year round.

Common problems with Philodendron Brasils

How to maintain a beautiful and healthy Philodendron Brasil

Philodendrons are known for being easy to care for, read on for tips on how to keep yours looking full and colorful over time.

Pruning Philodendrons

Remove dry or dead leaves all year round, but save any major pruning for the spring and summer months. When pruning your philodendron, use sharp, clean shears and cut any excessive growth at the base of the stem.

Cleaning Your Plant

Take each leaf between two soft tissue cloths and wipe off the top to reveal a healthy shine (also helps the plant soak in more light!).

How to repot your Philodendron

Houseplants grow much slower than they would in the wild. Depending on the size of your plant and the density of the roots, this is nice to do every 2-3 years to provide fresh nutrients and encourage new growth.

  • When to repot - Philodendrons are known for their rapid growth. You’ll know when it’s time to repot yours when its roots are growing our of the pot.

  • Pot sizing - if you want your plant to grow outwards more, find a nursery pot that’s 2” in diameter larger than the current pot. If you want your plant to stay the same height, you can reuse the same pot and simply change the soil.

  • Get your hands dirty - spread out newspaper on the floor, remove the plant from the pot and shake off as much of the old soil as possible so that you have clean roots. Place the plant in the center of the pot, add new soil and pat down firmly. Water the soil thoroughly and place the plant in an area with bright indirect light. Your plant will take 2-4 weeks to settle from the shock and adjust to its new home.

How to propagate a Philodendron Brasil

If you’re interested in making more of your Philodendron Brasil either for yourself or a friend rest assured that propagating this plant is very easy. Though there are many ways to do this, water propagation is generally the easiest way to go about it. Follow these instructions to propagate your Philodendron Brasil:

  • Select a stem to propagate - Using sharp, clean scissors or shears, cut an inch or two below a node(these are the areas where leaves attach to the vines).

  • Place in water - Find a clear glass and fill it with water. Submerge only the stem of the vine, any leaves that are sitting in the water will rot!

  • Place in a bright area and wait! - Avoid any direct sun. You may need to change the water out every few days to keep it fresh. It usually takes just a few days for the root to start growing.

  • Transfer to soil - After a week or so, transfer to indoor potting soil. A small pot is best — no larger than 6” in diameter.

  • Keep hydrated - During the first few weeks, or until your plant feels firmly rooted in its soil, regularly water and drain your Philodendron. The soil should be just barely moist to the touch at all times.


brasil.jpg

Philodendron Brasil

An incredibly resilient tropical plant, this colorful variation of the heart-leaf philodendron is the perfect choice for beginners.

How to Care For and Grow Your Anthurium
anthuriumscandiwhite.jpeg

The Anthurium

AKA Laceleaf Anthurium

AKA Flamingo Flower

With bright, long-lasting “flowers” that bloom from large, heart-shaped foliage, it’s no wonder that the Anthurium is a popular houseplant to bring a splash of color and vibrancy to any surface it adorns. Read on for simple tips on how to care for this gorgeous flowering plant, a plant with many names and varieties and also commonly known as flamingo flower, laceleaf, queen of spades, and king of hearts anthurium.

How much light do Anthuriums need?

Anthuriums prefer bright indirect light, but they can also tolerate medium levels of light. Brighter light will produce more and larger flowers. Avoid harsh direct sunlight.

How to water your Anthurium

Water your plant about once a week when the top inch of soil feels dry. This plant can be resistant to the occasional drought.

How fast do Anthuriums grow?

This plant is a slow to moderate grower; more light will promote faster growth. Anthuriums do not need a lot of fertilizer. Fertilize your plant once a month in the spring and summer, using 1/2 the recommended dose.

Natural leaf shine, pest repellent, and fungicide, all in one with our Organic Black Soap Spray.

loriginal-soap-main-photo.jpg

Organic Black Soap Spray

Made with organic black olive oil and containing just four ingredients, an essential tool to keep your plants thriving and glowing over time.

$24

Common problems with the Anthurium

No or very few new flowers

First of all, did you know the “flowers” on the Anthurium are not actually flowers? In fact, they are “spathes”, which is a type of modified leaf that surrounds a spike of miniature flowers. So your plant does have flowers, but what appears to be a big petal is actually a leaf! When plants with spathes show little “flowering”, it is usually attributed to the plant not getting enough light. Try placing your plant in a brighter area and it should produce more flowers. If you’ve found your plant showing no flowers for months, read below for an easy trick to promote a new cycle of flowers for your plant.

Small or misshapen flowers

While Anthuriums will slow flower growth in low light, small flowers can ironically be caused by too much light. This plant will sometimes also show small or deformed flowers when they are consistently not getting enough water. Be sure to follow a regular watering routine, and give your plant a drink when the top inch of soil feels dry.

Yellow or brown leaves

The most common cause of yellow or brown leaves on Anthuriums is improper watering, and specifically, overwatering. Excessive light may also cause your plant to develop yellow leaves. Simply remove the yellow stems with sharp, clean scissors, and adjust either light levels or watering routine.

Shop Anthuriums at leonandgeorge.com

How to care for Anthurium plant

How to maintain a beautiful and healthy Anthurium

Take care of your Anthurium and it will take care of you! Below are simple tips to continue caring for and growing your plant over time.

  • Pruning - remove old, unattractive or damaged leaves from the base of the plant; if they don’t come out easily with a tug, cut them off with a clean blade. Regularly remove spent flowers as well, so that the plant can focus its energy on producing new ones.

  • Trimming - if there is just a small portion of a leaf that was damaged such as the edges or tips, trim off any discoloration or blemishes by following the natural lines and shape of the leaf.

  • Cleaning - regularly mist your Anthurium to keep it clean. If a lot of dust has accumulated on its large leaves, use a damp cloth to wipe each one clean.

How to grow and repot the Anthurium

  • Growing - Anthuriums are slow to moderate growers that do not need a lot of fertilizer to thrive. During spring and summer, fertilize once a month, using about half the recommended dose.

  • Repotting - Léon & George Anthuriums come in 4” or 6” grow pots and only need to be repotted every few years and only if the plant is unhappy (i.e. has been overwatered) or to refresh the soil and give it new nutrients. If you’d like your plant to grow larger, find a new grow pot that is 2” larger than its current pot. If you’re happy with the current size, you can reuse the same pot and simply change the soil.

    • Getting your hands dirty with or without a yard - spread out newspaper on the floor, remove the plant from the pot and shake off as much of the old soil as possible so that you have clean roots. At the bottom of the grow pot, and a layer of soil, then place the plant in the center of the pot and cover with new soil. Pat down firmly and water thoroughly. Place the plant in an area with bright indirect light. Your plant will take 2-4 weeks to settle from the shock and adjust to its new home.

Shop Anthuriums at leonandgeorge.com

How to promote flowering on your Anthurium

With the right light, water, and love, Anthuriums will produce flowers all year round. However, generally there are cycles of flowering, where the plant will produce flowers for a few months, and then take a rest for another few months. Because the flowers last so long, it’s possible you will “have” flowers at all times.

However, if you notice your plant is not producing new flowers, here are simple steps to encourage that it does:

  • Make sure your plant is in a bright area with plenty of indirect light and receiving adequate water.

  • In the late winter or early spring, slow your watering routine and water sparingly or less than you normally would for 6-8 weeks.

  • After this period, return to your regular watering routine and begin fertilizing. You should see new growth over the following weeks and months, followed by flowers!

Shop Anthuriums at leonandgeorge.com

How to propagate the Anthurium

There are a few different ways to propagate an Anthurium. You can either divide your Anthurium, or, more easily and without getting your hands too dirty, take cuttings and propagate in water:

  1. Select a stem to propagate - Find a stem with at least two nodes (the part of a plant stem from which one or more leaves emerge). Using a clean blade, cut the stem at the base.

  2. Place in water - Find a clear glass and fill with water. Make sure only the stem is submerged, and no leaves or flowers are sitting in the water.

  3. Place in a bright area and wait! - Avoid any direct sun. It usually takes just a week or so for roots to start growing.

  4. Transfer to soil - After 3-4 weeks, transfer to indoor potting soil. A small pot is best — no larger than 4-6” in diameter.

  5. Keep hydrated - During the first few weeks, or until your plant feels firmly rooted in its soil, regularly water and drain your new Anthurium. The soil should be just barely moist to the touch at all times until the plant is thoroughly rooted in the soil, at which point you can water every time the top inch of soil feels dry, generally about once a week.


queenanthuriumblack.jpeg

Queen of Spades Anthurium

A beautiful, long-lasting alternative to the traditional bouquet, with spade-like foliage and plentiful white blooms year round.

How To Create The Perfect Drainage for a Fiddle Leaf Fig

Fiddle Leaf Figs can be unforgiving plants if their requirements are not fully met. Beyond the very basic need—plenty of bright, indirect light—making sure your Fiddle Leaf Fig has proper drainage is probably the most important piece in ensuring a healthy and beautiful plant. And while this is the case for all indoor plants, none will let you know as quickly as a Fiddle Leaf Fig! So what type of drainage does this plant need, and how can you be sure your plant is getting proper drainage?

What Type of Drainage Do Fiddle Leaf Figs Need?

First of all, Fiddle Leaf Figs like to dry out between waterings, plain and simple. That means they don’t want to be watered too frequently, and they prefer a fast-draining soil. In the wild, this plant is never sitting in water or completely drenched: its roots are constantly draining. This is what we want to mimic indoors.

What happens if the soil cannot properly drain? The plant will accumulate moisture, and the roots may eventually develop root rot. As such, making sure your Fiddle Leaf Fig (and really any indoor plant!) has proper drainage is key to keeping it healthy and vibrant.

Natural Plant Food

Nourish your plants with this specially-formulated organic liquid plant food. Our Boost Vitaminé is made with potent nutrients from nature to help your plants grow and thrive all year long.

$24

Creating Perfect Drainage for Your Fiddle Leaf Fig

There are a few different ways to pot plants for optimal drainage, but no matter what the case, your pot must have drainage holes, one way or another. We do not recommend potting this plant, which is known to be particularly finicky, in a pot without drainage holes. Never attempt to grow a fiddle leaf fig in a container without drainage holes. Here are a few different ways you can create drainage for your Fiddle Leaf Fig:

  • Use a pot with one large drainage hole at the bottom, usually the case with terracotta pots

  • Use a pot with several drainage holes, like some plastic pots, and then simply place your plant in the decorative container.

  • Add a layer of gravel or drainage rocks to the bottom of any pot, though we still recommend using a pot with drainage holes.

Do you have a decorative pot with no drainage holes? While some people like to DIY it by drilling a hole on the bottom, this can be cumbersome and also risks breaking the pot! In this case, we recommend “staging” your plant, which means leaving it in its plastic nursery pot and simply placing it inside the decorative container.

In fact, we do this for all of our plants, as it not only ensures optimal drainage but also allows our customers to use stylish mid-century plant stands!

This post was adapted from the Fiddle Leaf Fig Plant Resource by expert Claire Akin. Head to their website to learn more about caring for the Fiddle Leaf Fig.


Indoor plants, potted & delivered

Premium plants paired with stylish pots, plus lifetime plant care support. Order online at leonandgeorge.com

How to Care For and Grow Your Silver Evergreen
silver-evergreen-white-cropped-1200px_black.jpg

Silver Evergreen

AKA the Chinese Evergreen

AKA Silver Bay Aglaonema

An eye catching indoor plant, the Silver Evergreen is a colorful, low-maintenance accent to any space with bright green leaves covered in stunning silver marbling. Read on for simple tips on how to care for the Silver Evergreen, also known as the Chinese Evergreen or Silver Bay Aglaonema.

Light

  • Tolerant of low or medium light(minimum of four hours of indirect sunlight a day)

  • Brighter light allows the plant to maintain its variegated patterns.

  • Avoid direct sunlight that may burn your plant’s leaves

Water

  • Water about once a week to keep soil evenly moist but never soggy

  • Water around the base and keep away from the center to avoid root rot. A watering can with a long spout will help you water precisely.

  • Allow soil to dry out between waterings

Growth

  • The Silver Evergreen is a slow grower but can reach up to four feet in height

  • Fertilize your Silver Evergreen 1-2 times per month in the spring and summer with indoor plant food, or foliar feed year round.

Never overwater your plants again with these sleek and simple moisture meters.

leon-and-george-moisture-meters.jpg

MOISTURE METERS

Finally, a moisture meter that actually works. Tested by our very own Plant Doctors, all orders of Large or Extra Large Léon & George plant sets include a moisture meter.

$24-$29/pack

Common problems with the Silver Evergreen

Brown or yellow leaves - underwatering or overwatering

  • Symptom - yellow leaves that wilt or dry out

  • Cause - usually underwatering, or not enough humidity. However, if you water this plant excessively (allowing it to become soggy or waterlogged), this could also be the cause. Yellowing leaves may also signify being cold or in need of fertilizer.

  • Remedy - If underwatered, remove your Silver Evergreen from its decorative pot and give a good shower in the sink. Regularly mist to increase moisture levels. If overwatered, aerate the soil, or simply hold off until the plant dries out a bit until the next watering. If it is very damaged, you may need to repot.

Thin and leggy stems - not enough light

  • Symptom - long, thin stems

  • Cause - not enough sunlight. Silver Evergreens are tolerant of low-light conditions but if they are positioned too far away from their light source they’ll stretch themselves thin trying to get closer.

  • Remedy - Make sure your plant is getting at least 4 hours of indirect sunlight a day or try using a grow light.

How to care for a Chinese Evergreen.

How to maintain a beautiful and healthy Silver Evergreen

Take care of your Silver Evergreen and it will take care of you! Below are simple tips to continue caring for and growing your Silver Evergreen over time.

  • Pruning - remove old, unattractive or damaged leaves from the base of the plant with a clean blade, ideally during the dormant period.

  • Trimming - if there is just a small portion of a leaf that was damaged such as the edges or tips, trim off any discoloration or blemishes by following the natural lines and shape of the leaf.

  • Cleaning - regularly mist the Silver Evergreen to keep it clean. If it is very dusty, you may want to use a damp cloth to wipe the leaves clean.

How to grow and repot the Silver Evergreen

  • Growing - Silver Evergreens are slow growers and will grow even slower in low light conditions. During spring or summer, use a diluted fertilizer every two weeks to give your plant a vitamin boost.

  • Repotting - Léon & George Silver Evergreens come in 6” or 10” grow pots and only need to be repotted every few years and only if the plant is unhappy (i.e. has been overwatered) or to refresh the soil and give it new nutrients. If you’d like your plant to grow larger, find a new grow pot that is 2” larger than its current pot. If you’re happy with the current size, you can reuse the same pot and simply change the soil.

    • Getting your hands dirty with or without a yard - spread out newspaper on the floor, remove the plant from the pot and shake off as much of the old soil as possible so that you have clean roots. At the bottom of the grow pot, and a layer of soil, then place the plant in the center of the pot and cover with new soil. Pat down firmly and water thoroughly. Place the plant in an area with bright indirect light. Your plant will take 2-4 weeks to settle from the shock and adjust to its new home.

How to propagate the Silver Evergreen

Silver Evergreens are relatively straightforward to propagate because they create small plants off of the mother plant as they grow. Wait to propagate during the growing months when your plant has the energy to recover. To get started lay down some newspaper to contain any messes and then all you need to do is:

  1. Locate an established plant, it will be on the perimeter of the mother plant in the center.

  2. Tease the small plants roots away from the roots of the main plant.

  3. Place your separated plant in a small pot filled with quality potting soil.

  4. Give your new plant a generous watering after planting it and keep it moist for the next couple of weeks before resuming a normal watering schedule.

Shop Silver Evergreen at leonandgeorge.com


silver-blog.jpg

SILVER EVERGREEN

A lush and colorful plant featuring large silver-green leaves, this plant is happy in areas with little to no light or ventilation. It is listed as one of NASA’s top ten air purifying houseplants. Also known as the Chinese Evergreen, this plant is considered to bring good luck.

Cleaning dusty plant leaves
Photo credit: wikihow

The latest in plant care tips for keeping your foliage happy and healthy, brought to you by premium plant delivery service Léon & George.

Dusty leaves be gone! Dirty or sticky leaves not only look unpleasant, they also prevent your plant from photosynthesizing properly. Here are ways to kick the cleanliness up a notch, and get your plants looking and feeling their best!

  • Mix your cleaning solution - use a ratio of 3 tablespoons of mild dish soap mixed with a gallon of room temperature water.

  • Cleaning small plants - dip and swish their leaves around in the solution to remove dirt, grime or bugs and rinse with clean water immediately after.

  • Cleaning large plants - use a cloth and wipe each leaf clean with the soapy water, rinse off with a clean non-soapy damp cloth (if you're seeing bugs, leave the soapy solution on for a few minutes to an hour).

*Bonus tip* - dish soaps can double as a mild insecticide. If you're seeing any critters, leave the soapy mix on for a few minutes to an hour before rinsing.

*Extra bonus tip!* Use our Plant Doctors’ favorite black olive oil soap, which comes in a ready to use spray bottle formula. Not only does it clean plants and reveal a brilliant shine, but it also acts as a natural insecticide and pest repellant.


parlorpalm2.jpg

Indoor plants, potted & delivered

Premium plants paired with stylish ceramics, plus lifetime plant care support. Order online at leonandgeorge.com

How To Grow Herbs Indoors

Growing your own herbs is a rewarding experience that has the added benefit of sprucing up your kitchen with beautiful (and useful!) living greenery. Plus, who doesn’t love the fresh scent of fragrant herbs like rosemary or thyme? Read on to learn the basics of indoor herb gardens, and how to create a thriving one of your own!

How to Start an Indoor Herb Garden

While you can start from seeds or cuttings, finding starter herbs at your local grocery or hardware store is the simplest and quickest way to enjoy fresh herbs in your kitchen. But before purchasing your herbs you want to have a few things figured out:

  • Placement - A lot of people don’t know this, but most herbs need at least six hours a day of full sun to thrive. Don't have a sun-drenched window? Try using a stylish artificial grow light like the Smart Growbar, or consider growing them outside on a balcony, patio, garden, or even windowsill!

  • Watering - Most herbs do best when their soil is just humid to the touch. This means regular watering, once or twice a week depending on the environment around them. Herbs in general can be pretty resilient when it comes to drought, so don’t worry if you forget to water or need to travel, as they can rebound pretty quick from a week or two without water!

  • Drainage - As with any potted plant, it is crucial that there is proper drainage for your herbs in the pot you use. Not allowing excess water to drain out of the pot can lead to overwatering and more serious issues like root rot.

  • Potting Soil - Your herbs will come in soil but if you plan on repotting them, you will need your own bag of soil. Any quality indoor potting soil will do! Watch our video at the end of this post and learn how to pot your herbs in just a few steps.

isaac-leon-and-george-09-2019-0563.jpg

scandinavian ceramics

Sleek, two-piece minimalist vessels accompanied by a deep overflow saucer.

Starting at $47

The Best Herbs to Grow Indoors

Now that you know how to set up your indoor herb garden you’ll need to decide which herbs to actually grow. Here are a few popular herbs to grow in your kitchen:

  • Basil - Hardy and fast-growing, basil is a great option for beginners, especially during the spring and summer when they naturally are in season. Basil is a thirsty plant whose soil is best left moist to the touch. This means watering multiple times a week in the hotter months of the year. When taking a piece of your basil to use it is best to pinch off a piece of the stem below where a couple of leaves are sprouting. Don’t worry about harming your plant—this will actually promote new growth!

  • Rosemary - Rosemary is another beautiful herb for your kitchen countertop, and while it will grow best with at least six hours of direct sunlight, it can also survive and thrive in a bright spot with indirect light in your kitchen. Similar to basil, don’t let Rosemary dry out, and instead water once or twice a week to keep the soil a bit humid to the touch.  

  • Thyme - Thyme is the perfect herb to add to a small kitchen space. Plenty of direct sunlight is best, but Thyme can also do just fine in a bright sunny spot of your kitchen. Once again, keep your Thyme plant just moist to the touch.

These three herbs have similar care requirements and make the perfect starter set for those just beginning their kitchen herb garden. But if you’re curious for more, don’t feel like you need to stop there! There are at least a dozen herbs to try growing at home, and with the right care your indoor kitchen herb garden can provide you with fresh flavor all year round!

Ready to get potting? Watch a brief tutorial below on how to pot your kitchen herbs.


fiddleleaffigbush.jpg

Indoor plants, potted & delivered.

Premium plants paired with stylish ceramics, plus lifetime plant care support. Order online at leonandgeorge.com

The Best (Most Beautiful) Indoor Watering Cans
Large leaf tropical plants

On the search for a stylish watering can that you don’t have to hide?

Whether a painful chore or a cherished ritual, watering your plants with a beautifully designed vessel will easily elevate your weekly routine. Our plant stylists have made a roundup of the best watering cans out there, and they’re just as stylish as the greenery itself. Ranging anywhere from $24 to upwards of $200, some of these are an absolute splurge but all will function beautifully as accent decor.

Anything specific to look for when purchasing an indoor watering can? Here are a few tips:

  • Avoid extra large watering cans, even if you have a lot of plants. They can be uncomfortable to maneuver and lead to more spillage on the floor.

  • Go for a cylindrical spout, which will help with precision particularly in hard to reach places! Avoid spouts that mimic rain, unless you’re only watering extra large plants. They will make a mess with smaller plants and are best suited for outdoor use.

  • Material matters. Plastic for example is great as it’s very lightweight. Brass on the other hand will oxidize, giving it an antique or vintage look which can be nice but keep in mind that brass will not stay the same over time.

Now that you’re an expert, check out some of the best indoor watering cans out there!

haywateringcan.jpeg

Hay watering can

With an intake that doubles as a handle and an elongated spout for comofortable watering, this clean yet functional plastic watering can is a minimalist’s dream. $25

Shop now →

wateringcan.jpeg

House of Botanicals Watering Can

Simplicity is the ultimate sophistication and that’s how it goes with this adorable, timeless watering can that also doubles as a mister. $24

Shop now →

nurturewateringcan.jpeg

Nurture Watering Can

Skultana has produced fine metal objects for over 400 years. This brushed brass watering can is a piece of timeless decor that elevates the simplest of everyday routines. $180

Shop now →

hadronwateringcan.jpg

Hadron Watering Can

A gorgeous sand-colored watering can that can compete with your ceramics. $210

Shop now →

alessi.jpg

Diva Watering can

Leave it to the Italians to name a watering can Diva. But what’s in a name? We love this sleek and curvaceous design by iconic Italian Alessi. $53

Shop now →


blogsnake.jpg

Indoor plants, potted & delivered.

Premium plants paired with stylish ceramics, plus lifetime plant care support. Order online at leonandgeorge.com

6 Houseplant Books To Add To Your Coffee Table Collection
Six ways to tell if your fiddle leaf fig tree is healthy

The gardening community has been producing practical indoor plant care books and manuals for decades. Today, so many of us look to the internet for information and inspiration on indoor plants, but there’s nothing like cracking open a beautiful book on the subject. Whether it’s for your own personal growth or as a gift for a plant-loving friend, here are our favorite books that not only cover some of the basics of practical plant care but also dive into the world of living with and styling beautiful indoor greenery.

The New Plant Parent by Darryl Cheng

Best for: New plant parents! And anyone looking to deepen their relationship and understanding of their leafy companions.

Darryl Cheng of House Plant Journal knows a thing or two about practical plant care. His book is a wonderfully holistic introduction to the world of indoor plants, and focuses primarily on developing the intuitive sense we know as “green thumb”.

Get the book →

thenewplantparent.jpg

The House Gardener by Isabelle Palmer

Best for: DIYers and those looking to get their hands dirty.

From moss walls to greenhouse terrariums, this book by The Balcony Gardener’s Isabelle Palmer is a fun introduction to hands-on projects for small urban spaces.

Get the book →

thehousegardener.jpg

Wonder Plants by Irene Schampaert

Best for: architecture and interior lovers, plant styling inspiration, and unique coffee table decor.

From Antwerp to Tokyo and everywhere in between, Wonder Plants is a visual journey through beautiful green-inspired spaces. Best for gaining inspiration, this book also includes some practical plant care information.

Get the book →

Practical houseplant books

The Little Book of Cacti And Other Succulents by Emma Sibley

Best for: those looking to create a boho cacti collection.

The name says it all. This adorable little pocket book covers over 60 different varieties of cacti and succulents worth adding to your collection, including care tips, trivia, and more.

Get the book →

Practical houseplant books

Grow in the Dark by Lisa Eldred Steinkopf 

Best for: urbanites living in dimly-lit spaces.

You don’t need to have tons of light to enjoy the benefits of indoor greenery, and this book is proof. Discover and learn about the low-light beauties that bring just as much joy as their sun-loving counterparts.

Get the book →

Practical houseplant books

House of Plants: Living with Succulents, Air Plants and Cacti by Rose Ray & Caro Langton

Best for: practical coffee table decor.

The perfect balance of plant care and plant styling, this book makes not just a beautiful decor object but also a practical handbook for taking care of and styling some of the most popular indoor plants.

Get the book →

Practical houseplant books
 

fiddle-bush-white-stand-nude-leather-chair.jpg

Indoor plants, potted & delivered

Premium plants paired with stylish pots, plus lifetime plant care support. Order online at leonandgeorge.com

3 Simple Secrets to a Healthy Fiddle Leaf Fig Tree
fiddleshop.jpeg

If you haven’t heard, the Fiddle Leaf Fig is the plant of our era. But despite the place that it has won in our collective hearts and homes, many of us still do not know how to care for it properly. Even simple tasks like watering can cause issues for many owners.

Apart from trendy, stunning, and structural, Fiddle Leaf Figs are also described as finicky, delicate, and hard to please. But is that really the case? Truth be told, this plant often lands in the homes of brand new plant parents who could not resist the appeal. And while everyone can and should experience the joy that plants bring into our lives, the Fiddle Leaf Fig is not always our first recommendation for new plant parents! The Fiddle Leaf Fig can be a very low maintenance plant, but knowing the basics—and what to look out for when things go wrong—is crucial to keeping this plant beautiful and growing over time.

Below find the three expert secrets to maintaining a happy and healthy Fiddle Leaf Fig, for both novice and experienced plant owners alike.

Natural Plant Food

Nourish your plants with this specially-formulated organic liquid plant food. Our Boost Vitaminé is made with potent nutrients from nature to help your plants grow and thrive all year long.

$24

The Secret to Keeping Fiddle Leaf Fig Tree Happy Is Watering Properly

Fiddle Leaf Figs have unique watering needs and need to dry out for a brief period before being rehydrated. New owners are prone to overwatering their Fiddle Leaf Figs because they do not understand how crucial this cycle is for the plant. But even otherwise experienced plant owners can struggle with over and underwatering this plant. The secret to watering your Fiddle Leaf Fig just right lies in following these three simple tips:

Water your plant once a week. This is a great rule of thumb to get you started. Set a day for this in your calendar so you never forget. Watering once a week is likely the most that you want to water. Depending on the unique conditions of your home your Fiddle Leaf Fig might take longer to dry out between waterings and you might end up watering every 10 days. That’s okay, what is important is that you are giving your plant what it needs on a consistent basis.

Always take a moment to feel your plant’s soil before you water next. Stick your finger, or a chopstick, about two inches into the soil. Does dirt cling to it? If your plant’s soil is still moist and it needs more time before you water again. Did all the dirt fall away when you pulled it out? Your plant’s soil is likely dry enough and you may water. Over time you will begin to figure out how much time your unique Fiddle Leaf Fig needs between watering.

Give your plant the same amount each time you water. Many fiddle leaf fig owners like to follow a rule of one cup of water per two feet of growth from the base of the soil to the tallest leaf. The exact measurement for this rule varies from expert to expert but what we’ll say is that your plant desires consistency most. So try watering your Fiddle Leaf Fig a set amount each week and see how it responds. If it begins drying out faster than usual up the amount of water that you give it. At the end of the day measuring will be more precise than simply pouring water until you think it’s had enough. Also remember that you may need to water more during the warmer months of the year than you might, say, in the winter.

Fertilize your plant each time you water during the spring and summer months. If you want your Fiddle Leaf Fig to produce large glossy leaves then you need to give it the nutrients that it needs. The time to fertilize is from spring to summer, and you can slowly taper off your fertilizing routine in the fall. All that you need to do is add diluted houseplant food or Fiddle Leaf Fig Plant Food to your plant’s water every week in the spring and summer. This will become every other week in the fall. Your plant needs nutrients for growth that it can’t get from potting soil alone. Using a diluted liquid fertilizer will supplement the nutrients in your plant’s soil and might be just what you need if the newer leaves on your plant are smaller than the old ones.

Now you know the secret to maintaining an Instagram-worthy Fiddle Leaf Fig! Remember that patience is key, and always keep growing!

This post was adapted from the Fiddle Leaf Fig Plant Resource by expert Claire Akin. Head to their website to learn more about caring for the Fiddle Leaf Fig.


howtoarrangeindoorplants1.jpg

Indoor plants, potted & delivered

Premium plants paired with stylish ceramics, plus lifetime plant care support. Order online at leonandgeorge.com