Posts in Plant Care
Mealybugs: A Definitive Guide on How to Deter and Treat Them

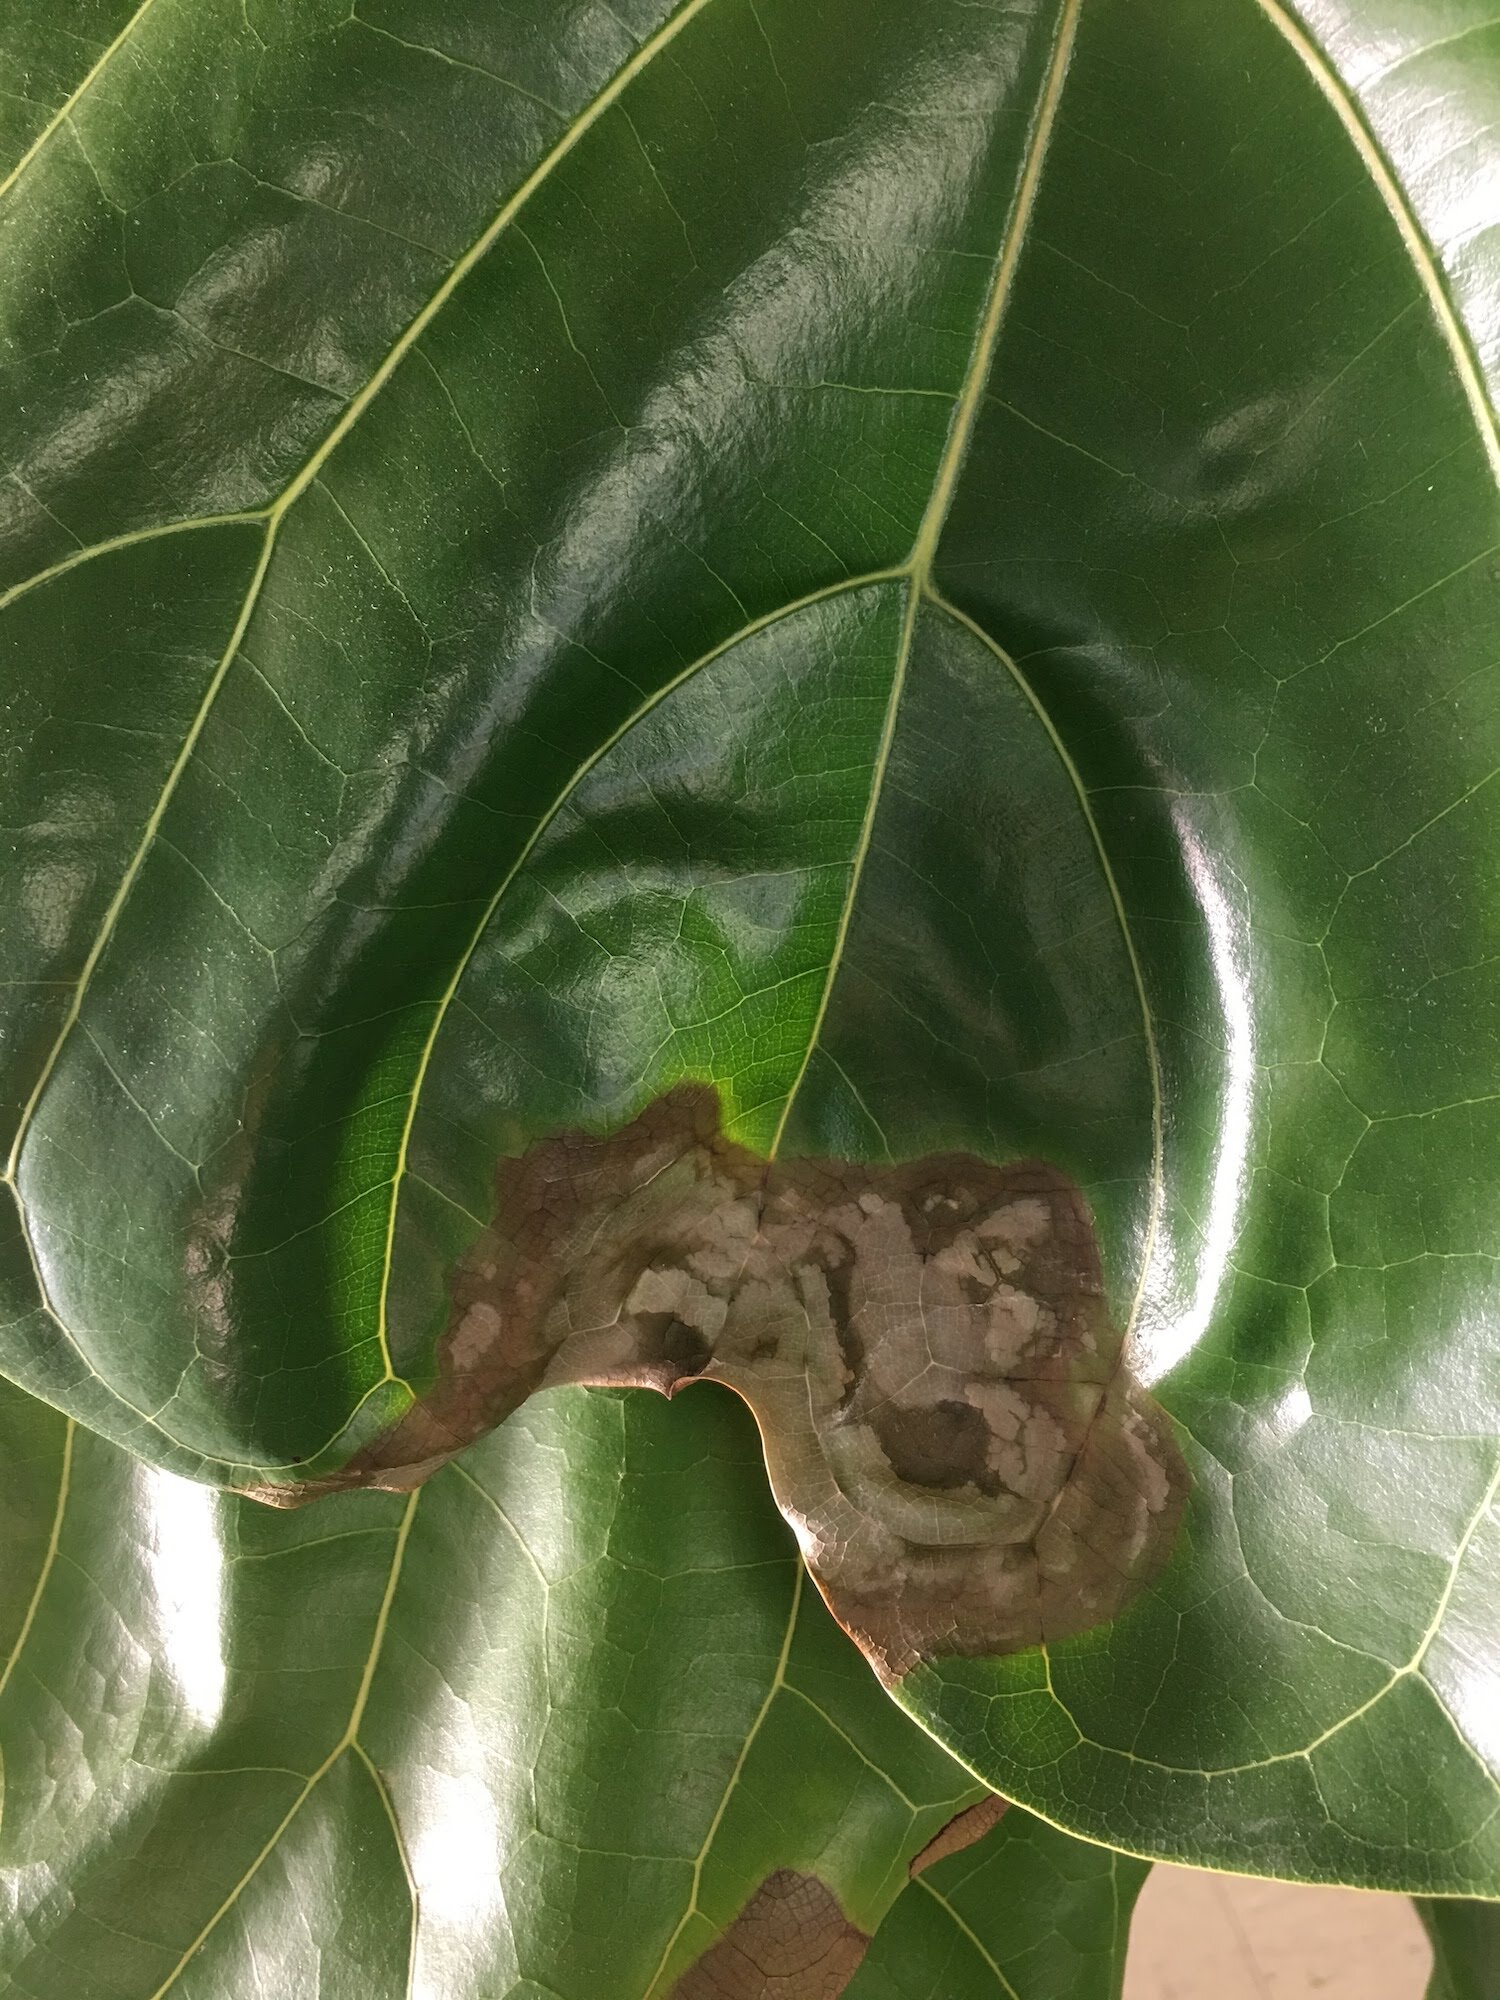
Mealybugs look like cottony masses on the leaves or stems of plants.

How to get rid of mealybugs on houseplants

Mealybugs are no joke. They seemingly sprout up overnight, and can spread like wildfire in a matter of days. Wondering what these pests look like? If you see white, snowy patches on the stems or leaves of your plant, you’ve got a case of mealybugs.

What are mealybugs?

Mealybugs are wingless insects found in warm, humid environments. They often appear as white fluffy growth on the leaves, stems and fruit of plants. They feed on plants by sucking out sap and other fluids from the tissue of the plant. Though mealybugs don’t usually cause heavy damage, they can cause leaf yellowing and a generally sad-looking plant if an infestation arises.

What causes mealybugs on indoor plants?

mealybugs houseplants

Mealybugs can be caused by so many different things. You might see them on your plants due to one of the following sources:

  • Taking your plants outside

  • Bringing in fresh flowers or produce from the garden or grocery store

  • Using contaminated potting soil when repotting your plants

  • Bringing in a new plant unknowing that it has mealybugs (the most common!)

As mentioned, they love warm environments, so it’s not uncommon to see them during the warmer months of the year.

Three ways to get rid of mealybugs

Getting rid of mealybugs can be tough, but not impossible. Above all it is tedious and will require some patience. As always with any pest sighting, first quarantine the plant(s) so that you can prevent the mealybugs from spreading to others. Here are simple ways to get rid of mealybugs:

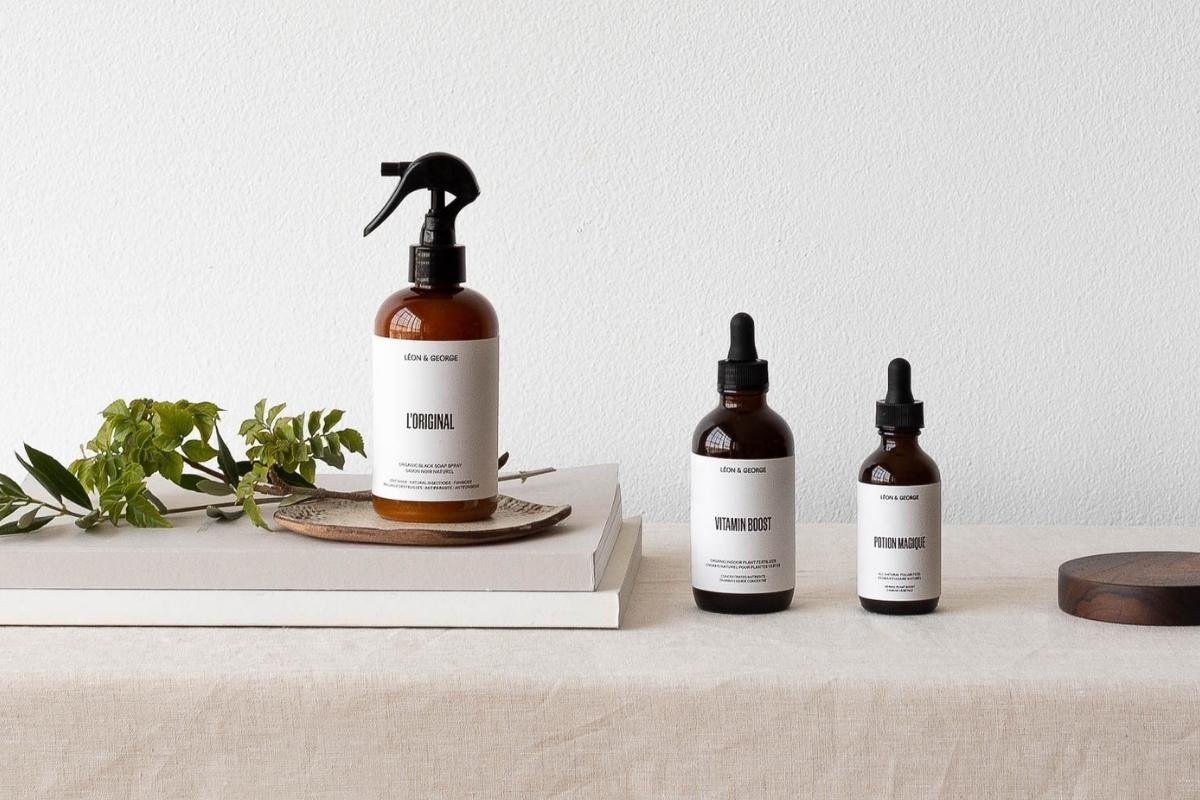
  • Neem oil or insecticidal spray - Neem oil is a non-toxic, all-natural oil derived from the neem tree. It disrupts the growth and development of pests and has repellant properties as well. L’Alchimie Botanique’s Super Neem Oil is an excellent solution, with a pleasant lemon-eucalyptus scent to boot!

  • Rubbing alcohol - Soak a cotton ball or q-tip with rubbing alcohol and gently clean all affected areas of your plant. Mealybugs like to hide so make sure to inspect your plant carefully to ensure you have cleaned all the affected areas. Repeat every few days as needed.

  • Homemade dish soap spray - Soap will suffocate mealybugs. Combine 1 tablespoon of dish soap with a quart of water and spray down your plant. Test the spray on one leaf before applying to the rest, and repeat every few days as needed.

How to prevent mealybugs

One of the best ways to keep mealybugs and other pests off your plants is to keep them clean. That means regularly (once a month or so) cleaning the tops and bottoms of their leaves, and of course acting quick if you see any signs of pests.

We recommend using L’Original Black Olive Oil Soap as an all-natural plant cleaner, pest deterrent and leaf shine. Potion Magique, a natural foliar food, also has essential oils that keep pests at bay.

Another easy way to prevent mealybug problems is to avoid purchasing your plant from big box hardware stores and garden centers. Plants in stores like these are often not cared for properly and overcrowded, which can lead to weaker plants that are susceptible to disease and infestation.


CHECK US OUT ON YOUTUBE!

Watch the full tutorial on getting rid of major pest infestations on your precious houseplants.

What To Know Before You Buy A Kentia Palm
Kentia Palm

Kentia Palms are great air-purifiers, safe for pets, and adaptable to different light levels.

So, you’ve got your heart set on a Kentia Palm. You’ve seen it in all of the magazines, and you know that it will be the perfect addition to your space. But before you dive into this gorgeous head-turner, there are a few things that you should know about the Kentia Palm. From lighting requirements to care instructions, we’ve got you covered. Here’s everything you need to know before you buy a Kentia Palm.

The Kentia Palm Loves Indirect Light

Don’t have a sun-soaked home? Don’t worry! The Kentia Palm does not require direct sunlight in order to thrive. In fact, direct sunlight can actually be harmful to this plant. Instead, Kentia Palms love indirect light. This means that you should place your Kentia Palm in an area where it will receive bright, filtered light throughout the day. While some dappled and/or soft morning light is okay, in general you should avoid harsh direct sunlight, like that of a west-facing window. This plant can also adapt to medium light levels,  making it a great choice for the office.

The Kentia Palm is a Slow Grower

Don’t expect your Kentia Palm to grow quickly. This plant is a slow grower, and it can take years for it to reach its full height, making it a great choice for someone who doesn’t want to do a lot of maintenance over time. 

Kentia Palm

With their graceful fronds and striking appearance, Kentia Palms are sure to make a statement in any room.

The Kentia Palm is a Good Air Purifier

In addition to being a beautiful plant, the Kentia Palm is also a good air purifier. This plant is known for its ability to remove toxins from the air, such as formaldehyde and benzene, making it a great plant for anyone who wants to improve the air quality in their home or office.

The Kentia Palm is a Pet-Friendly Plant

If you have pets in your home, you’ll be happy to know that the Kentia Palm is a pet-friendly plant. This means that it is non-toxic to both dogs and cats. Of course, it’s always a good idea to keep an eye on your pets when you introduce a new plant to your space, just to make sure that they don’t show any interest in it–if anything for the plant’s sake!

The Kentia Palm is a Great Statement Plant

If you’re looking for a plant that will make a statement in your space, the Kentia Palm is a great choice. This plant has a bold, tropical look that attracts the eye and beautifies any space. Whether you’re using it as a focal point in your living room or adding it to your office to liven up the space, the Kentia Palm is a plant that will not disappoint.

Avoid Buying Your Kentia Palm from a Garden Center

The health of your Kentia Palm is essential for its overall beauty and ability to thrive. The care it receives both before and after you bring it home is critical. While garden centers might offer a lower price, their plants might not have been well-tended or free from pests. Therefore, it's best to buy from a trusted and reputable grower who can provide the pick of the litter.

When you buy plants from a garden center, you might be getting a plant that has been watered and treated the same as every other plant in the store, regardless of its specific needs. Kentia Palms, for instance, cannot tolerate overwatering. When they receive too much water from the store's hose, their health can slowly start to decline.

Another problem with buying plants from a garden center is transporting them. The process of getting the plant into your car and taking it home can be stressful for the plant, particularly if you're using the car's air conditioning or heater. Environmental stress can be harmful to plants, and it can take time for them to recover.

To ensure the health and vitality of your Kentia Palm, it's best to buy from a supplier that specializes in these plants. They'll know precisely how to care for them and transport them safely to your home. The initial cost may be higher, but in the long run, it's worth it. You'll save both money and energy, and you'll be able to enjoy a beautiful, healthy plant for years to come.


Kentia Palm

Designed to Thrive

Our premium selection of Kentia Palms, potted and delivered, plus lifetime access to 24/7 Plant Doctor support.

When and how often should you fertilize indoor plants?

Plants need light, water, and nutrients. Most plants get their nutrients from the soil, but over time a soil’s nutrients can get depleted, especially with potted plants. This is when fertilizer comes in handy. But there are a few things you should know about fertilizer before feeding your plant.

When to fertilize indoor plants

The general guideline is to fertilize during the growing season, which is usually spring and summer. The extra warmth and light during these seasons stimulates plant growth that pauses during the cold and dark of winter. This is also why plants need less water during the winter. Adding nutrients at the right time helps spur that growth.

What type of fertilizer to use

Most commercial fertilizers include three main nutrients: nitrogen, phosphorus and potassium (NPK for short). These are often listed as numbers on a fertilizer’s packaging, in the form of 10-20-15 or 15-15-15. The numbers correspond to the percentages of N-P-K in the fertilizer. All purpose fertilizer usually has them in equal proportions, but the labeling should be clear. There are special fertilizers for plants like orchids or roses that have different proportions of NPK and other micronutrients the plants might need, and there are even fertilizers for stages of growth (ex: younger plants often need more phosphorous). A fertilizer’s label should tell you all you need to know about what it’s meant to be used for.

Liquid Fertilizer

A water soluble fertilizer that you add directly to your watering can every 2 weeks. Any brand will do, just follow label instructions closely for proper measurements. Overdoing it can scorch the plant’s leaves.

Benefits:

  • gives you more precise control over the amount of nutrients your plants are getting

  • allows you to see results faster, observe how your plants are reacting, and adjust future feedings (amount & length of time in between) accordingly

Slow Release

At the beginning of the growing season add slow release fertilizer directly to your plants’ soil. Any brand will do, but follow label instructions closely.

Benefits:

  • you'll only have to feed your plants once during this growth season as these fertilizers release a small amount of nutrients into the soil intermittently over 2-3 months

  • if vacationing is on your agenda, you can leave knowing your plants have the food they need to flourish in your absence

Recommended fertilizers for indoor plants

Any indoor plant food is suitable, but here are some recommended products worth checking out:

Boost Vitaminé Natural Plant Food

This natural plant food contains only four ingredients and is designed to be used with any indoor plant. We love it because unlike harsher, chemical-based fertilizers, it’s gentle enough to use sparingly even in the winter!

Potion Magique Foliar Feed

Ever tried foliar feeding? While it won’t be as effective in boosting new growth on your plant, it will increase nutrient intake through the plant’s leaves, and also works as a wonderful rescue remedy for sad or neglected plants. Try Potion Magique, a potent, all-natural foliar feed that you use in your misting routine (and also smells divine!).

How to fertilize indoor plants

Always follow the guidelines that come with the fertilizer you’ve purchased. Some fertilizer is liquid that you mix in when you water the plant, and some comes in solid form you stick in the soil or sprinkle above it. Generally speaking, fertilize your plants 1-2 times per month in the spring and summer, and reduce to one time per month or no fertilizing during the winter (depending on the strength of your plant food).

Something to note is that it’s very possible to give a plant too much fertilizer. It’s possible to “burn” a plant with too much fertilizer at once, and you’ll notice this if the tips of the leaves turn yellow/brown.

Also note that new commercial potting mix generally already has fertilizer in it, so you wouldn’t want to fertilize a freshly potted plant right away – wait about a month or so.

That’s about it. Now go forth and feed your hungry plants!


fiddlebush.jpg

Indoor plants, potted & delivered

Premium plants paired with stylish ceramics, plus lifetime plant care support. Order online at leonandgeorge.com

How to Care For and Grow Your Dieffenbachia

THE DIEFFENBACHIA

AKA Dieffenbachia, Dumb Cane, Tropic Snow

If you're looking for a lush, green plant that will add a touch of the tropics to your home, the Dieffenbachia is an excellent choice. This plant is known for its large, variegated leaves that come in a range of colors, from deep green to creamy white. But, as with any plant, the Dieffenbachia needs specific care to thrive in your home. Read on to learn about how to care for and grow a healthy Dieffenbachia.

What type of light does the Dieffenbachia need?

Dieffenbachia prefers bright, indirect light, but can also tolerate low light conditions. However, if you place your Dieffenbachia in direct sunlight, it can scorch the leaves, so it's best to keep it away from windows that receive direct sunlight.

How to water your Dieffenbachia

Water your Dieffenbachia thoroughly once every 7-10 days. This plant loves moisture, but also needs to dry out a bit between waterings. Think about giving it one big drink after extended thirst. A good rule of thumb is to water your Dieffenbachia when the top two inches of soil feel dry to the touch, or use these handy moisture meter indicators. Misting the leaves occasionally will help keep your plant humid and keep dry browning edges to a minimum.

black-soap-spray.jpg

BLACK SOAP SPRAY

All natural and made with just four ingredients, L'Original acts as a natural leaf shine, insecticide, and fungicide for all living plants.

$24

How fast does the Dieffenbachia grow?

In prime conditions, the Dieffenbachia is a fast grower and can grow up to 2 feet per year. Fertilize your Dieffenbachia 1-2 times per month in the spring and summer with indoor plant food, or foliar feed year round.

Common problems with Dieffenbachia

Yellow Leaves

See just one yellow leaf? Don’t worry. It may just be time for that leaf to go! There is only cause for concern if you see multiple yellow leaves or a consistent pattern of yellowing.

One of the most common issues with the Dieffenbachia is the appearance of yellow leaves. This is usually due to overwatering and/or poor drainage. If you begin to notice yellow leaves on your plant, check in on your watering routine: are you checking the soil each time you water? The top two inches or so should be dry to the touch. If you believe you’ve overwatered beyond repair, check in on the plants roots to ensure there is no root rot. Root rot can be serious for most indoor plants if not treated quickly.

Although less common, yellow leaves can also be a sign of nutrient deficiency or even a pest infestation. Inspect your plant thoroughly to ensure there are no unwanted visitors (and if there are, isolate your plant and treat it as soon as possible — Super Neem Oil is a great all-natural remedy for common plants!). As for nutrient deficiencies, make sure you are fertilizing your plant at least once a month in the spring and summer. Alternatively, think back to the last time you repotted your plant. If it’s been over two years, it may be time to repot.

Legginess

Dieffenbachias can also get leggy over time if not cared for properly. With most plants, legginess is a sign of the plant not getting enough light— it will literally reach towards the light to soak up more of it!

While less common, legginess can also be a sign of the general malnourishment of the plant— whether that’s due to lack of fertilizing, a pest infestation, or even a root bound plant that needs more space to grow.

How to maintain a beautiful and healthy Dieffenbachia

Take care of your Dieffenbachia and it will take care of you! Below are simple tips to continue caring for your Dieffenbachia or Dumb Cane over time.

  • Pruning - Remove dry or dead leaves all year round, but save any major pruning for the spring and summer months. When pruning your Dieffenbachia, wear gloves as your plant has a sap that can irritate skin. Use sharp, clean shears and cut just above where the stem is growing from the cane. Dieffenbachias can be fast growers and so it is recommended to prune often or when things start to look crowded.

  • Cleaning - Take each leaf between two soft tissue cloths and wipe off the top to reveal a healthy shine (also helps the plant soak in more light!). Check out L’Original black olive soap as an excellent all-natural houseplant cleaner.

  • Repotting - Houseplants grow much slower than they would in the wild. Depending on the size of your plant and the density of the roots, this is nice to do every 2-3 years to provide fresh nutrients and encourage new growth.

    • When to repot - if the roots start to become visible outside the soil, it is time to consider repotting your Dieffenbachia

    • Pot sizing - if you want your plant to grow taller, find a nursery pot that’s 2” in diameter larger than the current pot. If you want your plant to stay the same height, you can reuse the same pot and simply change the soil.

    • Get your hands dirty - spread out newspaper on the floor, remove the plant from the pot and shake off as much of the old soil as possible so that you have clean roots. Place the plant in the center of the pot, add new soil and pat down firmly. Water the soil thoroughly and place the plant in an area with bright indirect light. Your plant will take 2-4 weeks to settle from the shock and adjust to its new home.

How to propagate a Dieffenbachia

Dieffenbachias are easy plants to propagate. While there are multiple ways to propagate this plant, the most straightforward is to simply take a cutting from your plant and root it in water:

  • Select a stem to propagate - Using sharp, clean scissors or shears, cut a stem at the base of the cane, the stalky “trunk” of your plant.

  • Place in water - Find a clear glass and fill with water. Make sure only the stem of the branch is submerged, and no leaves are sitting in the water.

  • Place in a bright area and wait! - Avoid any direct sun. You may need to change the water out every few days to keep it fresh. It could take up to several weeks for your cutting to form roots.

  • Transfer to soil - After some time, you will start to see tiny white roots emerging from the cutting. Give it a few more days until the roots have grown, and then transfer to indoor potting soil. A small pot is best — no larger than 6” in diameter.

  • Keep hydrated - During the first few weeks, or until your plant feels firmly rooted in its soil, regularly water and drain your plant. The soil should be just barely moist to the touch at all times.


Dieffenbachia

A vibrant and colorful plant with intricately patterned leaves that are silky smooth to the touch, the Dieffenbachia or Dumb Cane is a sought-after statement plant for its easy-going nature and effortless ability to brighten any room. Native to the verdant rainforests of Central and South America, the Dieffenbachia is an excellent air-purifier that does best in medium to bright indirect light.

5 Spring Plant Care Tips For A Greener Thumb
Extra tall plants

The XL Plant Collection, ready for spring.

Spring is a time of change and growth, and it’s the favorite time of year for living plants! If you are worried that their needs have changed with the season (hello, fertilizer routine) be at ease! The spring season is all about enjoying your plants as they flourish, promoting their new growth, and saying goodbye to the dormancy of winter. Taking care of your plants during the spring is simple. We mean it: even fertilizing them is not the mystery it may seem! Read on, and learn all you need to know about providing your plants with the best care this spring.

  1. Feed your plants

During the winter, many plants go dormant and do not exhibit a lot of growth. But once spring arrives, the days start to get longer and the sun shines abundantly. Plants just love it: they come out of their dormant stage ready to grow, and hungry for nutrients! Now is a great time to fertilize and give them a bit of extra energy. And we promise, fertilizing may sound scientific, but it truly a simple process. Follow the instructions on the bottle to dilute the fertilizer, and err on the side of under-fertilizing if you’re nervous. The spring sun accomplishes a lot on its own.

2. Consider repotting

Springtime is also a great time to repot your plant, considering that its roots will begin to grow again and may benefit from the extra nutrients in fresh soil. This only needs to happen once every 1-2 years, or when your plant looks to be outgrowing its pot. For refreshing nutrients, you can simply change out the soil and keep the plant in the same pot. You can also replace just one third of the soil at a time to add fresh nourishment without risking plant shock. To help your plant grow taller, you can move it into a pot that’s one size bigger than its original (usually about 2” larger) to give it room to grow. Remember that most plants like to have tightly compressed roots, so you don’t want the new pot to have too much extra space.

3. Give your plants a trim

After the long months of winter, your plants might need a haircut. Many indoor plants come from warm, tropical climates, and winter can be rough on them causing them to go through natural shedding. Trim any brown or yellowing foliage, and don’t be afraid to prune back funky growth (especially if your plant has been growing towards the light!). Both trimming and pruning will help your plant focus on all the new growth it is about to produce.

4. Do some spring cleaning

When it comes to plant care, cleaning leaves is a little like flossing: we should be doing it often, but how many of us actually follow through? If it’s been a while since you’ve cleaned your plant’s leaves, now is the perfect time to get a little spring cleaning in. Even a few minutes of dusting goes a long way, revealing a beautiful shine while helping your plant to photosynthesize. From dust to sap to calcium buildup, you can’t go wrong with a soft cloth and a natural, gentle soap.

5. Watch for new growth!

Spring and summer are the most rewarding times of year to own and care for plants! Enjoy watching your plant grow and “blossom” into its best self over the coming months, whether that’s unfurling leaves or even flowering, and remember that the recipe to great plant care is simple: a light touch, combined with a curious eye.

Looking to add some fast growers to your collection this spring? Some of our favorite easy-care plants that are perfect for spring include the Cascading Pothos, Monstera Deliciosa, and Ponytail Palm.


spring plant care tips

SPRING-READY PLANTS

Premium plants paired with stylish ceramics, plus lifetime plant care support.

What To Know Before You Buy a Non-Toxic Plant
Cast Iron Plant

Looking to add plants to your space that are safe for children and/or pets? Shop the Léon & George collection of easy to care for non-toxic plants!

Bringing houseplants into your home is a wonderful way to add a touch of greenery and life to any space. However, if you have pets or small children, it's important to be aware of the potential dangers of toxic plants. Luckily, there are plenty of non-toxic houseplants that you can choose from to create a safe and healthy environment for everyone in your household. In this article, we'll explore what plant toxicity means, the most popular non-toxic plants and their traits, and how to choose a non-toxic plant for your space.

What Plant Toxicity Means

Plant toxicity refers to the potential harm a plant can cause to humans or animals when ingested or touched. This harm can range from mild irritation to serious illness or even death, depending on the plant and the amount consumed. It's important to note that even non toxic plants can cause issues if consumed in large quantities, so it's always a good idea to keep an eye on pets and children around all houseplants.

Pilea Peperomioides

The Pilea is an adorable non-toxic option, making them a great choice for households with children and pets.

Mildly Toxic Plants vs. Highly Toxic Plants

When it comes to toxic plants, not all plants are created equally and there are two main categories to consider: mildly toxic plants and highly toxic plants. Mildly toxic plants are those that may cause mild irritation or discomfort if ingested, but are not typically life-threatening. Having mildly toxic plants in a home with pets or children is usually no cause for concern. Examples of mildly toxic plants include the Pothos (Epipremnum aureum), Spider Plant (Chlorophytum comosum), and Snake Plant (Sansevieria trifasciata). Highly toxic plants, on the other hand, can cause severe illness or even death if ingested or touched. Examples of highly toxic plants include the Peace Lily (Spathiphyllum), Oleander (Nerium oleander), and the Sago Palm (Cycas revoluta).

The Most Popular Non-Toxic Plants and Their Traits

If you're looking for non-toxic plants to add to your collection, there are plenty of options to choose from. Here are some of the most popular non-toxic plants and their traits:

  1. Braided Money Tree: The Braided Money Tree, also known as Pachira aquatica, is a popular indoor plant with a unique braided trunk and lush, green foliage. It's non-toxic to pets and humans and is believed to bring good luck and prosperity in the teachings of feng shui, making it a great addition to any home.

  2. Calathea Medallion: With its striking, patterned leaves and easy-to-care-for nature, the Calathea Medallion is a perfect choice for pet owners looking for a non-toxic houseplant. Its beautiful foliage features shades of green, purple, and white, and it thrives in medium to low light conditions.

  3. Pilea Pepermioides: The Pilea Peperomioides, or Chinese Money Plant, is a small but mighty non-toxic plant that is easy to care for and looks great in any space. Its round, pancake-shaped leaves and delicate stems give it a unique and playful look that is sure to brighten up any room.

  4. Staghorn Fern: The Staghorn Fern, or Platycerium bifurcatum, is a beautiful and unique non-toxic plant whose antler-like fronds make it a striking addition to any wall or hanging basket.

  5. Kentia Palm: The Kentia Palm, or Howea forsteriana, is a popular non-toxic statement plant with tall, graceful fronds and a tropical vibe. It's easy to care for and can thrive in a variety of light conditions.

  6. Parlor Palm: The Parlor Palm, or Chamaedorea elegans, is a classic indoor plant that is both beautiful and non-toxic to pets and humans. Its delicate, feather-like fronds and compact size make it a great choice for small spaces or as a table centerpiece.

  7. Cast Iron Plant: The Cast Iron Plant, or Aspidistra elatior, is a tough and resilient non-toxic houseplant that can thrive in low light conditions and neglect. Its dark green, leathery leaves make it a great choice for adding some texture and depth to any room.

  8. Ponytail Palm: The Ponytail Palm, or Beaucarnea recurvata, is a unique and non-toxic plant that is perfect for pet owners who want to add a touch of whimsy to their home. Its long, slender leaves and bulbous trunk give it a playful and distinctive look that is sure to delight.

How to Choose a Non-Toxic Plant for Your Space

Now that you are familiar with non-toxic plant options, it’s time to choose the perfect plant for your home. Here are some things to consider when making your selection:

Lighting

One of the most important factors to consider is the amount of light your space receives. Some plants require bright, direct sunlight, while others can tolerate low light conditions. Be sure to choose a plant that can thrive in the lighting conditions of your space.

Space

Calathea Rattlesnake and Birds Nest Fern

A collection of two plants that are non-toxic, tolerant of low light, and vibrant in both color and style will let flora and fauna coexist. Shop the Rattlesnake and Birds Nest Fern Duo.

The size of your plant should be in proportion to the size of your space. If you have limited space, consider a smaller plant, such as a Pothos or a Spider Plant. If you have more room, you may want to consider a larger plant, such as a Monstera or a Fiddle Leaf Fig.

Watering Needs

Different plants have different watering needs. Some plants, such as succulents, can go weeks without water, while others, such as Peace Lilies, require frequent watering. Choose a plant that fits your lifestyle and schedule.

Maintenance

Consider how much maintenance you are willing to do. Some plants require regular pruning while others like the Cast Iron Plant can go for months without any attention. Choose a plant that you can commit to caring for.

FilLing Your Home With Gorgeous, Non-Toxic Greenery

In conclusion, choosing a non-toxic plant for your home is a smart and safe decision. Not only do these plants add beauty and natural ambiance to your space, but they also provide a range of health benefits. By choosing a non-toxic plant, you can enjoy the benefits of greenery without worrying about the safety of your family and pets!


Kentia Palm

DESIGNED TO THRIVE

Discover the beauty of nature without sacrificing safety with these eye-catching non-toxic plants, perfect for any home or office space!

What You Need To Know Before You Buy A Sago Palm

Looking for a perfectly potted Sago Palm? Shop the Léon & George Sago Palm here.

So, you’re thinking about adding a Sago Palm to your plant collection? Great choice! Sago Palms are beautiful, unique plants that add a tropical vibe to any space. But before you rush out to buy one, there are a few things you should know to ensure that you’re giving your Sago Palm the best possible care. Read on to learn the basics of Sago Palm care, so you can make an informed decision before purchasing one.

Sago Palms Are Not True Palms

Despite their common name, Sago Palms are not true palms. They’re actually cycads, which are an ancient group of plants that date back to the dinosaur era. Cycads are similar to palms in appearance, but they’re actually more closely related to conifers like pine trees.

Sago Palms Are Toxic to Pets & Humans

One thing you should be aware of before purchasing a Sago Palm is that they’re toxic to humans and pets. All parts of the plant contain cycasin, which is a toxin that can cause pretty severe illness, and even death if ingested in large enough quantities. It’s important to keep Sago Palms away from children and pets, and to wear gloves when handling them.

Sago Palms Grow Slowly

Sago Palms are slow-growing plants, which means they can take a long time to reach their full size. It’s not uncommon for a Sago Palm to take 10-15 years to reach its mature size, which can be up to 10 feet tall and wide. If you’re looking for a plant that will quickly fill a space, a Sago Palm may not be the best choice.

The Sago Palm makes for an excellent addition to shady outdoor spaces, like a deck, patio, front porch and more.

Sago Palms Prefer Bright, Indirect Light

Like most plants, Sago Palms need light to survive. However, they prefer bright, indirect light rather than direct sunlight. Too much direct sunlight can scorch the leaves, while too little light can cause the plant to become leggy and weak. Ideally, you should place your Sago Palm in a spot that receives bright, filtered light for most of the day, such as a shady outdoor area or a bright corner of your home.

Sago Palms Like to Be Kept on the Dry Side

Sago Palms are drought-tolerant plants, which means they prefer to be kept on the dry side. Overwatering can cause the roots to rot, which can quickly kill the plant. It’s best to let the soil dry out slightly between waterings, and to avoid getting water on the leaves, which can cause them to turn yellow and brown.

Sago Palms Need Well-Draining Soil

Sago Palms prefer well-draining soil that’s rich in organic matter. They don’t like to be in soil that’s too wet or too dry, so it’s important to choose a soil mix that will allow for proper drainage. A mix of sand, perlite, and peat moss can be a good choice for Sago Palms.

Sago Palms Can Be Propagated From Pups

One of the unique things about Sago Palms is that they can be propagated from pups, which are small offshoots that grow at the base of the plant. To propagate a Sago Palm from a pup, simply remove the pup from the parent plant and plant it in a separate pot. It may take a few years for the pup to reach maturity, but it’s a great way to expand your Sago Palm collection.

How To Select A Healthy, Thriving Sago Palm

When selecting a healthy Sago Palm, it is important to look for signs of vitality and overall well-being. Look for a plant with bright green fronds that are firm and upright, without any signs of discoloration, wilting, or yellowing. Check the base of the plant for any signs of rot, such as mushy or discolored areas, as this can indicate an unhealthy root system. The plant should also be free from any pests or diseases, such as scale insects or fungal growths. Additionally, consider the size and shape of the plant - a healthy sago palm should have a well-formed crown of fronds and a sturdy, well-established trunk. By selecting a healthy Sago Palm, you can ensure that your plant will thrive in its new home and bring beauty and greenery to your space for years to come.

Avoid Purchasing Your Sago Palm From A Garden Center

Buying a Sago Palm is an investment, and it's important to ensure that you're making a wise decision. Opting for the cheapest option may seem like a good idea, but it can lead to problems in the long run. The health of your Sago Palm directly impacts its beauty, wellbeing, and overall aesthetic, and it's crucial to prioritize its care both before and after purchase. To guarantee the best quality, it's recommended to purchase your Sago Palm from a reputable, high-quality grower who takes exceptional care of their plants. Be wary of garden centers that offer lower prices but provide no guarantee of healthy, pest-free plants.

Most plants at garden stores receive the same care, including watering and light, regardless of their species. Unfortunately, this approach doesn't work well for Sago Palms, which can't tolerate overwatering. A daily deluge of water from a hose that hits neighboring plants doesn't benefit Sago Palms, and can even harm them.

When you purchase a large Sago Palm from a garden center or store, transporting it home can be challenging. Putting it in your car is not only a hassle, but it can cause environmental stress on the plant. It can take a long time for them to recover from such stress. To avoid such complications, it's advisable to buy your Sago Palm from a trusted supplier who will take care of transportation for you. The price tag may be a bit higher, but it will save you money and energy in the long run.

More questions about the Sago Palm? Reach out to us at hello@leonandgeorge.com and let us help you style your space with beautiful living greenery!


Sago Palm

A verdant, textural dream plant, the Sago Palm features fronds which are both feathery and high-gloss, and a richly tactile, deep mahogany-hued trunk. With their preference for indirect bright light, Sagos are well situated for outdoor areas that receive some shade. Slow growers, Sago Palms have been known to live for hundreds of years. This plant is low-maintenance and suitable for beginners.

3 Ways To Pot A Plant With No Drainage Hole

Snake Plant and Zanzibar Gem in Mid-Century pots

As most people know, owning and maintaining beautiful indoor plants requires just a few basic necessities. But beyond light and water, what many don’t realize is that there’s a third extremely important factor when it comes to plant care: drainage. Without proper drainage, no plant can thrive—especially if it’s receiving regular watering. For this reason, potting your plant with adequate drainage in mind is crucial to your success. This article will look at three methods for repotting your plants. We'll provide detailed instructions and tips for each method to help you give your plants the best care possible.

  1. Layer rocks at the Bottom of Your Pot

  2. Drill a Drainage Hole (not recommended - read why)

  3. Staging (the BEST way!)

Why is drainage important for plants?

Drainage allows for the plant’s roots to aerate and “breathe” in between waterings. Much like excess water is absorbed into the ground in their natural environment, you should always make sure your plant has somewhere to drain after each watering, as accumulated moisture or standing water can lead to serious health issues like root rot.

The most common way to provide drainage for potted plants is with a drainage hole in the pot and a saucer below to catch the water. A typical terracotta pot has this set up, for example. When you repot any houseplant, ensuring proper drainage is vital. If your pot has a drainage hole, we recommend using a saucer or dish below so as not to damage any floor or surface when you water. But what happens if you have a pot with no drainage hole?

Scandinavian pot with drainage hole

Our Scandinavian planters have a drainage hole and deep overflow saucer.

Best Practices for Pots Without Drainage Holes

Not all planters have drainage holes, and that’s okay, too! There are plenty of ways around a pot without a drainage hole. In fact, some of the most stylish planters do not have drainage holes, as they sit atop sleek wooden stands (and this would be a big mess if there were a drainage hole!). Our Mid-Century planters, for example, do not have drainage holes and are designed to sit directly on wooden stands or other surfaces.

For our pots with no drainage hole, we use a method called “staging”, which we’ll explain in more detail below. Here are some other ways you can create some drainage in a pot with no drainage hole:

1. Layer rocks at the Bottom of Your Pot

Placing rocks or gravel at the bottom of your pot is a common practice to create some separation between your plant’s soil and any excess water. However, this does not in a literal sense help with drainage, and as your plant grows, its roots can stretch into this bottom area and be exposed to the sitting water. It's essential that houseplants should be thoroughly watered, but with proper drainage to prevent root rot.

2. Drill a Drainage Hole

Some people like to go the DIY route and drill a hole in their favorite planter with no drainage. This is do-able, but keep in mind that you risk breaking the pot altogether.

Staging is the best way to pot plants in planters without drainage holes. All Léon & George plants are staged as seen in the diagram.

Staging is the best way to pot plants in planters without drainage holes. All Léon & George plants are staged as seen in the diagram.

3. Staging (the BEST way!)

The simplest and easiest way to set your plant up with proper drainage when there’s no drainage hole is to stage it. Staging simply implies that the plant does not actually live inside the decorative planter, but rather in its plastic nursery pot (i.e. the one it came in). When you repot in fresh potting soil that drains well, this further ensures optimal moisture levels for the plant. Plastic nursery pots generally have several small drainage holes at the bottom (even better!), and can simply be placed inside the ceramic pot.

The ideal soil cover for indoor greenery, this 100% natural forest moss is green, clean and ready to bring that extra polished look to your indoor plants.

PRESERVED FOREST MOSS

The ideal soil cover for indoor greenery, this 100% natural forest moss is green, clean and ready to bring that extra polished look to your indoor plants after staging.

If you tend to have a heavy hand with watering, we recommend slightly elevating your plant inside the pot, either with a wood plank, styrofoam block, or any other material that won’t mind the occasional douse of water. This ensures that no matter how much you water, your plant will never “sit” in standing water for long periods of time.

There are actually quite a few benefits to staging your plants, beyond just drainage:

  • Swapping plants from one pot to another is easy and mess-free.

  • You can take your plant out of its decorative container without any fuss to give it a shower in the sink or bathtub (plants love this type of watering!).

  • You can easily tell when your plant is ready for repotting, as the roots will begin to come out of the plastic nursery pot (simply lift the nursery pot to have a look!).

For those passionate about choosing the correct house plant to grow indoors, we offer a comprehensive list to guide your green journey. Dive into our collection at this link and enjoy year-round gardening. Discover plants that are well suited to growing in containers, ensuring they thrive and bloom beautifully within your space. So have at it and start staging your plants! If you’re still on the hunt for the perfect ceramic, keep in mind that our ceramics are sized to fit most nursery pots and are 100% water-sealed, which means they'll never damage your floors or surfaces. Handcrafted with high-fired stoneware, the simple and elegant design was created to stand the test of time! Find the perfect size for your plants, or better yet, order a fully-potted plant set from Léon & George and let us do the work for you!

1 TO 1 VIDEO CALL WITH AN EXPERT

Yellow leaves? Worried about watering or struggling with incorrect lighting? Book a call and get truly personalized support for all your plant-related needs.


What To Do About Yellow-Brown Leaves
yellow brown leaves on plant

Is your plant showing some yellowing and/or browning on its leaves or tips? Plants are living things just like us, and far from perfect! Before you begin to worry if something may be wrong, read on for reasons why your plant might be doing this, and what can be done about it.

Why do plants get yellow-brown leaves?

As plants age, it’s natural for them to have occasional yellow-brown leaves or tips. While sad-looking leaves can sometimes mean there’s something off with its care, it doesn’t always mean the plant is in distress. Here are a few reasons why your plant might be showing yellow or brown leaves or tips:

  • It’s just that leaf’s time to go. If you see just one or two leaves that are yellow and brown, but the rest of the plant looks perfectly healthy— rest assured that absolutely nothing is wrong! It’s just the end of that leaf’s life cycle.

  • Overwatering or underwatering. If you see multiple brown or yellow leaves or a pattern, it’s possible your watering routine needs some tweaking. Make sure to read the instructions carefully for your plant (all Léon & George plants come with simple instructions) and water accordingly.

  • More or less light is needed. Brown or yellow leaves could also mean that your plant needs more or less light. This can often go hand in hand with watering, and striking the right balance for your specific plant is an art that we are certain you will master, even if it takes a little trial and error. Remember that plants are resilient, so don’t be afraid to try out new things!

  • Nutrient deficiency or overdose. If it’s been a long time since you repotted or fertilized your plant, it’s possible that it’s time to give your plant a little bit of extra nutrients either by repotting or feeding it natural plant food. As for an overdose, fertilizing your plants too much can lead to fertilizer burn either on your plants leaves or tips.

What to do about yellow-brown leaves

Here are some ways you can improve the appearance of your plant. Note that it doesn’t always mean cutting the leaf off entirely!

Shape: maintain the ideal size and shape for your space by trimming off unruly stems and yellow-brown leaves. Cut close to the base of the stem, or remove completely if possible. Maintaining a lean and balanced structure also prevents future tilting.

Shave: Shave off imperfect edges and re-shape the tips to match the other leaves. Make sure to leave a sliver of brown just before the green. Plants don’t like to be nicked while shaving and cutting into a healthy part of the leaf can create an open wound.

Shed: like any diet, it’s important not to go overboard. When pruning your plants, be careful not to shed more than ¼ of its foliage at any given time. Over pruning can be detrimental to future growth.

*Pro-tip* While pruning off yellow and brown leaves can make your plant simply look nicer, it’s also beneficial for their health: well-kept and well-pruned plants attract less pests, and also have more energy to spend on their new growth.


isaac-leon-and-george-09-2019-0546 (1).jpg

Indoor plants, potted & delivered

Premium plants paired with stylish ceramics, plus lifetime plant care support. Order online at leonandgeorge.com

Top 6 Problems with Fiddle Leaf Fig Trees
Six ways to tell if your fiddle leaf fig tree is healthy

What are signs of an unhealthy Fiddle Leaf Fig?

Fiddle Leaf Figs are notoriously finicky plants. From brown spots to dropping leaves, there are a few common ailments of this plant that can sicken it, or worse, quickly lead to its demise. Keeping an eye out and catching them early is key to keeping your plant happy and healthy. Look for these signs of a potentially unhealthy Fiddle Leaf Fig.

  1. Brown spots on the leaves

  2. New growth is smaller than the older leaves

  3. Dropping leaves

  4. Leaves turning yellow

  5. Stunted or slow growth

  6. Dirty or dusty leaves

Brown spots on the leaves

Fiddle Leaf Figs are incredible prone to browning on their leaves. While minor markings here and there are nothing to worry about, brown spots that begin to develop and spread should be looked into.

Unfortunately it can be quite difficult to diagnose the issue, as most brown spots on Fiddles are caused by two opposing forces: over watering or under watering. Here’s how to tell the difference:

Brown spots that start in the middle of the leaf and spread outwards are likely caused by overwatering, which in turn causes root rot. Root rot is a fungal infection that will spread to the leaves and eventually kill your plant. If your plant has root rot, you will need to repot, sooner rather than later. Remove the plant from its soil, thoroughly wash the roots and remove any that are brown or mushy. Afterwards, repot in fresh soil with proper drainage and cut off the affected leaves.

Are your Fiddle’s brown spots are starting on the edge of the leaves and spreading inward? This is likely caused by the plant being overly dry. Give your Fiddle a good shower, and also make sure it’s not placed too close to any air vents or heaters, that will likely dry the plant out faster than what’s ideal.

Natural Plant Food

Nourish your plants with this specially-formulated organic liquid plant food. Our Boost Vitaminé is made with potent nutrients from nature to help your plants grow and thrive all year long.

$24

Finally, brown spots may appear randomly due to trauma. A plant can go through trauma simply by moving homes (i.e. changing environments). If your plant has just one or two damaged brown leaves, cut them off at the stem and give your plant time to recover.

The new growth is smaller than the older leaves

New growth is always a great sign of a healthy plant, and if the leaves on your Fiddle grow large and strong, that means your plant is thriving.

However, if the new leaves grow in small and stunted, it could be a sign that your plant is lacking in nutrients. If it’s been years since you repotted, consider repotting to give your plant fresh soil, or simply fertilize your plant in the spring and summer to give it the extra nutrients it needs.

Dropping leaves

Fiddle Leaf Figs can sometimes seem to drop leaves at the drop of a hat. One leaf here and there is nothing to worry about, but if your plant has lost multiple leaves within a few days, you will need to act fast to save the tree. Once again, the most likely causes of leaf drop in Fiddle Leaf Figs is under watering or over watering. So how can you tell the difference? Look at where the leaves are falling from the plant: if the older leaves (towards the bottom) are going first, it’s likely over watering. However, if the leaves are falling off from all over the plant, it’s likely under watering. Here are more ways to tell the difference.

Leaves turning yellow

Are you seeing yellow leaves on your Fiddle Leaf Fig? There are a few possible causes:

  • Not enough light. Fiddle Leaf Figs need as much bright indirect light as possible. A bit of direct sunlight is fine too, but avoid areas of medium or low light. Also keep in mind that a Fiddle that does not get enough light is more prone to over watering.

  • Poor nutrition. Your Fiddle could show yellow leaves due to a lack of nutrients in the soil, and you may consider feeding your plant with liquid fertilizer 

  • Pests. Fiddles may also show yellow leaves if they are suffering from an insect infestation. If you suspect this is the case, thoroughly examine both the top and bottom sides of the leaves for any possible bugs.

Stunted or slowed growth

Healthy Fiddles usually grow new leaves every four to six weeks during spring and summer. Growth tends to be in spurts, and it’s possible to see your plant grow several new leaves in a matter of just a few days or weeks! In the winter, it’s normal not to have any new growth. If you aren’t seeing the type of growth that’s normal with this plant, once again, it may be in need of fresh nutrients in the form of a good plant fertilizer .

Dirty or dusty leaves

When was the last time you cleaned the leaves of your plant? Plants not only absorb sunlight through their leaves, but they also breathe through them too! If your plant has a layer of dust on its large leaves, it won’y be able to perform either of these functions as well as we’d like. Cleaning the leaves on your Fiddle Leaf Fig every few months is a great way to keep the plant healthy, glowing, and vibrant. Here you can read about a few different ways to clean your Fiddle Leaf Fig.

While Fiddle Leaf Figs can be relatively low maintenance plants, they are known to be pickier than most. Keep a regular watering schedule, fertilize in the spring and summer, and above all, make sure your plant is getting the light it needs throughout the year (yes, this may mean moving it in the winter!). Keep an eye out for any of these signs, as catching them early is key to keeping your plant looking fresh and feeling good!

This post was adapted from the Fiddle Leaf Fig Plant Resource by expert Claire Akin. Head to their website to learn more about caring for the Fiddle Leaf Fig.


1 TO 1 VIDEO CALL WITH AN EXPERT

Yellow leaves? Worried about watering or struggling with incorrect lighting? Book a call and get truly personalized support for all your plant-related needs.

What You Need To Know Before You Buy A Stromanthe Triostar

A strikingly unique plant, the Magenta Triostar aka Stromanthe Triostar is truly one of a kind.

The Stromanthe Triostar or Magenta Triostar is a beautiful, low-maintenance plant that adds vibrant colors and lush greenery to any room. Native to the tropical rainforests of South America, specifically Brazil, they are a popular choice as indoor plants due to their attractive, colorful foliage and relatively easy care requirements.

Could this plant be right for you? Read on to learn a bit more about what makes the Stromanthe Triostar so unique, and to see if it’s the right fir for your home.

Your Stromanthe Likes Light

Like many tropical plants, the Stromanthe Triostar requires bright, indirect sunlight to thrive. Direct sunlight can scorch its leaves and cause damage. In its natural habitat, it grows under the canopy of larger trees, receiving dappled sunlight. Indoors, it is best to place the plant near a window that receives bright, indirect light, but not direct sunlight. If your window is too sunny, you can place a sheer curtain to filter the light. You can also supplement the light with artificial grow lights if needed.

A pop of pink! The Stromanthe Triostar is also often referred to as the Magenta Triostar.

…And They Like Humidity Even More

The Stromanthe Triostar does best when its soil maintains a consistent level of moisture. As such, these humidity loving plants won’t love sporadic or infrequent watering, and they also should be kept at arm’s distance from air conditioning units or heaters. And while watering your Stromanthe is important for its health, but it's also important to avoid overwatering. Allow the soil to dry out slightly between waterings, and be sure to use well-draining soil to prevent root rot.

They’re Not the Easiest Plant to care for

Like many tropical plants, the Stromanthe can sometimes take some patience before finding the ideal conditions to help it thrive. While still considered a relatively easy-care plant, we do not recommend it for those who travel often or are likely to forget to water, as plant can be a diva when it comes to their watering routine!

Stromanthe Triostar is a Prayer Plant

The Stromanthe triostar is a proud member of the prayer plant family— but what does that mean? These fascinating plants are called "prayer plants" because of their unique ability to raise and lower their leaves in a manner that resembles hands in prayer. During the day, they lower again, capturing as much light as possible.

If Green ain’t your thing

While the Stromanthe Triostar has some green markings on its foliage, the predominant colors are actually bright pinks, magentas, and creamy whites. A variegated plant at its finest, the Stromanthe Triostar is often referred to as the Magenta Triostar thanks to its vibrant pink leaves that appear to be painted on by Mother Nature herself.

A plant that’s safe for pets

Do you have a curious pet or child at home? The good news for pet owners and parents is that the Magenta Triostar is completely safe for pets: it is non-toxic and causes no harm if consumed. That said, it’s always best to keep plants outside the reach of pets and children, if anything for the health and well-being of the plant!

Feeding Your Stromanthe: A Fertilizer 101

As a houseplant, the Stromanthe Triostar does best when regularly fertilized, particularly during the spring and summer. Use a balanced fertilizer designed for indoor plants, usually one to two times a month between March and October. Boost Vitaminé is a gentle, all natural plant food that can even be used (albeit less frequently) during the winter!

How To Select A Healthy, Thriving Stromanthe Triostar

If you're interested in buying a Stromanthe Triostar, be sure to do your research and choose a reputable seller. Look for a healthy plant with vibrant, colorful foliage— it should not have a pale or yellowed appearance. If you see a few brown tips or yellowed leaves, don’t be worried— this is very common with this plant and not necessarily a sign of ill health.

Despite its bold colors, he Stromanthe Triostar blends in beautifully with any type of decor.

Avoid purchasing your Stromanthe from a Garden Center

Buying a Stromanthe Triostar, like any plant, is an investment, and you want to make sure that you’re getting your money’s worth. But cutting corners from the beginning by purchasing your plant for the lowest possible price can come back to bite you in the pocket. Remember that the plants offered by garden centers may have an appealing price tag, but no guarantee of pest- free, well-tended health.

Plants at garden stores are frequently given the same water, light and care regardless of their species. This does not bode well for Stromanthe varieties, which prefer more frequent watering than most typical houseplants.


Magenta Triostar

A striking accent plant with exotic magenta, cream, and green colored foliage. It is a member of the prayer plant family, with leaves that close at night and open during the day. The Triostar prefers prefers medium light and is a great air purifier.

How to Care For and Grow Your Olive Tree

Olive Tree

AKA Olea europaea

With their elegant, silver-green foliage and graceful silhouettes, the Olive Tree or Olea europaea is a time-tested, infinitely elegant legacy tree and indoor plant for outdoor and indoor spaces that receive plenty of bright light. This plant variety is naturally both pest and drought resistant and easy to care for. But like all living things in the gardening realm, they have their own requirements and preferences for care. So read on and explore tips on optimal planters and dive into the horticulture of the Olea europaea. 

How Much light do Olive Trees need?

The Olive Tree needs ample direct sunlight to thrive and produce fruit — ideally at least six hours a day or more of direct sunlight. Generally speaking, it is best if Olive Trees are placed outdoors. Refrain from placing in low light or medium light areas.

Water

Check moisture of topsoil weekly and give plant four cups of water when top two inches of soil are dry to the touch. Avoid overwatering and too much damp soil to prevent root-rot. Occasionally mist your Olive Tree to increase the humid climate. Prevent the soil from drying out.

Growth

It can take several months to years for Olive Trees to begin blooming fruit. Remember that light and full sun = fruit, and fertilize every two weeks during spring, summer and fall. Ensure your Olive Tree is receiving the right humidity,

MOISTURE METERS

Finally, a moisture meter that actually works.

Common problems with Olive Trees

Weeds

Symptom: Other plants growing in your Olive Tree’s pot and soil. 

Cause: Particularly young Olive Trees can experience competition from opportunistic weeds.

Remedy: Pluck the weeds out as soon as you see them and make sure to get the roots out. Gentle herbicides can be used but are usually not required.

Yellow Leaves: Not Enough Light

Symptom: A large amount of yellow leaves in the tree’s canopy.

Cause: Too much shade, not enough direct light.

Remedy: Ensure that your tree is in a space that receives ample direct sunlight for at least 8 hours/day.

Yellow Leaves: Needs Fertilizer

Symptom: Majority of canopy exhibiting yellow leaves.

Cause: The tree needs more nitrogen, which is available through fertilizer.

Remedy: Give your tree a balanced fertilizer every two weeks from spring through fall. 

Shop the Olive Tree at leonandgeorge.com

How to care for and grow olive tree

Can I keep an Olive Tree indoors?

One of the most common question our Plant Stylists receive is whether or not Olive Trees can survive indoors, and while we don’t necessarily recommend it, this plant can be kept indoors if that area receives enough light and humidity—at least four hours a day of direct sun minimum. However, it is unlikely to bloom or produce fruit indoors.

If you’re interested in this look for your home, try the Black Olive Tree, a similar variety of plant that does better indoors. Read more about the differences between the Olive Tree and the Black Olive Tree aka Shady Lady.

How to maintain a beautiful and healthy Olive Tree

Care for your plant and it will thrive for years to come. See these simple tips to keep your tree flourishing. 

  • Pruning: your tree will not need to be pruned for the first 2+ years of its life with you. When it is time, prune off any yellow or dying leaves from your tree with clean, sharp shears. Limited pruning to the fall and winter months. 

  • Fertilizing: fertilize your tree twice monthly during the warmer months including spring, summer and fall with a balanced slow-release fertilizer. During these months, your Olive Tree may need to be watered more frequently.

  • Pests: To keep your olive trees thriving, regular inspections are crucial to catch signs of pests such as mealybugs, aphids, or spider mites early. Consider introducing neem oil as organic pest control methods

Shop the Olive Tree at leonandgeorge.com

How to propagate an Olive Tree

Beautiful plants are wonderful gifts to share and easy to grow, some Olive Tree varieties can be propagated from cuttings. Only propagate during summer with this one, when your tree experiences its highest rate of growth.

  • Prepare a rooting container or grower pot: a small nursery pot with drainage, and fill it with fruit tree potting soil and watch your planted roots grow

  • Select an eight-inch long, hardwood tip from one of your tree’s branches.

  • Trim the branch with clean, sharp shears. Be sure to sever it directly below a leaf “node or bud.”

  • Remove all but six or seven leaves from the branch.

  • Coat the cut end of the branch in 0.2-percent IBA rooting talc.

  • Plant the branch in the rooting container and place it outdoors in a spot that receives partial shade.

  • Mist the branch and its foliage regularly. 

  • Check for roots after three months. Allow it to grow within the rooting container until sturdy, then transplant to a new pot, preferably during autumn.

Incorporating Olive trees into your collection of house plants can be a rewarding experience for any gardener. Their resilient and tolerant nature makes them an excellent choice for outdoor and indoor spaces, thriving in high light exposure. The lush foliage not only enhances your living environment but also contributes to improved air quality as they purify the indoor air. As you embark on this green journey, consider exploring our nursery for Olive Trees. Happy gardening!


olivetreeblackstand.jpg

Olive Tree

A classic and elegant addition to any brightly lit space, plus naturally pest and drought resistant.