Posts in Care Guide
The Best Fertilizer For Snake Plants

Help your Snake Plant live its best life with a regular fertilizing routine!

  1. Understanding the NPK Ratio

  2. The Best Plant Food for a Snake Plant

  3. Can Fertilizing My Snake Plant Help It Grow?

  4. When To Fertilize Your Snake Plant

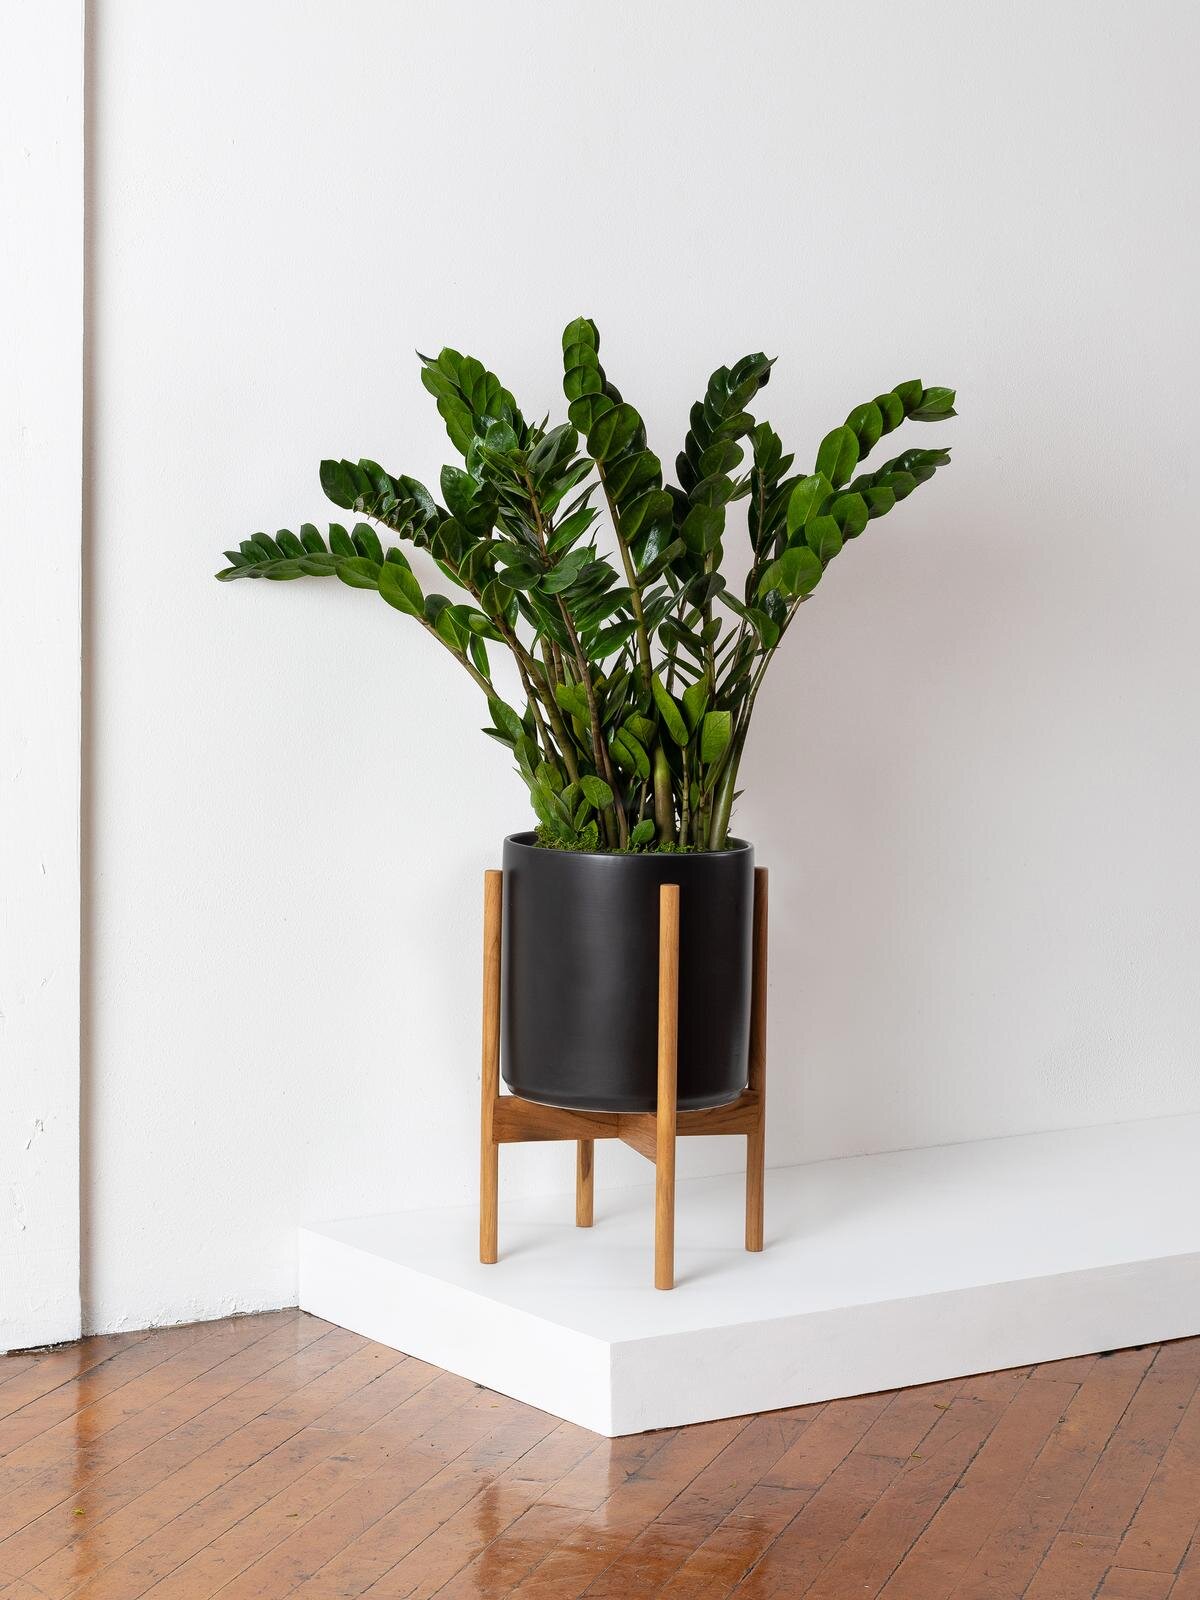
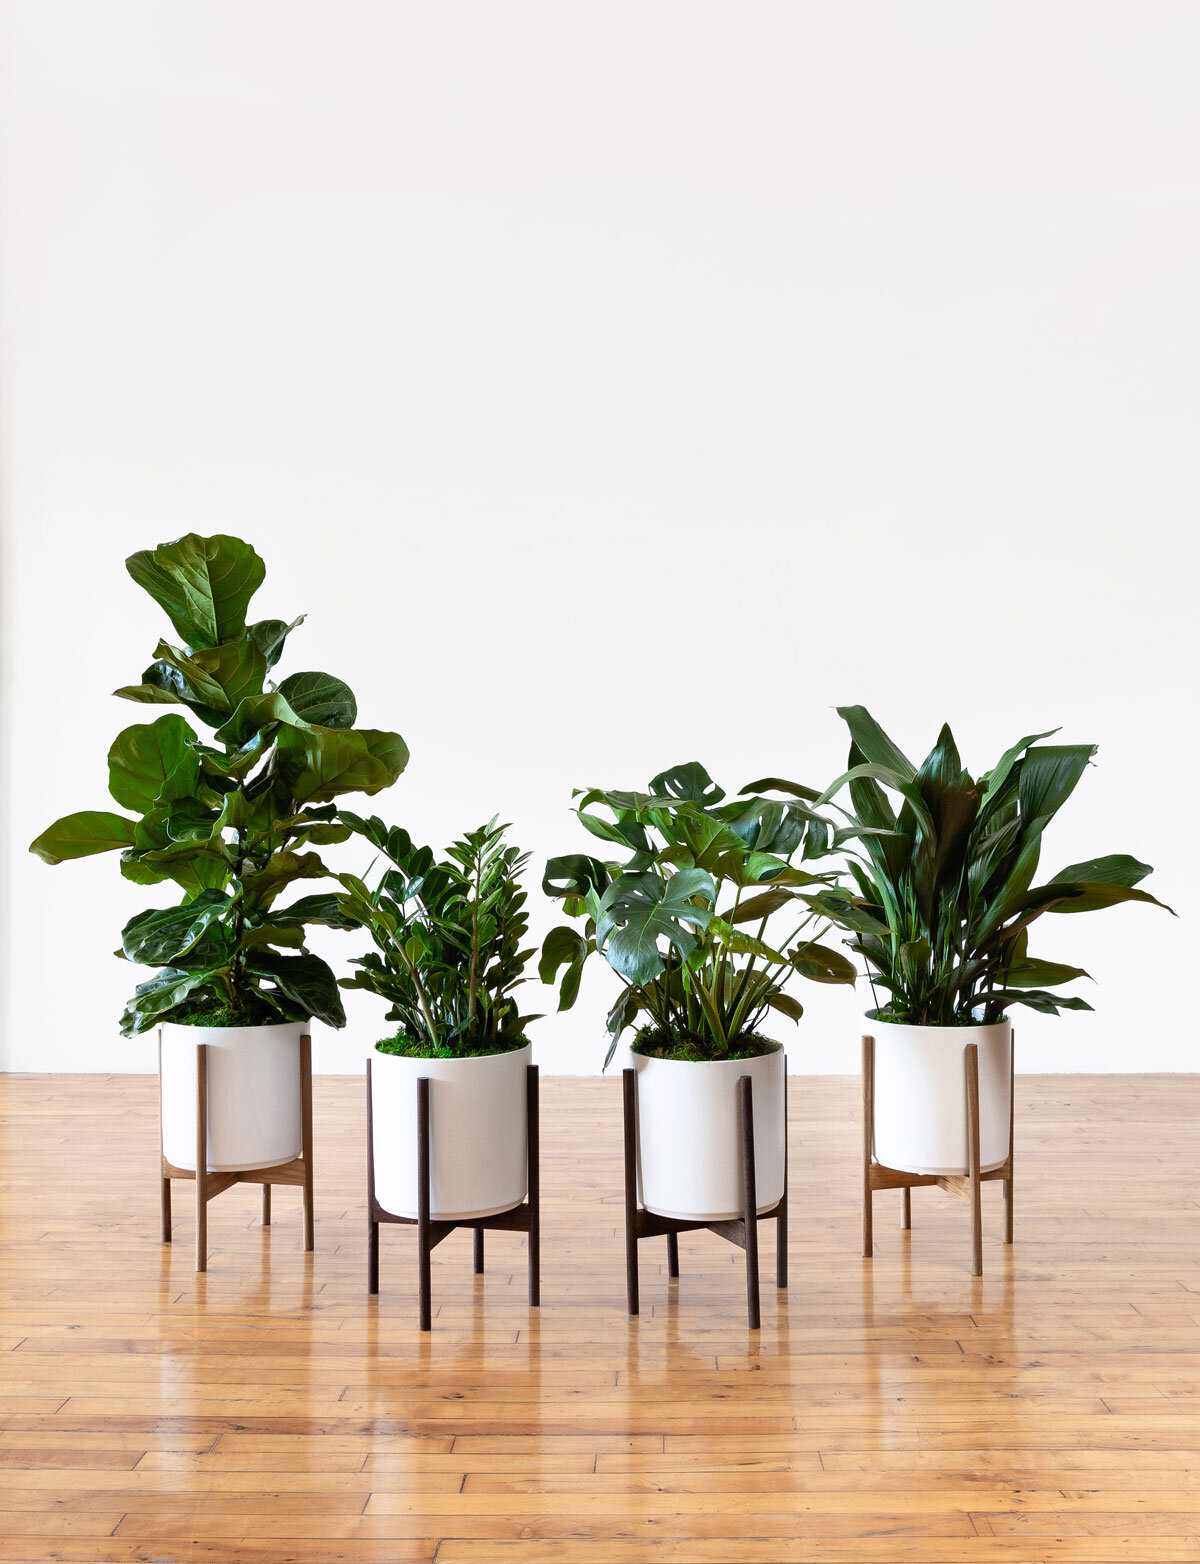
With their striking upright leaves and air-purifying qualities, Snake Plants (Sanseverias) are a popular choice for indoor plant enthusiasts and novices alike. Native to the arid regions of West Africa, they are well-suited to indoor environments due to their ability to tolerate low light conditions and infrequent watering. While Snake Plants are known for their adaptability, providing them with the right nutrients can boost their growth and overall health. Keep reading to learn about the best fertilizer for all varieties of Snake Plants and how to best fertilize these low-maintenance plants effectively.

Understanding the NPK Ratio

Fertilizer labels often display an NPK ratio, representing the ratio of nitrogen (N), phosphorus (P), and potassium (K) in the product. Different plants have specific nutrient requirements, so it's important to choose a fertilizer that matches your Snake Plant's needs.

Snake plants thrive with a balanced, all-purpose liquid fertilizer with an NPK ratio of 10-10-10 or similar. This balanced ratio ensures that your Snake Plant receives essential nutrients for overall growth and health.

The Best Plant Food for a Snake Plant

While various fertilizers with the right NPK ratio can effectively nourish your Snake Plant, consider using a high-quality, all-natural liquid plant food that is gentle enough to use year round. Our Boost Vitaminé is an all-natural plant food that promotes growth, strengthens roots, and enhances overall plant vigor. It's suitable for Snake Plants and many other indoor plants, offering a convenient solution to your plant care needs.

Feed your Snake Plant's inner beauty with the secret to lush leaves: the perfect fertilizer.

Can Fertilizing My Snake Plant Help It Grow?

Snake Plants are primarily grown for their attractive foliage and air-purifying qualities, making them a favorite for those seeking low-maintenance greenery. While Snake Plants can occasionally produce small, fragrant white flowers, especially when grown outdoors, indoor Snake Plants rarely bloom as indoor houseplants. Fertilization may encourage leaf growth and overall plant health but is unlikely to trigger flowering in indoor settings.

By choosing the right fertilizer and following a simple feeding schedule, you can keep your Snake Plant thriving and looking its best. Remember that Snake Plants are hardy and forgiving, making them an excellent choice for both beginners and experienced plant enthusiasts. 

When To Fertilize Your Snake Plant

Timing is key when it comes to fertilizing Snake Plants. These plants experience active growth during the spring and summer months, making this the ideal time to focus on providing them with nutrients. To ensure your Snake Plant receives the nourishment it needs, incorporate a balanced liquid fertilizer into your watering routine every four to six weeks during the growing season.

Liquid fertilizers like the Natural Plant Food are convenient for Snake Plants because they are easy to apply and less likely to cause fertilizer burn (when you give your plant too much fertilizer), provided you follow the package instructions and dilute the fertilizer correctly in water.

As fall and winter approach and your Snake Plant enters a period of slower growth, reduce feeding your Snake Plant to once every two months. During this dormant phase, Snake Plants require fewer nutrients, and over-fertilizing can harm their health.

Good luck! The Snake Plant is an easy-going houseplant that requires little to no maintenance over time, but by giving it a little nutrient boost, you’ll enjoy its beauty for years and years to come!


Designed to Thrive

Premium plants, potted and delivered, plus lifetime access to 24/7 Plant Doctor support. Order online at leonandgeorge.com

How To Care For and Grow your Jade Cactus AKA Euphorbia Ingens

The Jade Cactus, scientifically known as Euphorbia Ingens and also commonly referred to as the Candelabra Cactus or Candelabra Tree, is a stunning and low-maintenance succulent that adds a touch of desert elegance to any indoor space. With its robust columnar structure and deep green coloring, the Jade Cactus is a popular choice amongst interior designers and design enthusiasts alike. Read up on the basics of how to care for the Euphorbia Ingens, from water and light requirements to propagation and everything in between.

Light requirements

The Euphorbia Ingens has flexible light preferences, making it a versatile choice for various lighting conditions. While bright indirect light and even some direct sunlight is ideal, they can also adapt to medium levels of light, though less light will significantly slow their growth rate. Place your Euphorbia Ingens near a south-facing or west-facing window for optimal light conditions, or even outdoors in a semi-shaded area (too much direct sunlight may scorch your cactus!).

Choosing the best soil

Choose a well-draining cactus or succulent potting mix for your Euphorbia. This blend typically consists of sand, potting soil, and perlite or pumice. The mix allows for plenty of drainage and prevents moisture-related issues such as root rot

Watering - less is more

Euphorbias are drought-resistant and the Euphorbia Ingens is no exception: it is essential to allow it to dry out between waterings. Water the plant infrequently and sparingly, allowing the top inch of soil to become dry before the next watering. Depending on placement and time of year, your plant may only need watering once per month! Overwatering can lead to root rot, so exercise caution and prioritize a well-draining pot and soil mix.

Temperature and humidity 

Euphorbia Ingens thrive in average household temperatures between 65 to 75 degrees Fahrenheit. They can tolerate cooler temperatures down to 55 degrees Fahrenheit, but avoid prolonged exposure to temperatures below 50 degrees Fahrenheit. Maintain consistent temperatures to prevent stress and maintain your Euphorbia’s health for years to come!

The perfect fertilizing routine

Feed your Euphorbia during its growing season (spring and summer) with a controlled-release succulent fertilizer or a diluted, balanced liquid fertilizer. Use a 10-10-10 fertilizer for mature plants and a low-nitrogen fertilizer for young ones. Avoid overfeeding, as succulents prefer light feeding.

Propagating

Propagating the Euphorbia Ingens is an exciting project and a great way to grow your collection! You can propagate by taking a cutting from your plant–the easiest way to do this is to remove one of the “arms” from the cactus. Allow it to dry for at least 24 hours before placing in well-draining succulent or cactus mix, and lightly wet the soil with water. Place in a warm, dry area–you have a new plant that should begin to start growing within just a few weeks!

Potting and repotting

Select a pot that accommodates your Euphorbia Ingens’ root system. While they have small roots, avoid oversized pots that may retain excess moisture. Repot every 2-3 years for smaller plants and 4-5 years for larger ones.

Common problems

Monitor your Euphorbia for potential issues such as wrinkled leaves (sign of underwatering), all-over yellowing (indicates overwatering), and leaf loss (oftentimes not enough light). If your Euphorbia faces decline, diagnose the problem first and adjust your care routine accordingly. Combat pests like mealybugs, spider mites, and scale using gentle methods like wiping with rubbing alcohol-soaked cotton balls and neem oil.

The Jade Cactus is a captivating and easy-to-care-for succulent that adds a touch of desert charm to indoor spaces. With its striking appearance and low-maintenance requirements, it's a popular choice among plant enthusiasts. By providing the right light, well-draining soil, and careful watering, you can ensure the Euphorbia Ingens thrives and remains a stunning addition to your home.


Designed to Thrive

Premium plants, potted and delivered, plus lifetime access to 24/7 Plant Doctor support.

(if the article is about a specific plant we sell, change this block content/link to that specific product)

What You Need To Know Before You Repot Your Plant

So you've decided it's time to give your leafy friend a new home. Well, hold onto your gardening gloves because before you get started, there are a few things you should know…

Whether you're a seasoned green thumb or a newbie plant parent, repotting can be a bit like transplanting your plant to a new city. You want to make sure it settles in comfortably and flourishes. So, let's dive into what you need to know before you repot your plant and make this experience a rootin' tootin' good time!

  1. Timing is Everything

  2. The Right Pot is a Game-Changer

  3. Soil Matters

  4. Mind Those Roots

  5. One Size Doesn’t Fit All

  6. Watering Wisdom

  7. Post-Repotting TLC

Timing is Everything

Before you get your hands dirty, consider when to repot your plant. Spring and summer are like the plant equivalent of a beach vacation – the ideal time for relocation. Your plant will have the energy to adapt to its new pot and grow like it's on a tropical getaway. That said, if you have to repot in the fall or even dead of winter, it won’t be the end of the world.

The Right Pot is a Game-Changer

Picking the right pot is crucial. Think of it as finding the perfect-sized shoes for your feet. You want a pot that's just a tad larger than your plant's current one (or, you may decide to repot back into its original pot, simply refreshing the soil). If it's too big, your plant might feel like it's swimming in a sea of soil, and most plants like to have their roots tightly compacted within their soil and pot. Too small, and it's a suffocating shoe that'll cramp its growth.

Soil Matters

Imagine moving to a new city and having to adapt to a different climate. Your plant goes through something similar when you change its soil. Choose a high-quality potting mix that suits your plant's needs. Some like it dry, while others prefer to be constantly moist. Check your plant's preferences and cater to them like a plant concierge!

Mind Those Roots

When you're repotting, don't just yank your plant out like you're trying to win a tug-of-war. Be gentle and tease out those roots. If they've circled the old pot, give them a little massage to encourage them to explore their new territory. If you must, you can trim them, particularly if your plant experienced root rot (in which case, definitely trim them), or if they are too difficult to untangle from their grow pot.

repotting plants

Choosing the right pot size is essential— you can either pot back into the same size planter with fresh soil, or something just slightly larger than its current size.

One Size Doesn't Fit All

Not all plants need repotting at the same frequency. Some are like party animals and want to upgrade their space every year, while others are introverts and can go for years without needing a change. Get to know your plant's personality and repot accordingly. Some signs that your plant is ready for repotting is if the roots are circling the top or bottom of the soil surface, or if your plant generally seems to look a bit sad despite receiving adequate light, water and love.

Watering Wisdom

After repotting, your plant might be a bit stressed, just like you would be after a move. Be mindful of watering – don't drown it in sympathy water. Give it a drink, then let it settle in. Gradually increase the watering as it starts to adapt.

Post-Repotting TLC

Finally, show your plant some love after the big move. Give it some time to adjust to its new surroundings, and maybe even play some soothing tunes (okay, not really, but plants do respond positively to music!).

Remember, repotting is like redecorating your plant's home – it's a chance for a fresh start and a new lease on life. So, embrace the dirt, get your hands a little muddy, and watch your leafy companion thrive in its revamped abode.

With these friendly and funny tips, you're ready to embark on your plant-potting adventure. Happy repotting, and may your plant grow taller and greener than ever before!


repotting kit

Designed to Thrive

Upgrade your gardening game with our Repotting Kit, complete with everything you need for successful repotting, and enjoy the confidence of 24/7 Plant Doctor support.

The 10 Commandments of ZZ Care

Discover the timeless charm of the Zanzibar Gem, a symbol of natural beauty that graces any environment with elegance.

10 Commandments of ZZ Care

With its glossy, dark green leaves and air-purifying qualities, the ZZ plant has captured the hearts of plant lovers worldwide. To ensure your Zanzibar plant thrives and becomes a centerpiece of natural beauty, follow these 10 Commandments of ZZ Care.

Embrace lower light

Welcome your ZZ plant into your home's low-light areas with open arms. This hardy plant excels in low light conditions, making it a perfect fit for corners and rooms with minimal natural light. It also will happily grow (and grow fast!) in bright, indirect light, but avoid direct sunlight, as it can scorch the leaves and hinder growth.

light guide

Embrace the beauty of the no-fuss Zanzibar Gem, thriving gracefully in low light and illuminating even the dimmest corners.

With watering, less is more

Adopt a minimalist approach to watering your ZZ plant. These drought-tolerant wonders prefer to dry out between waterings as they store water in their bulbous roots. Allow the top inch of soil to become dry before giving a moderate drink. We’ll say it once and we’ll say it again: overwatering can lead to root rot, so err on the side of underwatering, especially with this plant!

Use well-draining soil

Plant your ZZ in a well-draining potting mix to ensure proper aeration and prevent waterlogging. Because the Zanzibar Gem is actually a succulent, a mix designed for succulents or cacti is ideal. This helps maintain a healthy root system and prevents moisture-related issues.

A cozy pot size

Choose a pot that provides a snug fit for your ZZ plant's roots. A slightly tight space encourages healthy growth and prevents excessive soil moisture. Repotting every few years into a slightly larger pot is sufficient.

Fertilizer, please!

Feed your ZZ plant with a well balanced fertilizer during the growing season (spring and summer) 1-2 times per month. If you use our natural plant food, you may continue to fertilize your plant but reduce to just one time per month or every other month. Avoid over-fertilizing, as ZZ plants are light feeders. 

fertilizer

Nourish your Zanzibar Gem to new heights of beauty with our specialized fertilizer and watch as your ZZ flourishes for years to come!

Prune lightly

Trim brown or yellowing leaves close to the base to encourage new growth. Pruning promotes a tidy appearance and redirects energy to healthy foliage. Remember, less is more; ZZ plants have a slow growth rate, so don't be too eager with the shears.

Toxicity: handle with care

While ZZ plants are stunning, they contain compounds that can be harmful if ingested. Keep them out of reach of curious pets and children. If nibbled on, they may cause discomfort, so ensure proper placement, out of reach from curious children or pets!

Keep things temperate

Provide gentle air circulation by placing your ZZ plant in a well-ventilated area. Avoid exposing it to strong drafts, which can stress the plant. As with all plants, good airflow prevents pests and promotes overall plant health.

Give your Zanzibar Gem a spa day by gently trimming away any yellow or brown leaves to promote a healthier appearance.

Shine that foliage

The Zanzibar Gem is not an easy plant to clean, but it will love you so much more for regularly doing it! Dust off your ZZ plant's leaves every few months or so to keep them glossy and vibrant. Wipe gently with a damp cloth to remove dust and improve its ability to photosynthesize–bonus points if you use a soap specially crafted to clean plants and naturally repel pests. 

Patience for growth

Patience is key when it comes to caring for plants, and above all with the Zanzibar Gem! ZZ plants are slow growers, so be patient and allow them to thrive at their own pace. With time and care, your plant will reward you with its striking presence and air-purifying prowess!


Designed to Thrive

Elevate your space with our premium plants like the stunning Zanzibar Gem, meticulously potted and expertly delivered.

The 10 Commandments of Succulent Care

With their captivating charm and remarkable resilience, succulents have captured the hearts of plant enthusiasts worldwide—and it’s no wonder why! With over 10,000 different succulent varieties in a plethora of different shapes and vibrant colors, these easy care plants are unique to say the least. Though generally quite easy to care for, your succulent deserves nothing less than the utmost care and admiration! To ensure your plants flourish and bring you years of joy and new growth, follow these 10 commandments of succulent care.

  1. The perfect sunlight for succulents

  2. Reccommended watering routines

  3. The importance of proper drainage with succulents

  4. Growth expectations with succulents

  5. Wintertime tips

  6. Propagating, explained

  7. Pruning your succulent

  8. Guide to fertilizing succulents

  9. Pairing multiple succulents

  10. Providing ideal humidity

Basking in the Sunlight

Picture these desert dwellers in their natural habitat, basking under the gentle warmth of the sun: succulents are light-loving plants and most varieties thrive in bright, direct light— ideally about six hours per day. Some succulents can adapt to shady areas, and some, like the Snake Plant (aka Sansevieria) can even thrive in low light. Check the variety of your succulent to ensure you’re giving it the proper amount of sunlight.

With Watering, Less is More

Water your succulents sparingly and with great care. Succulents have evolved to store water in their leaves and stems, making them drought-resistant. Overwatering is the most common mistake made by succulent caregivers, leading to root rot and other issues. Allow the soil to dry completely between waterings, and water deeply but infrequently. Remember, it is better to under water than to overwater these drought-resistant plants!

Providing Proper Drainage

All plants enjoy proper drainage, and succulents are no exception! Plant your succulents in well-draining soil and containers. Proper drainage prevents waterlogged soil, protecting your succulents from drowning in excess water. Opt for a cactus mix or create your own by adding sand or perlite to regular potting soil. Elevate the containers slightly to allow excess water to escape freely, or consider potting using the staging method, and your succulent will be happy and thriving with their perfectly proper drainage.

Patience - The Virtue of Growth

Be patient with your succulents. Growth in succulents can be slow, especially when compared to other plants. Take heed and resist the temptation to overfeed or overwater in the pursuit of hastened growth! Patience will reward you with healthy and vibrant succulents over time.

Growth During the Winter Months

Many succulents enter a period of dormancy and rest during the colder months, slowing down their growth and sometimes even stopping it. Reduce watering and refrain from fertilizing during this time to allow your succulents to recharge for the upcoming season. Shield them from freezing temperatures and protect them from frost damage–sun-loving succulents do not like to freeze!

Propagating Your succulents

Propagating succulents is a fascinating and rewarding process that allows you to expand your collection—for free! One of the most common methods is leaf propagation, which can be done by gently removing a healthy leaf from the parent plant (simply twist and snap off!) and allowing it to callus over for a day or two before placing it on damp, well-draining soil. With time and care, tiny roots will emerge, followed by a new baby succulent sprouting from the base of the leaf, which can then be potted into its own container. It’s really that simple, and incredibly rewarding.

Prune Unhealthy Leaves

Do not fear pruning, for it brings rejuvenation to your growing succulent! Remove dead or decaying leaves to promote new growth, improve your plant’s appearance and maintain the plant's health. Pruning encourages your plant to put out new leaves, resulting in fuller, more beautiful succulents.

Fertilizer for the Best Nutrition

Feed your succulents with care— as with any plant, overfertilizing can cause fertilizer burn or damage to the foliage. During their active growing season (typically spring and summer), offer a diluted, balanced fertilizer no more than once a month. Refrain from fertilizing during winter dormancy when the plants are not actively growing. Over-fertilizing can lead to nutrient imbalances and harm your succulents.

Pairing Your succulents

Arranging your succulents in captivating groupings creates a mini-desert oasis, and is one of the most popular ways to enjoy these beautiful plants. Consider succulent compatibility and water requirements when choosing companions for a harmonious display. Groupings of three or more succulents in one space not only look aesthetically pleasing but also create a mini-biome of moisture that benefits them all!

Keep Your succulent Away From Dry Breezes And Appliances

Succulents, originating from arid regions, have adapted to thrive in low-humidity conditions, but they still require a degree of moisture in the air to remain healthy. Avoid placing your succulents near air conditioners, heaters, or vents, as the dry air from these appliances can quickly dehydrate their leaves and stems. Instead, opt for a spot with consistent air circulation that avoids direct exposure to drafts.

Remember, each succulent is a unique adventure waiting to unfold, and with a sprinkle of patience and a dash of love, you'll cultivate a thriving succulent haven that brings endless joy and serenity to your life. So, let the succulent caregiving fun begin! Happy growing!


Designed to Thrive

Premium plants paired with styled ceramics, plus lifetime access to 24/7 Plant Doctor support. Order online at leonandgeorge.com

How to Care For and Grow Your Desert Cactus AKA Euphorbia Ammak
DesertCactus-Care-Guide.jpg

The Desert Cactus

AKA euphorbia ammak

The Desert Cactus (or in scientific terms, the Euphorbia Ammak) is a tree-like succulent that thrives with just a bit of water and lots of sunlight. Sometimes referred to as the African Candelabra, the Desert Cactus hails from Saudi Arabia and Yemen and is known for its structural beauty and its ribbed arms edged with spines. Though this plant prefers full sun, it may also flourish in bright indoor conditions, and will undoubtedly elevate any space with its eye-capturing beauty. Read on for simple tips on how to care for the Desert Cactus.

  1. Light, water, and growth

  2. Common problems

  3. Maintenance

  4. Propagating

Light REQUIREMENTS FOR THE DESERT CACTUS

Watering your desert cactus

  • Water sparingly once every two weeks in the summer, and once a month for the rest of the year. Avoid overwatering

cactus growth rate

  • In prime conditions, the Desert Cactus is a fast grower and can grow to over 8 feet tall indoors

  • Fertilize lightly (half a dose) once a month in the summer

Now Shipping Nationwide

Our popular Desert Cactus, aka Euphorbia Ammak, is as low maintenance as they come and now ships nationwide.

Common problems with the Desert Cactus

Brown patches or scars - sunburn

  • Symptom - rough, localized “scabs” or brown patches

  • Cause - too much sun (yes, this plant can burn!) due to harsh climatic changes (i.e. the plant was grown in a greenhouse with indirect light, then placed in full sun).

  • Remedy - This is simply a scar and though it is not contagious or will spread, there is nothing you can do about its appearance. By the time your plant is burned, it will already have acclimated to its new environment.


Soft brown areas - overwatering

  • Symptom - Mushy or soft brown areas

  • Cause - Too much water or root root

  • Remedy - Check the roots. If the roots are damaged (wet, slimy, etc), you will need to repot your plant (see below for instructions). If they are not damaged, simply hold off on watering until the bottom of the soil completely dries out.

Powdery mildew disease

  • Symptom - Coat of white power on and around ribs

  • Cause - caused by a fungus

  • Remedy - Test out a commercial fungal control on a small area of the plant before treating the entire plant.

Shop the Desert Cactus at leonandgeorge.com

How to maintain a beautiful and healthy Desert Cactus

Take care of your Desert Cactus and it will take care of you! Below are simple tips to continue caring for your Desert Cactus over time.

New growth on a euphorbia ammak.

New growth on a euphorbia ammak.

  • Pruning - The Desert Cactus can often grow very tall with many arms, resulting in a “top-heavy” plant that could potentially topple over. If this is the case, time to prune! Follow the first step in propagation (listed below) to safely prune your cactus.

  • Cleaning - With a damp cloth, gently clean between the ribs once a month to remove any collected dust. Alternatively, you may use a small hand broom to brush off dust.

  • Repotting - Depending on the size of your Desert Cactus, you may need to repot it to ensure it has a big enough base to support the weight of the plant.

    • When to repot - When the cactus has grown substantially and no longer stands straight in its pot. You may also consider pruning instead of attempting to repot.

    • Pot sizing - Find a nursery pot that’s 2” in diameter larger than the current pot.

    • Get your hands dirty - spread out newspaper on the floor, remove the plant from the pot and shake off as much of the old soil as possible so that you have clean roots. Place the plant in the center of the pot, add new soil (be sure to use cactus and succulent potting mix!) and pat down firmly. You may need to use a stake to support the weight of your cactus until it fully roots. Your plant will take 2-4 weeks to settle from the shock and adjust to its new home.

Shop the Desert Cactus at leonandgeorge.com

How to propagate the Desert Cactus

Whether your Desert Cactus needs a trim, or you’d like to create new plants, propagating the Desert Cactus is relatively simple (though should be approached with care!). The best way to propagate the Desert Cactus is by using cuttings.

  • Prepare for cutting - The safest way to cut your cactus is to lay it down horizontally if possible, and use a sharp, clean, serrated knife. This plant can have a sticky sap that can irritate skin and eyes when cut open so make sure to also wear gloves, protect your arms with long sleeves, and also wear protective eyewear. If you are unable to lay the cactus down, you can also achieve the same results with a few extra hands: one person holds while the other cuts.

  • Determine where you will make the cut - If you’re going to cut your cactus, you should generally cut where the “arm” or branch begins.

  • Rinse and allow to dry - rinse the cutting with cool water and allow to dry.

  • Transfer to soil - Once your cactus cutting(s) are dry, place it in fresh soil and put in a warm, dry place. Do not move the plant for at least six weeks -- it will take some time to root and until then, it is very fragile.

Illustrations by our talented plant stylist, Kailie Barnes.


cactuswhite.jpg

Desert Cactus

With thorns as sharp and tough as its personality, the Desert Cactus is a low maintenance and attractive indoor plant that will draw the attention of anyone.

How to Care for and Grow Your Fiddle Leaf Fig TREE

The Fiddle Leaf Fig Tree, known for its sculptural shape and stick-thin trunk, is arguably the “it” plant of the moment. If you are not familiar yet, you will be soon: this incredibly gorgeous tree, which also comes in bush or columnar form, appears in magazines, design blogs, and all over Instagram. But despite the popularity, the Fiddle Leaf Fig is not necessarily the easiest of plants to take care of. It is notoriously finicky, and is known to drop leaves with even the most minimal change in its watering schedule, temperature, or environment. Worth it? We think so. Read on for simple tips on how to care for and grow the Fiddle Leaf Fig Tree.

  1. Light, watering, and growth

  2. Common problems with Fiddle Leaf Fig Trees

  3. Maintaining the beauty of your Fiddle over time

  4. How to propagate Fiddle Leaf Figs

Light Requirements for Fiddle Leaf Fig Trees

The Fiddle prefers bright indirect light — and a lot of it. If you place this plant in an area of medium to low light, it will quickly start to lose leaves. However, leaves may scorch in harsh direct sunlight, so keep it out of strong rays of sun. Read our guide on finding the perfect placement of your Fiddle Leaf Fig.

How to water Fiddle Leaf Fig Trees

Water thoroughly when topsoil is dry, usually once every ten days or so. Avoid overwatering, and keep in mind that watering schedule may be less frequent during winter months. Read our ultimate guide to watering the Fiddle Leaf Fig Tree.

Fiddle Leaf Fig Growth Rate

In prime conditions, the Fiddle Leaf Fig Tree is a fast grower and can grow up to 10 feet tall indoors. Make sure to fertilize your plant regularly during the spring and summer.

fiddle-white-light-small.jpg

FIDDLE LEAF FIG TREES

Léon & George plants are California-certified and carefully potted in stylish, high-fired stoneware ceramics. With a structural shape and robust, healthy foliage, there’s a reason why our Fiddle Leaf Fig is a best-seller.

Common problems with Fiddle Leaf Fig Trees

How to fix your fiddle leaf fig

Yellow or brown leaves - overwatering

  • Symptom - leaves turning yellow or brown, usually starting at the center of the leaf

  • Cause - overwatering and/or not enough sunlight

  • Remedy - allow soil to dry out completely, sometimes this can take 2-3 weeks. Check the soil’s moisture through the drainage holes at the bottom. Overwatering can lead to more severe ailments like root rot and that may eventually require you change the soil.  

Yellow or brown leaves - underwatering

  • Symptom - leaves turning yellow or brown, usually starting at the edge of the leaf

  • Cause - underwatering

  • Remedy - give your plant a full shower! Take it out of its decorative pot and put in a bathtub, shower or outdoor area and give it a thorough watering. You may even let it sit in water for a few hours so that the roots can drink from the bottom. Let it drain out completely before returning it to its decorative pot.

Leaf drop - overwatering or underwatering

  • Symptom - leaves dropping, either at the bottom of the plant or from all areas of the plant

  • Cause - usually overwatered fiddles will drop their bottom leaves, while underwatered fiddles will drop leaves from anywhere on the plant.

  • Remedy - follow instructions above for either overwatered or underwatered Fiddle Leaf Fig plants!

Leaf droop - underwatered or too warm

  • Symptom - leaves sagging or drooping

  • Cause - fiddles will sometimes begin to droop if it’s warm and they are thirsty

  • Remedy - adjust your watering schedule. During warm summer months, your plant may need more frequent waterings.

Is this all very confusing? Fiddles are known for that. Dive deeper on some common issues with the Fiddle Leaf Fig:


Shop beautiful Fiddle Leaf Fig Trees at leonandgeorge.com

How to maintain a beautiful and healthy Fiddle Leaf Fig

Take care of your Fiddle Leaf Fig and it will take care of you! Below are simple tips to continue caring for your plant over time.

  • Pruning - Remove dry or dead leaves all year round, but save any major pruning for the spring and summer months. It is not uncommon for fiddles to grow like crazy toward the light (especially if you don’t rotate them!), and if this is the case, you may want to prune it back. When pruning your Fiddle Leaf Fig Tree, wear gloves and protect your floor with newspaper — the sap that leaks out can be sticky and damage floors. Use sharp, clean shears and cut just above the node at a 90 degree angle.

  • Staking - Sometimes Fiddles can grow so large that they need some extra support. If you’ve pruned and still find your plant leaning, try staking it, or inserting a wooden dowel gently into the soil near the trunk.

  • Cleaning - Take a damp cloth or sponge and gentle clean each leaf (this also helps the plant soak in more light!).

  • Repotting - Houseplants grow much slower than they would in the wild. Depending on the size of your plant and the density of the roots, this is nice to do every 2-3 years to provide fresh nutrients and encourage new growth.

    • When to repot - if the roots start to become visible outside the soil (i.e. circling around the grow pot), it is time to consider repotting your Fiddle Leaf Fig Tree.

    • Pot sizing - if you want your plant to grow taller, find a nursery pot that’s 2” in diameter larger than the current pot. If you want your plant to stay the same height, you can reuse the same pot and simply change the soil.

    • Get your hands dirty - spread out newspaper on the floor, remove the plant from the pot and shake off as much of the old soil as possible so that you have clean roots. Place the plant in the center of the pot, add new soil and pat down firmly. Water the soil thoroughly and place the plant in an area with bright indirect light. Your plant will take 2-4 weeks to settle from the shock and adjust to its new home.


Shop beautiful Fiddle Leaf Fig Trees at leonandgeorge.com

How to propagate a Fiddle Leaf Fig Tree

Whether you want to recycle your Fiddle Leaf Fig cuttings or you simply want to create a new plant, propagating the Fiddle Leaf Fig Tree is relatively simple. Though there are many ways to do this, water propagation is generally the easiest way to go about it. Follow these instructions to propagate your Fiddle Leaf Fig Tree:

  • Select a small branch to propagate - Using sharp, clean scissors or shears, cut a two to three inch branch just above a node (a leaf joint). Do not cut a branch off with more than three leaves— it will require too much energy to grow roots.

  • Place in water - Find a clear glass and fill with water. Make sure only the stem of the branch is submerged, and no leaves are sitting in the water. You may like to use a rooting hormone to increase your chances of rooting.

  • Place in a bright area and wait! - Avoid any direct sun. You may need to change the water out every few days to keep it fresh. It could take up to several weeks for your cutting to form roots.

  • Transfer to soil - After some time, you will start to see tiny white roots emerging from the cutting. Give it a few more days until the roots have grown, and then transfer to indoor potting soil. A small pot is best — no larger than 6” in diameter.

  • Keep hydrated - During the first few weeks, or until your plant feels firmly rooted in its soil, regularly water and drain your plant. The soil should be just barely moist to the touch at all times.


fiddle-new-copy.jpg

Fiddle Leaf Fig

A lush and sculptural plant with elegant violin-shaped leaves, the Fiddle Leaf Fig makes for a dramatic addition to any indoor space.

How to Care For and Grow Your Elephant Ear
elephantear-care-guide.jpg

The Elephant Ear

AKA alocasia regal shield

  1. Lighting

  2. Watering

  3. Common Problems

  4. Maintenance

  5. Growing & Repotting

  6. Propogating

A stunning plant with large heart-shaped leaves and wavy edges, it’s easy to see where the Elephant Ear got its common name. It is part of the alocasia family, so that is the other name you may hear it called. Here’s everything you need to know to keep this beautiful plant healthy and growing over time.

Elephant Ear Light Requirements

This plant prefers bright indirect light, near a south or north facing window is best. Avoid harsh direct sunlight that may burn your plant’s leaves. Rotate plant monthly for balanced growth

How to water the Elephant Ear

Water your plant about once a week to keep soil evenly moist but never soggy. Mist between waterings to provide humidity.

How fast do Elephant Ears Grow

In prime conditions, the Elephant Ear grows relatively fast and can reach up to two feet in height. Fertilize your Elephant Ear 1-2 times per month in the spring and summer with indoor plant food, or foliar feed year round.

Common problems with an Elephant Ear plant

Yellow leaves on Elephant’s Ear plant

Yellowing edges - light to water ratio imbalance

  • Symptom - edges of the large leaves are turning yellow

  • Cause - unhappy with its light/water balance

  • Remedy - do small weekly tests of giving more or less light OR more or less water. Test one adjustment at a time until yellowing has stopped.

Dark Spots - overwatering

  • Symptom - dark brown or black spots on the leaves, surrounded by a yellowish rim

  • Cause - the soil has been drenched and caused a fungal disease, typically this is due to overwatering or not enough air circulation around the plant

  • Remedy - remove damaged leaf or cut off diseased areas and spray with a fungicide. Optionally, mix 1 tablespoon of baking soda, 1 teaspoon of mineral oil and 2-3 cups of water in a spray bottle, shake well and spray plant evenly.

Drooping leaves on an Elephant’s Ear plant

Droopy leaves - underwatering

  • Symptom - leaves drooping and bending backwards

  • Cause - underwatering

  • Remedy - give your plant a thorough shower, allowing all the roots to have a chance to drink and refresh. Wait until water has drained before returning to decorative pot.


How to maintain a beautiful and healthy Elephant Ear plant

Take care of your Elephant Ear and it will take care of you! Below are simple tips to continue caring for and growing your Elephant Ear over time.

Pruning

The voluptuous leaves will droop as they age. You can safely trim these off with a clean blade, this will give your plant more energy to grow new leaves!

Trimming

If there is just a small portion of a leaf that was damaged such as the edges, trim off any discoloration or blemishes by following the natural lines and shape of the leaf.

Cleaning

Regularly remove dust to ensure your plant can soak in as much light as possible. Use a damp cloth and gently wipe the leaf clean while supporting the under side with your other hand.

How to grow and repot an Elephant’ Ear plant

How to care for and grow the Elephant’s Ear plant
  • Growing - in prime conditions with the right light/water/temperature balance, Elephant Ear plants are fast growers. After some time, if you don’t see any new growth, consider adjusting one of its elements. During spring and summer, use a diluted fertilizer to give your plant a vitamin boost.

  • Repotting - Léon & George’s Elephant Ears plants come in 10” or 12” grow pots and only need to be repotted every few years if you notice the roots outgrowing the pot, or to refresh the soil and give it new nutrients. If you’d like your plant to grow larger, find a new grow pot that is 2” larger than its current pot. If you’re happy with the current size, you can reuse the same pot and simply change the soil.

    • Getting your hands dirty with or without a yard - spread out newspaper on the floor, remove the plant from the pot and shake off as much of the old soil as possible so that you have clean roots. At the bottom of the grow pot, and a layer of soil, then place the plant in the center of the pot and cover with new soil. Pat down firmly and water thoroughly. Place the plant in an area with bright indirect light. Your plant will take 2-4 weeks to settle from the shock and adjust to its new home.

How to propagate an Elephant Ear plant

Propagating an Elephant Ear plant is best done through division and during spring or summer.

  • Divide the roots - remove the plant from its container and determine which area you will divide to create new plants. Make sure there is at least one bud in each clump of tubers, aka their roots. Carefully untangle the roots and pull apart with your hands or cut through with a clean sharp knife.

  • Place in fresh soil - Place the new divisions in fresh soil, press soil firmly and water thoroughly.

  • Stabilize - Keep freshly repotted plants in a warm area with bright indirect light, and for Elephant Ears the soil should be kept moist thought not drenched.


Illustrations by our talented plant stylist, Kailie Barnes.


elephants-ear-plant.jpg

Indoor plants, potted & delivered

Premium plants paired with stylish ceramics, plus lifetime plant care support. Order online at leonandgeorge.com

The 10 Commandments of Orchid Care

The orchid's beauty is found in its simple and graceful charm, and of course, unmistakable vibrant flowers.

  1. Lighting Requirements for Orchids

  2. Ideal Humidity Levels for Orchids

  3. Orchid Temperature Preferences

  4. Fertilizing Orchids

  5. Watering Requirements for Orchids

  6. Trimming and Pruning Your Orchid

  7. Pest Prevention

  8. Repotting Considerations for Orchids

With their exotic allure and delicate blooms, Orchids have captured the hearts of plant enthusiasts and novices around the world. Despite their reputation, many Orchid varieties can actually be very low-maintenance and highly adaptable to different environments. 

To ensure your Orchid flourishes and graces your space with its captivating beauty for years to come, follow our 10 simple commandments of general Orchid care, but don’t forget: Orchids are one of the most diverse plant families in the world, so make sure to look into your specific variety and any notable care requirements it may have!

Don’t Overlook the Lighting

Adequate lighting is vital for the well-being of an orchid, as it fuels the plant's growth, influences its blooming cycle, and ensures its overall health and vitality.

Generally speaking, Orchids are light-loving plants but prefer indirect light to avoid scorching their leaves. There are many different types of Orchids and it’s best to know the exact variety of yours and follow light requirements accordingly, as some Orchids are pickier in this regard. As a general rule of thumb, place them near a window with filtered sunlight or use sheer curtains to create a diffused light environment, and avoid direct exposure to intense midday sun, as it can damage the leaves. While some Orchids can easily adapt to medium and even low light conditions such as offices or retail settings, make sure your variety is suitable to this type of environment before placing it there!

Create a Humid Haven 

Most orchids originate from tropical regions and thrive with humid conditions. In fact, even Orchids that have adapted to live in the desert prefer some humidity. Mist your orchids regularly, especially during dry seasons or in air-conditioned environments. Alternatively, you can place them on a humidity tray filled with water or use a humidifier to maintain adequate moisture levels.

Keep Things Cozy

Like many tropical plants, Orchids can be sensitive to temperature fluctuations. Keep them away from drafts and air vents, and avoid sudden temperature changes. Most orchids prefer temperatures between 60-80 degrees Fahrenheit (16-27 degrees Celsius) during the day, with a slight drop at night. They can handle extreme heat or cold if periods in these conditions are brief.

Do not Forget to Feed Your Orchid!

Orchids have unique nutritional needs, and do best when fertilized regularly throughout the year. Though it depends on the exact brand of fertilizer you’re using, fertilizing twice a month during peak growing season (spring and summer) and once a month during fall and winter is advised. 

If you’re looking for a good fertilizer for your Orchid, we recommend this Orchid food by Houseplant Resource Center, a comfortable spray that is specifically formulated for Orchids.

Water Your Orchid Wisely

Orchids like a fine balance between moisture and dryness. Depending on the environment your plant lives in, it may need watering more or less frequently. We recommend starting once a week, giving your Orchid a thorough watering, and checking the soil to see if it’s still moist before watering again. 

About 70% of Orchids are epiphytes, which means they grow on other plants rather than in soil. That’s why it is crucial to ensure your Orchid has proper drainage, and to never let it soak in water for various days. 

Easy Care Flowering Plants by Léon & George

Beautifully potted flowering plants for indoors, paired with high-quality ceramic planters. Lifetime Plant Doctor access included.

Trim and Prune with Care

Pruning is an essential aspect of orchid care, but generally speaking, it’s best to take a delicate approach and never prune away too much of your orchid at one time. 

Remove any dead, yellowing, or damaged leaves and spent flower spikes using clean, sterilized tools to prevent the spread of diseases. Pruning encourages new growth and helps maintain the overall health and appearance of your orchid.

Are you ready to prune your orchid? Read this full guide which explains how to prune different types of orchids.

Keep an Eye Out for Pests

Orchids are susceptible to various pests, such as aphids, scale insects, and mealybugs. Regularly inspect your orchids for signs of infestation, including sticky residue, webbing, or distorted leaves. Treat any pest problems promptly– we suggested using Super Neem Oil to naturally treat an orchid with pests. Additionally, be vigilant for signs of diseases like fungal or bacterial infections and take necessary action to prevent their spread.

Remember that keeping your plant clean is the pest form of prevention! Use L’Original black olive soap, specifically designed to clean plants, to regularly wipe away dust and other build up on your orchid.

Repot Your Orchid Only When Necessary

Orchids require occasional repotting to ensure healthy root growth and provide fresh growing medium. Repot your orchids when you notice overcrowded or deteriorating roots, or every 1-2 years as a general rule. Use a well-draining orchid potting mix and provide adequate support for your plant.

Pro tip: Many orchids are sold in small plastic containers that do not have drainage. If you purchase an orchid in one of these pots or containers, be sure to immediately pot it into something with proper drainage, as this is key to keeping your orchid happy and healthy over time. 

Introduce Companions to Your Orchid

Consider grouping your orchids with other plants that have similar light and humidity requirements. This creates a microclimate that enhances moisture levels and helps maintain stable conditions. Orchids also benefit from the increased humidity created by neighboring plants.

Be Patient with Your Orchid!

Growing orchids can be a rewarding yet challenging endeavor, and even more so getting them to flower multiple times throughout the year. Each orchid variety has unique care requirements, and it may take time and experimentation to find the perfect balance. Be patient, observe your plants closely, and adjust your care routine accordingly. Remember, the journey of caring for orchids is as beautiful as the flowers themselves!

Photos by @gaellemarcel and @nosova


Designed to Thrive

Premium plants, potted and delivered, plus lifetime access to 24/7 Plant Doctor support.

(if the article is about a specific plant we sell, change this block content/link to that specific product)

Identifying and Treating Common Houseplant Pests
houseplant pests

While indoor plants can live for years with zero pest problems, there is always a possibility for an infestation if not careful. And while a few bugs may coexist with a plant without causing major harm, the real problem arises when a small infestation quickly multiplies into a full-blown invasion. Excessive feeding by insects can cause significant damage to your plants, and there's also a risk of pests spreading from one plant to others nearby. To ensure the well-being of your houseplants, it's essential to learn how to identify common indoor insect pests and effectively control them.

As a preventative measure, keep your plants clean by regularly wiping down the leaves with water and a gentle soap or neem oil, an all natural pest control solution that also acts as a leaf shine. 

Keep reading to see the most common types of pests on houseplants, how to identify them and how to treat them.

  1. Mealybugs

  2. Spider Mites

  3. Scale Insects

  4. Fungus Gnats

  5. Aphids

  6. Thrips

  7. White Flies

  8. Preventation

Mealybugs

mealybugs

Mealybugs

Mealybugs are soft-bodied insects that leave white cottony masses along stems and beneath leaves. They use their mouth parts to feed on plant sap, potentially causing damage. To prevent infestations, inspect your plants before bringing them indoors. 

How to treat Mealybugs

If you notice a fuzzy white mass on leaves and stems, it's a sign of a full-blown attack. Take action early by washing the bugs off the plant and regularly inspecting your houseplants to catch and control mealy bugs before they become unmanageable.

Read our full article on how to treat mealybugs on houseplants

Spider Mites

spider mites

Spider Mites

These tiny creatures lay eggs and feed on the undersides of leaves, leaving webbed areas, yellowing foliage, and debris. They are most common in hot, dry conditions, making summer the prime season for spider mite infestations.

How to treat for spidermites

To keep spider mites at bay, maintain moist conditions by using humidifiers or periodically misting your plants with water. Adding peat moss to the potting mix can also help.

Read our full article on how to treat spider mites on plants

Scale Insects

scale

Scale Insects

Scale insects appear as smooth, rounded bumps on stems and leaves. They feed on plant sap and can remain in one location for an extended period. 

How to treat for scale on houseplants

To eliminate scale insects, manually remove them using a fingernail or soft toothbrush. Rinse the plants with water to dislodge bugs from between leaves. Follow up with an insecticide to kill any remaining larvae, using neem oil or insecticidal soap based on the severity of the infestation.

Read our full article on how to treat scale on houseplants

Fungus Gnats

fungus gnats

Fungus Gnats

Fungus gnats are tiny flies that are attracted to moist soil, laying eggs there and causing an infestation. The emerging larvae feed on decomposing organic matter and plant roots. 

How to treat for fungus gnats

To deal with fungus gnats, allow the soil to dry between waterings to kill larvae and deter egg-laying females. Regularly spray with neem oil until the fungus gnats no longer appear.

Aphids

aphids

Aphids

Aphids are soft-bodied insects that suck plant juices, often found on new growth and undersides of leaves. Curled, distorted new leaves and a sticky residue indicate their presence. 

How to treat for aphids

Combat aphids by spraying or wiping the leaves with a mild soapy solution every two to three days for up to two weeks.

Thrips

thrips

Thrips

White Flies

These pests can be found on the undersides of leaves or flying around plants, piercing plant tissue and causing damage. Yellow, mottled foliage and leaf drop are signs of whitefly infestation. Act quickly by blasting them off with water or using insecticidal soap spray multiple times as needed.

How to Treat for White Flies

Act quickly by washing the plant thoroughly with high pressure water or using insecticidal spray such as neem oil multiple times as needed.

Thrips are winged insects that cause damage by tearing plant tissue and sucking plant juices. Thrip-infested areas appear as brown or silvery blotches. Eliminate thrips by shaking the branches to dislodge them onto a cloth and disposing of the cloth to eliminate the bugs.

How common pest problems start

Houseplant pests can enter your home in various ways, such as through fresh produce, cut flower bouquets, potted gift plants, newly purchased plants, potting soil, clothing, or even through open windows. Understanding their entry points can help you take preventive measures.

When dealing with a pest infestation on your indoor plants, there are some general rules to follow:

  1. Isolate the infected plant: As soon as you notice a bug problem, move the affected plant away from other plants to prevent the infestation from spreading.

  2. Physically remove pests: Rinse the plant with water in a sink, tub, or outdoors to remove as many pests as possible from the foliage. You can also use tweezers or a paper towel to manually remove insects if the infestation is small.

  3. Use rubbing alcohol: Apply rubbing alcohol directly on the insects using a spray bottle or cotton swabs. The alcohol will quickly evaporate, killing the pests without harming the plant.

  4. Dish soap solution: Mix 1/2 teaspoon of dish soap with a quart of water in a hand-sprayer and spray it directly on the pests. The soapy solution suffocates the insects and helps control their population.

  5. Insecticidal soap: Consider using  insecticidal soaps designed for indoor or outdoor plant pests. Follow the instructions on the product label for safe and effective use. Super Neem Oil is a highly effective and all-natural pest control that can be used as a both preventative and combative solution.

  6. Manual removal: If you're not squeamish about bugs, you can manually remove them using tweezers or a paper towel. This method works well for small infestations.

  7. Chemical insecticides: If the infestation is severe and other methods have failed, you can use chemical insecticides specifically formulated for houseplants. Always check the product label to ensure it targets the specific insect you're dealing with, is safe for your plant, and suitable for indoor use.

How to prevent pest infestations on houseplants

Prevention is key in keeping your houseplants pest-free. Here are some tips to avoid infestations:

  1. Thoroughly inspect plants before purchasing: Avoid bringing home plants with visible signs of pests, including flying insects around them. Be wary of plants purchased at big box gardening centers, where they are often neglected or not properly cared for, making them more susceptible to pest infestations.

  2. Quarantine new plants: Isolate any new houseplants for about a month and closely monitor them to ensure they are pest-free before placing them near other plants.

  3. Maintain cleanliness: Remove dead foliage and periodically wash plant leaves with water and all-natural soap like L’Original (specially formulated for plants and other precious surfaces!) to keep them clean and discourage pests.

  4. Regular inspections: Inspect your plants occasionally for any signs of pests. Early detection can prevent infestations from spreading.

  5. Soil replacement: If a plant has experienced a severe infestation, replace the soil with fresh potting mix after treating the pests to ensure the eradication of any remaining eggs or larvae.

  6. Optimal plant care: Provide your plants with the recommended amount of light, water, and fertilizer according to their specific needs. Healthy plants are more resilient to pests.

  7. Avoid extreme temperatures: Keep your plants away from cold or hot drafts near windows, doors, or air ducts, as temperature stress can weaken them and make them more susceptible to infestations.

Despite your best efforts, some infestations may become too severe to salvage the plant. In such cases, it's best to discard the infested plant and replace it with a new, healthy one to protect the rest of your plants from further harm.

Remember, identifying and addressing houseplant pests promptly is crucial for maintaining the health and vitality of your indoor garden. By implementing preventive measures and taking effective control actions, you can keep your plants thriving and insect-free.


Designed to Thrive

Premium plants, potted and delivered, plus lifetime access to 24/7 Plant Doctor support.

The Best Fertilizer for A Bird of Paradise

Bird of Paradise plants, with their stunning tropical foliage and vibrant blooms, add a touch of exotic beauty to any indoor or outdoor space. To ensure these majestic plants thrive and reach their full potential, providing them with the right nutrients is essential. Just like any other living organism, Bird of Paradise plants require nourishment to grow healthy leaves and (if you’re lucky!) produce those iconic, colorful flowers. In this article, we'll explore the best fertilizer for Bird of Paradise and guide you on how to fertilize these plants effectively.

Bird of Paradise plants, scientifically known as Strelitzia reginae, originate from South Africa and are accustomed to nutrient-rich soils. While it's challenging to recreate the exact conditions found in their natural habitat, we can still strive to provide them with optimal care. By choosing the right fertilizer, you can supply your Bird of Paradise with the essential nutrients it needs to flourish and achieve its full potential.

When To Fertilize Your Bird of Paradise

best-fertilizer-bird-of-paradise

Discover L'alchimie Botanique, our in-house formulated plant care products, including nutrient-rich foliage mist, natural insecticidal neem oil, and potent liquid plant food, designed to nurture a diverse range of indoor and outdoor plants,

When it comes to fertilizing Bird of Paradise plants, timing is crucial. The growing season for these plants typically occurs during spring and summer when they experience active growth. It's during this period that you should focus on providing them with adequate nutrients. To ensure your Bird of Paradise receives the nourishment it requires, incorporate a liquid fertilizer into your watering routine every other week. Liquid fertilizers are easy to use and generally safe for your plants. However, it's crucial to follow the instructions on the package carefully, diluting the fertilizer into water to avoid over-fertilization and potential fertilizer burn.

As fall approaches and your Bird of Paradise enters its dormant stage, it's important to adjust your fertilization routine accordingly. During this period, you should taper off fertilizing and reduce it to every three or four weeks. This adjustment allows the plant to prepare for its dormant phase in winter when growth slows down. If your plant is  no longer growing at all, you can completely stop fertilizing until the spring.

What NPK Ratio Does The Bird Of Paradise Need?

best-fertilizer-bird-of-paradise

Transform your Bird of Paradise into a leafy paradise with healthy leaf growth!

Understanding fertilizer terminology can be daunting, particularly if you're new to plant care. Fertilizers are often labeled with an NPK ratio, representing the ratio of nitrogen (N), phosphorus (P), and potassium (K) they contain. Each plant species has specific nutritional requirements, which is why it's recommended to choose fertilizers tailored to the plant you are nurturing. 

Bird of Paradise plants, similar to their foliage-loving counterparts, benefit from fertilizers with an NPK ratio of 3-1-2. This ratio signifies a higher nitrogen content, which is essential for promoting healthy leaf growth and overall plant vigor. Nitrogen supports the production of chlorophyll, which is responsible for the plant's lush green foliage. Our all-natural liquid plant food is gentle enough to use on your Bird of Paradise year round, and has an excellent NPK ratio not just for Birds of Paradise but for all indoor plants

What’s The Best Plant Food For A Bird Of Paradise?

Now that we've covered the basics of fertilizing Bird of Paradise plants, you may be wondering which specific fertilizer is best for your beloved plant. While there are several fertilizers available with an NPK ratio of 3-1-2 that can work effectively, Boost Vitaminé, an all-natural plant food with just four ingredients, will work wonders for your Bird of Paradise. This specialized fertilizer is formulated specifically for indoor plants and provides comprehensive instructions on the best care practices, ensuring optimal growth and blooming potential.

Will Fertilizing My Bird Of Paradise Help It Grow Flowers?

If you are caring for an outdoor Bird of Paradise, then yes! Fertilizing will absolutely promote your plant’s beautifully vibrant flowers. However, it is very rare for this plant to produce flowers when grown indoors.


best-fertilizer-bird-of-paradise

Designed to Thrive

Elevate your plant paradise with a stunning potted Bird of Paradise, delivered to your doorstep with lifetime of 24/7 Plant Doctor support.

How to Care For and Grow Your Dieffenbachia

THE DIEFFENBACHIA

AKA Dieffenbachia, Dumb Cane, Tropic Snow

If you're looking for a lush, green plant that will add a touch of the tropics to your home, the Dieffenbachia is an excellent choice. This plant is known for its large, variegated leaves that come in a range of colors, from deep green to creamy white. But, as with any plant, the Dieffenbachia needs specific care to thrive in your home. Read on to learn about how to care for and grow a healthy Dieffenbachia.

What type of light does the Dieffenbachia need?

Dieffenbachia prefers bright, indirect light, but can also tolerate low light conditions. However, if you place your Dieffenbachia in direct sunlight, it can scorch the leaves, so it's best to keep it away from windows that receive direct sunlight.

How to water your Dieffenbachia

Water your Dieffenbachia thoroughly once every 7-10 days. This plant loves moisture, but also needs to dry out a bit between waterings. Think about giving it one big drink after extended thirst. A good rule of thumb is to water your Dieffenbachia when the top two inches of soil feel dry to the touch, or use these handy moisture meter indicators. Misting the leaves occasionally will help keep your plant humid and keep dry browning edges to a minimum.

black-soap-spray.jpg

BLACK SOAP SPRAY

All natural and made with just four ingredients, L'Original acts as a natural leaf shine, insecticide, and fungicide for all living plants.

$24

How fast does the Dieffenbachia grow?

In prime conditions, the Dieffenbachia is a fast grower and can grow up to 2 feet per year. Fertilize your Dieffenbachia 1-2 times per month in the spring and summer with indoor plant food, or foliar feed year round.

Common problems with Dieffenbachia

Yellow Leaves

See just one yellow leaf? Don’t worry. It may just be time for that leaf to go! There is only cause for concern if you see multiple yellow leaves or a consistent pattern of yellowing.

One of the most common issues with the Dieffenbachia is the appearance of yellow leaves. This is usually due to overwatering and/or poor drainage. If you begin to notice yellow leaves on your plant, check in on your watering routine: are you checking the soil each time you water? The top two inches or so should be dry to the touch. If you believe you’ve overwatered beyond repair, check in on the plants roots to ensure there is no root rot. Root rot can be serious for most indoor plants if not treated quickly.

Although less common, yellow leaves can also be a sign of nutrient deficiency or even a pest infestation. Inspect your plant thoroughly to ensure there are no unwanted visitors (and if there are, isolate your plant and treat it as soon as possible — Super Neem Oil is a great all-natural remedy for common plants!). As for nutrient deficiencies, make sure you are fertilizing your plant at least once a month in the spring and summer. Alternatively, think back to the last time you repotted your plant. If it’s been over two years, it may be time to repot.

Legginess

Dieffenbachias can also get leggy over time if not cared for properly. With most plants, legginess is a sign of the plant not getting enough light— it will literally reach towards the light to soak up more of it!

While less common, legginess can also be a sign of the general malnourishment of the plant— whether that’s due to lack of fertilizing, a pest infestation, or even a root bound plant that needs more space to grow.

How to maintain a beautiful and healthy Dieffenbachia

Take care of your Dieffenbachia and it will take care of you! Below are simple tips to continue caring for your Dieffenbachia or Dumb Cane over time.

  • Pruning - Remove dry or dead leaves all year round, but save any major pruning for the spring and summer months. When pruning your Dieffenbachia, wear gloves as your plant has a sap that can irritate skin. Use sharp, clean shears and cut just above where the stem is growing from the cane. Dieffenbachias can be fast growers and so it is recommended to prune often or when things start to look crowded.

  • Cleaning - Take each leaf between two soft tissue cloths and wipe off the top to reveal a healthy shine (also helps the plant soak in more light!). Check out L’Original black olive soap as an excellent all-natural houseplant cleaner.

  • Repotting - Houseplants grow much slower than they would in the wild. Depending on the size of your plant and the density of the roots, this is nice to do every 2-3 years to provide fresh nutrients and encourage new growth.

    • When to repot - if the roots start to become visible outside the soil, it is time to consider repotting your Dieffenbachia

    • Pot sizing - if you want your plant to grow taller, find a nursery pot that’s 2” in diameter larger than the current pot. If you want your plant to stay the same height, you can reuse the same pot and simply change the soil.

    • Get your hands dirty - spread out newspaper on the floor, remove the plant from the pot and shake off as much of the old soil as possible so that you have clean roots. Place the plant in the center of the pot, add new soil and pat down firmly. Water the soil thoroughly and place the plant in an area with bright indirect light. Your plant will take 2-4 weeks to settle from the shock and adjust to its new home.

How to propagate a Dieffenbachia

Dieffenbachias are easy plants to propagate. While there are multiple ways to propagate this plant, the most straightforward is to simply take a cutting from your plant and root it in water:

  • Select a stem to propagate - Using sharp, clean scissors or shears, cut a stem at the base of the cane, the stalky “trunk” of your plant.

  • Place in water - Find a clear glass and fill with water. Make sure only the stem of the branch is submerged, and no leaves are sitting in the water.

  • Place in a bright area and wait! - Avoid any direct sun. You may need to change the water out every few days to keep it fresh. It could take up to several weeks for your cutting to form roots.

  • Transfer to soil - After some time, you will start to see tiny white roots emerging from the cutting. Give it a few more days until the roots have grown, and then transfer to indoor potting soil. A small pot is best — no larger than 6” in diameter.

  • Keep hydrated - During the first few weeks, or until your plant feels firmly rooted in its soil, regularly water and drain your plant. The soil should be just barely moist to the touch at all times.


Dieffenbachia

A vibrant and colorful plant with intricately patterned leaves that are silky smooth to the touch, the Dieffenbachia or Dumb Cane is a sought-after statement plant for its easy-going nature and effortless ability to brighten any room. Native to the verdant rainforests of Central and South America, the Dieffenbachia is an excellent air-purifier that does best in medium to bright indirect light.